Struggling to find the perfect festive manicure for Christmas? You want a look that’s trendy, elegant, and captures the holiday spirit without being generic. The pressure is on to find a style that truly wows.
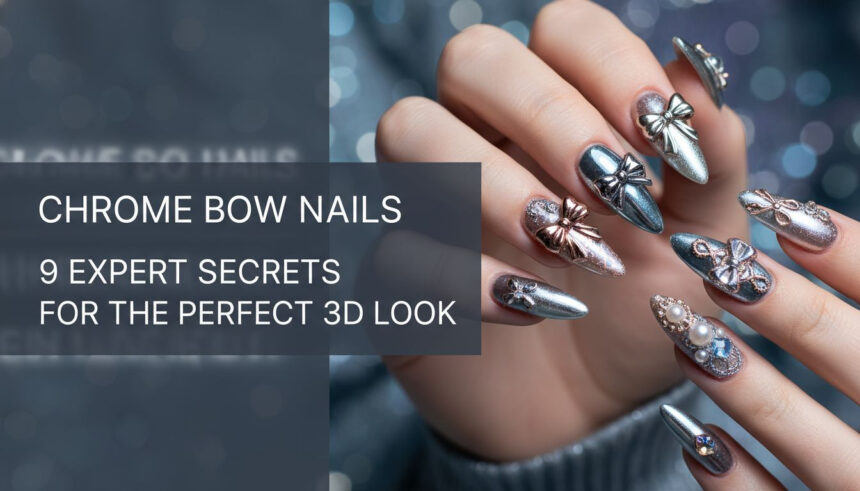
Chrome Bow Nails are a nail art style featuring a 3D bow motif over a high-shine, metallic chrome powder finish. This look perfectly blends the festive elements of Christmas with the viral, hyper-feminine Coquette aesthetic, making it the top trend for the 2026 holiday season.
Drawing from proven methodologies and professional best practices, this guide reveals the expert secrets to achieving flawless results. You will discover the precise techniques for a perfect mirror shine, symmetrical 3D sculpting, and long-lasting wear. Get ready to master the most sought-after manicure of the season.
Why Are Chrome Bow Nails the Top Trend for Christmas 2026?
Chrome bow nails are the definitive manicure for Christmas 2026 because they perfectly capture two major cultural moments: the timeless appeal of festive tradition and the viral dominance of the Coquette aesthetic. This style isn’t just a manicure; it’s a statement piece. The delicate, feminine bow motif directly taps into the hyper-feminine Coquette trend that has swept through fashion, while the high-shine, reflective chrome finish provides the luxurious, celebratory feel essential for the holidays.
This combination of a soft, vintage element with a modern, metallic texture creates a unique visual contrast that feels both fresh and nostalgic. It moves beyond simple glitter or red polish, offering a sophisticated and detailed look. Achieving the flawless 3D chrome bow, however, involves technical complexity. It requires expert guidance to master the gel chemistry and precision sculpting, which is why these professional secrets are essential for a perfect outcome.
Chrome Bow Nails: 9 Expert Secrets For The Perfect 3D Look
Achieving the perfect 3D chrome bow nail isn’t just about painting a design; it’s a multi-step process that relies on understanding gel chemistry, precise application, and proper finishing techniques. From preparing the base to ensuring the final design lasts through every holiday party, these nine expert secrets cover the critical details that separate a professional, mirror-shine manicure from a dull, amateur attempt. Follow these proven methods to create a flawless and durable festive look.
1. Optimizing the Base Coat for Flawless Chrome Adherence

Pin this genius hack to your ‘Nail Art Pro Tips’ board!
The secret to a flawless chrome finish begins long before you touch the powder. The foundation—your base color and top coat—determines whether the chrome will adhere as a perfect mirror or a streaky, glittery mess. The chemistry of a non-wipe top coat is specifically designed to provide the ideal surface tackiness for chrome powder to burnish into. Without it, the effect will fail. The base color is equally important; a pigmented black or white base creates the necessary contrast for the chrome to achieve its purest, most reflective hue.
Products & Tools Used:
- Sheer or Pigmented Base Gel (Black is ideal for silver chrome, or nude for softer hues)
- Quality Non-Wipe Top Coat (Crucial; must be labeled non-wipe)
- 90% Isopropyl Alcohol or Nail Cleanser
- Lint-Free Wipes
Application Steps:
- Prep the natural nail (clean, file, buff) and apply a thin layer of your chosen pigmented base gel.
- Cure the base coat fully under the UV/LED lamp (60 seconds standard).
- Apply a thin, even layer of the Non-Wipe Top Coat over the cured base color.
- CRITICAL STEP: Cure the Non-Wipe Top Coat for the optimal chrome adherence time (See Secret No. 2).
- Do NOT touch the cured top coat surface before applying chrome.
Pro-Tip: Always use a black or white base color beneath silver or colored chrome, respectively, as this provides the necessary contrast and allows the chrome pigment to reflect its purest hue.

2. Mastering the 7-Second Chrome Cure Rule (The Shine Secret)

Save this clever organization idea!
The most common mistake that leads to dull, glittery chrome is improper curing time. The key to a true mirror finish is curing the non-wipe top coat for a very short duration, typically between 7 to 15 seconds, depending on your lamp’s wattage. This “flash cure” leaves the gel surface perfectly polymerized but still warm and with just enough microscopic tackiness for the fine chrome powder to burnish into a seamless, reflective layer. Curing for too long makes the surface too slick, while not curing enough leaves it too wet.
Products & Tools Used:
- Fine-Grade Chrome Powder (Cosmetic grade, 10-15 microns)
- Silicone or Foam Applicator
- LED/UV Lamp (Minimum 48W)
Application Steps:
- After applying the Non-Wipe Top Coat (Secret No. 1), cure the nail for a shorter duration—typically 7 to 15 seconds (depending on your lamp wattage and brand).
- Immediately upon removal from the lamp (while the nail is still warm), gently pick up the chrome powder with the applicator.
- Burnish the powder onto the entire surface using light, circular motions until a flawless mirror shine appears.
- Use a soft, fluffy brush to gently dust off any excess pigment from the nail and cuticle area.
Lesson Learned: If your chrome looks streaky or dull, the top coat was either cured too long (no tackiness) or not long enough (still wet). Adjust the cure time in 5-second increments until you find the sweet spot for your specific lamp.

3. Sculpting the Perfect Symmetrical 3D Bow Motif

Try this micro-sculpting tutorial for your next set!
A flawless 3D bow is all about symmetry and crisp edges. The secret to achieving this is using a high-viscosity, non-leveling 3D sculpting gel and employing the “flash cure” technique between steps. A standard builder gel is often too runny and will self-level, causing the bow loops to lose their shape and dimension before you can fully cure them. A specialized sculpting gel holds its form, allowing you to perfect each loop and ribbon individually.
Products & Tools Used:
- High-Viscosity 3D Sculpting Gel (Clear or opaque white)
- Fine Detail Brush or Silicone Sculpting Tool
- Cleanser or Isopropyl Alcohol (to wet the brush tip)
- LED/UV Lamp (for flash curing)
Application Steps:
- Using a detail brush dipped in cleanser, pick up a small, pea-sized bead of the sculpting gel.
- Place the bead where you want the bow knot to be (near the cuticle is popular).
- Divide the gel into two equal halves for the loops. Use your tool to sculpt the first loop shape, dragging the edges back toward the center knot.
- Flash Cure (3-5 seconds) the first loop to lock the shape.
- Repeat the process for the second loop, ensuring it mirrors the first for perfect symmetry. Flash cure again.
- Add the ribbons or tails, adjust the depth, and perform a final, full cure (60-90 seconds).
Pro-Tip: Flash curing (a very short cure time) is essential between sculpting the loops and the knot to prevent the gel from self-leveling and losing its crisp edges before the final full cure.

4. The Advanced Secret to Achieving Isolated Chrome

Pin this flawless technique to your ‘Luxury Nail Art’ inspiration!
The “isolated chrome” effect—where only the 3D bow is metallic—is what elevates this design to a professional level. The technique hinges on precision: you must apply the non-wipe top coat only to the surface of the fully cured 3D bow. Since chrome powder only adheres to the specific tacky surface of a flash-cured non-wipe top coat, the rest of your nail will remain clean. This creates the crisp, clean lines that make the design so striking.
Products & Tools Used:
- Completed and Fully Cured 3D Bow (Sculpted in Secret No. 3)
- Non-Wipe Top Coat (Same as Secret No. 1)
- Ultra-Fine Detail Brush
- Fluffy Dry Brush (for cleanup)
Application Steps:
- After the final base color and the 3D bow are cured, use the ultra-fine detail brush to carefully apply the Non-Wipe Top Coat ONLY onto the surface of the cured 3D bow. Avoid getting any top coat on the flat part of the nail.
- Cure the top coat on the bow using the 7-second rule (Secret No. 2).
- Immediately apply chrome powder to the bow surface. The chrome will only adhere where the new top coat was placed (the bow).
- Use the fluffy brush to dust away the excess chrome. Because the background nail surface has no tackiness, the chrome residue should lift completely, leaving a crisp, isolated chrome bow.
Pro-Tip: To ensure the background nail remains perfectly clean, apply a thin layer of a separate, fully cured top coat over the base nail before sculpting the 3D bow. This creates a fully non-tacky surface for easy chrome cleanup.

5. Design 1: Scarlet Red Chrome Bows (The Festive Classic)

Save this classic Red Chrome look for your Christmas party!
For a timeless holiday party look, the scarlet red chrome bow is unmatched. This design combines the classic festive red with a high-impact metallic finish for ultimate glamour. The key is creating depth and contrast. Using a highly pigmented red chrome powder over a dark base enhances the richness of the color, while a contrasting silver or gold chrome bow provides a brilliant focal point.
Products & Tools Used:
- Deep Red Pigmented Gel Polish (Base color)
- Silver or Red Chrome Powder
- Clear High-Viscosity 3D Sculpting Gel
- Optional: Cat-Eye Magnetic Gel (applied under base color for depth)
Styling Tips:
- Base: Apply a deep red gel polish, or for ultimate depth, use a black base under a highly pigmented red chrome powder.
- Chrome Application: Use the 7-Second Rule (Secret No. 2) to apply the chrome powder evenly over the entire nail (for a full chrome look) or only as the base for a French tip/design.
- Bow: Sculpt a single, clean 3D bow (Secret No. 3) on the accent nail (ring or middle finger) using clear gel.
- Finish: Apply a layer of silver or gold chrome only to the clear bow (Isolated Chrome Secret No. 4) to ensure the metallic texture pops against the red background.
Pro-Tip: If using a magnetic Cat-Eye gel as your red base, the chrome will adhere differently, creating a dynamic, two-toned depth that looks like moving light beneath the mirror finish.

6. Design 2: Coquette Pink Chrome Bows (The Viral Aesthetic)

Save this ultra-feminine Pink Chrome Bows look!
To adapt the chrome bow trend for the viral Coquette aesthetic, shift the color palette to soft, delicate hues. This style is less about bold holiday statements and more about hyper-feminine detail. A sheer, milky pink base provides a soft glow, while multiple tiny, micro-sized bows scattered across the nails create a maximalist, romantic effect that is central to the Coquette look.
Products & Tools Used:
- Sheer Nude or Pale Pink Base Gel Polish
- Light Pink, Silver, or White Pearl Chrome Powder
- White or Clear High-Viscosity 3D Sculpting Gel
- Fine Glitter Accent Polish (Optional, for shimmer)
Styling Tips:
- Base: Apply 1-2 coats of a sheer, milky pink gel polish to achieve a soft, natural base, then cure fully.
- Chrome: Apply a light pink or pearl white chrome powder (Secret No. 2) over the entire nail surface for a subtle, high-shine glow.
- Bow Placement: Unlike the single red accent, use multiple, micro-sized 3D bows (Secret No. 3) scattered across 2-3 nails per hand for a maximalist Coquette look.
- Finish: Use the Isolated Chrome technique (Secret No. 4) to ensure the bows are a slightly different hue (e.g., pure white chrome) or texture (e.g., velvet chrome) than the background for contrast.
Lesson Learned: For the Coquette aesthetic, volume is key. Applying tiny 3D bows to most or all nails, rather than just one accent nail, maximizes the hyper-feminine visual impact.

7. The Pro Seal: Encapsulation and Edge Capping for Durability

Pin this longevity secret before applying your 3D charm!
A beautiful design is worthless if it doesn’t last. To prevent 3D bows from breaking and chrome from chipping, the final sealing process is the most critical step. Encapsulating the base of the bow with builder gel creates a strong structural bond to the nail plate. Additionally, meticulously capping the free edge of the nail with your final top coat seals all layers, preventing moisture from getting underneath and causing lifting.
Products & Tools Used:
- Medium-Viscosity Clear Builder Gel or Structured Gel Top Coat
- Detail Brush
- Final High-Shine Non-Wipe Top Coat
Application Steps:
- Encapsulation: Once the chrome bow is fully dusted and cleaned, use the detail brush and a thin layer of builder gel to carefully brush around the base of the bow, locking it into the nail surface. Cure fully (60 seconds).
- Sealing: Apply the final Non-Wipe Top Coat over the entire nail, ensuring you cover every surface of the chrome powder (this prevents the chrome from oxidizing or dulling).
- Edge Capping: Ensure the final top coat is brushed over the free edge of the nail. This seals the layers, preventing lifting and chipping of the chrome and the gel layers.
- Perform a final, full cure (60-90 seconds).
Pro-Tip: Pay special attention to the areas where the bow meets the natural nail and the free edge. If the top coat coverage is thin here, moisture can penetrate, leading to premature lifting and breaking.

8. The Beginner Secret: High-Quality Press-On & Decal Alternatives

Try this quick chrome bow hack when you are short on time!
Not everyone has the time or skill for intricate 3D sculpting. For beginners or those short on time, high-quality pre-made metal or resin bow charms are the perfect alternative. These charms provide a flawless, symmetrical bow instantly. The secret to making them last is using a strong structural adhesive, like a thick gel resin or professional nail glue, to create a durable bond that won’t snag or lift.
Products & Tools Used:
- Pre-Made Metal or Resin Chrome Bow Charms
- Strong Nail Glue or Thick Structural Resin
- Wax Pencil or Tweezers
- Optional: Clear Builder Gel (for extra reinforcement)
Quick Application Steps:
- Prepare and polish the base nail with your desired chrome look (Secrets No. 1 & 2) and seal with a top coat.
- Apply a generous dot of structural resin or strong nail glue to the back of the bow charm and to the designated spot on the nail.
- Using a wax pencil or tweezers, carefully place the bow charm onto the glue/resin, pressing firmly.
- Reinforcement (Resin Only): If using resin, use a small detail brush to brush a thin layer of resin around the base of the charm to encapsulate the edges slightly, then cure fully (90 seconds). This prevents snagging.
Pro-Tip: Always use a protective top coat over the base nail before attaching charms. This creates a sacrificial layer so when you inevitably remove the 3D charm, you are filing or soaking away the top coat, not your natural nail.

9. The Final Clean Up: Safe Removal of 3D Elements

Don’t ruin your nails! Follow these safe removal steps!
Improper removal is the fastest way to damage your natural nails. The professional secret to safely removing 3D elements is to first file down the bulk of the hard gel or charm before attempting to soak it off. Never, ever pry or pick off a 3D embellishment, as this will peel away layers of your natural nail plate. Using a coarse file to reduce the charm’s volume allows the acetone to penetrate the remaining gel more effectively and safely.
Products & Tools Used:
- Coarse Nail File (100/180 grit is ideal for bulk removal)
- Fine Buffer (180/240 grit for finishing)
- 100% Acetone
- Cotton Balls and Foil Wraps (for soaking)
Removal Steps:
- Break the Bulk: Use the coarse file (100/180 grit) to gently and slowly file down the highest bulk of the 3D bow and any thick builder gel used for encapsulation. File only the artificial product, being careful not to touch the natural nail.
- Break the Seal: Once the 3D element is mostly filed flat, use the file to gently break the seal of the remaining top coat and chrome layer across the entire nail.
- Soak Off: Wrap the nail in acetone-soaked cotton balls secured with foil. Wait 10-15 minutes, then gently scrape away the softened gel product.
- Finish: Once all product is removed, gently buff the natural nail surface with a fine buffer (240 grit) and apply cuticle oil.
Lesson Learned: Never pry or pick off a 3D charm! This will inevitably peel off layers of your natural nail, causing damage. Filing the bulk down first is mandatory for safe removal.

Key Takeaways: Your Quick Guide to Flawless Chrome Bows
| Secret Focus | Expert Technique | Key Product | Benefit Achieved |
|---|---|---|---|
| Foundation | Use a pigmented base under the chrome color. | High-quality base gel | Maximizes color vibrancy and mirror effect. |
| Shine | Cure the Non-Wipe Top Coat for only 7-15 seconds. | Chrome Powder, Non-Wipe Top Coat | Ensures a mirror finish, not a glittery residue. |
| Symmetry | Use high-viscosity gel and flash cure the loops. | 3D Sculpting Gel | Prevents distortion and maintains crisp edges. |
| Precision | Apply top coat only to the bow for isolation. | Fine Detail Brush | Creates clean lines and the sought-after ‘isolated’ look. |
| Durability | Encapsulate the bow’s base with builder gel and cap the edges. | Builder Gel | Prevents chipping and ensures the design lasts 2-4 weeks. |
People Also Ask About Chrome Bow Nails
Why does my chrome powder look glittery instead of metallic?
The most common reason for a glittery finish is that the non-wipe top coat was cured for too long. Chrome powder requires a specific, slightly tacky surface to burnish into a mirror finish. If the top coat is fully cured (over 20 seconds for most lamps), the surface becomes too hard and the powder simply sits on top like glitter. Try curing for just 7–15 seconds to find the ideal tacky window.
How long do sculpted 3D chrome bows typically last?
Properly sculpted and sealed 3D chrome bows should last between 2 to 4 weeks. Longevity depends heavily on the quality of the sculpting gel used and the crucial step of encapsulation. If the edges are not fully sealed (capped) with a final top coat or builder gel, the bow is highly susceptible to snagging and breakage.
What is the difference between sculpted 3D bows and using pre-made bow charms?
Sculpted 3D bows allow for greater customization, especially for the ‘isolated chrome’ effect, but require significant skill and time. Pre-made metal or resin charms offer a faster, lower-skill alternative and often use stronger materials. However, pre-made charms must be attached with very strong resin or glue and cannot be fully customized in size or shape like a hand-sculpted bow can be.
What base color should I use to get the best red chrome look?
For the richest, most vibrant red metallic effect, nail technicians highly recommend applying the red chrome powder over a cured black gel polish base coat. The dark background maximizes the mirror reflection, allowing the red pigment to appear deeper and more saturated. If you prefer a slightly lighter, more subtle red, use a deep gray base instead.
Final Thoughts
It takes a combination of precise technique and high-quality products to transform a simple manicure into a viral Christmas statement. By mastering these nine expert secrets—from the seven-second cure rule to the final encapsulation process—you can guarantee your chrome bow nails will achieve that perfect 3D mirror shine and withstand the festive season. Now, which design will you choose first: the bold scarlet red or the delicate coquette pink? Let us know in the comments below
Last update on 2026-03-12 / Affiliate links / Images from Amazon Product Advertising API


