Tired of the same old red and green holiday manicures? You’re looking for a chic, sophisticated style that feels festive yet modern, but worry that a dark, detailed design won’t last through the busy season. Achieving a flawless, durable navy bow nail design at home can feel like a professional secret.
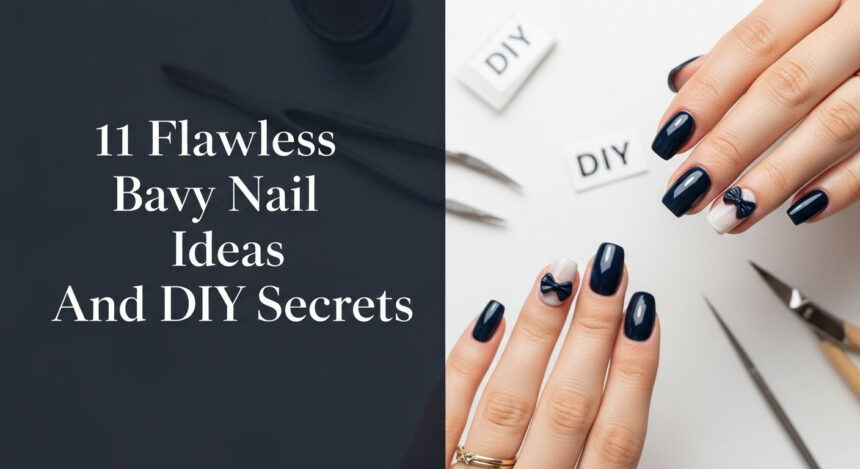
Navy Bow Nails are a sophisticated, trending holiday manicure featuring deep blue polish accented with bow elements, often utilizing high-contrast textures like matte navy paired with glossy 3D accessories, perfect for a chic winter aesthetic. This design provides an elegant alternative to traditional festive colors, offering incredible versatility.
Drawing from established best practices and verified nail art techniques, this guide unlocks the secrets to achieving a salon-quality finish. You will discover 11 flawless navy bow nail ideas, complete with step-by-step DIY instructions and durability hacks. Prepare to master a look that’s both stunning and long-lasting.
Are Navy Bow Nails The Ultimate Flawless Look For The 2026 Holidays?
Yes, navy bow nails are emerging as the ultimate flawless look for the holidays, offering a sophisticated and chic alternative to the traditional red and green palette. The deep, rich tone of navy blue functions as an elegant dark neutral, creating a high-end canvas that makes metallic and white accents pop. This dark blue holiday manicure is more than just a color choice; it’s a statement of modern festive style.
The beauty of festive bow nail designs lies in their versatility. Whether achieved with simple decals, intricate hand-painting, or statement-making 3D accessories, the bow element adds a touch of classic holiday charm. The high-contrast pairing—such as a velvety matte navy base with a glossy white bow—creates a visually stunning texture play. Most importantly, when applied using expert-approved techniques, this durable manicure is designed to last through every party and event of the Christmas and holiday season.
11 Flawless Navy Bow Nail Ideas And DIY Secrets For Lasting Holiday Style
Get ready to discover the perfect navy bow nail design for your holiday style. This curated list of 11 ideas covers every preference, from subtle micro-accents on almond nails to dramatic gold bows on long coffin shapes. More than just inspiration, each design comes with the crucial DIY secrets and professional tips needed to ensure your manicure is flawless and long-lasting. Based on nail technician best practices, these steps focus on proper adhesion and color pairing, so you can confidently rock your festive manicure without fear of chipping or bows falling off.
1. Micro Bow Accents on Elegant Almond Nails

Pin this sophisticated almond nail idea to your ‘Holiday Manicure Goals’ board!
This glossy navy manicure is the epitome of understated elegance. The tapered shape of almond nails provides the perfect canvas for a subtle, flat silver foil decal. It’s the easiest way to achieve a chic and polished holiday look with minimal effort.
Products & Tools Used:
- High-opacity navy blue lacquer or gel polish (recommended 2-coat coverage)
- Silver foil bow nail decals (micro-sized for almond shape)
- High-shine, chip-resistant top coat
- Tweezers or silicone tool for decal placement
Application/Styling Steps:
- Prepare nails, apply a quality base coat, and apply two thin coats of navy polish, curing each coat if using gel.
- While the final color coat is still slightly tacky (lacquer) or after wiping the cure inhibition layer (gel), cut the micro bow decal close to the edges.
- Submerge the decal in a small dish of water for 10-15 seconds until it slides easily off the backing paper.
- Use tweezers to carefully slide the decal onto the accent nail (ring finger recommended) near the cuticle or tip.
- Gently smooth out any wrinkles with a silicone tool.
- Encapsulate the entire nail with a generous layer of high-shine top coat, ensuring the decal edges are sealed.
Pro-Tip: Decals adhere best to a tacky surface. If using gel, apply the decal onto the cured color coat before the top coat, or use a tiny bit of builder gel to secure it for extra longevity.

2. Velvet Matte Navy Base with Contrast 3D Glossy Bows

Save this sophisticated texture play for your ‘Must-Try Winter Manicures’!
This modern design leverages a striking texture contrast for a high-impact, sophisticated look. A velvety matte navy finish makes the sculpted, high-gloss 3D resin bow pop, creating a durable statement piece that feels luxurious and unique.
Products & Tools Used:
- High-opacity navy blue gel polish
- Dedicated matte top coat (must be UV/LED cured)
- Pre-made white or clear 3D resin bow charms
- High-strength builder gel or specialized rhinestone adhesive
- UV/LED Curing Lamp (36W minimum)
- Dotting tool or precision placement tweezers
Application/Styling Steps:
- Complete nail prep, apply navy base color (2 thin coats), and cure fully.
- Apply the matte top coat to all nails and cure for the full recommended time (usually 120 seconds) to ensure a perfect velvet finish.
- On the chosen accent nail, place a small bead of builder gel where the 3D bow will sit. Do not cure yet.
- Using a dotting tool or tweezers, gently press the base of the 3D bow into the builder gel. Ensure the bow is level and sits securely.
- Flash cure the nail (5-10 seconds) to set the bow in place without shifting.
- Use a small detail brush dipped in top coat or builder gel to seal around the edges of the bow, creating a tiny barrier, then cure fully (60-120 seconds). Do not cover the matte surface.
Lesson Learned: The biggest mistake with 3D art is using regular nail glue. Builder gel or thick rhinestone adhesive and proper curing is the only reliable way to ensure the bow lasts 2+ weeks.

3. Elegant Gold Foil Bows on Long Coffin Nails

Pin this high-impact gold & navy look to your ‘Glam Holiday Nails’ board!
For a truly festive and dramatic look, the combination of a high-gloss navy base with warm gold accents on long, angular coffin nails is unbeatable. Using gold foil decals or transfer foil provides a crisp, metallic sheen that is quick to apply but looks incredibly luxurious.
Products & Tools Used:
- High-gloss navy blue gel polish
- Gold transfer foil or gold foil bow decals
- Foil transfer glue (if using plain foil)
- Fine brush for applying metallic glitter or flakes (optional)
- No-wipe gel top coat
Application/Styling Steps:
- Apply and cure navy gel base (two coats).
- Apply a thin layer of foil transfer glue to the areas where the bow is desired (if using foil). Allow glue to dry until tacky and clear.
- Press the foil decal or gold foil firmly onto the tacky area, rubbing gently. Peel back quickly to transfer the design.
- Alternatively, if using pre-cut decals, apply them onto the cured color coat (Step 2 in H3:1).
- Secure the design by fully encapsulating it with two thin layers of high-gloss, no-wipe top coat, ensuring the edges of the foil are completely sealed. Cure after each top coat layer.
Pro-Tip: Foil transfer glue works best for crisp lines. Ensure the glue is perfectly dry and tacky before pressing the foil—if it’s still wet, the design will smudge.

4. Hand-Painted White Micro Bows for a Classic Look

Try this delicate hand-painted technique and save it to your ‘Advanced Nail Art’ board!
For those who love the artistry of nail design, hand-painting white micro bows offers a truly classic and customizable look. The high contrast of crisp white against the deep navy base is timeless, and mastering this freehand technique allows for perfect placement and scale on any nail shape.
Products & Tools Used:
- Navy blue gel or lacquer polish (base color)
- Highly pigmented white gel paint or acrylic nail paint (must be thick and opaque)
- Fine detail brush (size 000 or a striping brush with short bristles)
- Palette or aluminum foil for thinning paint
- Top coat (matte or glossy)
Application/Styling Steps:
- Apply and cure your finished navy base and top coat (if using a matte top coat, apply that now).
- Dip the fine detail brush lightly into the white paint, ensuring there is no excess product that will cause flooding.
- Draw a tiny ‘V’ shape where the bow center will be.
- Create the two loops of the bow by drawing two small triangles or curved ‘D’ shapes pointing inward towards the ‘V’.
- Draw two short lines extending down for the ribbon ends.
- Once satisfied with the shape, cure the white paint (if using gel) or allow it to fully air dry (if using acrylic paint).
- If using glossy top coat, apply a thin layer over the entire design and cure/dry to seal the painted art.
Pro-Tip: Stabilize your hand by resting your pinky finger on the table or against your other fingers while painting. Consistency is key for micro-details!

5. Navy Base with Festive Silver Glitter Tip Bows

Save this sparkling silver and navy idea for New Year’s Eve!
Incorporate a touch of festive sparkle with this elegant design. A delicate silver glitter gradient at the tips of the nails provides a perfect backdrop for a crisp white bow decal, creating a harmonious blend of classic navy and celebratory shimmer on soft oval nails.
Products & Tools Used:
- Navy blue polish (lacquer or gel)
- Loose silver micro-glitter or silver glitter polish
- Small, flat white bow decals (decals are best for a flat glitter surface)
- Fan brush or makeup sponge (for gradient effect)
- Base coat and two layers of top coat
Application/Styling Steps:
- After applying and curing two coats of navy polish, apply a thin layer of clear polish or builder gel to the tip of the nail. Do not cure.
- Use a fan brush to gently pat or sprinkle the silver micro-glitter onto the tacky tip, focusing most of the glitter directly at the free edge and feathering it upward for a seamless gradient. Cure/dry.
- Apply and seal the white bow decal following the instructions in H3:1, placing it where the glitter gradient begins to fade.
- Apply two coats of top coat to ensure the glitter is fully encapsulated and the surface is smooth (glitter often requires extra top coat).
Lesson Learned: Loose micro-glitter creates the most seamless gradient effect. If using glitter polish, wipe most of the polish off the brush before stamping the glitter onto the tip.

6. Negative Space Bow Design for a Minimalist Aesthetic

Pin this simple yet trendy minimalist nail art to your ‘Quick DIY Manicures’!
Embrace a modern, minimalist aesthetic with this clever negative space design. By using striping tape or stencils, you can create a crisp bow shape where the navy polish frames the natural nail, resulting in a clean, trendy look that’s surprisingly easy to achieve.
Products & Tools Used:
- High-quality clear base coat (essential)
- Opaque navy blue polish (lacquer or gel)
- Thin nail art striping tape or bow stencil stickers
- Clean-up brush and acetone/cleanser
- Top coat
Application/Styling Steps:
- Apply a clear base coat to the entire nail and let it dry completely. This is the ‘negative space’ layer.
- Once dry, use striping tape to outline the desired bow shape on the nail (creating a stencil). For the loops, you can use two small curved pieces; for the center knot, use a tiny square piece. Press the tape down firmly.
- Paint the navy polish over the entire taped design. Apply two thin coats for full opacity.
- CRITICAL STEP: While the polish is still wet (for lacquer) or immediately after curing (for gel), use tweezers to carefully peel off the striping tape/stencils, revealing the clear negative space underneath.
- Apply a top coat to seal the polish and the exposed natural nail.
Pro-Tip: If the polish has set, peeling the tape will cause jagged edges. Always remove the tape while the polish is still wet enough to self-level slightly.

7. Sculpted Builder Gel Bows for Professional Durability

Save this advanced 3D technique to your ‘Nail Art Mastery’ board!
For the ultimate in 3D durability and customization, sculpting a bow directly onto the nail with builder gel is the professional standard. This advanced technique creates a strong, structural, glass-like bow that is fully integrated with the nail, offering unparalleled longevity.
Products & Tools Used:
- Navy blue gel polish base and top coat
- Clear or white sculpting builder gel (medium viscosity recommended)
- Fine tip sculpting brush or dedicated 3D gel tool
- UV/LED Curing Lamp
- Cleanser (alcohol or specialized gel cleanser)
Application/Styling Steps:
- Apply and cure the navy base and top coat (the sculpting takes place on the finished, cured nail).
- Scoop a small bead of builder gel onto the chosen accent nail.
- Using the tip of the sculpting brush (dipped slightly in cleanser to prevent sticking), push the gel bead into the desired bow shape—first, the central knot, and then sculpt the two symmetrical loops.
- Cure the sculpted bow fully under the UV/LED lamp (usually 60 seconds).
- If desired, clean the tacky layer of the builder gel with cleanser. If the builder gel is non-wipe, this step is unnecessary.
- Apply a thin layer of top coat around the edges of the sculpted bow to fully encapsulate the base where it meets the nail surface.
Pro-Tip: Builder gel is self-leveling, so sculpt the shape quickly and cure immediately before it has a chance to flatten.

8. Proportional Navy Bows on Practical Short Square Nails

Pin this practical, everyday look to your ‘Short Nail Art Ideas’!
Yes, you can absolutely rock this trend on practical, short square nails. The key is proportionality. By using an extremely small micro-bow decal and placing it discreetly, you maintain a clean, uncluttered look that is both stylish and suitable for minimal nail space.
Products & Tools Used:
- High-coverage navy blue lacquer polish (to reduce thickness on short nails)
- Extremely small nail art decals or flat micro-charms
- Precision tweezers
- Fast-drying top coat
Application/Styling Steps:
- The key to short nail art is thinness. Use two extremely thin coats of high-opacity navy polish.
- Ensure the bow decal/charm is no wider than half the width of the nail plate. Use tweezers to pick it up.
- For square nails, placement is best centered near the cuticle or positioned slightly off-center for a modern asymmetry.
- Apply a thin layer of top coat, place the micro-bow gently, and seal immediately.
- Use an angled clean-up brush dipped in acetone/cleanser to ensure no dark polish has stained the surrounding skin—this is crucial for short, dark manicures.
Lesson Learned: Large bows overwhelm short nails. Stick to micro-charms (2mm or less) or hand-painted details to maintain visual balance.

9. Subtle Transparent/Clear Resin Bow Look

Pin this minimalist 3D concept to your ‘Quiet Luxury Nail Art’ board!
For a 3D effect that whispers quiet luxury, try a clear resin bow. This subtle, crystalline bow catches the light beautifully, offering a sophisticated, transparent look against the deep navy base. It’s a structural design that maintains an elegant, understated aesthetic.
Products & Tools Used:
- Shimmery or high-gloss navy gel polish
- Clear 3D pre-made resin bows
- Clear builder gel or thick resin adhesive
- Precision placement tool (dotting tool or silicone pusher)
- UV/LED Curing Lamp
Application/Styling Steps:
- Apply two coats of the shimmery navy polish and cure fully.
- Using the clear builder gel, follow the secure adhesion steps outlined in H3:2 to attach the clear resin bow.
- The advantage of the clear bow is that the color of the navy base shines through, making it look integrated.
- Apply top coat around the base of the bow to fully seal the adhesion point. If the bow is high-shine already, do not apply top coat over the dome of the bow to maintain clarity.
Pro-Tip: Ensure the clear resin bow is completely free of dust or debris before applying, as the navy background will highlight any imperfections trapped underneath.

10. Navy Base with Warm Rose Gold Accents and Bows

Save this luxurious rose gold color pairing to your ‘Festive Beauty’ board!
Combine the cool tones of navy with the trendy warmth of rose gold for a luxurious and balanced holiday look. This elegant color pairing feels both modern and festive, with delicate rose gold bows and striping creating a coordinated, high-end design on versatile oval nails.
Products & Tools Used:
- High-shine navy blue gel polish (base color)
- Rose gold metallic gel paint or nail polish
- Fine striping brush (for detail work)
- Small rose gold bow decals or charms (optional, can be hand-painted)
- High-gloss top coat
Application/Styling Steps:
- Complete the navy base color application and curing/drying.
- Dip the fine striping brush into the rose gold paint and carefully paint thin, crisp lines as accents (e.g., near the cuticle or outlining the tip).
- If using rose gold decals, apply them to the accent nail following the steps in H3:1.
- Apply a small dot of rose gold paint to the center of the nail to represent the knot of the bow, then create the two loops with short, curved lines or use a decal.
- Allow the art to dry fully or cure, then seal the entire design with a high-gloss top coat.
Pro-Tip: Rose gold is a beautiful compromise between traditional silver and gold. For the most sophisticated finish, keep the rose gold accents and bows small and delicate.

11. Uniform Bow Pattern via Nail Stamping Technique

Save this quick, high-consistency stamping method to your ‘Quick & Easy Nail Hacks’!
For a design that requires perfect repetition, nail stamping is the ultimate hack. This technique allows you to create a dense, uniform pattern of identical miniature bows quickly and easily, overcoming the difficulty of hand-painting multiple, consistent shapes.
Products & Tools Used:
- Navy blue polish (lacquer or gel)
- Stamping Plate featuring a bow pattern
- Stamping polish (must be opaque, black or white recommended)
- Stamper and scraper tool
- Liquid latex or clean-up tape (for mess reduction)
- Top coat
Application/Styling Steps:
- Apply and dry/cure the navy base color fully.
- Apply liquid latex or clean-up tape around the cuticles and skin to catch excess stamping polish.
- Swipe a small amount of stamping polish over the desired bow image on the stamping plate.
- Immediately use the scraper to remove excess polish at a 45-degree angle.
- Quickly roll the stamper head over the image to pick up the design, and then roll the stamper directly onto the nail to transfer the bow pattern.
- Repeat the stamping process for all desired nails, reloading the plate for each stamp to ensure clarity.
- Remove the liquid latex/tape, clean up any remaining polish around the edges with acetone, and apply a final top coat.
Pro-Tip: Stamping polish dries extremely fast. Work quickly from scraping the plate to stamping the nail (within 5 seconds) for the clearest transfer.

Key Takeaways: Your Quick Guide to Durable Navy Bow Art
Here are the top five secrets to remember for achieving a flawless and long-lasting navy bow manicure this holiday season.
- Color Base Mastery: Always use two thin coats of high-opacity navy polish over a protective base coat to prevent staining and ensure a rich, streak-free color depth.
- Durability Hack: For 3D resin bows, always use builder gel or specialized rhinestone adhesive, cured fully under a UV/LED lamp. Traditional nail glue will fail quickly.
- Contrast is Key: Pair a matte navy base with a glossy or metallic bow element to create striking visual contrast and depth, enhancing the sophisticated winter aesthetic.
- Scale Matters: Match the bow size to your nail length. Use micro-decals (2mm or less) on short nails and save large 3D elements for long coffin or almond shapes.
- Sealing is Essential: Regardless of the method (decal, foil, or hand-painted), fully encapsulate the art with a quality top coat, paying close attention to sealing the decal edges to prevent lifting and chipping.
People Also Ask About Navy Bow Nail Longevity
How Do I Stop My 3D Resin Bows From Falling Off Before March?
The longevity of 3D nail art depends entirely on the adhesive. To ensure 3D bows last for weeks through the busy holiday season, bypass traditional nail glue entirely. Secure the bow using a bead of high-strength builder gel or thick rhinestone glue and cure it under a UV/LED lamp for at least 60 seconds, sealing the edges with a final top coat.
Is Navy Blue Considered a Good Holiday Color for Manicures?
Yes, navy blue is excellent for holiday nails and is often used as a sophisticated alternative to classic reds and greens. It functions as an elegant, versatile dark neutral, especially when paired with warm metallics like gold or cool metallics like silver, linking it directly to the festive season without being overtly traditional.
What is the Easiest Method for Beginners to Get a Navy Bow Design?
The easiest and quickest method for beginners is using pre-made nail decals or foil stickers. These elements are flat, require minimal skill to place, and can be successfully encapsulated with a regular top coat, eliminating the need for complex micro-painting or specialized UV equipment required for 3D art.
Should I Use a Matte or Glossy Finish for the Navy Base Color?
While glossy is classic, a matte top coat is highly recommended for the navy base to enhance visual contrast. A matte finish gives the dark color a soft, velvety appearance that makes a glossy, metallic, or 3D bow pop dramatically, resulting in a more chic and professional-looking design.
How Can I Make My Dark Navy Polish Look Less Streaky During Application?
Streaking is usually caused by applying too much polish in one layer. Ensure your polish is highly opaque and apply the navy color in two or three very thin, even coats, allowing each coat to fully dry or cure before applying the next. Also, avoid getting polish too close to the cuticle, which causes flooding and uneven edges.
Final Thoughts
The search for the perfect holiday manicure ends here. With these 11 flawless ideas and proven DIY secrets—especially the expert techniques for securing those tricky 3D bows—you are ready to create a sophisticated, durable navy bow look that will last straight through the new year. By mastering the right application technique for your chosen bow type, you can achieve a truly salon-quality finish at home.
Which of these 11 navy bow nail ideas will you be trying for your next March holiday event? Let us know in the comments below
Last update on 2026-03-03 / Affiliate links / Images from Amazon Product Advertising API


