Tired of the same old bright red heart nails every February? Finding a look that’s festive for the holiday but still feels sophisticated and chic can be a real challenge. You want to celebrate with a beautiful manicure, but you don’t want to sacrifice your personal, elegant style for something that feels cliché.
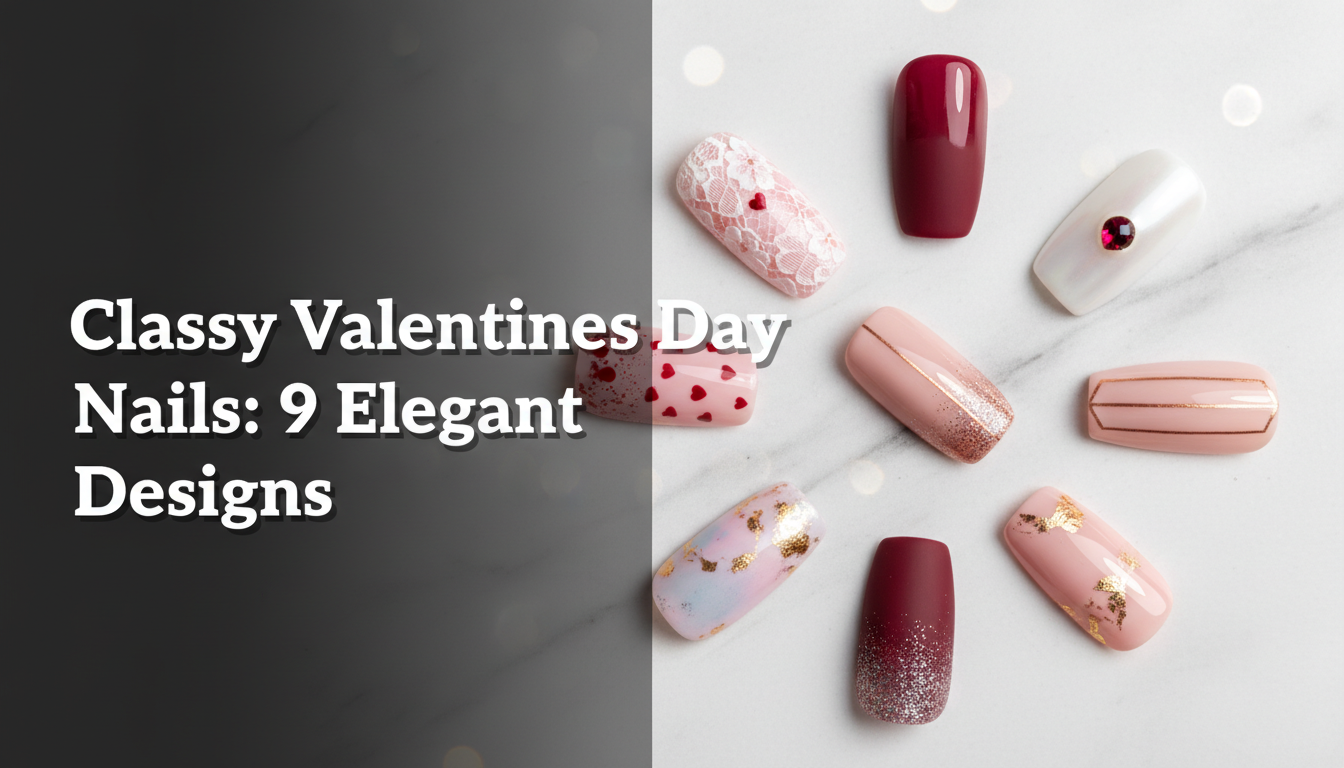
Classy Valentine’s Day nails for 2026 are defined by minimalist designs, sophisticated color palettes, and high-end finishes that prioritize subtlety over spectacle. They move beyond traditional bright reds to include muted pinks and nudes, often featuring delicate details like micro-hearts, modern French tips, or a pearly glazed donut effect. This approach is about capturing a romantic feeling with an understated and modern aesthetic.
Drawing from established best practices and current trend analysis, this guide is your curated collection of truly elegant designs. We will explore nine sophisticated valentines day nail ideas that are both timeless and on-trend for 2026. Get ready to discover your new favorite way to wear a refined valentines day manicure.
What Defines Classy Valentines Day Nails in 2026?
In 2026, the definition of classy valentines day nails has evolved significantly, moving away from loud patterns and embracing a more refined, understated aesthetic. This shift is heavily influenced by the ‘Quiet Luxury’ trend, where quality, subtlety, and flawless execution are valued above all else. Instead of covering nails in overt hearts and glitter, the modern approach is about incorporating romantic elements in a way that feels intentional and sophisticated. This means focusing on elements like nuanced color palettes, innovative textures, and minimalist art. For example, a classic red is updated with a deep, velvet texture, or a simple nude base is elevated with a single, perfectly placed micro heart nail art. The goal is to create a look that complements professional and formal attire, feeling both special for the occasion and effortlessly chic for everyday wear. Designs are often tailored to elegant nail shapes, with the almond shape and short, natural squares being particularly popular canvases for these refined looks.
9 Elegant & Classy Valentines Day Nails to Try in 2026
Ready for some inspiration? This isn’t just another gallery of pictures. Below are nine distinct, elegant valentines day nails, each presented as a complete blueprint you can take to your salon or use to create a salon-quality finish at home. We’ll break down the specific products, tools, and step-by-step techniques required for each look, from the viral glazed donut finish to moody, romantic florals. Each design has been selected to represent the pinnacle of chic, aesthetic valentine nails for 2026, ensuring you’ll find the perfect, sophisticated style to match your taste.
1. Design a Minimalist Micro-Heart Manicure

Pin this chic and understated look to your ‘Minimalist Nail Art’ board!
This dainty and sophisticated design is the epitome of minimalist elegance. The beauty of the micro heart nail art is its subtlety; it enhances a simple, sheer nude base without overwhelming it, making it one of the most popular neutral valentine nails. It’s a perfect choice for an almond shape nail and is professional enough for any work environment.
Products & Tools Used
- Sheer Nude or Pale Pink gel polish (e.g., a sheer formula for a ‘your nails but better’ look)
- High-Pigment Red Nail Art Paint
- Ultra-Fine Tipped Nail Art Brush or a Dotting Tool
- High-Shine, No-Wipe Top Coat
- Base Coat
- LED lamp for curing
Application/Styling Steps
- Prep nails by filing to your desired shape, pushing back cuticles, and buffing the nail plate.
- Apply one thin layer of base coat and cure under the LED lamp for 60 seconds.
- Paint two thin coats of the sheer nude gel polish, curing for 60 seconds after each coat.
- Place a small drop of red nail art paint onto a palette. Dip your ultra-fine brush and design a tiny heart on one or two accent nails.
- Cure the heart design for 60 seconds to lock it in place.
- Seal the entire nail with a layer of high-shine top coat and cure for a final 60-90 seconds.
- Moisturize with cuticle oil for a salon-quality finish.
Pro-Tip: For a perfectly symmetrical micro-heart, use your dotting tool to place two tiny dots side-by-side, then use the fine-tipped brush to drag them down into a ‘V’ shape. This beginner friendly art technique offers more control than trying to freehand the curves.

2. Craft a Modern Red French Manicure

Save this sophisticated red french tip nail idea to your ‘Holiday Nails’ board!
This look evolves from the classic french manicure into something utterly modern and chic. A thin, crisp red tip contrasts with a sheer pink base, creating a sharp and sophisticated statement. It’s a perfect way to wear classy red valentine nails without committing to a full-color manicure.
Products & Tools Used
- Sheer Pink or Nude Base Gel Polish
- A classic, highly-pigmented classy red valentine nails polish
- Thin Line Nail Art Brush OR French Tip Nail Guides/Stickers
- Glossy Top Coat
- Base Coat
- Isopropyl Alcohol and a small brush for cleanup
- LED Lamp
Application/Styling Steps
- Prep and shape your nails (this look is stunning on square nails or almond shape nails). Apply and cure your base coat.
- Paint one to two coats of your sheer pink or nude base color, curing between each layer.
- For the tip: If using a brush, paint a very thin, crisp line across the free edge of your nail with the red polish. If using guides, place the sticker just below where you want the tip to end and paint above it.
- Immediately remove the guide sticker if used. Clean up any mistakes with a small brush dipped in alcohol.
- Cure the red tips for 60 seconds.
- Finish with a glossy top coat over the entire nail to seal the design and add a high-shine finish. Cure for 90 seconds.
Pro-Tip: The key to a modern French is a “deep” smile line on an almond shape nail or a razor-straight line on a square nail. For a vogue approved look, make the red line as thin as possible—this is what makes it look chic and not dated. This is a form of minimalist linear art.

3. Achieve the Sheer “Glazed” Pink Look

Pin this glazed donut nail trend for a subtle and romantic look!
The viral glazed donut effect is the perfect way to create classy pink valentine nails. This design features a special chrome powder applied over a sheer pink polish, which transforms a simple manicure into a shimmering, high-fashion statement with a beautiful pearly finish. It’s the ultimate aesthetic valentine nails look.
Products & Tools Used
- A sheer milky pink or white gel polish
- White pearly or iridescent chrome pigment application powder
- A no-wipe glossy top coat
- A silicone applicator or eyeshadow sponge
- A soft, fluffy brush for dusting off excess
- Base Coat & LED Lamp
Application/Styling Steps
- Prep nails as usual. Apply and cure your base coat.
- Paint one coat of your sheer pink polish. Don’t make it opaque; the beauty is in the translucency. Cure for 60 seconds.
- Apply a thin layer of the NO-WIPE top coat. This step is critical. Cure for only 30-45 seconds – it should be firm but slightly warm and tacky.
- Using your silicone applicator, pick up a tiny amount of chrome powder. A little goes a long way.
- Gently rub the powder onto the surface of each nail until the pearly finish appears.
- Use the soft, fluffy brush to gently dust away all excess powder.
- Seal the design with one final, generous layer of the no-wipe top coat. Be sure to cap the free edge. Cure for 90 seconds for a durable, long-lasting color.
Pro-Tip: The secret to a true glazed donut look versus a full metallic finish is using minimal powder. You should still be able to see the sheer pink base color through the shimmering chrome effect. This is a high-end technique that separates a professional look from an amateur one.

4. Embrace “Quiet Luxury” with a Muted Rose Manicure

Pin this timeless, chic muted rose nail polish idea for year-round elegance.
Nothing says “Quiet Luxury” quite like a perfect, opaque manicure in a sophisticated shade. This muted rose color is a chic alternative to traditional Valentine’s colors and is perfect for anyone seeking understated elegance. It’s especially beautiful on classy short valentine nails, offering a timeless look that is ideal for classy valentine’s day nail designs for work.
Products & Tools Used
- A high-quality, opaque muted colors polish in a dusty rose or mauve shade.
- A smoothing or ridge-filling base coat (essential for flawless opaque colors).
- A plumping, gel-like glossy top coat.
- Nail polish remover for cleanup.
- Cuticle Oil.
Application/Styling Steps
- This look is perfect for classy short valentine nails. File them into a neat, rounded-square (‘squoval’) shape.
- Apply a ridge-filling base coat to create a perfectly smooth canvas.
- Paint two thin, even coats of the muted rose polish. Let the first coat dry for at least two minutes before applying the second to prevent chipping.
- Use a cleanup brush dipped in remover to perfect the edges around your cuticles.
- Finish with a thick, glossy top coat to give the lacquer a plump, gel-like appearance.
- Let your nails dry completely, and finish with a nourishing cuticle oil.
Pro-Tip: “Quiet Luxury” nails are all about perfection in simplicity. The key is flawless application. For a salon approved look, make sure your polish is not thick or old, as this leads to streaks. If needed, add a few drops of nail polish thinner to the bottle.

5. Add Subtle Gold Foil Accents

Save this luxury valentine nails idea for a touch of glamour!
For those who want a subtle + sparkle without the glitter, gold foil is the perfect solution. A few delicately placed gold + foil flakes can transform a simple manicure into a work of art. The foil accentuates a creamy white or soft pink base, creating a look that is both luxurious and tastefully restrained. It’s a perfect example of encapsulated art.
Products & Tools Used
- A base color of your choice (creamy white, soft pink, or even black).
- Gold Foil Flakes for nail art.
- A pair of fine-tipped tweezers.
- A thick glossy Top Coat (preferably gel for encapsulation).
- Base Coat & LED Lamp (if using gel).
Application/Styling Steps
- Prep nails. Apply and cure your base coat.
- Paint two coats of your chosen base color, curing between layers.
- Apply a thin layer of top coat but DO NOT CURE IT. This will act as your adhesive.
- Using tweezers, gently adhere tiny pieces of gold foil onto the wet top coat. Create a subtle, abstract pattern near the cuticle or on the tip of an accent nail.
- Gently pat the foil down with a silicone tool or your fingertip to ensure it’s as flat as possible.
- Now, cure the layer with the foil to lock it in place.
- Seal everything with one or two generous layers of your top coat. This encapsulated art technique ensures a perfectly smooth finish. Cure fully.
Pro-Tip: To make the foil look truly integrated, use your tweezers to break up larger flakes into smaller, more delicate pieces. The goal is a subtle sparkle, not large, distracting chunks. This creates a more refined valentines day manicure.

6. Try a Moody Matte Black with a Glossy Heart

Pin this edgy yet romantic nail trend to your ‘Dark Nails’ board!
Who says Valentine’s nails have to be pink or red? This matte + black design offers a chic alternative that is both edgy and romantic. The magic is in the textural matte vs glossy play, where a high-shine heart contrasts with the velvety matte finish of the base. It’s a sophisticated and unexpected choice, perfect on sharp stiletto nails.
Products & Tools Used
- A highly pigmented black gel polish.
- A high-quality matte finish top coat.
- A regular glossy top coat.
- A fine-tipped nail art brush.
- Base Coat & LED Lamp.
Application/Styling Steps
- Prep nails. This look is particularly striking on stiletto nails or coffin nails.
- Apply and cure your base coat.
- Paint two coats of black polish, curing for 60 seconds after each.
- Apply the matte finish top coat over all nails. Cure fully for 90 seconds.
- Once cured, wipe the nails with isopropyl alcohol to reveal the full velvety matte effect.
- Using your fine-tipped brush and the GLOSSY top coat, paint a heart shape onto an accent nail, directly over the matte finish.
- Cure one final time for 60 seconds. The contrast between the matte nail and the shiny heart will appear.
Pro-Tip: To keep your matte finish nails looking pristine, avoid contact with oils and lotions, which can cause them to look shiny. You can refresh the matte effect by wiping them with a bit of alcohol on a lint-free pad. This helps with maintenance.

7. Create a Luxurious Velvet Red Manicure

Save this mesmerizing velvet texture nail idea for a truly showstopping look.
This is how you do classy red valentine nails with a major wow factor. The velvet texture trend uses a special magnetic polish that requires a nail magnet to create a deep, luminous glow that shifts in the light. This velvet + red combination is pure opulence and transforms a standard red manicure into one with an incredible, light-reflecting texture.
Products & Tools Used
- A red “cat-eye” or velvet texture magnetic gel polish.
- A strong nail art magnet wand (bar magnets work best for the velvet effect).
- A black or dark red polish to use as a base color (optional, but enhances depth).
- Glossy Top Coat, Base Coat, and LED Lamp.
Application/Styling Steps
- Prep nails. Apply and cure your base coat.
- (Optional) Paint one coat of black or dark red polish as a base to make the velvet effect pop. Cure.
- Apply one coat of the red magnetic polish, but DO NOT CURE.
- Hover the magnet wand close to the nail for 10-15 seconds. To get the “velvet” look, hold the magnet flat over the nail or along each side, which disperses the magnetic particles rather than creating a sharp line.
- Once you are happy with the effect, cure immediately for 60 seconds.
- Repeat with a second coat of magnetic polish and activate with the magnet again for ultimate depth, then cure.
- Seal with a glossy top coat and cure for a final 90 seconds.
Pro-Tip: For the most convincing velvet texture, after applying the magnetic polish, hold the magnet on all four sides of the nail (top, bottom, left, right) for a few seconds each before curing. This pushes the magnetic pigment to the center from all angles, creating a diffuse, luminous glow that looks just like fabric.

8. Play with Dainty Negative Space Designs

Try this creative negative space nails look for a modern Valentine’s Day manicure!
The negative space technique is a modern and artistic way to play with nail art. This design highlights your natural nail by leaving parts of it unpolished, creating a dainty and breathable look. It’s a design that requires precision but the result is incredibly chic, and it’s especially perfect for showcasing healthy classy valentine nails on short natural nails.
Products & Tools Used
- A clear or sheer pink base coat.
- An opaque polish in your chosen color (e.g., pink, red, or white).
- A very thin nail art brush OR heart-shaped nail vinyls/stickers.
- A glossy top coat.
Application/Styling Steps
- Prep your nails, ensuring they are perfectly clean as parts will be visible.
- Apply your clear base coat and let it dry completely.
- Freehand Method: Using your thin brush, carefully outline a heart shape on your accent nail. Then, paint the area outside the heart, leaving the inside as negative space.
- Sticker Method: Place a heart-shaped vinyl sticker firmly onto the nail. Paint your color over the entire nail and the sticker. While the polish is still slightly wet, carefully peel off the sticker with tweezers to reveal the negative space heart.
- Let the design dry completely.
- Finish with a glossy top coat over the entire nail to seal the design and make it shine.
Pro-Tip: For a true salon approved negative space manicure, start with a layer of clear builder gel. This creates a perfected, plumped, and ultra-smooth surface, so the ‘negative space’ of your natural nail looks flawless. This is the foundation of a good structural manicure.

9. Paint Delicate, Moody Florals

Save this vintage-inspired floral idea for a truly unique and romantic nail trend.
A delicate floral motif is a beautiful alternative to hearts for Valentine’s Day. When set against a deep, moody burgundy base, the design feels both romantic and incredibly sophisticated. This vintage-inspired look shows that romantic nail trends can be artistic and unique, offering a departure from more traditional holiday designs.
Products & Tools Used
- A deep, moody base color like burgundy, navy, or forest green.
- White, pink, and green nail art paints or acrylic paints.
- An ultra-fine liner brush and a slightly larger detail brush.
- A matte or glossy top coat.
- Base Coat & LED Lamp (if using gel).
Application/Styling Steps
- Prep nails. This design looks beautiful on coffin nails.
- Apply your base coat and two coats of the moody base color, curing between each layer.
- For the floral design: place small dots of your white, pink, and green paint on a palette.
- Using the detail brush, create a small, imperfect pink blob for the main rose.
- With the fine liner brush, use white paint to add small ‘C’ shapes and commas around the blob to create the illusion of petals. Don’t aim for perfection.
- Use the liner brush and green paint to add one or two small leaves next to your rose.
- Let the floral design dry/cure completely.
- Finish with a top coat (matte can look particularly vintage-inspired) and cure.
Pro-Tip: For a truly artistic, micro-painting effect, apply a matte top coat over your base color and cure it first. Then, use acrylic paint slightly thinned with water to paint your florals on top. The matte surface gives you more control than a slick surface. Once the acrylic is dry, you can seal it with a final glossy top coat.

Key Takeaways
- Elegance is in the Details: The trend for classy valentines day nails in 2026 leans towards minimalism. Think micro heart nail art, ultra-thin French tips, and subtle accents over loud, busy designs.
- Texture is the New Color: Sophistication comes from finishes like the pearly glazed donut effect, rich velvet texture, or the sharp contrast of a matte vs glossy design. These add depth without adding clutter.
- “Quiet Luxury” is a Key Influence: Instead of bright reds and pinks, consider chic muted rose nail polish ideas and sophisticated nudes. These colors are versatile and align with the broader aesthetic valentine nails trend.
- Technique Matters More Than Ever: Achieving a salon-quality finish at home requires the right tools and techniques, such as using a no-wipe top coat for chrome pigment application or a liner brush for the negative space technique.
- Don’t Be Afraid of Alternatives: Classy doesn’t have to mean traditional. Moody florals or an edgy matte black manicure can be incredibly romantic and offer a chic alternative to heart-centric designs.
FAQs About Classy Valentines Day Nails
What colors are classy for Valentine’s Day besides red?
Elegant alternatives to red include muted rose, dusty mauve, sheer milky pinks, deep burgundy, and even sophisticated nudes. The key is choosing a shade that feels intentional and polished. For a bolder, non-traditional look, a matte black or a rich navy blue can also be incredibly chic and romantic when paired with a subtle Valentine’s-themed accent.
Which nail shape is best for classy designs?
The best nail shape often depends on the design, but almond and short, soft square (squoval) nails are considered the industry standard for elegance. Almond shape nails elongate the fingers and are perfect for modern French tips and artistic designs. Classy short valentine nails with a squoval shape are timeless, practical, and ideal for solid colors and minimalist art.
How do I make my valentine nails look professional?
To get a professional look at home, focus on meticulous prep work and high-quality products. Always use a base coat to prevent staining and a good top coat for a salon-quality finish and durability. Keep your application thin and even with two coats, and always clean up the edges with a brush dipped in acetone before curing for perfectly clean lines.
Are long or short nails classier for Valentine’s Day?
Both long and short nails can be classy; it’s the grooming and design that matter. Classy short valentine nails that are neat and well-shaped exude a timeless, understated elegance. Longer nails, like almond shape or coffin, can also look very sophisticated, especially with minimalist designs that complement their length rather than overwhelm it.
Can I have classy valentine nails on short natural nails?
Absolutely. Short, natural nails are the perfect canvas for many classy designs. Simple looks like a “Quiet Luxury” muted rose, a single micro heart nail art accent, a subtle glazed finish, or a dainty negative space design are often more impactful and chic on shorter nails.
What are ‘quiet luxury’ valentine nails?
“Quiet luxury” valentine nails prioritize flawless application and sophisticated, understated colors over bold designs. Think perfect, opaque nudes, dusty roses, or a sheer, healthy-looking manicure. The “luxury” comes from the perfect shaping, cuticle care, and high-shine or perfectly matte finish, rather than from overt art or glitter.
How do I prevent my manicure from chipping during Valentine’s week?
To prevent chipping, properly prep the nail by removing oils, and be sure to “cap” the free edge. When applying your base coat, color, and top coat, run the brush along the very tip of the nail. This seals the polish and provides a crucial barrier against wear and tear, ensuring a long-lasting color.
Is a French manicure classy for Valentine’s Day?
Yes, a French manicure is a timelessly classy choice, especially with a modern twist. Instead of a thick white tip, opt for a “skinny” French with a thin red line, a shimmering tip, or even a deep V-shaped French. This updates the classic look, making it a sophisticated and relevant choice for 2026.
How can I wear glitter for a classy look?
For a classy glitter look, use it as a subtle accent rather than covering the whole nail. Try a delicate glitter ombré from the tip, a fine line of glitter along the cuticle, or choose a polish with a very fine, shimmering micro-glitter suspended in a sheer base. The key is for the sparkle to be a subtle + sparkle enhancement.
What is the difference between glazed and chrome nails?
The main difference is the finish; glazed is translucent while chrome is opaque. A glazed donut nail uses a sheer white or pearly powder over a light base to create a translucent, shimmery effect. A true chrome nail uses a metallic powder to create a solid, mirror-like, and fully opaque finish. For a classier, more subtle look, glazed is the preferred option.
Final Thoughts on Your Elegant Valentine’s Manicure
Ultimately, the most classy valentines day nails are the ones that make you feel confident and beautiful. As we’ve seen, the trends for 2026 are all about embracing sophistication, whether through minimalist details, luxurious textures, or modern takes on classic colors. It’s less about following a strict set of rules and more about expressing your personal style with flawless execution.
The nine designs above offer a starting point—a blueprint for elegance that you can customize. You can combine a muted rose color with a single micro-heart, or add a subtle gold foil accent to a modern red French tip. The power is in the details and the quality of the application. So, which of these sophisticated approaches will you try for your Valentine’s celebration this year?
Last update on 2026-03-06 / Affiliate links / Images from Amazon Product Advertising API


