Tired of the endless cycle of expensive salon appointments, painful waxing, and irritating razor burn? You’re looking for a better way to achieve beautifully smooth skin right from the comfort of your home. The search for a cost-effective, natural, and private hair removal diy solution is a common one.
DIY hair removal methods offer a cost-effective and natural alternative to salon treatments or shaving, allowing you to achieve smooth skin using readily available ingredients like sugar, turmeric, or baking soda. These at-home remedies provide a private and often gentler approach, but require careful preparation and adherence to instructions for safe and effective results. This is your guide to mastering those techniques.
Drawing from established best practices and proven methodologies, this guide breaks down the most effective techniques. We will explore seven distinct, actionable methods for at home hair removal. You’ll discover how to create your own remedies and achieve the flawless results you desire, safely and affordably.
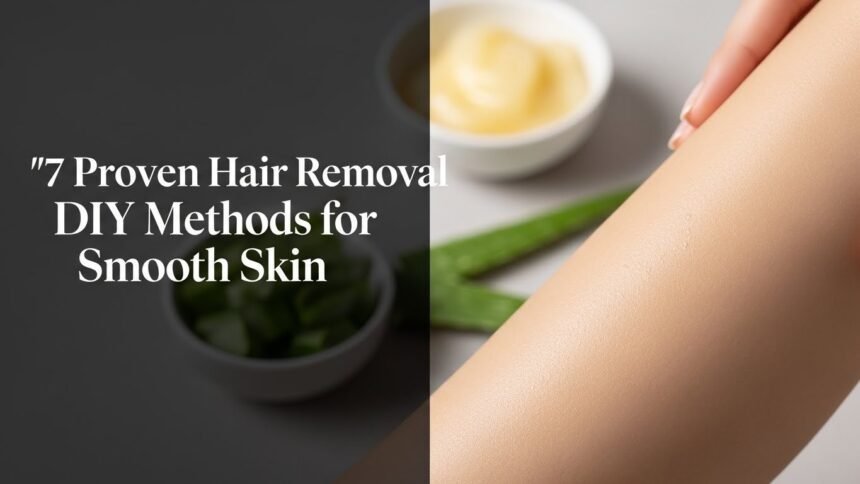
7 Proven Hair Removal DIY Methods for Smooth Skin
Exploring the world of hair removal diy opens up a range of natural and affordable options for achieving smooth skin. These methods, often passed down through generations, utilize simple household ingredients to create effective treatments. From the gentle pull of sugaring hair removal to the gradual weakening effect of a turmeric hair removal mask, there’s a solution to fit various needs and skin types. In the following sections, we’ll walk through seven proven recipes and techniques, providing clear, step-by-step instructions. Each guide is designed to empower you with the knowledge to perform these treatments safely and effectively, transforming your personal grooming routine.
1. Make Your Own Sugaring Paste for Gentle Hair Removal

Pin this DIY sugaring guide for beautifully smooth, natural results!
Supplies Needed
- 2 cups granulated sugar
- 1/4 cup fresh lemon juice
- 1/4 cup water
- Heavy-bottomed saucepan
- Candy thermometer
- Airtight container for storage
Instructions
- Combine sugar, lemon juice, and water in a heavy-bottomed saucepan.
- Heat the mixture over medium-high heat, stirring constantly until the sugar dissolves.
- Once boiling, reduce heat to medium-low and attach a candy thermometer. Continue to cook without stirring.
- Allow the mixture to reach 245-250°F (118-121°C), the soft-ball stage. The color should turn golden brown, like honey.
- Remove from heat immediately and carefully pour into an airtight, heat-safe container. Let it cool completely.
- Once cool, the sugaring paste should be pliable. Knead a small amount in your hand until it’s a lighter color and soft enough to spread.
- Ensure skin is clean, dry, and powdered. Apply the sugaring paste against the direction of hair growth.
- With a quick, flicking motion, pull the paste off in the direction of hair growth, keeping it parallel to the skin.
- Repeat on desired areas. Cleanse skin with warm water and moisturize afterward.
Pro-Tip: Achieving the perfect sugaring paste consistency is crucial; too soft, and it won’t grip; too hard, and it’s brittle. Invest in a good candy thermometer and always perform a small test patch before applying to larger areas to ensure it’s pliable and safe for your skin type. This aligns with dermatologist recommended hair removal practices for safe diy hair removal.

2. Whip Up a Turmeric and Milk Hair Removal Mask

Save this ancient beauty secret for natural, gentle hair reduction!
Supplies Needed
- 2 tablespoons turmeric powder
- 1-2 tablespoons cold milk (full fat recommended)
- Small mixing bowl
- Applicator brush or clean fingers
- Mild cleanser (to remove yellow tint)
Instructions
- In a small bowl, mix turmeric powder with milk to form a thick, smooth paste. Adjust milk quantity as needed.
- Cleanse your skin thoroughly and pat dry.
- Apply the turmeric and milk paste evenly over the desired area of unwanted hair, ensuring it’s thick enough to cover.
- Allow the mask to dry completely, which can take 15-20 minutes, or until it feels firm on the skin.
- Once dry, gently rub the mask off in circular motions against the direction of hair growth. This helps to loosen and remove fine hairs.
- Rinse any remaining turmeric with lukewarm water. Use a mild cleanser or a cotton pad soaked in milk (to help remove yellow tint) if staining occurs.
- Follow with a gentle moisturizer. Repeat 2-3 times per week for best results in gradual hair reduction.
Pro-Tip: While turmeric is a fantastic natural ingredient, it can temporarily stain the skin yellow. To minimize this, use cold milk and consider adding a pinch of chickpea flour to the mixture. A patch test on an inconspicuous area is highly recommended to check for both skin sensitivity and staining potential, aligning with best practices for diy hair removal.

3. The Baking Soda & Coffee Grounds Method for Gradual Hair Reduction

Discover this exfoliating trick for hair reduction – pin now!
Supplies Needed
- 1 tablespoon baking soda
- 1 tablespoon used coffee grounds (finely ground)
- A few drops of water
- Small mixing bowl
- Mild body wash or cleanser
Instructions
- In a small mixing bowl, combine baking soda and coffee grounds.
- Gradually add a few drops of water, stirring until a thick, scrub-like paste forms. It should be grainy but cohesive.
- Cleanse the desired skin area with a mild body wash and ensure it is damp.
- Apply the baking soda and coffee grounds paste to the area with unwanted hair.
- Gently massage the paste into the skin using circular motions for 2-3 minutes. Avoid harsh scrubbing.
- Leave the paste on the skin for an additional 5 minutes to allow the ingredients to work.
- Rinse thoroughly with lukewarm water.
- Pat skin dry and apply a nourishing moisturizer. Repeat 2-3 times a week for gradual hair growth reduction and smoother skin.
Pro-Tip: This method works primarily as a physical exfoliant, weakening the hair shaft over time rather than instant removal. Be mindful of baking soda‘s alkaline nature, which can be irritating to sensitive skin if used too frequently. Always do a patch test, especially on delicate areas, to avoid skin irritation remedies diy issues. Consistency is key for seeing any hair regrowth reduction.

4. Harness Lemon and Honey for a Natural Hair Removal Treatment

Pin this natural lemon and honey mask for a brighter, smoother complexion!
Supplies Needed
- 2 tablespoons honey
- 1 tablespoon fresh lemon juice
- Small mixing bowl
- Applicator spatula or clean butter knife
- Clean cotton cloth strips
Instructions
- In a small mixing bowl, combine the honey and fresh lemon juice. Mix well until you get a smooth, slightly sticky consistency.
- Cleanse the area with unwanted hair and pat dry. Ensure there’s no oil or lotion on the skin.
- Apply a thin layer of the lemon and honey mixture in the direction of hair growth using the spatula.
- Immediately place a cotton cloth strip over the applied mixture, pressing down firmly in the direction of hair growth.
- Allow it to sit for a few seconds.
- Holding the skin taut with one hand, quickly pull the strip off in the opposite direction of hair growth, keeping it parallel to the skin.
- Repeat the process with fresh strips until all desired hair is removed.
- Rinse any residue with lukewarm water and apply a soothing moisturizer, such as aloe vera.
Pro-Tip: While lemon can help lighten fine hair over time and aid in the depilatory process, it also increases skin’s photosensitivity. It’s crucial to avoid direct sun exposure immediately after using this method and to always apply a broad-spectrum SPF to prevent hyperpigmentation, a key aspect of skin health and hair removal guidance. This natural method is best for fine or light hair.

5. Create an Egg White & Corn Flour Peel-Off Mask for Fine Hair

Pin this simple peel-off mask for discreet facial hair removal diy!
Supplies Needed
- 1 egg white
- 1 tablespoon corn flour
- 1 tablespoon sugar
- Small mixing bowl
- Applicator brush or clean fingers
Instructions
- Separate the egg white into a small mixing bowl.
- Add corn flour and sugar to the egg white.
- Whisk vigorously until you achieve a thick, smooth, and lump-free paste.
- Cleanse your face thoroughly and pat dry.
- Apply a generous layer of the mask evenly over the area with unwanted hair, ensuring the hair is completely coated. Avoid eyebrows and hairline.
- Allow the mask to dry completely, typically 15-20 minutes, until it forms a tight, peelable film.
- Once dry, gently peel off the mask from the bottom edge upwards, pulling against the direction of hair growth.
- Rinse any residue with lukewarm water. Apply a soothing toner and a light moisturizer to your smooth skin.
Pro-Tip: This mask is most effective for removing fine, vellus hair, not coarse terminal hair. For optimal adhesion and a clean peel, ensure your skin is clean and dry before application. Repeat this treatment 1-2 times a week for consistent maintenance of facial hair removal diy. If you have very dry skin, follow up with a hydrating serum to prevent tightness.

6. Gentle Exfoliation with a Pumice Stone for Hair Removal

Pin this simple, eco-friendly method for light hair removal and exfoliation!
Supplies Needed
- 1 natural pumice stone
- Warm water
- Mild soap or body wash
- Moisturizer
Instructions
- Soak the area you wish to treat (typically legs or arms) in warm water for 5-10 minutes. This softens the skin and hair, making it easier to remove. A warm shower or bath works well.
- Wet the pumice stone thoroughly.
- Apply a small amount of mild soap or body wash to your skin or directly to the pumice stone for lubrication.
- Gently rub the pumice stone over the area with unwanted hair in small, circular motions. Apply minimal pressure.
- Continue for a few minutes, rinsing the stone periodically to remove dead skin and hair.
- Rinse your skin thoroughly with cool water to close pores.
- Pat your skin dry and immediately apply a rich, hydrating moisturizer to soothe and protect your freshly exfoliated, smooth skin.
Pro-Tip: The pumice stone works by abrading the hair and exfoliating dead skin cells, which can gradually reduce the appearance of hair. This method is best for fine, lighter hair on legs and arms. Never use a dry pumice stone on dry skin, as this can cause severe irritation and skin damage. Always be gentle, using minimal pressure to avoid issues like skin irritation remedies diy.

7. Papaya and Aloe Vera Enzyme Mask for Natural Hair Inhibition

Pin this soothing mask for natural hair inhibition and radiant skin!
Supplies Needed
- 1/4 cup raw green papaya paste (from an unripe papaya)
- 1/4 cup aloe vera gel (fresh from leaf or pure store-bought)
- 1 teaspoon turmeric powder (optional, for added benefits)
- Small mixing bowl
- Applicator brush or clean fingers
Instructions
- Peel and mash a small piece of raw green papaya into a smooth paste. It’s crucial to use unripe papaya as it contains a higher concentration of the hair-weakening enzyme, papain.
- In a small mixing bowl, combine the papaya paste, aloe vera gel, and the optional turmeric powder. Mix thoroughly to create a uniform mask.
- Cleanse your skin and pat it dry.
- Apply a thick layer of the mask to the desired area with unwanted hair.
- Gently massage the mask into the skin for 5-10 minutes, allowing the enzymes to penetrate.
- Leave the mask on for an additional 15-20 minutes.
- Rinse off with lukewarm water.
- Pat skin dry and apply a light, non-comedogenic moisturizer. For best results in natural hair inhibition, repeat 3-4 times a week.
Pro-Tip: The enzyme papain in raw papaya is believed to break down hair proteins, weakening the follicle over time. This method is a gentle, gradual approach to hair reduction and requires consistent application. Always use raw, unripe papaya as ripe fruit has less active enzyme. Combining with aloe vera helps soothe the skin, making it an excellent choice for sensitive skin hair removal problems.

Key Takeaways: Your Quick Guide to Hair Removal DIY
- DIY hair removal offers cost-effective, natural alternatives to traditional methods, empowering you to achieve smooth skin at home. These methods are often gentler, leveraging common household ingredients.
- Prioritize skin preparation and aftercare for optimal results and to prevent irritation. Proper cleansing, exfoliation, and moisturizing are crucial steps for smooth skin naturally.
- Always conduct a patch test before applying any new DIY method to a larger area. This crucial step helps identify potential allergic reactions or skin sensitivities, aligning with safe diy hair removal.
- Different DIY methods are best suited for different hair types and body areas. For instance, sugaring works well for coarser hair, while egg white masks target fine facial hair.
- Patience and consistency are key; most natural DIY methods offer gradual hair reduction, not instant, permanent removal. Manage expectations, especially concerning claims of diy permanent hair removal.
- Natural ingredients like turmeric and papaya contain enzymes that can weaken hair follicles over time, contributing to long-term hair inhibition. Consistent application is essential for seeing these natural hair inhibitor benefits.
- For best results, adhere strictly to recipes and instructions, paying attention to ingredient quality and application techniques. Following step-by-step guides ensures you effectively create homemade depilatory solutions.
FAQs About hair removal diy
What are the best DIY hair removal methods for sensitive skin?
For sensitive skin, gentler DIY hair removal methods like sugaring or enzyme-based masks (papaya and aloe vera) are highly recommended. Sugaring, made from natural ingredients like sugar, lemon, and water, adheres only to the hair and dead skin cells, causing less irritation than traditional waxing. Papaya masks utilize enzymes to gradually weaken hair follicles, offering a very mild approach without harsh friction or pulling, making them ideal for delicate areas and sensitive skin hair removal problems. Always perform a patch test first.
Does baking soda remove hair permanently?
No, there is no scientific evidence to suggest that baking soda permanently removes hair. While the baking soda and coffee grounds method can act as a physical exfoliant, potentially weakening the hair shaft over time and causing some hair regrowth reduction, it does not destroy hair follicles or prevent future hair growth. Claims of diy permanent hair removal should be approached with skepticism, as permanent hair removal typically requires professional treatments targeting the follicle.
How to make sugaring paste at home?
To make sugaring paste, combine 2 cups granulated sugar, 1/4 cup fresh lemon juice, and 1/4 cup water in a saucepan, then heat to 245-250°F (118-121°C). Stir until the sugar dissolves, then reduce heat and monitor with a candy thermometer until it reaches the golden-brown, soft-ball stage. This precise temperature ensures the correct consistency for a pliable paste that effectively binds to hair for removal.
Is diy laser hair removal safe?
DIY laser hair removal devices for at-home use can be safe when used strictly according to manufacturer instructions, but carry risks if misused. These devices use light energy to target melanin in the hair follicle. While generally less powerful than professional machines, improper use can lead to burns, skin discoloration, or ineffective results. Consultation with a dermatologist is always advised before attempting any diy laser hair removal as part of dermatologist recommended hair removal practices.
How to prevent ingrown hairs after DIY hair removal?
To prevent ingrown hairs after DIY hair removal, consistent exfoliation and proper moisturizing are crucial steps. Gently exfoliate the skin 2-3 times a week using a mild scrub or chemical exfoliant (like AHA/BHA) to prevent dead skin cells from trapping new hair growth. Following up with a hydrating, non-comedogenic moisturizer keeps skin soft and pliable, allowing hair to grow through freely. This comprehensive aftercare helps address prevent ingrown hairs effectively.
What natural ingredients can remove facial hair?
Natural ingredients like turmeric, papaya, lemon, honey, and egg white can be used in DIY masks to help reduce or remove fine facial hair. Turmeric and papaya utilize enzymes to weaken hair follicles, while lemon and honey act as mild depilatories and lighteners. Egg white masks can physically lift fine vellus hair upon peeling. These ingredients offer gentle facial hair removal diy options but require consistent use for noticeable results.
What are the pros and cons of DIY hair removal?
The pros of DIY hair removal include cost-effectiveness, privacy, and the use of natural ingredients, while cons involve potential skin irritation, inconsistent results, and the risk of improper technique. At home hair removal can save money and offers convenience, using ingredients you control. However, methods may be less effective than professional alternatives, require significant time and practice, and without proper technique, can lead to issues like redness, burns, or unwanted hair solution failures.
What are the risks of DIY hair removal?
The risks of DIY hair removal include skin irritation, burns, allergic reactions, ingrown hairs, and hyperpigmentation, especially if proper safety precautions are not followed. Ingredients like lemon can cause photosensitivity, while hot sugaring paste or improper pumice stone use can lead to burns or abrasions. Always perform a patch test, follow instructions carefully, and understand your skin’s sensitivities to minimize these risks, adhering to risk assessment for home methods.
How often should you do DIY hair removal?
The frequency of DIY hair removal depends on the chosen method, individual hair growth rate, and skin sensitivity. Gentle exfoliation methods like baking soda and coffee grounds or enzyme masks (papaya) can be used 2-3 times a week. Sugaring or lemon and honey treatments, which pull hair from the root, may be done every 2-4 weeks. Always observe your skin’s reaction and adjust frequency to prevent irritation, emphasizing practice safe hair removal.
How does sugaring work for hair removal?
Sugaring works by adhering to the hair and dead skin cells, then removing them from the follicle as the paste is swiftly flicked off. The sugaring paste, a mixture of sugar, lemon, and water, is typically applied against the direction of hair growth and removed in the direction of growth. This technique helps extract hair from the root, often resulting in smoother skin for longer periods compared to shaving, and can reduce breakage and ingrown hairs by aligning with the natural growth pattern.
Final Thoughts on Hair Removal DIY
Embarking on the journey of hair removal DIY offers a rewarding path to smooth skin, putting control and natural ingredients literally into your hands. As we’ve explored, from the ancient art of sugaring paste to the gentle exfoliation of baking soda and coffee grounds, a variety of methods exist to suit different preferences and skin types. The key to success lies not in seeking instant, miraculous results, but in consistent, patient application and a deep respect for your skin’s unique needs.
Remember, the goal of these natural hair removal at home solutions is not just to remove unwanted hair, but to nurture your skin in the process. Prioritize thorough skin preparation, diligent aftercare, and the non-negotiable step of patch testing. By doing so, you can minimize potential irritations and maximize the benefits, truly mastering the art of self hair removal techniques. Which of these proven diy methods are you most excited to try first for your journey to smooth skin?
Last update on 2026-03-11 / Affiliate links / Images from Amazon Product Advertising API


