Tired of daily shaving or painful waxing routines? Achieving truly smooth skin can feel like a constant battle against unwanted hair.
Epilation offers long-lasting smooth skin by removing hair from the root, providing an effective at-home solution for reducing regrowth and minimizing stubble compared to shaving. It can be initially painful but becomes more comfortable with consistent use and proper technique.
Drawing from comprehensive analysis of current data and proven methodologies, this expert guide will unveil 11 proven tips. You’ll discover how to master your hair removal epilator for lasting smoothness and minimize common concerns like pain and ingrown hairs.
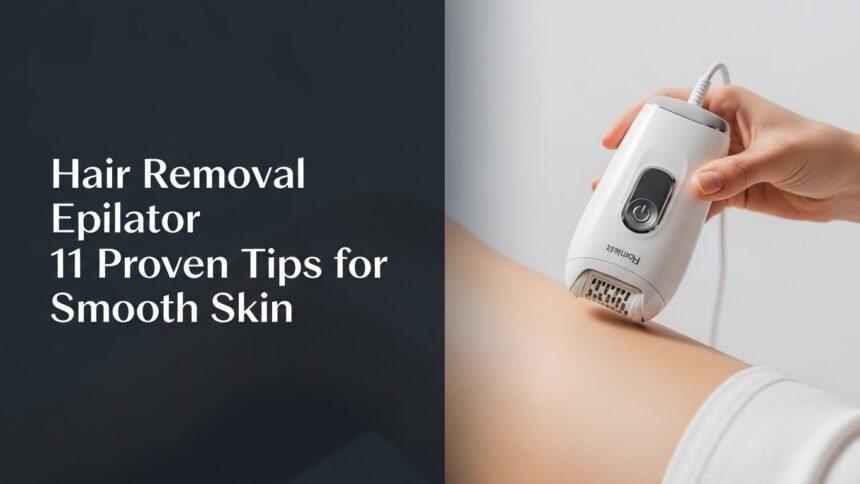
Your Expert Guide: 11 Proven Hair Removal Epilator Tips for Lasting Smoothness
Navigating the world of at-home hair removal can be daunting, especially with concerns about comfort and efficacy. A hair removal epilator stands out as a powerful mechanical device designed for long-lasting results by removing hair from the root. This comprehensive guide, built on expert tips and proven techniques, addresses common challenges users face. We’ll explore how to achieve and maintain smooth, stubble-free skin while minimizing discomfort and preventing issues like ingrown hairs, ensuring you get the most out of your epilation journey. This section dives deep into 11 practical tips to transform your epilation experience.
1. Master Your Skin Prep for a Smoother Epilation

Pin this essential skin prep hack for flawless results!
Mastering skin preparation for epilation is crucial for both comfort and achieving optimal results, reducing the likelihood of ingrown hairs and irritation. This foundational step ensures that your skin is clean, soft, and ready for efficient hair extraction, allowing the epilator to work effectively. By clearing away dead skin cells and softening hair follicles, you create an ideal surface for the mechanical hair removal device to easily grasp each hair at the root, minimizing pulling and discomfort.
Supplies Needed:
- Gentle exfoliating scrub (physical or chemical) for sensitive skin
- Mild antibacterial body wash
- Clean, soft towel
- Warm water
Step-by-Step Directions:
- Warm Shower/Bath: Take a warm shower or bath for 5-10 minutes to open pores and soften hairs.
- Exfoliate Thoroughly: Using a gentle exfoliating scrub, massage the areas you plan to epilate in circular motions. Focus on areas prone to ingrown hairs. Rinse completely.
- Cleanse Skin: Wash the skin with a mild antibacterial body wash to remove any oils, lotions, or residue that could interfere with the epilator.
- Dry Completely: Pat your skin completely dry with a clean towel. Ensure no moisture remains, especially if using a dry-only epilator.
Pro-Tip: Regular exfoliation (2-3 times a week) isn’t just for pre-epilation; it’s a key strategy in preventing folliculitis and ensuring that fine hairs don’t get trapped beneath the skin’s surface, a common cause of ingrown hairs. This also supports optimal skin barrier function.

2. Choose the Optimal Time for Epilation

Plan your epilation for maximum comfort! Pin this tip.
Choosing the optimal time for epilation can significantly impact your comfort level and allow your skin adequate recovery time. This strategic timing minimizes potential pain and visible irritation, leading to a more pleasant overall experience. By aligning your epilation sessions with your body’s natural rhythms and allowing for proper post-treatment rest, you enhance the effectiveness of the process and ensure your skin looks its best.
Supplies Needed:
- Post-epilation soothing lotion or aloe vera gel
- Loose, comfortable clothing
Routine Steps:
- Evening Epilation: Choose to epilate in the evening, ideally before bed. Your pain threshold is generally higher later in the day, and your skin has several hours to calm down overnight, reducing visible redness and irritation.
- Avoid Pre-Menstrual Week: Many people experience increased skin sensitivity during the week leading up to their period. If possible, avoid epilating during this time to minimize discomfort.
- Allow Recovery Time: If you’re epilating for an event, plan to do it at least 24-48 hours beforehand to ensure any temporary redness or bumps have subsided.
- Listen to Your Body: If you’re feeling particularly stressed or unwell, postpone your epilation. Your body’s response to discomfort can be heightened.
Pro-Tip: Applying a cool compress or a soothing gel containing aloe vera or chamomile immediately after epilation can help calm the skin and reduce redness, facilitating the skin’s natural desquamation process and lowering hyperpigmentation risks.

3. Hold Your Skin Taut for Effective Epilation

This simple trick reduces pain! Pin for later.
Holding your skin taut is a simple yet profoundly effective technique to enhance epilation efficiency and significantly reduce discomfort. This action prevents the skin from being pulled or pinched by the epilator’s rotating tweezers, ensuring that only the hair is targeted. The result is a smoother glide of the device, more effective hair extraction from the root, and a far less painful experience overall, directly addressing common pain points.
Supplies Needed:
- Your chosen hair removal epilator
- Clean hands
Step-by-Step Directions:
- Identify Area: Select a small section of skin you are about to epilate.
- Stretch Gently: With your free hand, use two fingers (or your thumb and index finger) to firmly stretch the skin taut around the area you’re working on.
- Maintain Tension: Keep the skin stretched throughout the epilation process. This minimizes the risk of the epilator pinching the skin and helps the tweezers grasp hairs more effectively.
- Glide Over Area: Once the skin is taut, slowly glide the epilator over the area.
Pro-Tip: This technique is especially important for areas with thinner, looser skin like underarms or the bikini area, where skin can easily be caught. It ensures the epilator’s micro-tweezers technology can grab only the hair, making the process of follicular extraction more precise and less irritating.

4. Epilate Against the Direction of Hair Growth

Get the closest epilation possible! Pin this technique.
Epilating against the direction of hair growth is the most effective method for ensuring the epilator’s tweezers grasp hairs at their base and remove them cleanly from the root. This technique is fundamental for achieving the closest and longest-lasting results, as it allows the device to lift and pluck each hair efficiently. Moving in the opposite direction of growth maximizes the chance of full follicular extraction, directly contributing to smoother skin and slower regrowth.
Supplies Needed:
- Fully charged or plugged-in epilator
Step-by-Step Directions:
- Identify Hair Growth Direction: Observe the hair on your chosen area to determine which way it naturally grows. Hair on legs typically grows downwards, while underarm hair can grow in multiple directions.
- Position Epilator: Hold your epilator so the head is at a 75-90-degree angle to your skin.
- Move Against Growth: Slowly glide the epilator against the direction of hair growth. This allows the tweezers to effectively grasp the hairs at their base and pull them from the root.
- Slow and Steady: Avoid rushing. A slow, steady motion is more effective and reduces the chance of hairs breaking instead of being removed from the root.
Pro-Tip: The goal is clean follicular extraction. Gliding against the hair growth ensures that the hair shaft is presented optimally for the epilator’s plucking mechanism. This significantly contributes to hair density reduction over time and prevents issues like hairs breaking at the skin’s surface, which can lead to stubble.

5. Keep Your Epilator at the Right Angle

Unlock optimal epilation with the perfect angle!
Maintaining the correct angle while using your epilator is paramount for preventing hair breakage and ensuring efficient hair removal. An improper angle can cause the tweezers to snap hairs rather than pull them from the root, leading to faster regrowth and potential ingrown hairs. By keeping the epilator head at an optimal position against your skin, you allow the device’s mechanism to work as intended, providing a cleaner, smoother finish.
Supplies Needed:
- Your epilator with desired attachment
Step-by-Step Directions:
- Read Your Manual: Always consult your epilator’s user manual first, as specific models might have slight variations.
- Find the Sweet Spot: For most epilators, the ideal angle is between 75 to 90 degrees to your skin. The epilator head should be relatively flat against your skin, but not pressed down too hard.
- Avoid Flat-Lying: Do not hold the epilator completely flat (0 degrees) against your skin, as this can lead to hairs being missed or breaking instead of being pulled.
- Avoid Upright Angle: Holding it too upright (90 degrees, straight perpendicular) can cause irritation and make it less efficient. Aim for the gentle angle that allows the tweezers to effectively grab hairs.
Pro-Tip: Many modern epilators feature pivoting or flexible heads designed to adapt to your body’s contours, making it easier to maintain the correct angle. However, even with these features, actively guiding the device at a near-right angle against the skin optimizes the hair pulling mechanism, reducing hair shaft damage and ensuring a cleaner removal.

6. Consider Wet Epilation for Reduced Discomfort

Discover the secret to comfortable epilation! Save this tip.
Wet epilation offers a distinct advantage in significantly reducing discomfort compared to dry epilation, making the hair removal process more tolerable. The warm water from a shower or bath helps to soften the skin and open pores, allowing hairs to be extracted more easily. Additionally, using a gentle shower gel provides lubrication, enabling the epilator to glide smoothly over the skin, which minimizes pulling sensations and enhances overall comfort.
Supplies Needed:
- Waterproof, wet & dry hair removal epilator
- Gentle shower gel or bath oil
- Warm shower or bath
Application Steps:
- Shower or Bath: Begin your epilation session in a warm shower or bath. The warm water helps to open pores and relax your skin, making the hair removal process less painful.
- Apply Shower Gel: Apply a small amount of gentle shower gel or bath oil directly to the area you want to epilate. This creates a smooth surface for the epilator to glide over.
- Glide Smoothly: Activate your wet & dry epilator and slowly glide it over your wet, soaped skin. The water and soap will help the epilator move more effortlessly and reduce pulling sensations.
- Rinse & Continue: Rinse the epilator head regularly under running water to remove accumulated hairs and maintain efficiency.
Pro-Tip: Many users report a significant reduction in pain threshold when epilating in a warm, wet environment. The soothing effect of water and the lubrication from shower gel allows for a smoother glide, minimizing the sensation of pulling and enhancing overall comfort during the process. Ensure your device is explicitly designed for wet use (waterproof, entity_attributes_descriptive).
7. Choose the Right Speed Setting for Your Comfort

Customize your epilation experience! Pin this smart tip.
Selecting the appropriate speed setting on your epilator is key to customizing your hair removal experience for both comfort and efficiency. Many modern epilators come equipped with multiple speeds, allowing you to adapt the device’s intensity to different body areas and your personal pain threshold. This feature is particularly beneficial for beginners or when epilating sensitive skin, as a slower speed can make the process significantly more comfortable.
Supplies Needed:
- Your epilator with multiple speed settings
Routine Steps:
- Start Low: If you’re a beginner or epilating a sensitive area, always start with the lowest speed setting. This allows your skin to acclimatize and can significantly reduce initial discomfort.
- Assess Comfort: As you glide the epilator, pay attention to your comfort level. If it’s too painful, stick with the lower speed.
- Increase Speed for Efficiency: Once you become more accustomed to the sensation, you can gradually increase to a higher speed. Higher speeds are often more efficient for larger, less sensitive areas like legs, removing more hairs quickly.
- Switch Speeds as Needed: Don’t be afraid to switch between speeds for different body parts or as your tolerance changes during a session.
Pro-Tip: Many individuals find that a slower speed (e.g., speed I) is best for the anagen phase of hair removal when hairs are more firmly rooted, as it allows the device to grasp each hair more effectively without breaking it. For follow-up sessions or areas with finer hair, a higher speed can be more efficient, maintaining smooth skin.

8. Use Epilator Attachments for Specific Body Areas

Maximize comfort & efficiency! Pin this guide to attachments.
Leveraging the specific attachments that come with your epilator is crucial for maximizing comfort and achieving precise, effective hair removal across different body parts. These specialized heads are ingeniously designed to adapt the epilator’s functionality for sensitive or contoured areas, minimizing irritation and ensuring optimal contact with the skin. Understanding which attachment to use for areas like the face, bikini line, or legs can dramatically improve your epilation experience and results.
Supplies Needed:
- Your epilator set with various attachments (e.g., facial cap, sensitive area cap, efficiency cap, shaver/trimmer head)
Routine Steps:
- Identify Area: Determine which body part you want to epilate (e.g., face, underarms, bikini line, legs).
- Select Attachment:
- Facial Cap/Precision Cap: Use for small, delicate areas like the upper lip, chin, or eyebrows. These caps reduce the number of tweezers in contact with the skin.
- Sensitive Area Cap: Ideal for underarms and the bikini line, these caps limit the epilating surface to minimize discomfort.
- Efficiency Cap: Often features a wider epilating surface, best for large areas like legs and arms for faster results.
- Shaver/Trimmer Head: Not for epilation, but useful for pre-trimming longer hairs or maintaining areas you don’t want to epilate fully.
- Attach Securely: Snap or slide the chosen attachment onto your epilator head firmly.
- Use as Directed: Follow the general epilation tips for skin prep, angle, and direction for the specific area.
Pro-Tip: Utilizing the correct attachment is crucial for comfort and efficacy, especially for sensitive skin areas. For instance, a facial epilator attachment ensures precise control and minimizes irritation for fine hair removal, aligning with dermatological considerations for delicate skin. Many devices, like the Braun Silk-épil, come with a comprehensive warranty covering these versatile attachments.

9. Implement a Post-Epilation Skincare Routine

Your secret to post-epilation glow! Pin this routine.
Implementing a meticulous post-epilation skincare routine is critical for calming the skin, preventing irritation, and fostering long-term skin health. Immediately after hair removal, your skin is more vulnerable to redness, bumps, and potential ingrown hairs. A thoughtful aftercare regimen focuses on soothing, hydrating, and protecting the skin, directly addressing these common concerns and ensuring that your journey to smooth skin is as comfortable and rewarding as possible.
Supplies Needed:
- Gentle, unscented moisturizing lotion or cream
- Aloe vera gel (optional, for extra soothing)
- Loose, breathable clothing
Application Steps:
- Cool Down: Immediately after epilating, rinse your skin with cool water to close pores and soothe any redness.
- Apply Moisturizer: Generously apply a gentle, unscented, and hydrating moisturizer to the epilated areas. Look for ingredients like hyaluronic acid, glycerin, or ceramides. Avoid products with heavy fragrances or alcohol, which can irritate sensitive skin.
- Aloe Vera (Optional): If you experience significant redness or discomfort, a thin layer of pure aloe vera gel can provide additional soothing.
- Wear Loose Clothing: For at least 24 hours, wear loose-fitting, breathable clothing (e.g., cotton) to prevent friction and allow your skin to recover without irritation.
- Avoid Sun Exposure: Protect newly epilated skin from direct sun exposure for 24-48 hours, as it can be more sensitive to UV radiation.
Pro-Tip: Proper post-epilation care is critical for managing potential hyperpigmentation risks and maintaining stratum corneum integrity. A good moisturizer helps replenish the skin’s natural oils and reinforces the skin barrier function, preventing dryness and reducing the likelihood of bacterial folliculitis from occurring in open hair follicles.

10. Stay Consistent with Your Epilation Routine

Consistency is key for lasting smoothness! Pin this reminder.
Maintaining consistency with your epilation routine is the most impactful factor for achieving long-term smooth skin and significantly reducing discomfort over time. The initial sessions with a hair removal epilator can be challenging, but regular use disrupts the hair growth cycle, leading to finer, sparser, and slower-growing hair. This consistent approach transforms epilation from a dreaded task into a comfortable and efficient part of your beauty regimen, yielding progressively better and more enduring results.
Supplies Needed:
- Your epilator
- Calendar or reminder app
Routine Steps:
- Establish a Schedule: Aim to epilate every 2-4 weeks, depending on your individual hair growth rate. Mark it on your calendar or set a reminder.
- Target Shorter Hairs: Don’t wait for hairs to become too long. Epilating shorter hairs (around 0.5mm to 1.5mm) is generally less painful and more efficient.
- Be Patient: The first few sessions might be uncomfortable, but consistent use will lead to finer, sparser hair regrowth, and significantly less pain over time.
- Embrace the Cycle: Understand that epilators target hair in the anagen (growing) phase. Consistent epilation ensures you catch more hairs in this phase, gradually weakening the hair follicle.
Pro-Tip: Regular disruption of the hair growth cycle through consistent follicular extraction is key to achieving true long-lasting smoothness. Over time, you’ll notice not only slower hair growth but also a change in hair texture—often becoming finer and less coarse. This is where epilation truly shines against methods like shaving which only remove the surface hair.

11. Properly Clean and Maintain Your Epilator

Extend your epilator’s life! Pin this maintenance guide.
Properly cleaning and maintaining your epilator is paramount for ensuring optimal performance, preventing skin irritation, and extending the lifespan of your device. A neglected epilator can harbor bacteria, leading to potential skin issues like folliculitis, and its efficiency can degrade with accumulated hair and debris. Regular cleaning after every use guarantees hygienic operation and ensures that your hair removal epilator consistently provides the best possible results.
Supplies Needed:
- Small cleaning brush (usually included with epilator)
- Mild soap or antibacterial cleanser
- Running water (for waterproof models)
- Disinfectant spray (optional, for non-waterproof heads)
- Clean, dry cloth
Step-by-Step Directions:
- Disconnect Power: Always ensure your epilator is turned off and unplugged (or disconnected from the charger) before cleaning.
- Brush Off Hairs: Use the small cleaning brush to gently brush away all trapped hairs from the epilator head. Work from the outside inwards.
- Rinse (Waterproof Models): If your epilator is waterproof, remove the head (if detachable) and rinse it thoroughly under running water, using a mild soap or antibacterial cleanser.
- Disinfect (Non-Waterproof/Extra Hygiene): For non-waterproof models, or for extra hygiene, you can spray the epilator head with an alcohol-based disinfectant after brushing (ensure no liquid enters the main body). Allow to air dry completely.
- Dry & Store: Ensure all parts are completely dry before reassembling or storing your epilator in its designated travel case or a clean, dry place.
Pro-Tip: Consistent cleaning after every use is vital not only for maintaining the efficiency and battery life of your epilator but, more importantly, for preventing bacterial accumulation. This minimizes the risk of pseudofolliculitis barbae and other skin irritations, demonstrating a commitment to advanced personal hygiene.

Key Takeaways
Your journey to consistently smooth skin with a hair removal epilator is entirely achievable with the right approach. Mastering this at-home hair removal method involves understanding both the mechanics of the device and the needs of your skin. By integrating proven techniques and consistent care, you can transform your routine.
Here are the essential points to remember for hair removal epilator success:
- Prep is Paramount: Proper skin preparation with exfoliation and cleansing before epilation significantly reduces discomfort and prevents ingrown hairs, ensuring a smoother result.
- Technique Matters: Holding your skin taut, epilating against hair growth, and maintaining the correct angle are crucial for efficient hair removal from the root.
- Comfort Customization: Utilize wet epilation (if your device allows) and adjust speed settings to personalize your experience and minimize pain.
- Attachments Are Your Allies: Leverage different epilator attachments for specific body parts (face, bikini, legs) to maximize effectiveness and comfort.
- Aftercare is Non-Negotiable: A gentle, hydrating post-epilation skincare routine is essential for calming the skin, preventing irritation, and maintaining healthy skin barrier function.
- Consistency Compounds: Regular epilation leads to finer, sparser hair regrowth and a less painful experience over time, offering true long-lasting smoothness.
- Maintain Your Tool: Consistently clean your epilator after every use to ensure hygiene, optimal performance, and to prolong its lifespan, preventing skin issues.
FAQs About Hair Removal Epilator
What is an epilator and how does it work?
An epilator is an electric hair removal device that uses multiple rotating tweezers to grasp and pull out hairs directly from the root. This mechanical action removes hair similar to waxing, but without chemicals, resulting in smoother skin that lasts for several weeks. The process targets the entire hair shaft, including the follicle, leading to slower regrowth.
Is epilation painful, especially for beginners?
Yes, initial epilation sessions can be painful, particularly for beginners or on sensitive areas, as it involves pulling hair from the root. However, the discomfort typically decreases significantly with consistent use as the hair grows back finer and sparser. Wet epilation, starting on a low speed, and proper skin preparation can help manage pain.
How can I prevent ingrown hairs after using an epilator?
Preventing ingrown hairs after epilation primarily involves consistent exfoliation and moisturizing. Exfoliate 2-3 times a week, both before and after epilation, to remove dead skin cells that can trap new hair growth. Always apply a gentle, unscented moisturizer to keep the skin hydrated and supple.
How long do epilation results typically last?
Epilation results typically last between 2 to 4 weeks, depending on individual hair growth cycles. Since the hair is removed from the root, it takes longer to regrow than with shaving. Consistent epilation can eventually lead to finer, slower-growing hair, extending the duration of smoothness.
Can epilators be used on all body parts, including the face and bikini area?
Yes, many modern epilators are designed with various attachments specifically for different body parts, including the face and bikini area. Precision caps reduce the epilating surface for delicate areas, ensuring safer and more comfortable hair removal on sensitive skin, but always check your device’s instructions.
What’s the difference between wet and dry epilation?
Wet epilation is performed in the shower or bath with water, while dry epilation is done on dry skin. Wet epilation can reduce discomfort as warm water opens pores and relaxes the skin. Dry epilation is often faster but may be more noticeable in terms of sensation. Waterproof, wet & dry epilators offer both options.
Should I shave before epilating for the first time?
No, you generally should not shave right before epilating, as epilators work best on short to medium-length hair (around 0.5-3mm). If your hair is too long, trimming it down is advisable; too short (from recent shaving) and the epilator’s tweezers may struggle to grasp it effectively, leading to missed hairs.
How often should I clean my epilator?
You should clean your epilator thoroughly after every single use to maintain hygiene and optimal performance. This involves brushing off trapped hairs and, for waterproof models, rinsing the head under running water with a mild cleanser. Proper cleaning prevents bacterial buildup and prolongs the device’s lifespan.
Are epilators safe for sensitive skin?
Yes, many epilators are designed with features like sensitive area caps, speed settings, and wet & dry capabilities specifically for sensitive skin. However, individual reactions vary. Always perform a patch test, use proper skin preparation, and follow post-epilation care to minimize irritation on sensitive skin.
Epilator vs. waxing: Which is better for long-term results?
Both epilation and waxing remove hair from the root, offering long-term results compared to shaving. However, epilators offer convenience for at-home, on-demand use, are generally more cost-effective over time, and can remove shorter hairs that waxing might miss. Waxing can be less painful initially but requires hair to be a certain length.
Final Thoughts on Your Hair Removal Epilator Journey
Embarking on your hair removal epilator journey means choosing a path to lasting smooth skin and increased confidence. This comprehensive guide has equipped you with 11 proven tips, moving beyond basic use to address common challenges like pain and ingrown hairs with expert-backed solutions. By embracing these techniques, from meticulous skin preparation to diligent aftercare and consistent routine, you’re not just removing hair; you’re cultivating healthier skin and a more comfortable grooming experience. The benefits of at-home hair removal with an epilator—longevity, efficiency, and ultimately, a reduction in hair growth density—make it a worthwhile investment in your personal care. Which of these essential epilation tips will you incorporate into your routine first in 2026?
Last update on 2026-03-04 / Affiliate links / Images from Amazon Product Advertising API


