Struggling to find cute hairstyles for short hair kids that don’t unravel by snack time? The morning rush is real, and wrestling with a wiggly toddler’s hair can feel like a losing battle, often ending in frustration and the same old boring look. You need styles that are quick, stay in place, and don’t lead to a mess of tangles.
The key to styling short hair for kids is to focus on simple twists, small accent braids, and decorative clips to add flair without needing length. These methods are quick, comfortable for the child, and help keep hair neatly out of their face during school and play, solving the common problem of flyaways. This approach transforms short hair from a challenge into a canvas for cute and easy styles.
Drawing from proven techniques and parent-approved methods, this guide is your new secret weapon for stress-free mornings. We’ll show you how to create adorable, durable kids short hairstyles that both you and your child will love. Get ready to discover 9 simple, step-by-step tutorials that make styling short hair fast, fun, and finally, fuss-free.
How to Do Hairstyles for Kids with Short Hair: The Ultimate Parent’s Guide
Styling short hair on a child can feel like trying to solve a puzzle with missing pieces. As a parent who has navigated countless school mornings, I understand the struggle of trying to create a neat look that lasts on a child who is always on the move. The good news is that short hair offers a world of possibilities for cute, simple, and time-saving styles. This guide moves beyond just listing ideas; it provides a framework for success. The core principle is to work with the short length, not against it, by using the right accessories and gentle methods. By focusing on healthy hair practices—like minimizing tangles and using soft elastics—you can create looks that are not only adorable but also comfortable for your child’s delicate scalp. This section will equip you with the foundational knowledge to tackle any of the fuss-free hairstyles that follow, turning chaotic mornings into moments of creative connection.
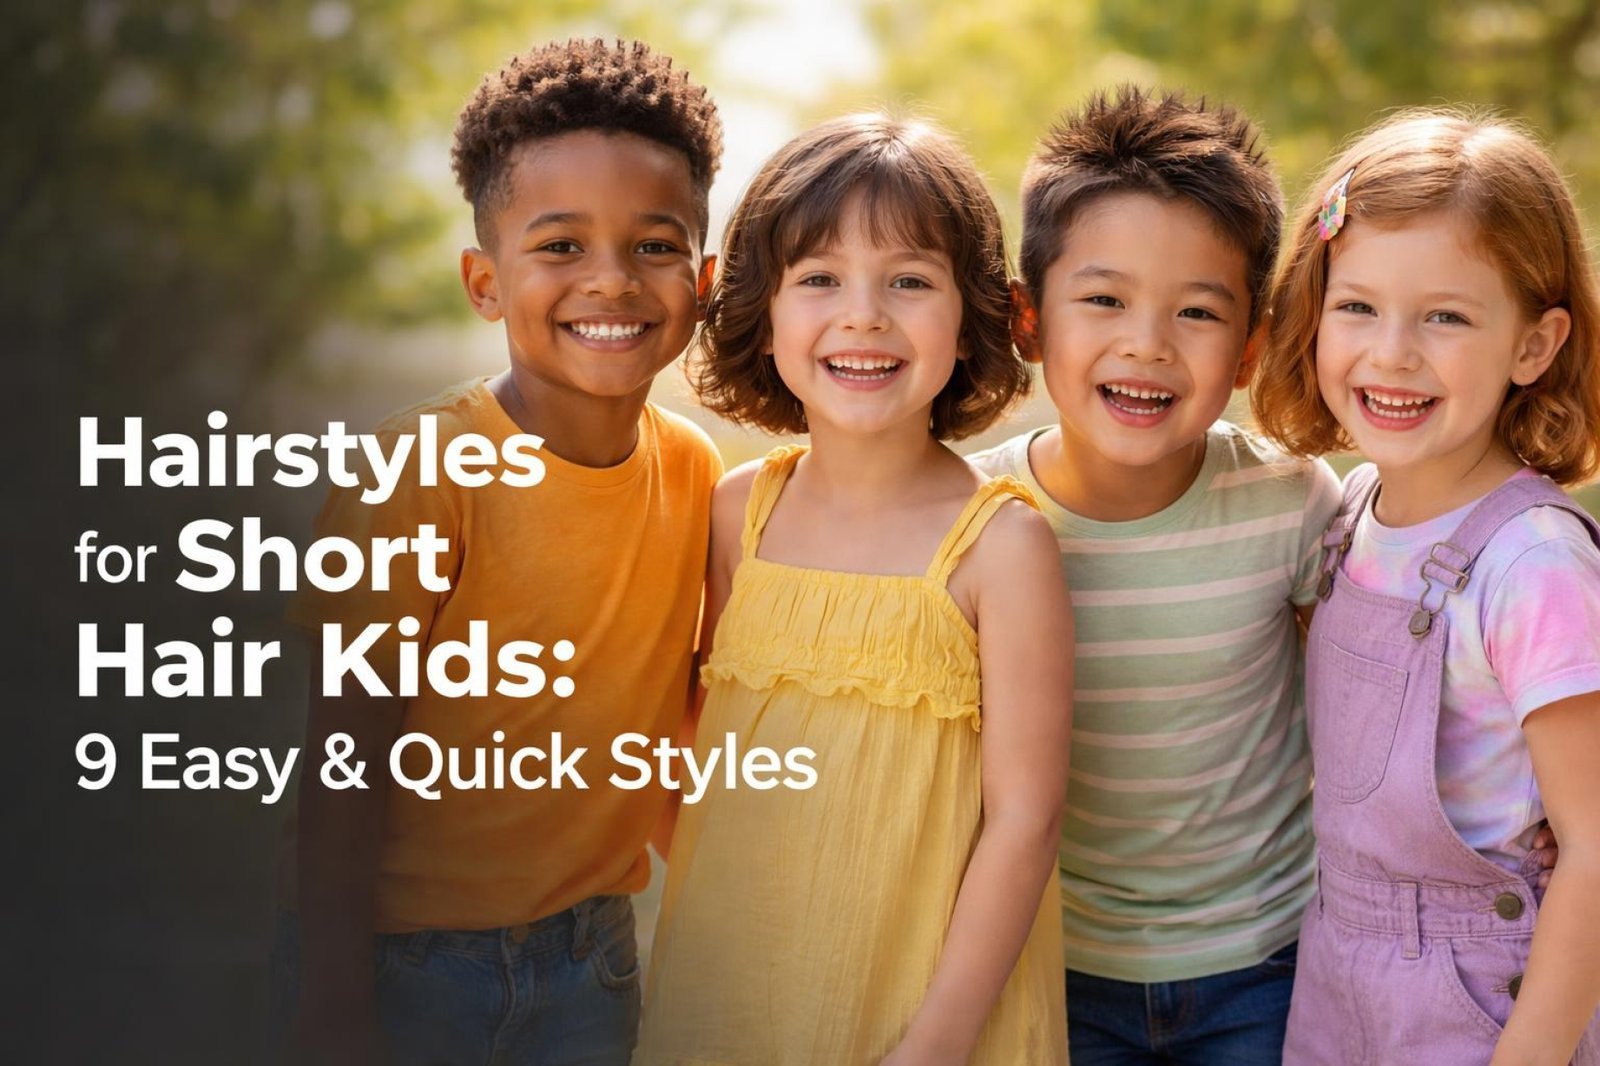
9 Easy & Quick Hairstyles for Short Hair Kids in 2026
Now we get to the fun part! Here are nine quick and easy hairstyles perfect for kids with short hair. Each style is designed for busy parents and active kids, ensuring the look is both durable and adorable. We’ve broken down each one into a simple, step-by-step tutorial, complete with a “Products & Tools Used” list and a “Pro-Tip” to give you that extra bit of expert advice. This catalog of ideas will give you plenty of inspiration for school days, parties, and everything in between. Whether your child has short curly hair, short 4c hair, or fine, straight hair, you’ll find a go-to style here.
1. Create Adorable Pigtail Twists

Pin this super cute toddler hairstyle for your next busy morning!
Products & Tools Used
- Fine-tooth comb for precise parting
- Spray bottle with water or a leave-in detangler
- Small, gentle hair elastics (clear or colored) that prevent breakage
Application/Styling Steps
- Part the hair down the middle from front to back, creating two equal sections.
- Lightly moisturize one section to minimize flyaways.
- Gather the section into a pigtail, then split it into two smaller, equal strands.
- Twist the two strands around each other from root to tip.
- Secure the end of the twist with a small, gentle elastic.
- Repeat on the other side.
Pro-Tip: For a fuller look on thin hair, gently tug on the edges of the twist after securing it. This technique, known as “pancaking,” adds instant volume without causing stress on the follicles. It’s a key piece of expert advice for styling fine tresses.

2. Style a Quick Front Twist with a Bow

Save this 2-minute hairstyle for a polished school-day look!
Products & Tools Used
- A rattail comb for a clean parting line
- A small amount of styling gel or water to tame flyaways
- A decorative bow clip or barrette
Application/Styling Steps
- Part the hair to one side.
- Take a small 1-inch section of hair from the front, near the hairline.
- Apply a tiny bit of gel or water to smooth the section.
- Begin to twist the hair away from the face, keeping the twist tight against the scalp.
- As you twist, incorporate small amounts of additional hair from along the hairline.
- Once the twist is long enough to be pulled back, secure it firmly with the bow clip.
Pro-Tip: When dealing with short natural hair, ensure the hair is well-moisturized before twisting to prevent breakage. For a twist that lays flat, twist downwards towards the ear. For more volume, twist upwards. This is a simple trick for scalp tension management.

3. Arrange a Criss-Cross Rubber Band Design

Pin this fun idea for a durable and cool party look!
Products & Tools Used
- Rattail comb for creating a clean grid of sections
- Colorful, high-quality mini rubber bands
- Edge control or hair gel for neatness
Application/Styling Steps
- Section off the front part of the hair into a grid of four or six small squares.
- Apply a small amount of gel to the base of the first square and secure it into a tiny ponytail with a rubber band.
- Repeat for all squares in the front row.
- Create a second row of sections behind the first.
- Take the ponytail from a front-row square, split it in half, and have each half join a new ponytail in the back row, creating the criss-cross “X” pattern.
- Secure each new combined ponytail with another rubber band.
- Continue this pattern as desired.
Pro-Tip: The most critical step is removal. NEVER pull rubber bands out. To prevent breakage, use a “rubber band removal tool” or apply a drop of oil to the band and let it slide out. This is a core principle of low-tension rubber banding.

4. Fix a Half-Up Top Knot or “Top-Knot”

Need a trendy look in 60 seconds? Pin this one!
Products & Tools Used
- A soft hair brush
- A small hair elastic or a stylish mini scrunchie
- Bobby pins if needed for extra security
Application/Styling Steps
- Brush the hair to remove any tangles.
- Using your fingers, section and gather the top portion of the hair, from the temples to the crown.
- Smooth this section into a high ponytail.
- Begin securing it with the hair tie or scrunchie. On the final loop, don’t pull the tail all the way through. Leave it as a small loop to form the bun.
- Tuck any loose ends from the tail around the base of the scrunchie or secure them with bobby pins.
- Gently pull at the “knot” to make it as messy or neat as you like.
Pro-Tip: For short curly hair, don’t brush it while dry. Use your fingers and a good moisturizer to gather the curls. This maintains the curl pattern and prevents frizz. This is a key part of porosity styling.

5. Create Multiple Mini Ponytails

Pin this super secure style, perfect for active kids!
Products & Tools Used
- Rattail comb for clean, even sections
- A set of colorful, small hair elastics
- Water or a light-hold hairspray
Application/Styling Steps
- Decide where you want the row of ponytails (e.g., down the middle like a mohawk, or along one side).
- Section out the first small square of hair at the front hairline. Smooth it and secure with an elastic.
- Move back one inch and create a second, identical section.
- Gather this second section and secure it with another elastic.
- Continue this process down the line for as many ponytails as you want to create (typically 3-5).
Pro-Tip: For a more intricate look, take the tail from the first ponytail and have it join the second ponytail as you secure it. Then take the combined tail and have it join the third. This “caterpillar” or “pull-through” effect is a salon secret for making short hair appear more complexly styled.

6. Do a Simple Side-Sweep with Decorative Clips

Save this for a beautiful, 30-second special occasion hairstyle!
Products & Tools Used
- A hair brush
- A set of decorative hair clips, barrettes, or sparkly bobby pins
- Light-hold hairspray (optional)
Application/Styling Steps
- Create a deep side part in the hair.
- Brush the hair on the fuller side so it sweeps smoothly across the forehead and over the ear.
- On the side with less hair, comb it down neatly behind the ear.
- Just above the ear on the fuller side, arrange two or three decorative clips to hold the sweep in place.
- Lightly spritz with hairspray to control any flyaways if desired.
Pro-Tip: For very fine or slippery hair where clips tend to slide out, create a tiny, hidden “X” with two bobby pins first. Then, slide your decorative clip over the bobby pins. This gives the clip something to grip and is a proven technique for a secure hold.

7. Braid Tiny Accent Braids

Pin this boho-chic idea for when you have an extra 5 minutes!
Products & Tools Used
- A small amount of hair wax or pomade for grip
- A very small, clear elastic band
- A comb for sectioning
Application/Styling Steps
- Section out a small, half-inch piece of hair near the temple or along the part line.
- Apply a tiny bit of hair wax to your fingertips and run it through the section. This helps grip the short strands.
- Split the section into three equal strands.
- Begin a standard three-strand braid.
- Continue braiding for 2-3 inches, just enough to create a noticeable accent.
- Secure the end of the tiny braid with a small, clear elastic. Let it blend in with the rest of the hair.
Pro-Tip: To make the braid “pop” and appear raised, use a Dutch braid technique (crossing the strands under the middle piece instead of over). This is one of the best alternatives to braids that lay flat and get lost in short hair.

8. Style a Funky Faux Hawk

Pin this awesome look for your little rockstar!
Products & Tools Used
- A strong-hold, kid-safe hair gel or wax
- A comb
- A blow dryer (optional, for extra hold)
Application/Styling Steps
- Start with slightly damp hair for best results.
- Comb the hair on both sides of the head downwards and flat.
- Take a generous amount of gel and warm it between your palms.
- Apply the gel to the center strip of hair, from the front hairline to the crown.
- Use your fingers to push and style the center strip upwards and towards the middle, creating the “hawk” shape.
- For extra hold, you can use a blow dryer on a low setting to set the gel.
Pro-Tip: Don’t be afraid to make it messy! The charm of a faux hawk is in its texture. Use your fingertips to pinch and define small sections for a more piecey, trendy look. This is a great way to manage a tapered cut as it grows out.

9. Define Protective Finger Coils

Pin this guide to healthy hair and learn how to do beautiful protective styles for short hair kids.
Products & Tools Used
- A rich, moisturizing curl cream or leave-in conditioner
- A spray bottle with water
- A detangling brush suitable for curly hair
Application/Styling Steps
- Start on clean, damp, and well-detangled hair. This style should be done on wash day.
- Work in very small sections, about half-inch squares.
- Apply a generous amount of curl cream to a single small section, ensuring it’s fully saturated from root to tip.
- Using your index finger, smoothly twist and coil the section of hair around your finger, starting from the root and twirling all the way to the end.
- Slide your finger out of the newly formed coil. It should spring back into a tight curl.
- Repeat this process over the entire head. Let air dry or sit under a hooded dryer.
Pro-Tip: The key to perfect finger coils is saturation. The hair must be wet enough to prevent frizz. If a section starts to dry, re-spray it with water before applying cream. This is a fundamental part of a proper wash-and-go prep for high porosity styling.

Key Takeaways: Your Quick Guide to Hairstyles for Short Hair Kids
- Accessories Are Key for Short Hair: For hairstyles for small hair kids, accessories like bows, clips, and colorful rubber bands aren’t just decorative; they are the primary tools for creating cute and functional styles.
- Prioritize Hair Health: Always use gentle methods. Detangle with moisturizer, use kid-safe products, and learn to remove elastics without causing breakage. A healthy scalp is the foundation for any style.
- Master a Few “Go-To” Styles: You don’t need to be a pro. Mastering 2-3 quick and easy hairstyles, like the Front Twist or Pigtail Twists, can save your busy mornings.
- Adapt Styles to Hair Type: A style that works on straight hair may need modification for short curly hair or short 4c hair. Use more moisture for curls and consider protective styles like Finger Coils for coily textures.
- “Protective” Doesn’t Have to Be Complicated: Simple styles like a half-up top knot or small twists reduce daily manipulation, which helps protect delicate hair from breakage and promotes follicle health.
People Also Ask About Hairstyles for Short Hair Kids
How do you make short hair look cute for kids?
The easiest way to make short hair look cute is by using fun accessories. A simple side part becomes instantly pretty with a sparkly barrette or a large bow. Even a basic pigtail is elevated with colorful elastics. The key is to add a point of visual interest that also serves a functional purpose of keeping hair out of the face.
What hairstyle for short hair girls is easiest?
The half-up top knot is arguably the easiest and quickest style for girls with short hair. It takes less than a minute, works on almost any hair type, and effectively keeps the front section of hair out of the eyes. It requires only one hair elastic and is very forgiving if it’s a little messy.
Can you braid very short hair?
Yes, you can absolutely braid very short hair by creating small “accent braids.” The trick is to work with small, slightly damp sections and use a bit of pomade for grip. You won’t be able to do a full French braid, but you can easily create tiny, three-strand braids near the face or along a part line for added texture.
How do you do a ponytail on short hair for kids?
For short hair, focus on half-ponytails or multiple small ponytails instead of one large one. Gather just the top section of hair into a “volcano” ponytail at the crown, or create a row of several mini ponytails. Using a bit of water to slick down flyaways helps create a neater look.
How do I manage my kid’s short curly hair?
The key to managing short curly hair is moisture and minimal dry brushing. Use a leave-in conditioner or curl cream on damp hair. Style using your fingers or a wide-tooth comb to avoid disrupting the curl pattern and causing frizz. Styles like the half-up top knot or pigtail twists are excellent for curly hair.
What are good protective styles for kids with short hair?
Excellent protective styles for short hair include finger coils, two-strand twists, and simple cornrows at the front. These styles reduce daily manipulation, help retain moisture, and protect the delicate ends of the hair. Even simple, low-tension rubber band styles can be protective when done and removed carefully.
How can I add volume to my kid’s short, thin hair?
To add volume, focus on styling techniques and product placement. A faux hawk style instantly creates height. When doing twists or braids, gently tug on the finished sections (“pancaking”) to make them appear fuller. Using a texturizing spray or mousse at the roots can also provide a temporary lift.
Is short hair easier for kids to manage?
Generally, yes, short hair is easier for both kids and parents to manage. It leads to fewer tangles, requires less drying time, and can be styled very quickly. This is especially helpful for active kids or those with sensory sensitivities who dislike lengthy grooming sessions.
How do you secure hairstyles for active kids so they last?
Use techniques that create multiple points of contact. Styles like the criss-cross rubber band design, multiple mini ponytails, or small, tight twists are far more durable than a single loose ponytail. A light mist of a flexible-hold, kid-safe hairspray can also provide extra staying power for school or sports.
What are cool hairstyles for short hair boys?
A faux hawk is a classic cool hairstyle for boys with short hair. You can also create a deep side part and use a bit of gel to slick it over for a more polished look. For textured hair, defining the natural curls or coils with a bit of cream is a stylish and healthy option that works well.
Final Thoughts on Styling Your Kid’s Short Hair
Styling your child’s short hair doesn’t have to be a source of morning stress. As we’ve explored, the secret lies not in complex techniques, but in embracing simple, quick, and fuss-free methods. By leveraging the power of fun accessories like clips and bows, and by mastering a few basic styles like the half-up knot or pigtail twists, you can conquer any busy morning with confidence. Remember that the goal is a happy child with a comfortable, neat hairstyle that’s ready for a day of learning and play.
The most important takeaway is to prioritize your child’s comfort and hair health above all else. Use gentle methods, choose kid-safe products, and adapt these ideas to fit your child’s unique hair type and personality. You now have 9 proven techniques in your arsenal, turning what was once a challenge into a fun, creative moment with your little one.
What’s your go-to hairstyle for your short-haired kid? Share your own tips in the comments below
Last update on 2026-03-13 / Affiliate links / Images from Amazon Product Advertising API


