Tired of the same old manicure and searching for a touch of romance or playful charm? You want beautiful heart nail designs that look stunning but feel achievable at home.
Heart nail designs are a versatile and romantic nail art trend that incorporates various heart shapes into manicures. They can range from subtle accents to bold statements, often utilizing techniques like hand-painting, stickers, or 3D embellishments to express love, cuteness, or elegance. This trend allows for endless creativity on your fingertips.
Drawing from proven methodologies and current data, this guide establishes a clear path to mastering this timeless look. You will discover 11 essential ideas, from beginner-friendly techniques to the latest trends for 2026. Get ready to transform your nails into a work of art.
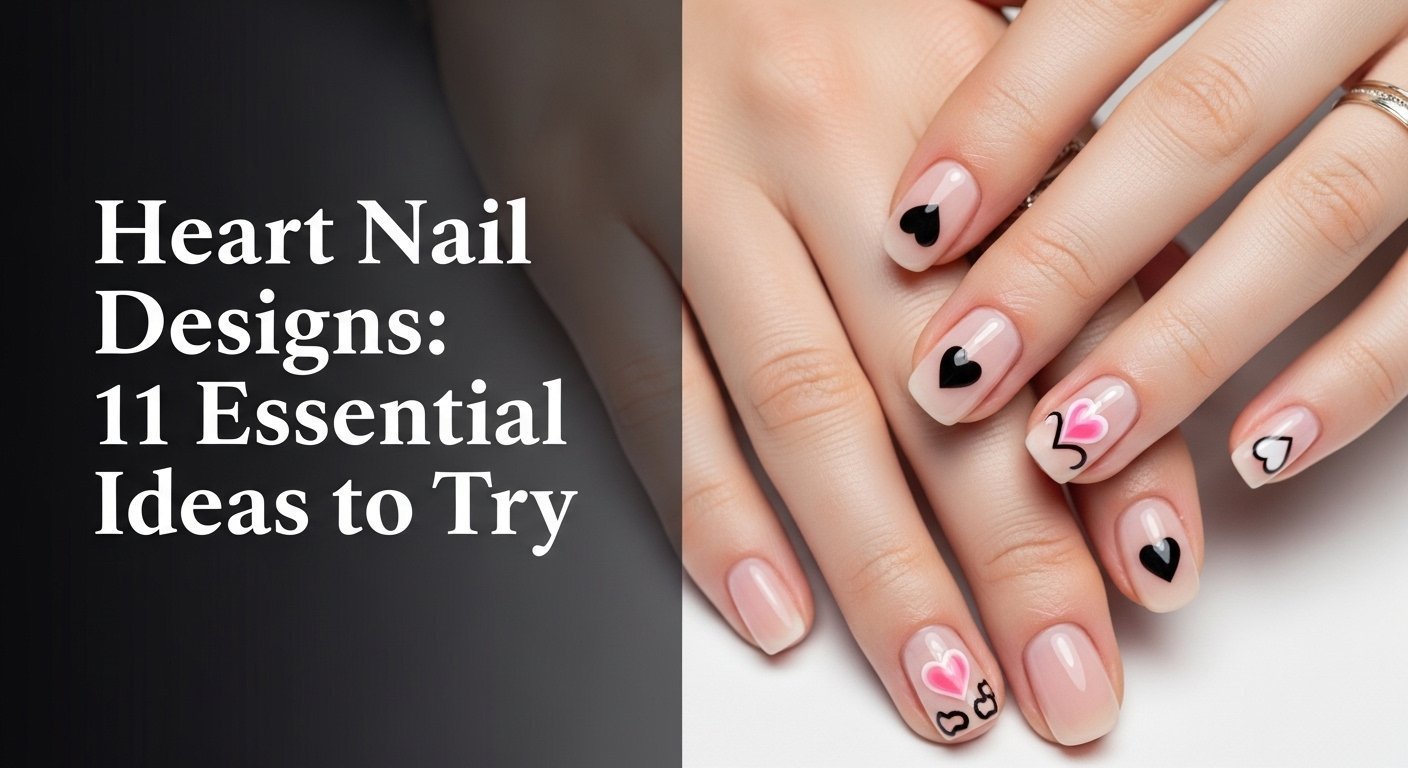
Master the Art of Heart Nail Designs: 11 Essential Ideas to Try in 2026
The world of heart nail designs is wonderfully diverse, offering a style for every mood, season, and skill level. It’s a creative field where the simple motif of a heart is transformed through various techniques, colors, and finishes. This guide explores the essential ideas that form the foundation of this popular nail art hearts trend. We’ll cover everything from easy heart nail designs perfect for a quick DIY session to more advanced, trendy heart nails that make a bold statement. By understanding how different entity attributes like color (classic red, modern black) and finish (glossy, matte) combine with tools like a nail dotting tool or techniques like ombre, you can unlock a new level of creativity. Each design serves as an expression of personal style, whether you’re aiming for a touch of elegance for a special occasion or a cute, playful look for everyday wear.
1. Create Simple Dotted Heart Nails for Beginners

Pin this easy heart nail design for your next DIY mani!
Supplies Needed
- Base coat (clear or nude milky pink nail polish)
- Red or pink nail polish (for hearts)
- Nail dotting tool (dual-ended for different sizes)
- Top coat (clear, quick-dry formula)
- Nail polish remover and cotton swabs (for cleanup)
Instructions
- Prepare nails by applying a base coat and two thin layers of your chosen nude or milky pink nail polish. Allow each coat to dry completely.
- Dip the larger end of the nail dotting tool into the red or pink polish, ensuring an even coating.
- Place two dots side-by-side at a slight angle on your nail, forming the top curves of the heart.
- Drag the dotting tool downwards from the center of the two dots, connecting them into a V-shape to form the bottom point of the heart.
- Repeat for desired number of hearts, ensuring polish is wet enough to connect dots smoothly.
- Clean up any mistakes immediately with a cotton swab dipped in nail polish remover.
- Apply a high-gloss top coat once the heart designs are completely dry to seal and protect your artwork.
Pro-Tip: For perfectly symmetrical hearts, ensure your dots are close enough before dragging. A slightly thicker polish works better for controlled dots. This method is a fantastic way to practice micro-painting nails without advanced brushes.

2. Design Elegant French Tip Heart Nail Designs

Save this timeless heart nail art idea for a chic look!
Supplies Needed
- Base coat
- Sheer nude or pink gel polish (for the base)
- White gel polish (for French tips)
- Small detail nail art brush or french tip nail guides
- Red or pink nail polish (for hearts)
- Nail dotting tool (or a toothpick)
- Top coat (no-wipe gel formula)
- UV/LED lamp (if using gel)
- Nail cleanser wipes
Instructions
- Prepare nails and apply a base coat. Cure under a UV/LED lamp according to product instructions.
- Apply two thin coats of your sheer nude or pink gel polish over the entire nail, curing each layer.
- Create the French tip: Use a detail brush or french tip nail guides to apply the white gel polish to the free edge of your nails. Aim for a clean, curved line. Cure under the lamp.
- Add the heart accent: Using a nail dotting tool or the fine detail brush, create a small red or pink heart. Place it either at the center of the white tip, slightly above the smile line, or near the cuticle.
- Cure the heart design under the UV/LED lamp.
- Seal with a no-wipe top coat and cure for the recommended time to achieve a glossy, long-lasting finish.
- Wipe nails with a nail cleanser wipe to remove any tacky layer.
Pro-Tip: For the perfect French tip smile line, use a thin brush to clean up the edge while the white polish is still wet. This technique works beautifully for almond heart nail designs and also for short square french tip with heart nail designs.

3. Achieve Chic Minimalist Outline Heart Nails

Pin this subtle heart nail art for effortless elegance!
Supplies Needed
- Base coat (clear or sheer nude)
- Black or white nail art liner gel (or regular polish with a fine brush)
- Ultra-fine detail nail art brush
- Top coat (glossy or matte finish)
- UV/LED lamp (if using gel)
- Acetone and clean-up brush (for mistakes)
Instructions
- Prep your nails and apply a base coat. Let it dry completely (or cure if using gel).
- Apply a sheer nude or clear polish as your base if desired, allowing it to dry/cure.
- Create the outline heart: Dip your ultra-fine detail brush into the black or white liner gel. Start by drawing two small, curved lines that meet at the top (the ‘v’ of the heart).
- Complete the heart: Bring the two curves down to meet at a single point at the bottom, forming the heart outline. Focus on making the lines as thin and clean as possible.
- Clean up any wobbles or excess polish immediately using a clean-up brush dipped in acetone.
- Cure the design under a UV/LED lamp (if using gel).
- Seal with a top coat of your choice (glossy for a classic look, or matte for an extra chic touch) and cure/dry.
Pro-Tip: Practice drawing the heart outline on a piece of paper first to get a feel for the brush and polish consistency. For crisp lines, apply minimal pressure. This design also makes fantastic minimalist black heart nail art ideas for a subtle edge.

4. Dazzling Glitter Accent Heart Nail Designs

Sparkle up your manicure! Pin this glitter heart nail design for a festive touch!
Supplies Needed
- Base coat
- Your chosen base color nail polish (e.g., deep red, black, or nude)
- Glitter polish (chunky or fine, desired color) OR loose nail art glitter
- Small detail nail art brush or nail dotting tool
- Top coat (extra thick for glitter, or gel top coat)
- UV/LED lamp (if using gel or gel top coat)
- Tweezers (if using individual glitter pieces)
Instructions
- Prepare your nails with a base coat and two coats of your chosen base color polish. Allow to dry completely (or cure if gel).
- For a polished glitter heart: Apply a layer of clear polish or a tacky base coat to the area where you want the heart on your accent nail. While wet, either paint a heart shape using glitter polish or carefully sprinkle/place loose nail art glitter using a detail brush or tweezers to form a heart shape.
- For loose glitter: Gently press the glitter into the wet polish to ensure it adheres. If using fine glitter, you can use a dry brush to dust off excess once dry.
- Seal the glitter: Once the heart is dry and secure, apply a generous layer of top coat. For chunky glitter, you may need 2-3 layers, allowing each to dry, to create a smooth finish. If using gel, cure each layer of top coat.
Pro-Tip: To prevent glitter from spreading, clean your brush meticulously between steps. If using loose glitter, apply it over a paper plate to catch excess for easy cleanup. An extra-thick gel top coat will ensure a smooth finish over chunky glitter and prevent it from catching on clothing, addressing the fading heart nail art and fragile heart designs concerns.

5. Trendy Chrome Heart Nail Designs at Home

Achieve salon-worthy shine! Pin these chrome heart nail designs now!
Supplies Needed
- Base coat (gel)
- Color gel polish (black, white, or clear are common bases for chrome)
- No-wipe gel top coat (essential for chrome powder application)
- Chrome nail powder (silver, iridescent, or color shift)
- Silicone tool or sponge applicator (for chrome powder)
- Small detail nail art brush
- UV/LED lamp
- Nail cleanser wipes
Instructions
- Prep nails with a base coat and cure. Apply two thin coats of your chosen color gel polish, curing each layer. (A black base gives a true silver chrome, white for a pearlescent, and clear allows the underlying color to shine through with an iridescent chrome).
- Apply a no-wipe gel top coat and cure for about 30-60 seconds (this is critical – it needs to be perfectly cured but still warm/tacky enough for the powder to adhere).
- Create the chrome heart: Using a small detail nail art brush, draw a heart shape with the no-wipe gel top coat. Cure this specific heart for a very short time (5-10 seconds) so it’s only slightly tacky.
- Apply chrome powder: Immediately rub the chrome powder onto the partially cured gel heart using a silicone tool or sponge applicator. Gently buff until it achieves a mirror-like finish.
- Dust off excess powder with a soft brush. Be careful not to touch the surrounding areas.
- Seal the design: Apply another layer of no-wipe gel top coat over the entire nail to protect the chrome and cure completely.
- Cleanse nails with a nail cleanser wipe if needed.
Pro-Tip: The key to perfect chrome hearts is the timing of the top coat cure before applying the powder. Experiment with cure times on a swatch stick. Also, ensure your no-wipe top coat is truly no-wipe for best results; otherwise, the chrome won’t adhere properly, which helps troubleshooting heart decals issues.

6. Bold 3D Pop-Out Heart Nail Designs

Make a statement with this eye-catching 3D heart nail art! Pin for advanced inspiration!
Supplies Needed
- Base coat (gel or regular, depending on base nail type)
- Color base nail polish (optional, for the nail underneath)
- 3D nail art gel or colored acrylic powder and monomer liquid
- Specialized 3D nail art brush (silicone or fine synthetic)
- Dapping dish (for monomer)
- UV/LED lamp (if using gel)
- Top coat (gel, non-yellowing)
- Nail wipes and cleanser
Instructions
- Prepare your nails and apply your base color if desired, curing/drying fully.
- For 3D Gel Hearts: Apply a non-wipe matte top coat and cure. Then, using your 3D gel, scoop a small bead and place it onto the nail. Using your silicone tool or brush, gently sculpt the gel into a heart shape. Start by creating two rounded humps for the top, then drag the gel downwards to form the point. Cure the sculpted heart under the UV/LED lamp.
- For Acrylic 3D Hearts: Dip your acrylic brush into monomer, then into the colored acrylic powder to create a bead. Place the bead onto the nail. Using the body of your brush (and very little pressure), gently pat and shape the bead into a heart. You can use the tip of the brush to refine edges and create definition. Allow to air dry.
- Repeat steps to build up dimension or add multiple hearts.
- Seal the entire nail (including the 3D heart) with a non-yellowing gel top coat and cure to add shine and protection.
Pro-Tip: Achieving a perfectly sculpted 3D heart takes practice. Control your bead size and work quickly before the product sets. For 3D nail art engineering, using a high-quality silicone tool offers more control than a brush for shaping gel hearts.

7. Modern Negative Space Heart Nails

Elevate your nail art with this chic negative space technique! Pin it now!
Supplies Needed
- Base coat (clear, for natural nail protection)
- Chosen color nail polish (e.g., red, black, white for the heart outline)
- Fine detail nail art brush or heart nail art stencils
- Liquid latex (optional, for clean lines)
- Top coat (glossy finish)
- Acetone and clean-up brush
Instructions
- Prep your nails and apply a clear base coat to protect the natural nail. Let it dry completely.
- For stencil application: Place a heart nail art stencil on your nail where you want the heart to appear. Ensure it’s firmly pressed down to prevent bleeding. (Alternatively, apply liquid latex around the area where you want the heart, leaving the heart shape clear).
- Paint around the stencil/latex: Apply your chosen color polish over the entire nail, including the stencil or painted latex area.
- Remove stencil/latex: While the polish is still wet, carefully peel off the stencil or liquid latex to reveal the negative space heart. If doing freehand, use a fine detail brush to carefully outline and fill in around the heart shape, leaving the center clear.
- Clean up any stray polish immediately with a clean-up brush and acetone.
- Apply a top coat once the polish is completely dry to seal the design and add shine.
Pro-Tip: Using liquid latex around the heart shape when painting freehand can significantly help in achieving clean lines and minimizing mess. This is a great way to create hollow heart designs with minimal effort.

8. Soft Ombre Blended Heart Nail Designs

Achieve a dreamy gradient! Pin this ombre heart nail design for unique nail art!
Supplies Needed
- Base coat
- Two or three complementary nail polish colors for the ombre (e.g., light pink, white)
- Small makeup sponge or nail art ombre sponge
- Liquid latex or petroleum jelly (for skin protection)
- Fine detail nail art brush (optional, for heart shape)
- Top coat (glossy)
- Nail polish remover and cotton swabs
Instructions
- Prep your nails and apply a base coat. Let dry.
- Create the ombre base: Apply liquid latex around your nails to protect your skin. Paint stripes of your chosen ombre colors onto a makeup sponge. Lightly dab the sponge onto your nail, moving it slightly up and down to blend the colors. Repeat for opacity, then remove the latex. Clean up any excess polish.
- Form the ombre heart: Once your base is completely dry, apply liquid latex around the area where you want your heart. Using a clean piece of sponge, paint a smaller stripe of your heart colors (e.g., a darker pink or red) and carefully dab it onto the heart-shaped area, blending the colors within that space.
- Alternatively, for a painted ombre heart: Create your ombre base. Once dry, use a fine detail brush to outline a heart with one of your ombre colors. Then, using a tiny piece of sponge, dab a second color into the center of the heart and blend outwards slightly to create a subtle gradient within the heart itself.
- Clean up any stray polish.
- Apply a glossy top coat once thoroughly dry to seal and smooth the ombre effect.
Pro-Tip: Applying several thin layers of polish with the sponge will give a smoother ombre effect than one thick layer. For a more defined ombre heart, use a heart nail art stencil when sponging the heart. This technique effectively addresses uneven heart edges and creates stunning pastel heart nail designs tutorial looks.

9. Playful Tiny Scattered Heart Nail Designs

Cute and whimsical! Pin these tiny heart nail designs for a joyful look!
Supplies Needed
- Base coat (clear or sheer nude)
- Two to three contrasting or complementary nail polish colors (e.g., red, pink, white)
- Smallest size nail dotting tool or a clean toothpick
- Top coat (glossy)
- Nail polish remover and small clean-up brush
Instructions
- Prep your nails and apply a base coat, followed by your chosen sheer nude or clear base polish. Allow to dry completely.
- Create the tiny hearts: Dip the smallest nail dotting tool (or the tip of a toothpick) into your first heart color. Place two tiny dots side-by-side. While wet, quickly drag the tool downwards from the center of the dots to create a small ‘V’ and form the heart shape.
- Scatter the hearts: Repeat this process, varying the colors and placement of the hearts across your nail for a playful, scattered effect. Don’t worry about perfect symmetry; the charm is in the irregularity.
- Repeat with different colors if desired, ensuring each heart is dry before adding another nearby to prevent smudging.
- Clean up any stray polish around the cuticles with a clean-up brush dipped in remover.
- Apply a glossy top coat once all hearts are thoroughly dry to seal the design and enhance shine.
Pro-Tip: Wipe your dotting tool after every 1-2 hearts to prevent polish buildup and ensure crisp shapes. This technique is fantastic for heart nail art for kids easy and provides a delightful way to explore sweetheart nails year-round.

10. Abstract Wavy Line Heart Accents

Unleash your inner artist! Pin these wavy line heart nail designs for a creative twist!
Supplies Needed
- Base coat
- Base color nail polish (e.g., creamy white, pastel blue)
- Contrasting color nail polish (e.g., red, black, deep blue)
- Fine detail nail art brush or striping tape
- Top coat (glossy)
- Nail polish remover and clean-up brush
Instructions
- Prep nails and apply a base coat, followed by two coats of your chosen base color polish. Allow to dry completely.
- Using a fine detail brush: Dip the brush into your contrasting polish. Start by drawing a wavy line from one side of the nail towards the center, then curve it upwards and around to suggest the top curve of a heart.
- Complete the heart shape: Draw a second wavy line, mirroring the first, to complete the other half of the heart’s upper curve and bring it down to a point. The key is to keep the lines fluid and slightly imperfect, creating an abstract interpretation of a heart.
- Alternatively, with striping tape: Apply striping tape in wavy patterns that mimic the curves of a heart. Paint over the tape with your contrasting color, then carefully peel off the tape while the polish is still wet to reveal the crisp wavy lines forming the heart.
- Clean up any stray polish immediately.
- Apply a glossy top coat once the lines are dry to seal the design and add shine.
Pro-Tip: For a more organic look, use slightly different widths for your wavy lines. This design is excellent for experimenting with color theory in nail art and creating a truly custom look. It’s a fantastic alternative to traditional hearts, making it an advanced way to do heart themed nails.

11. Sophisticated Matte Finish Hearts

Add a touch of luxury to your heart nails! Pin this chic matte design!
Supplies Needed
- Base coat
- Glossy base color nail polish (e.g., deep gray, burgundy, black)
- Color nail polish for the heart (e.g., red, black)
- Fine detail nail art brush or heart nail art stickers (pre-cut matte stickers work well too)
- Matte top coat (gel or regular, depending on base polish)
- Glossy top coat (if using regular polish)
- UV/LED lamp (if using gel)
Instructions
- Prep nails and apply a base coat. Apply two coats of your chosen glossy base color polish, allowing each to dry completely (or curing if gel).
- Apply a glossy top coat over your entire nail and let it dry/cure. This creates the contrasting glossy background.
- Create the matte heart:
- Option A (Matte Polish Heart): Using a fine detail brush, paint a heart shape onto your glossy base using a matte-finish polish. Let it dry completely.
- Option B (Matte Top Coat Heart): Paint a heart shape onto your glossy base using a regular glossy polish (e.g., red). Once dry, carefully paint only the inside of that heart with a matte top coat using a fine detail brush. Let it dry/cure.
- Option C (Matte Stickers): Apply a pre-cut matte heart nail art sticker onto your glossy base.
- Do NOT apply a final glossy top coat over the matte heart, as this will remove the matte effect. If you’ve used a matte top coat only on the heart, the rest of the nail will remain glossy.
Pro-Tip: For the cleanest lines when applying a matte top coat over a glossy color, use a very small, clean brush and minimal product. The contrast between glossy and matte creates an illusion of depth, making your heart nail designs truly unique and addressing the comparison of matte hearts vs glossy hearts.

Key Takeaways
- Versatile Design Spectrum: Heart nail designs offer a vast range of styles, from simple dotted heart nails perfect for beginners to intricate 3D pop-out hearts for advanced artists, ensuring an option for every skill level and aesthetic preference.
- Tools Make the Art Easy: Essential tools like a nail dotting tool and fine detail nail art brushes are key to achieving precise and clean heart nail art, greatly simplifying the process of creating heart nails at home.
- Trends & Timeless Elegance: While chrome heart nail designs and wavy line heart accents are trendy for 2026, classic looks like French tip heart nail designs and minimalist outline hearts offer timeless elegance suitable for any occasion.
- Mastering the Finish: Experimenting with finishes, such as the contrast of matte hearts on a glossy base or the dazzling effect of glitter accent hearts, dramatically enhances the visual appeal and sophistication of your manicure.
- Precision and Practice are Key: Achieving professional-looking heart nail designs relies on patience, attention to detail, and practicing techniques like steady brushwork and controlled polish application, leading to long-lasting heart nails and preventing common mistakes.
- Personalize Your Hearts: Don’t be afraid to customize your heart themed nails with different colors, sizes, and placements to reflect your unique style, whether it’s tiny scattered hearts or a bold single statement.
- Prep and Seal for Longevity: Proper nail prep for manicure and sealing your finished heart nail art with a quality top coat are crucial steps for ensuring durability and preventing chipping or smudging, vital for maintaining healthy nails with intricate designs.
People Also Ask About Heart Nail Designs
How can I make heart designs on nails if I’m a beginner?
You can easily create simple heart designs as a beginner using a nail dotting tool or even a toothpick. Start with a base coat and a dry base color. Dip the smallest end of your dotting tool into your heart polish, place two small dots side-by-side, then gently drag the tool downwards from their center to connect them into a ‘V’ shape, forming a heart. Practice on paper first to perfect your technique.
What tools do I need for heart nail art at home?
For basic heart nail art at home, you’ll need a good quality base coat and top coat, your preferred nail polish colors, and a nail dotting tool. A fine detail nail art brush can also be very useful for more intricate outlines or precise designs. Additionally, nail polish remover and cotton swabs are essential for quick clean-ups, ensuring your nail art hearts look professional.
Can I do heart nails at home without special equipment?
Yes, you can absolutely do heart nails at home with minimal or no special equipment. While dotting tools and fine brushes make it easier, you can improvise using a toothpick for small dots and a steady hand for simple hand-painted hearts. Nail art stickers and decals are also excellent beginner-friendly options that require no artistic skill, offering various heart nail designs.
What are popular heart nail designs for Valentine’s Day in 2026?
For Valentine’s Day in 2026, popular heart nail designs include classic red or pink dotted hearts, elegant French tip hearts, and trendy chrome heart accents. Many also opt for minimalist outline heart nails or playful tiny scattered hearts on a sheer base. 3D pop-out hearts are also gaining traction for a bold, celebratory look.
How do I do French tip heart nails cleanly?
To create clean French tip heart nails, begin with a perfectly applied French manicure as your base, ensuring crisp smile lines. Once completely dry, use a fine detail brush or a small nail dotting tool to carefully paint a small heart accent. Placement is key: either at the base of the white tip or along the cuticle. Finish with a high-quality top coat to seal the design without smudging.
How long do heart gel nails last compared to regular polish?
Heart gel nails typically last significantly longer than regular polish hearts, often maintaining their shine and integrity for 2-3 weeks. Gel polish is cured under a UV/LED lamp, which creates a more durable and chip-resistant finish. Regular polish, while easier to remove, usually lasts about 3-7 days before showing signs of wear or chipping.
How to make tiny heart nails look perfect?
To make tiny heart nails look perfect, use the smallest possible nail dotting tool or the tip of a clean toothpick for precision. Focus on creating two very small, close-set dots, then gently pull the product down from the center to form the point of the heart. Work with small amounts of polish to avoid flooding the nail, and clean up any mistakes quickly with an acetone-dipped clean-up brush for defined edges.
What polish colors are best for heart designs?
Classic polish colors best for heart designs include vibrant reds and soft pinks, which are traditionally associated with love and romance. However, modern trends also favor black and white for a chic, minimalist look, or iridescent and chrome polishes for a trendy, reflective finish. Nude and milky pink bases often complement these heart colors beautifully.
Are heart nail designs still popular or are they a passing trend?
Heart nail designs are an enduring classic that remain consistently popular, transcending fleeting trends. While specific styles like chrome heart nail designs or 3D hearts may trend in a given year, the fundamental motif of hearts on nails is a timeless symbol of love, cuteness, and romance, making them evergreen for any occasion, especially Valentine’s Day.
How can I prevent heart nail chipping or smudging?
To prevent heart nail chipping or smudging, ensure proper nail preparation including buffing and dehydrating the nail plate, and apply thin, even coats of polish, allowing each to dry fully. Always cap the free edge with each polish layer and, most importantly, seal your finished heart nail art with a durable, high-quality top coat. Applying a thin top coat every few days can also extend wear.
Final Thoughts on Heart Nail Designs
As we’ve explored the world of heart nail designs, it’s clear that this beloved motif offers an endless canvas for self-expression, ranging from the beautifully understated to the boldly artistic. Whether you’re a beginner eager to create simple dotted hearts or an experienced nail enthusiast tackling intricate 3D pop-out heart nail designs, the techniques and tools are readily available to help you achieve your desired look. The beauty lies in the versatility – a simple red heart nail design can be a subtle nod to romance, while chrome heart nails can make a modern, trendy statement that perfectly captures the spirit of nail trends in 2026.
Remember, the journey to mastering heart nail art is as rewarding as the destination. With the right nail art tools, a bit of patience, and the proven heart nail techniques shared here, you have everything you need to transform your manicure and express your unique style. Don’t be afraid to experiment with different colors, textures, and placements to truly personalize your heart themed nails. The joy of DIY heart nail art is in the creation itself.
Which of these 11 essential heart nail designs are you most excited to try first for your next manicure? Share your favorites in the comments below
Last update on 2026-02-19 / Affiliate links / Images from Amazon Product Advertising API


