Are you tired of giving the same generic gifts every Christmas? It can be a real challenge to find presents that feel both personal and exciting, moving beyond the usual gift cards and mass-produced items that lack a personal touch. You want your gifts to show how much you care, to be memorable, and to bring a genuine smile to the faces of your loved ones.
The endless search for the perfect present often leads to stress and settling for something that just doesn’t feel special enough. This cycle can take the joy out of the season of giving, leaving you feeling uninspired. You’re looking for heartfelt DIY Christmas inspiration, a way to create presents that are not only beautiful but are also infused with thought, effort, and a piece of your own creativity.
This year, you can make your Christmas gifts unforgettable with a personal touch by using a Cricut machine. With this incredible tool, you can create everything from custom monogrammed mugs and heartfelt recipe cutting boards to stylish handmade jewelry, ensuring a unique and thoughtful present for every loved one on your list. These homemade Cricut gift ideas are the perfect solution to crafting presents that are truly from the heart.
Struggling to Find Unique Christmas Gifts That Truly Feel Special?
The search for unique gifts stems from a desire to give something meaningful and handcrafted during the holidays. A Cricut machine, whether it’s a Maker, Explore, or Joy model, is the perfect tool to unlock your creativity and produce stunning, personalized presents for everyone on your list. As a crafter who has spent countless hours creating presents, I’ve found that nothing compares to the joy of giving something I’ve personally made. This curated list of 9 beautiful ideas comes from my own experience, featuring personally tested and favorite gift concepts that are sure to inspire your holiday crafting.
Why Handmade Cricut Gifts Are More Meaningful
Handmade Cricut gifts are more meaningful because they are infused with personal effort, love, and thoughtfulness. A gift you craft yourself, using the precision of a Cricut for personalization, becomes a unique and lasting keepsake that store-bought items simply cannot replicate. I still remember receiving a hand-painted ornament years ago; it wasn’t perfect, but the love that went into it made it my most treasured holiday decoration. That’s the feeling you give with a handmade present.
- Shows Extra Effort: Taking the time to design, cut, and assemble a gift shows the recipient they are worth your time and creative energy.
- Creates a Lasting Memory: A personalized item, like a mug with an inside joke or a blanket with a baby’s birthdate, becomes a cherished memento.
- Allows Complete Customization: You can tailor the gift perfectly to the recipient’s style, favorite colors, and interests, something impossible with off-the-shelf products.
- Can Be Budget-Friendly: Crafting gifts can often be more economical, allowing you to give high-quality, thoughtful presents without breaking the bank.
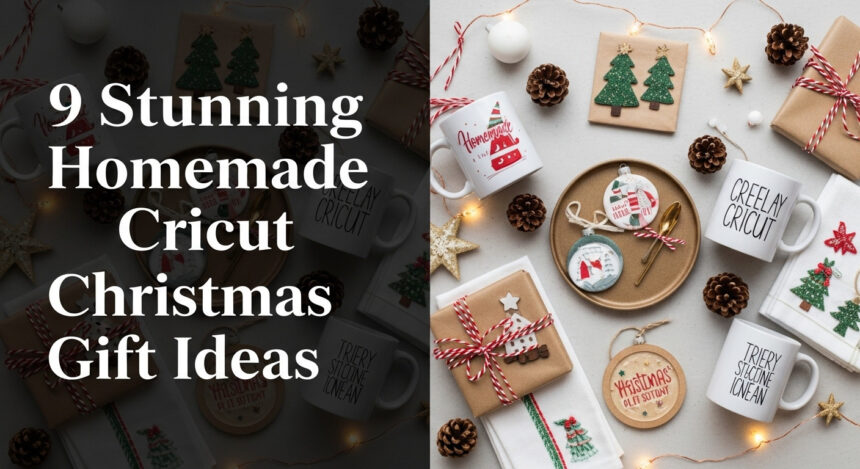
9 Stunning Homemade Cricut Christmas Gift Ideas for 2026
Finding the right project can be overwhelming, which is why I’ve curated this list of 9 beautiful and heartfelt DIY Christmas gift ideas suitable for various skill levels. These Cricut Christmas ideas have been chosen for their popularity, visual appeal, and high “gift-ability” factor based on years of my own holiday crafting experience. Each idea includes a detailed supply list and easy-to-follow step-by-step instructions to ensure your crafting is a joyful success from start to finish.
1. Personalized Mugs for Coffee & Cocoa Lovers

Save this cozy mug idea to your “DIY Christmas Gifts” board!
Creating professional-looking, dishwasher-safe custom mugs is incredibly easy with Cricut Infusible Ink. This method permanently infuses the ink into the mug’s surface, meaning the design will never peel, crack, or fade. It’s the perfect gift for coffee lovers, officemates, or anyone who enjoys a warm beverage.
- Materials Needed:
- Cricut Machine
- Cricut Infusible Ink Pens or Sheets
- Laser Copy Paper
- Lint Roller
- Heat Resistant Tape
- Cricut Mug Blank
- Cricut Mug Press or convection oven with mug wrap
- Step-by-Step Directions:
- Create your design, like a festive sweater pattern or a monogram, in Cricut Design Space. Crucially, remember to mirror your design before cutting!
- Use your Cricut machine to draw your mirrored design onto laser copy paper with Infusible Ink Pens or cut it from an Infusible Ink sheet.
- Clean the entire surface of your Cricut Mug Blank with a lint roller. Even tiny specks of dust can interfere with the ink transfer.
- Wrap the design tightly around the mug with the ink-side facing the ceramic. Secure it firmly with heat-resistant tape so it doesn’t shift. For a professional, edge-to-edge finish, a Cricut Mug Press provides the most consistent heat and pressure.
- Place the prepared mug into your preheated Cricut Mug Press and press the lever. The machine will automatically handle the precise timing and temperature for a perfect transfer.
- Once the press is finished, the mug will be extremely hot. Carefully remove it and place it on a heat-resistant surface to cool completely before you handle it and peel away the paper to reveal your stunning design.
Pro-Tip: For the most vibrant and permanent results, always use compatible sublimation mug blanks. I learned the hard way that standard ceramic mugs from a dollar store won’t work with Infusible Ink because they lack the necessary polymer coating for the ink to bond with.

2. Custom Recipe Cutting Boards

Pin this heartwarming gift idea for later!
You can preserve a cherished family recipe by transferring it onto a cutting board, creating one of the most decorative and sentimental Christmas gifts imaginable. This project transforms a simple kitchen item into a treasured family heirloom, keeping a loved one’s handwriting alive for generations.
- Materials Needed:
- High-quality photo of a handwritten recipe
- Cricut Machine
- Black Permanent or Iron-On Vinyl
- Transfer Tape (for permanent vinyl)
- Weeding Tool
- Scraper
- Cricut EasyPress or household iron (for iron-on)
- Wooden or Bamboo Cutting Board
- Step-by-Step Directions:
- Start by taking a clear, well-lit photo of the handwritten recipe card. Try to avoid shadows.
- Upload this image into Cricut Design Space. Use the “Remove Background” tool to meticulously clean up the image, leaving only the handwriting. Save it as a Cut image.
- Measure your cutting board and size the recipe design to fit perfectly. Send it to your Cricut machine to cut. If you’re using iron-on vinyl, don’t forget to mirror the design first.
- Carefully weed the excess vinyl from around the letters. This step requires patience, especially with cursive handwriting, but the result is worth it.
- For permanent vinyl, apply transfer tape over your weeded design, burnish it well with a scraper, and then carefully transfer the recipe to the cutting board. For a purely decorative item, high-quality permanent vinyl is a fantastic choice.
- For iron-on vinyl, preheat your Cricut EasyPress to the recommended temperature for wood. Position the design on the board and press firmly for the specified duration. Let it cool completely before you peel away the carrier sheet.
Pro-Tip: If the gift is intended for decorative purposes only, I recommend applying a thin coat of a food-safe sealant to protect the vinyl from dust and moisture. If the recipient might actually use it for chopping, be sure to place the design on the back or the handle area to avoid direct contact with knives.

3. Personalized Snowflake Pillows

Add this stylish home decor gift to your “Cricut Christmas” board!
You can easily create a custom, stylish piece of home decor that also serves as a comfortable and personal Christmas gift. A personalized pillow with a festive snowflake design and a name is a wonderful way to add a touch of winter magic to someone’s home.
- Materials Needed:
- Cricut Machine
- Iron-On Vinyl (glitter, foil, or flocked finishes look amazing for this)
- Weeding Tool
- Blank Pillow Cover (canvas, linen, or cotton work well)
- Pillow Insert
- Cricut EasyPress or household iron
- EasyPress Mat or a thick towel
- Step-by-Step Directions:
- Choose an intricate snowflake design from the Cricut Design Space library or upload one you love. Add a name or an initial in a complementary font to make it truly personal.
- Measure the front of your blank pillow cover and size your complete design accordingly in Design Space.
- This step is crucial: mirror your design in the software before you send it to be cut. Place the iron-on vinyl onto your cutting mat with the shiny carrier sheet facing down.
- Once the cut is complete, carefully weed away all the negative space from your snowflake and name design.
- Preheat your EasyPress to the correct temperature for your specific fabric type. Briefly press the pillow cover for about 5 seconds to remove any wrinkles and moisture.
- Position your weeded design onto the pillow cover. Press firmly with the EasyPress for the recommended time.
- Check the instructions for your specific vinyl to see if it requires a warm or cool peel. Once it reaches the right temperature, carefully peel off the plastic carrier sheet. Insert the pillow form, give it a good fluff, and your beautiful gift is ready!
Pro-Tip: From my experience with multi-layered designs, it’s best to press each layer for only a few seconds—just long enough for it to adhere. Save the full-duration press for the very final layer. This prevents you from overcooking and potentially shrinking the vinyl layers underneath.

4. Unique Handmade Jewelry

Save this stylish DIY jewelry idea for the fashionista in your life!
For the fashion-forward person on your list, you can create high-quality, unique jewelry pieces like earrings or necklaces. Using a Cricut Maker to cut materials like genuine leather, faux leather, or even thin basswood opens up a world of possibilities for creating one-of-a-kind accessories.
- Materials Needed:
- Cricut Maker or Explore
- Deep-Point Blade (for leather) or Knife Blade (for wood – Maker only)
- Cricut Genuine Leather or a thin Basswood Sheet
- StrongGrip Mat
- Masking Tape
- Jewelry Pliers
- Earring Hooks and Jump Rings
- Step-by-Step Directions:
- Select an earring or pendant shape in Cricut Design Space. Teardrops, leaves, and geometric shapes are all very popular and easy to start with.
- Size your shapes appropriately. I always cut a test version out of paper first to check the size, as they often look much larger on the screen.
- Select the correct material setting in the software (e.g., “Genuine Leather” or “Basswood”). Design Space will then tell you exactly which blade to install in your machine.
- Place your material onto a StrongGrip mat. For cutting wood, it is absolutely essential to tape down all four edges securely with masking tape to prevent any shifting during the cut.
- Let the Cricut work its magic. Be patient, as the knife blade for wood may take multiple passes to cut all the way through.
- Once the cut is finished, carefully remove the shapes from the mat. Use your jewelry pliers to gently open a jump ring, thread it through the small hole at the top of the earring, add the earring hook, and then close the jump ring securely.
Pro-Tip: When I’m cutting leather or faux leather, I always make sure the pretty, smooth side is facing down on the mat. I also move the white star wheels on my Cricut’s roller bar all the way to the right to prevent them from leaving any track marks on my material.

5. Monogrammed Cosmetics Bags

A perfect personalized gift! Save this to your “Cricut Ideas” board.
This project is a quick, easy, and practical gift idea that can be beautifully personalized with a monogram or name. A custom cosmetics bag is a thoughtful present for friends, family, teachers, or coworkers, and it’s a fantastic project for using up smaller scraps of iron-on vinyl.
- Materials Needed:
- Cricut Machine
- Iron-On Vinyl (HTV)
- Weeding Tool
- Blank Canvas or Cotton Cosmetics Bag
- Cricut EasyPress or EasyPress Mini
- Pressing Mat or a folded towel
- Step-by-Step Directions:
- Type out the initials or name you want to apply in Cricut Design Space and choose a font that matches the recipient’s style.
- Measure the available flat space on the front of the bag and size your monogram in the software to fit perfectly.
- Remember to mirror the design before you click “Make It.” Place your iron-on vinyl onto the mat with the shiny side facing down.
- Cut the design and then weed away the excess vinyl.
- Preheat your EasyPress. A Cricut EasyPress Mini is absolutely perfect for this job, as its small tip allows you to easily navigate the small surface and get close to the zipper.
- Press the bag for a few seconds to iron out any wrinkles. Position your design and press with firm pressure for the time recommended by the Cricut Heat Guide.
- Check if your vinyl requires a warm or cool peel, and carefully remove the plastic carrier sheet once it has reached the correct temperature.
Pro-Tip: I always place a folded EasyPress Mat or a thick towel inside the cosmetic bag before pressing. This creates a firm, flat surface to press on and protects the other side of the bag from the heat.

6. Custom Baby’s First Christmas Blanket

The sweetest keepsake! Pin this for a special new arrival.
You can create a memorable and sentimental keepsake gift to celebrate a baby’s very first Christmas holiday. A soft blanket personalized with their name and the year is a heartwarming present that new parents will treasure for years to come.
- Materials Needed:
- Cricut Machine
- Cricut Smart Iron-On or Everyday Iron-On
- Weeding Tool
- Blank Baby Blanket (fleece or soft cotton)
- Cricut EasyPress (a larger model is helpful for this)
- EasyPress Mat
- Step-by-Step Directions:
- In Design Space, create a special design that includes the baby’s name, the text “First Christmas 2026,” and a cute festive graphic like a reindeer, snowman, or gentle snowflake.
- Lay the blanket flat, measure the area where you want the design to go, and size your creation in the software.
- Don’t forget the most important iron-on rule: mirror your image before cutting! Place the iron-on vinyl on your mat with the shiny carrier sheet facing down.
- Weed the excess vinyl from your cut design.
- Consult the Cricut Heat Guide online for the correct temperature and time settings for your specific blanket material. Preheat the blanket for 5-10 seconds to remove any moisture.
- Carefully position your design on the warm blanket. Use your EasyPress to apply it, working in sections if the design is large and ensuring your presses slightly overlap for even adhesion.
- Allow the design to cool according to the vinyl’s instructions (check for warm peel vs. cool peel) before slowly removing the clear carrier sheet.
Pro-Tip: Whenever I give handmade clothing or blankets, especially for babies, I always include a small tag with care instructions. Letting the new parents know the blanket is machine washable (turn inside out, wash on a cold, gentle cycle, and tumble dry low) means they can use and love your beautiful gift without any worries.

7. Festive Decorative Jar Candles

Perfect hostess gift idea! Pin this for your next holiday party.
This is a simple, elegant, and quick DIY gift idea that is perfect for hostesses, neighbors, teachers, or coworkers. By adding a delicate vinyl design to a simple glass jar candle, you can transform it into a piece of beautiful festive decor.
- Materials Needed:
- Cricut Machine
- Permanent or Removable Adhesive Vinyl
- Weeding Tool
- Transfer Tape
- Scraper tool
- Glass Jar Candle
- Step-by-Step Directions:
- Measure the height and circumference of your candle jar to determine the maximum size for your design.
- Find a design you like in Cricut Design Space. Winter scenes, intricate snowflakes, or festive words like “Joy” or “Peace” work beautifully. Size the design to fit your candle.
- Cut the design from your chosen color of adhesive vinyl. You do not need to mirror the design for this project.
- Carefully weed away the excess vinyl from around your design.
- Apply transfer tape over the top of your weeded design and burnish it well with the scraper tool to ensure the vinyl sticks.
- Gently peel the paper backing off the vinyl. The design should now be stuck to the clear transfer tape.
- Clean the surface of the glass jar with rubbing alcohol to remove any fingerprints or oils, which helps the vinyl adhere better.
- Carefully position the design on the curved surface. I find it easiest to start from the center and smooth outwards to prevent bubbles. Burnish the design onto the glass before slowly peeling away the transfer tape at a 45-degree angle.
Pro-Tip: If you get a stubborn air bubble under your vinyl decal, don’t panic! Just take the sharp tip of your weeding tool or a small pin and poke a tiny, invisible hole in the center of the bubble. You can then easily press the trapped air out with your finger.

8. Magical Personalized Santa Sacks

Make Christmas morning extra special! Pin this magical idea.
You can create a reusable, personalized Santa sack to add a truly magical touch to your family’s Christmas morning traditions. Imagine your child’s delight when they see a special sack from the North Pole with their own name on it! This is a gift that becomes part of the holiday magic year after year.
- Materials Needed:
- Cricut Machine
- Large Blank Santa Sack or canvas laundry bag
- Iron-On Vinyl (HTV)
- Weeding Tool
- Cricut EasyPress (the 12×10 size is ideal for this)
- EasyPress Mat
- Step-by-Step Directions:
- Measure the area on the sack where you’ll be placing the name and any other designs.
- In Design Space, type the child’s name and choose a festive, bold font. You can also add other fun elements like “Special Delivery from the North Pole” or “Do Not Open Until Dec 25th.” Size the entire design to fit the space.
- If your design is larger than your cutting mat, you can use the “Slice” tool in Design Space to cut it in manageable sections.
- Mirror the design! This is a big project, so double-check that mirroring is turned on before you cut your iron-on vinyl (shiny side down).
- Weed the design carefully.
- Using the largest EasyPress you have will give you the best results on a big surface like a Santa sack. Preheat the bag to remove wrinkles, then press your design. If you’re working in sections, make sure to slightly overlap your presses for seamless coverage.
- Check for a warm or cool peel and slowly remove the carrier sheet to reveal the magical result.
Pro-Tip: For oversized projects like this, planning my EasyPress placement is key. I always start in one corner and work my way across the design systematically. I try not to let the hot edge of the heat plate rest on already-pressed vinyl for too long, as it can sometimes leave a faint impression line.

9. Elevated Custom Gift Tags & Packaging

The perfect finishing touch! Pin this for your gift-wrapping inspiration.
While not a gift itself, you can use your Cricut to create custom, high-end looking gift tags and packaging that will elevate any present. The presentation is part of the gift, and a beautiful, personalized tag shows an extra layer of thought and care that makes the whole experience more special.
- Materials Needed:
- Cricut Machine
- Various colors of Cardstock
- Cricut Pens
- LightGrip Mat
- Scoring Stylus or Scoring Wheel (for making gift boxes)
- Twine or Ribbon
- Step-by-Step Directions:
- In Cricut Design Space, simply search for “Gift Tags” or “Christmas Tags” to find hundreds of fantastic pre-made projects ready to go.
- Select a design you like and click “Customize.” Here, you can change the Operation type for any text layers from “Basic Cut” to “Pen” to have the Cricut write the names for you in beautiful fonts.
- Follow the on-screen prompts during the making process. The software will tell you exactly when to load the Cricut Pen into the clamp and when to swap it for the Fine-Point Blade.
- To create elegant, layered tags, cut the main base shape from one color of cardstock and smaller accent pieces from a contrasting or glittery color.
- Once all your pieces are cut and written on, use a craft glue stick or a fine-tip liquid glue to assemble the layers.
- Thread a piece of festive ribbon or twine through the hole, and your custom tag is ready to be attached to your gift.
Pro-Tip: My favorite trick for perfect tags is using the “Attach” tool in the bottom right corner of Design Space. This tool locks your writing layer and your cutting layer together, ensuring the machine writes the name in the exact position on the tag before it cuts the shape out.

Key Takeaways: Your Quick Guide to home made christmas gift ideas cricut
To ensure your Cricut Christmas crafting is a success, keep these key points in mind. This quick summary will help you remember the most important tips and tricks from this guide.
- Personalization is Key: The biggest advantage of a Cricut is its incredible ability to add names, important dates, and custom designs, making any gift feel truly special and unique.
- Choose the Right Material: Always match your vinyl to your project’s surface. Use Cricut Infusible Ink for vibrant, permanent, peel-proof designs on compatible mugs and coasters. Use Iron-On (HTV) for fabrics like pillows, shirts, and blankets. Use Adhesive Vinyl for hard surfaces like glass candles, ornaments, and signs.
- Don’t Forget to Mirror: This is the golden rule of heat-transfer projects. When working with any product that you will apply with heat (like Iron-On or Infusible Ink), you must mirror your design in Design Space before cutting.
- Elevate with Packaging: A beautiful, handmade gift deserves equally beautiful packaging. Use your Cricut machine and some quality cardstock to create custom gift tags and boxes for a complete, professional-looking presentation.
People Also Ask About home made christmas gift ideas cricut
When starting with Cricut crafting for the holidays, a few questions often come up. Here are direct answers to some of the most common queries to help you get started with confidence.
What are the best Cricut Christmas ideas to sell?
The best Cricut Christmas items to sell are those that can be easily personalized and produced in batches. Personalized ornaments with family names and the year, custom mugs with festive sayings, monogrammed Santa sacks, and sets of unique faux leather earrings are all highly popular and profitable. To succeed, focus on taking high-quality, well-lit photos of your products and be sure to offer personalization options like names or dates to attract more buyers.
Can a beginner really make these Cricut Christmas gifts?
Absolutely! Many of these gift ideas are very beginner-friendly. Projects like applying adhesive vinyl to candles, making simple iron-on cosmetic bags, and cutting layered cardstock gift tags are perfect starting points for a novice. Cricut Design Space offers countless pre-made templates and projects, and by following step-by-step instructions, even a first-time crafter can create stunning, professional-looking gifts.
What supplies do I need to start making Cricut Christmas gifts?
To start making gifts, you’ll need a Cricut machine (like the Joy, Explore, or Maker), cutting mats, and the Basic Tool Set, which includes essential tools like a weeder and a scraper. For the projects on this list, the most versatile materials to have on hand are black and white Iron-On Vinyl, a variety pack of Adhesive Vinyl, and some quality cardstock. A Cricut EasyPress is also highly recommended to get the best, most durable results for your iron-on projects.
Final Thoughts
This holiday season, I encourage you to step away from the crowded stores and into the creative joy of your craft room. With your Cricut machine and a little bit of inspiration, you have the power to create truly memorable gifts that are filled with love and personal meaning. There is simply no substitute for the joy on someone’s face when they unwrap a gift that was made just for them.
What amazing Cricut Christmas gift are you planning to make first? Share your ideas and projects in the comments below
Last update on 2026-03-05 / Affiliate links / Images from Amazon Product Advertising API


