Are you staring down the holiday season, wondering how to create a homemade Christmas gift that your teen will genuinely love and not just stash in their closet? It’s a classic holiday dilemma: you want to give something thoughtful and personal, a gift made with love, but you’re also acutely aware that the line between ‘cool’ and ‘cringe’ is razor-thin in the teenage world. The fear of their polite but unenthusiastic ‘thanks’ is real, leaving you searching for DIY Christmas gift ideas on a budget that don’t scream “my mom made this.”
You’re not alone in this search for the perfect, meaningful present. The challenge lies in finding a project that feels both modern and authentic, something that reflects their unique personality while still being practical enough for them to use. Forget the generic crafts of the past; today’s teens appreciate gifts that are stylish, useful, and look like they could have come from a cool Etsy shop. The good news is, you don’t need to be a master crafter to make something they’ll be excited about.
The secret to a successful gift lies in finding items that are both practical and highly personalizable. This guide is packed with trendy, easy, and affordable DIY gift ideas that teens will actually be excited to receive, from custom tech accessories and stylish room decor to amazing self-care kits. We’ve curated projects that are fun to make and even more fun to give, ensuring your handmade present is the highlight of their Christmas morning.
Struggling to Find a “Cool” Homemade Christmas Gift for Your Teen?
The best homemade Christmas gifts for teens are items that are both practical and highly personalizable. The difficulty isn’t in making something by hand; it’s in making something that resonates with their discerning, trend-aware tastes. You want to give a gift that feels special and thoughtful, but the fear of creating something they find embarrassing or useless is a significant hurdle for many parents and friends. It’s a delicate balance between a heartfelt, unique DIY project and a gift they’ll actually use and show off.
This is where the magic of personalization comes in. A generic craft might fall flat, but a craft that’s tailored specifically to their interests, style, or inside jokes becomes a cherished possession. Whether it’s a pouch for their art supplies, a cozy heat pack for post-game recovery, or a stylish accessory they can wear daily, the key is to tap into what makes them unique.
As a parent who has navigated the tricky teen years, I’ve spent countless hours figuring out which homemade gifts get a genuine smile versus a polite ‘thanks.’ This list is the result of that trial-and-error, updated for 2026. It moves beyond basic crafts to offer ideas that are genuinely cool, budget-friendly, and simple enough for any skill level.
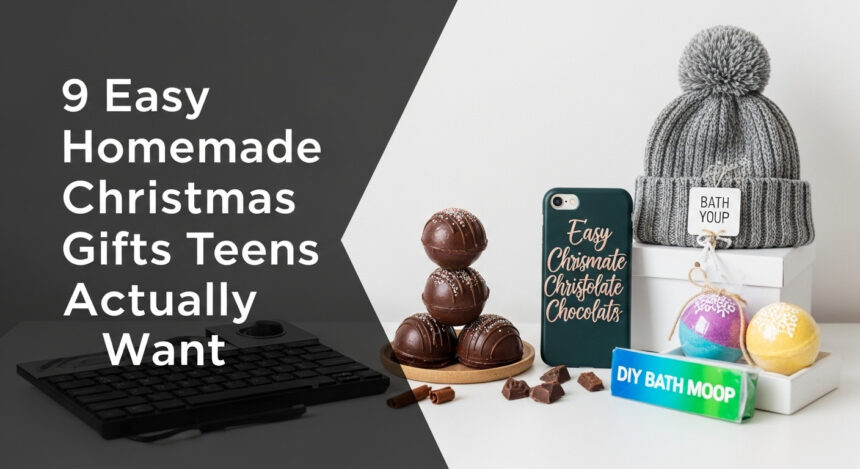
9 Easy Homemade Christmas Gifts Teens Actually Want
To find the best DIY gift ideas for teens, we’ve curated a list of projects that are chosen for their “cool factor,” ease of creation, and potential for deep personalization. These aren’t just crafts; they are blueprints for creating thoughtful, stylish, and incredibly useful gifts that resonate with current teen aesthetics and interests. Whether you’re looking for a homemade gift for a teen girl who loves self-care or a practical gift for a teen boy who’s always on the go, you’ll find an inspiring project here.
Each of these 9 ideas has been selected based on current teen trends on platforms like Pinterest and TikTok, ensuring your handmade gift feels fresh and modern, not dated. We’ll provide clear, step-by-step instructions for each idea, making the creative process enjoyable and stress-free. Get ready to make something they’ll be genuinely thrilled to unwrap this Christmas.
- Personalized Zippered Pouches
- DIY Bath Bombs or Sugar Scrubs
- Customized Phone Accessories
- Cozy “Hot Hands” Pouches
- Custom DIY Notebooks or Journals
- Personalized Room Decor
- DIY Lip Balm or Beard Balm
- Creative Wearable Accessories
- Stylish Zippered Tote Bags
1. Personalized Zippered Pouches

Save this idea to your ‘DIY Christmas Gifts’ board!
A personalized pouch is an incredibly versatile and practical gift that any teen can use. It’s perfect for organizing everything from makeup and pens to charging cables and snacks, making it a go-to item for their backpack or bedroom. The beauty of this gift is how easily it can be customized to match their unique style.
Materials Needed:
- Blank cotton canvas zipper pouches
- Fabric markers, puffy paint, or a high-quality fabric paint set
- Iron-on vinyl letters or pre-cut designs
- Embroidery starter kit (optional, for a more sophisticated, textured look)
- Household iron
Step-by-Step Directions:
- Prep Your Pouch: Always start with a clean, pre-washed pouch. This removes any sizing from the manufacturing process and ensures your design will adhere properly and last longer.
- Plan Your Design: Lightly sketch your design onto the canvas with a pencil. Consider their initials in a modern font, a favorite quote, a simple trendy symbol like a lightning bolt or smiley face, or an inside joke between the two of you.
- Apply Color: Use high-quality fabric markers or paint to bring your design to life. For a fun, retro 3D effect, puffy paint is a fantastic choice.
- Use Iron-On Vinyl: For crisp, clean lettering, cut out designs or letters from iron-on vinyl. Place them carefully on the pouch and press firmly with a hot iron, following the instructions on the vinyl package for the best results.
- Add an Embroidered Touch: For a truly handmade, boutique feel, use an embroidery hoop to secure a section of the fabric. A few simple stitches can outline a shape or create a small, detailed design that adds a beautiful, tactile element.
- Let It Cure: Allow the pouch to dry completely for at least 24 hours to ensure the paint or adhesive is fully set before you wrap it up.
Pro-Tip: If you’re new to sewing or short on time, buying pre-made blank canvas pouches is a huge time-saver and guarantees a professional-looking result. This allows you to focus all your creative energy on the personalization, which is what makes this gift truly special!

2. DIY Bath Bombs or Sugar Scrubs

Save this amazing self-care gift idea to your Pinterest!
Teens often appreciate self-care items that offer a relaxing, spa-like experience at home. Homemade bath bombs or sugar scrubs are fantastic because they are made with simple, natural ingredients and can be customized with their favorite scents and colors. Packaged in a cute mason jar, this gift feels both luxurious and personal.
Materials Needed:
- For Bath Bombs: 1 cup baking soda, 1/2 cup citric acid, 1/2 cup Epsom salt, 1/2 cup cornstarch, their favorite essential oils (like soothing lavender or uplifting eucalyptus), 2 tbsp coconut oil, a few drops of skin-safe food coloring, and bath bomb molds.
- For Sugar Scrubs: 1 cup granulated sugar, 1/2 cup coconut oil (melted), essential oils, and attractive glass jars with airtight lids.
- A complete DIY bath bomb making kit can simplify the process significantly by providing all the pre-measured dry ingredients and molds.
Step-by-Step Directions:
- For Bath Bombs: In a large bowl, whisk together all the dry ingredients: baking soda, citric acid, Epsom salt, and cornstarch. Breaking up any clumps is key to a smooth final product.
- In a separate small bowl, mix your wet ingredients: the essential oil, melted coconut oil, and a few drops of food coloring.
- Very slowly drizzle the liquid mixture into the dry ingredients, whisking constantly as you go. You want the mixture to feel like damp sand. If you add the liquid too quickly, it will start fizzing prematurely.
- Firmly pack the mixture into your bath bomb molds, slightly overfilling each half before pressing them together. Let them dry and harden for at least 24 hours before carefully removing them.
- For Sugar Scrubs: This is even easier! In a mixing bowl, combine the granulated sugar and melted coconut oil. Add a few drops of their favorite essential oil and stir until everything is well combined.
- Spoon the finished scrub into a clean, airtight glass jar. To create a beautiful layered look, you can divide the mixture into two bowls, add different food coloring to each, and then layer them in the jar.
Pro-Tip: When making bath bombs, a common challenge is getting them to hold their shape. A great trick is to keep a spray bottle of witch hazel nearby. If your mixture feels too dry, a light spritz can help it clump together perfectly without setting off the fizzing reaction.

3. Customized Phone Accessories

Pin this genius tech gift idea for later!
In a world where teens are rarely without their smartphones, a personalized tech accessory is a guaranteed hit. While a phone case decorating kit is a fun idea, a DIY taco cord holder is a unique, practical, and fun gift that solves the universal problem of tangled charging cables. It’s a non-sewing project that looks stylish and is incredibly useful.
Materials Needed:
- A scrap piece of tan or colored leather (about 2.5mm thick is ideal)
- A metal snap kit that includes the snaps and setting tools
- Sharp scissors or a rotary cutter
- A round object for tracing, like the lid of a jar or a cup (3-4 inches in diameter)
- A pencil
Step-by-Step Directions:
- Trace Your Circle: Place your round object onto the back (the rough side) of the leather scrap and trace a perfect circle.
- Cut It Out: Using very sharp scissors or a rotary cutter, carefully cut out the leather circle. A clean cut will make the final product look much more professional.
- Form the Taco: Fold the leather circle in half to create the “taco” shape. This is how it will hold the cords.
- Set the Snap: Following the instructions included with your leather snap fastener kit, punch a hole through both layers of the folded leather, about half an inch in from the curved edge.
- Secure the Fastener: Set the two parts of the snap using the tools provided. Typically, this involves placing one half of the snap on the top layer and the other on the bottom, then using a mallet or hammer to secure them together.
- Ready to Use: That’s it! To use, the teen can simply wrap their charging cord or earbuds into a neat loop and snap the taco holder around them to keep them secure and tangle-free in their bag.
Lesson Learned: Working with leather for the first time can be intimidating. Using a complete leather craft kit that might include pre-cut pieces and all the necessary snaps can make this a much quicker and more foolproof project, allowing you to get a perfect result on your first try.

4. Cozy “Hot Hands” Pouches & Heat Pads

Save this cozy and practical DIY gift idea!
These microwavable heat pads are incredibly useful for soothing sore muscles after sports or warming up cold hands during the winter months. It’s a simple sewing project that even a beginner can tackle, and the result is a wonderfully comforting and practical gift that will be appreciated time and time again.
Materials Needed:
- 100% cotton flannel fabric in a stylish pattern the teen would like
- Sewing machine or a needle and thread
- Sharp scissors
- Uncooked white rice or feed corn for the filling
- A funnel (optional, but makes filling much easier)
Step-by-Step Directions:
- Cut Your Fabric: For small hand warmers, cut two identical squares of flannel, approximately 4×4 inches each. For a larger neck or back heat pad, cut two identical rectangles, roughly 9×18 inches.
- Pin and Sew: Place the two fabric pieces together with their “right” sides (the patterned sides) facing each other.
- Stitch the Edges: Sew around the perimeter of the fabric with a 1/2-inch seam allowance. Be sure to leave a 2-inch gap open on one of the sides—this is where you’ll add the filling.
- Turn It Out: Trim the fabric at the corners to reduce bulk, then carefully turn the pouch right-side out through the opening you left. Use a pencil or chopstick to gently poke the corners out so they are sharp. Press the pouch flat with an iron.
- Fill the Pouch: Use a funnel to fill the pouch about two-thirds full with uncooked rice. It’s important not to overfill it; you want it to be pliable so it can comfortably conform to their neck or hands.
- Seal It Up: Carefully fold the raw edges of the opening inward to match the rest of the seam. Topstitch the opening closed with your sewing machine or a secure hand stitch, ensuring no rice can escape.
- How to Use: To use, they can simply heat it in the microwave for 30-60 seconds (for hand warmers) or 1-2 minutes (for a larger pad).
Pro-Tip: Safety is paramount for this project. It is absolutely critical to use only 100% cotton fabric and 100% cotton thread. Synthetic fibers like polyester can melt or even catch fire in the microwave. If you’re unsure about your fabric, you can always test its safety by microwaving a small, damp swatch for 20-30 seconds first.

5. Custom DIY Notebooks or Journals

Pin this thoughtful and creative journal idea!
For the teen who loves to write, draw, or simply stay organized, a handmade notebook or journal can be an incredibly thoughtful gift. Creating a sophisticated, hand-stitched leather journal adds a timeless, artisanal touch that feels far more special than anything bought in a store.
Materials Needed:
- A DIY journal making kit is a great starting point, as it often includes the paper, cover material, binding thread, and needles.
- For a Leather Journal: A piece of tooling leather, high-quality paper for the inside pages, waxed thread for binding, and a leather punch or awl.
- A leather embossing stamp set (optional, but fantastic for personalization).
- A ruler and a sharp craft knife.
Step-by-Step Directions:
- Prepare the Cover: Cut your cover material (whether it’s leather or heavy cardstock) to your desired journal size. Remember that this piece will be folded in half, so it should be twice as wide as your final journal. A good starting size is 12×8 inches, which will create a 6×8 inch journal.
- Create the Signatures: Fold your interior pages in half to create “signatures,” which are small groups of pages. Stack 5-6 folded pages inside each other to make one signature. You will likely need 4-5 signatures for a journal of a decent thickness.
- Assemble the Journal: Neatly stack the signatures and place them inside your folded cover.
- Punch the Holes: Using a ruler and an awl, punch a series of evenly spaced holes along the central fold, making sure to go through the cover and all the signatures at once. This is the most critical step for a neat binding.
- Stitch It Together: With a needle and waxed thread, use a simple bookbinding technique like the pamphlet stitch to sew the signatures securely into the cover. There are many easy-to-follow video tutorials for this stitch online.
- Emboss the Cover: If you’re using a leather cover, you can personalize it before binding. Lightly dampen the leather surface, then use metal letter stamps and a mallet to firmly emboss their initials or a small design onto the front for a custom finish.
Pro-Tip: For a much simpler, no-sew version, start with a basic spiral-bound notebook that has a plain cover. You can then dedicate your time to decorating the cover with high-quality scrapbook paper, trendy stickers, and a personalized nameplate. A full scrapbooking kit will provide a wide variety of materials to make it truly unique.

6. Personalized Room Decor

Save this trendy room decor idea to your DIY board!
Teens love to express their individuality through their personal space, making custom room decor a thoughtful and impactful gift. Embroidered wall art is a particularly trendy and aesthetic option. Stitching a favorite quote, an inside joke, or a simple modern design creates a piece of art that is completely unique to them.
Materials Needed:
- An embroidery hoop (a 6-8 inch hoop is a great size for wall art)
- A piece of light-colored cotton or linen fabric, larger than your hoop
- Embroidery floss in a curated palette of colors
- An embroidery needle
- Scissors
- A water-soluble marking pen or a light pencil
- A beginner-friendly embroidery starter kit will conveniently contain all of these essential items.
Step-by-Step Directions:
- Secure Your Fabric: Place your fabric in the embroidery hoop and pull it taut, ensuring there are no wrinkles. This smooth surface is your canvas.
- Transfer Your Design: Lightly draw your design or write out their favorite short quote onto the fabric with the marking pen. If you’re a beginner, it’s best to keep the design simple and clean.
- Start Stitching: Thread your needle with embroidery floss. It’s common to use 3 of the 6 strands for a good thickness.
- Use Basic Stitches: Master a few basic stitches to complete your project. The backstitch is perfect for clean lines and lettering, while the satin stitch is great for filling in colored shapes. You can find countless video tutorials for these simple stitches online.
- Finish the Back: Once your design is complete, trim the excess fabric from the back of the hoop, leaving about a 1-inch border all the way around.
- Tidy Up: You can either neatly fold the excess fabric into the back and secure it with a hot glue gun, or use a simple running stitch around the edge of the excess fabric and pull it tight to gather it cleanly behind your artwork.
Pro-Tip: Choosing the right font is absolutely key to making embroidered text look modern and cool, not old-fashioned. Look online for simple, clean sans-serif fonts. An easy way to transfer it perfectly is to print the quote in your chosen font, tape it to a bright window, place the fabric in the hoop over it, and trace the letters directly onto the fabric.

7. DIY Lip Balm or Beard Balm

Pin this easy and natural skincare DIY!
Skincare and grooming products are always appreciated, and making your own allows you to use all-natural ingredients and customize the scent. Homemade lip balms are a practical gift for any teen, while a cedarwood beard balm can be an excellent, personalized option for male teens.
Materials Needed:
- A DIY lip balm making kit is the easiest and most efficient way to start, as it includes all the necessary pre-portioned ingredients and containers.
- Core Ingredients: 2 tbsp beeswax pellets, 2 tbsp shea butter, 2 tbsp coconut oil.
- Essential oils for scent (e.g., peppermint for lip balm, or cedarwood for beard balm).
- Empty lip balm tubes or small metal tins.
Step-by-Step Directions:
- Set Up a Double Boiler: You don’t need fancy equipment for this. Simply place a heat-safe glass measuring cup or bowl over a saucepan that has a few inches of simmering water in it. This gentle heat will prevent the ingredients from scorching.
- Melt the Ingredients: Add the beeswax pellets, shea butter, and coconut oil to the glass bowl. Stir gently and occasionally until everything has completely melted into a smooth, combined liquid.
- Add Scent: Remove the bowl from the heat and let it cool for just a minute or two. This is important because adding essential oils when the mixture is too hot can diminish their scent.
- Customize the Aroma: Stir in a few drops of your chosen essential oil. For a refreshing peppermint lip balm, 10-15 drops is plenty. For a masculine beard balm, use a woodsy scent like cedarwood or sandalwood.
- Pour into Containers: Carefully and quickly pour the liquid mixture into your empty lip balm tubes or tins. A small pipette can be very helpful for this step to avoid spills.
- Cool and Solidify: Let the balms cool and harden completely at room temperature for several hours. It’s best to avoid putting them in the fridge, as rapid cooling can sometimes cause the surface to crack.
Lesson Learned: The final texture of your balm is determined by the ratio of beeswax to oils. Beeswax provides the firmness. If you live in a warmer climate or want a firmer balm, adding just a little extra beeswax (about 1/2 teaspoon more) will help it stay solid.

8. Creative Wearable Accessories

Save this stylish DIY accessory idea for a super cool gift!
Fashion-conscious teens will love a unique accessory that looks store-bought but has a personal touch. While a 10-minute infinity scarf is a great quick sewing project, stamped metal bracelets offer a stylish, no-sew alternative that can be customized with a name, date, or meaningful word.
Materials Needed:
- A metal stamping kit for jewelry, which should include a set of letter/number stamps, a steel bench block for a stamping surface, and a small hammer.
- Metal bracelet blanks (soft metals like aluminum, pewter, or copper are best for beginners).
- A black fine-tip permanent marker.
- A soft polishing cloth.
Step-by-Step Directions:
- Set Up Your Workspace: Place your metal bracelet blank onto the steel bench block. To help you line up your letters evenly, you can use stamp guide tape, which is specially designed for this purpose.
- Choose Your Stamp: Select the first letter stamp for your message.
- Make Your Impression: Hold the stamp firmly and perfectly vertically on the blank. Give the top of the stamp one firm, swift strike with the hammer. The key is a single, confident hit—hitting it multiple times can create a blurry “double impression.”
- Repeat for Each Letter: Continue this process for each letter in your message, carefully aligning them as you go.
- Darken the Letters: Once all the stamping is complete, color over the impressions with the black permanent marker, making sure the ink gets down into all the crevices.
- Polish and Reveal: Let the ink sit for just a minute, then use a polishing cloth to vigorously wipe away the excess ink from the surface of the bracelet. The ink will remain in the stamped indentations, making your letters stand out clearly.
- Shape the Bracelet: Gently bend the metal blank into a cuff shape that can comfortably fit a wrist.
Pro-Tip: Don’t let your final bracelet be your first attempt! Practice on a few scrap pieces of metal before working on your actual gift. This will help you get a feel for exactly how hard you need to strike the stamp to get a deep, clear impression. You’ll find that softer metals like aluminum require much less force than something like stainless steel.

9. Stylish Zippered Tote Bags

Save this practical and trendy tote bag idea!
A handmade tote bag is a practical, eco-friendly, and stylish gift that will be used constantly. Whether it’s for carrying books to school, packing sports gear, or for a day out with friends, a sturdy tote is a teen essential. Personalizing a blank tote is an easy way to create a high-impact gift.
Materials Needed:
- A high-quality, blank heavy canvas tote bag. Opting for one with a zippered top is a great feature for teens to keep their belongings secure.
- High-quality fabric paint or permanent fabric markers.
- Painter’s tape or pre-made stencils.
- A piece of cardboard that fits inside the bag.
Step-by-Step Directions:
- Prep the Bag: Always wash and dry the tote bag first to pre-shrink it. Iron it thoroughly so you have a perfectly smooth, flat surface to work on.
- Prevent Bleed-Through: Place the piece of cardboard inside the bag. This is a crucial step that will prevent any paint or marker ink from bleeding through to the other side.
- Create Your Design: Use painter’s tape to mask off crisp, clean geometric designs or stripes. For more intricate designs, you can use a pre-made stencil or even create your own by cutting a design out of contact paper.
- Apply the Paint: Apply your fabric paint using a foam brush or a pouncer for even coverage. For perfectly sharp lines, always remember to carefully pull the painter’s tape off while the paint is still wet.
- Draw a Custom Design: As an alternative to painting, you can use fabric markers to draw a custom illustration or hand-letter a favorite song lyric or inside joke directly onto the canvas.
- Set the Design: Allow the paint to dry completely, then heat-set it according to the paint manufacturer’s instructions. This step, which usually involves ironing over the design (with a cloth in between), is essential to make the design permanent and washable.
Pro-Tip: For a super simple yet incredibly trendy look, stick to black fabric paint on a natural-colored canvas bag. You can create a cool, abstract design of splatters and lines, or find a minimalist line-art drawing online to replicate. When it comes to modern teen aesthetics, less is often more.

Key Takeaways: Your Quick Guide to home made christmas gift ideas for teens
Making a successful homemade gift for a teen comes down to a few core principles. Keep these in mind, and you’re sure to create something they’ll love.
- Personalization is Paramount: The most successful and cherished gifts are those that are customized to the teen’s specific interests. Whether it’s their initials, a favorite quote, an inside joke, or a symbol from their favorite fandom, personalization is what elevates a simple craft into a treasured gift.
- Practicality Wins: Teens are practical. They appreciate gifts they will actually use in their daily lives. Focus on items that solve a problem (like tangled cords), serve a purpose (like a tote bag), or provide comfort (like a cozy heat pack).
- Aesthetics Matter: Before you start, take a quick scroll through Pinterest or TikTok to see what’s trending. Choose projects that align with modern, minimalist, or aesthetic styles. Pay attention to current color palettes and font styles to ensure your gift feels fresh and relevant.
- Quality Over Complexity: A simple gift made well is always far better than a complex one that looks sloppy or unfinished. Don’t be afraid to start with pre-made “blanks” (like pouches, tote bags, or notebooks). This allows you to focus your efforts on high-quality customization, which is the most important part.
People Also Ask About home made christmas gift ideas for teens
What is a good homemade Christmas gift for teens?
A great homemade Christmas gift for a teen is something both useful and personalized. Items like custom zippered pouches for organizing tech or makeup, stylish DIY room decor like embroidered art, or practical self-care kits like homemade sugar scrubs are excellent choices because they can be tailored to the teen’s individual style and interests.
What does a teenage girl actually want for Christmas?
Teenage girls often appreciate gifts that align with their hobbies and social lives. This includes trendy accessories, personalized room decor that expresses their personality, and quality self-care items. Fun pens, face masks, hair accessories, and customizable items like journals or tote bags are consistently popular choices.
What can you make a 15-year-old for Christmas?
For a 15-year-old, focus on gifts that feel a bit more grown-up and stylish. A hand-stamped leather bracelet offers a cool, personalized accessory. A DIY beard balm (for boys) or a set of natural lip balms shows thoughtful care. A practical, decorated tote bag for their books or sports gear is another great option they will use regularly.
How can I make a homemade gift look professional?
To make a homemade gift look professional, start with high-quality materials and pay close attention to the finishing details. Use heavy canvas for a tote bag or pure beeswax for lip balm. Ensure your seams are straight, paint lines are clean, and your packaging is neat. Using a pre-made kit for projects like bath bombs or journals can also provide the right tools for a polished, store-bought result.
Final Thoughts
The true value of a homemade gift isn’t in its perfection, but in the thought, effort, and love that you pour into it. Creating something with your own hands for a teen in your life is a powerful way to show them you see them, you know what they love, and you took the time to make something just for them. It’s a message that no store-bought item can replicate. We hope these ideas have inspired you to get creative this holiday season and make a gift that earns a genuine, heartfelt “thank you.”
What’s the best homemade gift you’ve ever given or received? Share your stories and ideas in the comments below
Last update on 2026-03-04 / Affiliate links / Images from Amazon Product Advertising API


