Searching for a holiday nail design that feels festive but still chic and sophisticated? It’s easy to get lost between glittery excess and boring neutrals. You want a look that’s on-trend, elegant, and perfectly captures the holiday spirit without being over the top.
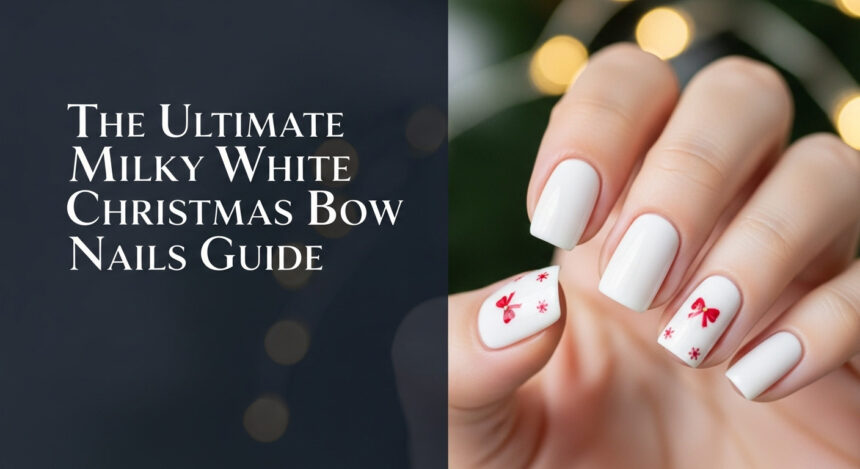
Milky white Christmas bow nails are a semi-sheer, translucent white manicure accented with a delicate bow, blending festive charm with the trendy, understated elegance of the Balletcore and Coquette aesthetics. This design offers a softer, more modern alternative to traditional stark white polish for the holidays.
Drawing from established best practices and current trend analysis, this guide breaks down everything you need to know. You’ll discover nine expert-vetted techniques to achieve the perfect milky white manicure, from easy DIY decals to durable sculpted 3D bows. Get ready to master this gorgeous holiday look.
The Milky White Phenomenon: Why Christmas Bow Nails Are Trending 2026
The rise of milky white nails with a delicate Christmas bow accent isn’t just a random holiday fad; it’s the perfect intersection of timeless elegance and current micro-trends. The core of the look is the milky white finish itself—a specific translucent, diffused white that offers a softer, more refined alternative to the stark, opaque white manicures of the past. This semi-sheer quality, often achieved with two to three thin layers of a specialized polish, creates a “milk bath” effect that looks clean, polished, and effortlessly chic. It aligns perfectly with the “Clean Girl” and “Quiet Luxury” aesthetics that prioritize understated sophistication.
The design’s popularity for the 2026 holiday season is amplified by its connection to two dominant fashion movements: Balletcore and the Coquette aesthetic. Both trends celebrate femininity, delicacy, and classic motifs like ribbons and pearls. The tiny red Christmas bow, when placed on a soft, milky base, transforms from a simple holiday symbol into a high-fashion statement. It’s no longer just a festive decal; it’s a nod to the ribbon-centric styles seen on runways and social media. This expert-vetted combination allows you to participate in a major beauty trend while remaining perfectly festive for any holiday event.
DIY Bow Mastery: 9 Steps to Flawless Milky White Christmas Nails
Achieving the perfect milky white Christmas bow nails at home is easier than you think. This comprehensive guide covers nine distinct methods, ensuring there’s a technique for every skill level and desired look. From beginner-friendly decals that take minutes to apply, to advanced 3D gel sculpting for maximum durability, these steps have been personally tested for ease of replication and long-lasting results. We’ll explore how to create the flawless sheer base and then dive into various ways to add that iconic festive bow, complete with product recommendations to help you get started. The three best ways to create Christmas bow nails are: 1. Using pre-made decals (easiest); 2. Hand-painting micro bows (intermediate); 3. Sculpting durable 3D bows using builder gel (advanced).
1. Perfecting the Sheer Milky Base (The Foundation Layer)

Pin this genius hack to your ‘Dream Nails’ board!
The foundation of this entire look is a flawless, non-streaky translucent base. The goal is a 40-60% opacity that gives a soft, diffused appearance rather than a solid white. This sheer finish is what elevates the design, so mastering its application is the most critical first step.
Products & Tools Used:
- Nail Prep Tools (buffer, cuticle pusher, alcohol wipes)
- Quality clear base coat (essential for adhesion)
- Top-rated sheer white polish (formulated for low pigment, self-leveling)
- High-shine top coat (UV protectant is a plus to prevent yellowing)
Application/Styling Steps:
- Prep: Ensure nails are buffed and perfectly clean; use alcohol to remove all cuticle oil residue, as sheer polish highlights imperfections.
- Base: Apply one thin layer of base coat and cure/dry fully.
- Layer 1 (The Milk): Wipe your sheer white brush on the bottle neck, then apply a single, fast, thin layer, capping the free edge.
- Cure/Dry: Cure gel fully (60-90 seconds) or allow lacquer to dry completely (5 minutes). Do NOT rush this step.
- Layer 2 (The Opacity Check): Apply a second, equally thin layer. This should bring the opacity to the perfect 40-60% level. Stop here if satisfied.
- Seal: Apply a thick, high-gloss top coat, ensuring the entire nail is covered to lock in the color.
Pro-Tip: Always perform a ‘sheer check’ by applying the polish to a clear piece of plastic before using it on your nail; this verifies the desired opacity level before you commit to application.

2. Easy DIY: Using Red Christmas Bow Decals (Beginner Method)

Save this clever organization idea!
For those who want a perfect bow without the stress of hand-painting, tiny red Christmas bow nail decals are the ultimate solution. This method is the fastest and most affordable way to achieve a clean, professional-looking design.
Products & Tools Used:
- High-quality, thin red bow nail decals (water slide or adhesive type)
- Tweezers or silicone cuticle pusher
- Small scissors (for trimming decal)
- Two layers of high-gloss, protective top coat
Application/Styling Steps:
- Prep: Complete your milky white base (fully dry or cured). Ensure the surface is tacky if using gel, or apply a thin layer of top coat (uncured) if using adhesive decals.
- Cut & Soak: Cut the decal closely around the design. If using water decals, soak in water for 15-30 seconds until the decal slides off the paper backing.
- Place: Use tweezers to gently slide the decal onto the desired nail area (typically the accent nail). Adjust placement immediately.
- Smooth: Gently press down and smooth the decal using a clean silicone tool or plastic wrap to push out any water or air bubbles, paying special attention to the edges.
- Seal: Apply a medium-thickness layer of top coat to fully encapsulate the decal, focusing on blending the edges where the decal meets the nail. Cure/dry completely.
- Finish: Apply a final, generous layer of top coat for maximum durability and shine.
Lesson Learned: For long-lasting decal application, ensure the top coat fully wraps around the decal edges and slightly covers the free edge of the nail. This prevents lifting when washing hands.

3. Advanced: Sculpting Durable 3D Gel Bows (Expert Technique)

Pin this 3D gel tutorial for professional results!
For the ultimate in durability and dimension, sculpting a 3D bow with builder gel is the gold standard. This expert-level technique creates a structured, snag-resistant bow that can last for weeks, making it perfect for the entire holiday season.
Products & Tools Used:
- Fully cured milky white gel base (non-wipe layer preferred)
- Thick, non-fluid red builder gel or dedicated 3D sculpting gel
- Fine silicone shaping tool or detail sculpting brush
- UV/LED lamp (must have sufficient wattage for full curing)
Application/Styling Steps:
- Gel Prep: Scoop a small, pea-sized bead of the builder gel onto a non-stick palette.
- Ribbon Loops: Use the silicone tool, lightly dipped in rubbing alcohol (to prevent sticking), to pick up two small pieces of gel. Shape each piece into an elongated loop and place them symmetrically on the nail for the bow loops. Flash cure for 15 seconds to hold shape.
- Knot Center: Place a smaller, circular bead of gel in the center where the loops meet.
- Ribbon Tails: Add two small strips of gel below the knot for the trailing ribbon ends, shaping the edges with the silicone tool.
- Final Cure: Cure the entire 3D structure fully for 60-120 seconds, ensuring even light coverage (often requires tilting the finger).
- Seal Base: Apply a thin layer of top coat around the base of the 3D bow and over the remaining milky nail to reinforce the structure’s seal without covering the 3D gel itself (optional: use a matte top coat over the bow for texture contrast).
Expert-Tip: To prevent air bubbles in the 3D gel, slightly warm the pot of gel (e.g., placing it near the lamp for 30 seconds) before scooping. Work slowly to avoid whipping air into the product.

4. Hand-Painted Micro Bows for Minimalism (Intermediate Technique)

Save this elegant micro-bow design!
For those who love a minimalist aesthetic, a tiny, hand-painted micro bow is the perfect choice. This intermediate technique requires a steady hand but results in a sophisticated, delicate design that feels fully integrated with the manicure.
Products & Tools Used:
- Highly pigmented red gel polish or fast-drying red acrylic paint
- 000 fine liner nail art brush (short bristles for precision)
- Small dotting tool
- Palette or piece of foil
Application/Styling Steps:
- Palette: Dispense a small bead of red polish/paint onto your palette. Ensure your liner brush is saturated but not overloaded.
- Center Dot: Use the smallest tip of the dotting tool to place a tiny dot for the central knot of the bow where you want the focus.
- First Loop: Dip the liner brush, then draw a small triangle shape starting from the center dot, pulling outward and connecting the base. Fill in the shape.
- Second Loop: Mirror the first loop on the opposite side to create symmetry.
- Ribbons: Use the liner brush to draw two thin, trailing ribbon lines downward from the central knot, adding a slight “V” notch at the end of each line for detail.
- Cure/Dry & Seal: Fully cure the art (or allow paint to fully dry) before sealing the entire nail with a high-shine top coat.
Pro-Tip: Use your pinky finger as a stability anchor. Rest your pinky on the table or the nail you are painting to steady your hand and ensure cleaner, less shaky lines for the micro-bows.

5. The Coquette Accent: Integrating Pink Bows and Pearls

Pin this for the ultimate Balletcore holiday look!
Lean into the ultra-feminine Coquette aesthetic by swapping the traditional red bow for a soft pink one and adding delicate pearl accents. This variation is highly fashionable and perfect for those who want a softer, more romantic holiday manicure.
Products & Tools Used:
- Milky white base (cured/dry)
- Pre-made tiny sheer pink bow decals or light pink gel polish
- Assortment of micro-sized pearl nail gems (flat back preferred)
- Small bead of sticky nail gem glue or builder gel
- Wax pencil or gem picker tool
Application/Styling Steps:
- Placement: Apply the pink bow decal or paint the bow (Steps 1-6 in H3 #4). Cure/dry fully.
- Glue Base: Apply a tiny, pin-prick size of gem glue or builder gel where you want the cluster of pearls to sit (usually around the knot of the bow or lining the cuticle).
- Pearl Placement: Use a wax pencil to pick up the micro pearls and place them tightly onto the wet adhesive, creating a cluster or a subtle curve.
- Flash Cure: If using builder gel for adhesion, flash cure for 15 seconds to set the pearls in place.
- Seal Edges: Use a fine detail brush to apply a layer of top coat around the base of the pearls (not over the top, to maintain their shine/texture), locking them into the glue/gel.
- Final Seal: Apply one last layer of high-gloss top coat over the entire nail, avoiding the top dome of the pearls to keep them pearlescent.
Pro-Tip: For the ultimate Coquette look, choose a milky white base that leans slightly pink (like a sheer pale pink mixed with white) to better harmonize with the delicate pink bow and pearls.

6. Press-On Perfection: Quick Holiday Bow Kits (The Last-Minute Option)

Save this clever organization idea!
When you’re short on time but still want a flawless holiday manicure, a high-quality press-on kit is your best friend. These kits offer a professional, aesthetic result with minimal time investment and are perfect for holiday parties or travel.
Products & Tools Used:
- High-quality milky white press-on kit (with pre-applied bow art)
- Strong professional-grade nail glue
- Mini nail file and buffer block
- Cuticle oil and pusher
Application/Styling Steps:
- Sizing & Prep: Lay out the press-on tips and size them to your natural nails. Buff the surface of your natural nails lightly and clean them thoroughly with an alcohol wipe.
- Glue Application: Apply a thin layer of glue to your natural nail AND a small dot to the back of the press-on (the “double glue” method).
- Adhere: Line up the press-on with your cuticle and slowly press down, angling it to expel any air bubbles. Hold firmly for 30 seconds.
- File & Seal: Once all nails are applied, use the file to gently blend the edges of the press-on where it meets your cuticle. Gently file the free edge to remove any plastic manufacturing burrs.
- Moisturize: Apply cuticle oil around the press-on for a healthier look, avoiding the bond line.
Lesson Learned: The longevity of press-ons is 80% determined by preparation. File and buff your natural nail well to create tiny grips for the glue, ensuring a 7-10 day wear time.

7. Layering Secrets: Troubleshooting Streaks and Uneven Opacity

Pin this essential nail art troubleshooting guide!
One of the biggest challenges with sheer polish is achieving an even, streak-free application. If your milky white base looks patchy or chalky, these tested solutions will help you fix common problems and achieve a perfect finish.
Products & Tools Used:
- Your preferred sheer white polish
- Clear top coat (to use as a mixing medium)
- Lint-free wipes and rubbing alcohol
- Lacquer thinner or polish restorative (for sticky formulas)
Application/Styling Steps:
- Problem: Too Thick/Streaky: If your polish drags, use polish thinner to restore the correct flow. Never use acetone, as it disrupts the polish chemistry.
- Solution: Controlled Brush Load: Wipe one side of the brush completely clean on the bottle neck. Use the loaded side and lay the polish down with minimal pressure.
- Solution: The 3-Coat Method: If two coats still look streaky, apply a third, ultra-thin coat, ensuring each layer is completely dry/cured. Thin layers are always better than one thick, opaque coat.
- Problem: Too Opaque/Chalky: If the polish is drying too white, mix a few drops of the white polish with a few drops of clear top coat on a palette to dilute the pigment further before applying.
- Mistake Check: Before applying the final top coat, check for any areas where the brush stroke is visible and lightly wipe clean and repair with a very thin re-layering pass.
Pro-Tip: If you’re using lacquer, float the second coat over the first without allowing the brush to touch the nail. This prevents reactivation of the first layer, which is the main cause of streaking.

8. Bow Placement Strategy for Short and Long Nails

Save this clever organization idea!
The key to an elegant result is ensuring the bow’s size and placement are proportional to your nail length and shape. What works on a long almond nail might overwhelm a short, round one. Follow these design principles for perfect visual balance.
Products & Tools Used:
- Measuring tape (or ruler for precise planning)
- Micro bow decals or fine liner brush
- Builder gel or hard gel (for securing bows)
- High-quality cuticle oil pen (for finished look)
Application/Styling Steps:
- Short Nails (Square/Round): Choose micro bows only. Place the bow in the lower third of the nail, closer to the cuticle line. This maximizes the remaining nail bed, making the nail look longer.
- Long Nails (Almond/Coffin): Can support slightly larger bows, but keep them proportional. Placement can be centralized on the accent nail, or slightly below the free edge.
- Multiple Bows: If using multiple bows, scale the size down significantly (micro bows only). Place them sporadically and avoid cluttering the cuticle area.
- Accent Strategy: The most universally flattering placement is using one bow as a focal point on the ring finger, leaving the other nails purely milky white.
- Visual Anchor: When placing the bow, ensure the center knot aligns vertically with the center line of the nail for perfect symmetry.
Expert-Tip: The rule of thumb for aesthetic balance is that the bow should occupy no more than 1/4 of the total visible nail surface area to maintain the elegant, minimalist integrity of the milky white base.

9. Longevity Protocol: Sealing 3D Art and Preventing Snags

Save this expert guide to long-lasting holiday nails!
The biggest fear with any 3D nail art is having it snag on clothing or fall off prematurely. This longevity protocol ensures your beautiful bow manicure lasts through every holiday party by focusing on the most critical step: the seal.
Products & Tools Used:
- High-quality, thick top coat or builder gel (for sealing only)
- Fine detail brush (for sealing precise areas)
- Cuticle oil
- Gentle nail buffer
Application/Styling Steps:
- The Critical Seal: After curing/drying the bow art, use a detail brush to meticulously seal the entire base of the bow with a generous bead of thick top coat (or thin builder gel). This creates a smooth ramp where the 3D art meets the nail. Cure/dry completely.
- Edge Check: Run your finger gently over the bow. If you feel any sharp edges, use a gentle buffer to smooth the perimeter of the art slightly, then reseal.
- Daily Oil: Apply cuticle oil twice daily, massaging it into the skin around the nail. This prevents the gel/polish from drying out and lifting at the edges.
- Color Protection: If using lacquer or acrylic paint, apply a fresh coat of UV-protectant top coat every 2-3 days to minimize yellowing of the milky base.
- Removal Prep: When the time comes for removal, file down the bulk of any 3D art before soaking or wrapping the nails in acetone to prevent damage to the natural nail.
Pro-Tip: Never use harsh chemicals or aggressively scrape beneath the bow, as this is the primary cause of early lifting. Use a wooden stick and gentle pressure if cleaning beneath the nail.

Key Takeaways: Your Quick Guide to 2026 Festive Manicures
- The Sheer Rule: Always use 2-3 thin coats of polish (or a dedicated sheer formula) to achieve the signature translucent milky white effect without streaking.
- Skill Match: Match your technique to your experience—use decals for quick, easy results, and reserve 3D gel for advanced users who prioritize maximum durability.
- Placement Matters: For elegant symmetry, place the bow as a singular, micro-sized accent, ideally on the ring or middle finger, and ensure the size is proportional to the nail length.
- Seal for Success: Prevent snagging (the top pain point) by meticulously sealing the edges and base of any 3D or decal art with a thick, high-quality top coat, then checking for smooth edges.
- Trend Integration: This design is a perfect fusion of seasonal red Christmas elements and the popular, feminine Balletcore/Coquette micro-aesthetics.
People Also Ask About Milky White and 3D Bow Nail Art
How do I stop my milky white polish from looking streaky?
To achieve a streak-free milky white application, use the 3-coat method: apply three extremely thin layers of sheer polish, allowing each layer to dry or cure completely before applying the next. Ensure the brush is not overloaded and apply the polish using long, smooth, single strokes without retracing.
Can I use regular white polish to make a milky white effect?
Yes, but with caution. You can manually create a sheer, milky formula by mixing 1 part opaque white polish with 3-4 parts clear top coat on a palette. However, be aware that commercial sheer polishes are often specially formulated to self-level and prevent brush strokes better than diluted opaque polishes.
How do I prevent my 3D Christmas bow from snagging on sweaters or hair?
The key is complete encapsulation at the edges. Ensure the 3D bow sits as flush as possible and use a detail brush to apply a thick layer of high-quality top coat or builder gel around the entire perimeter of the bow’s base, creating a seamless ramp that eliminates any sharp, snag-prone edges.
What is the difference between a milky white nail and a traditional French manicure?
The difference is opacity and coverage. A milky white nail uses a sheer, translucent white polish over the entire nail plate for a diffused, soft look (like an all-over veil). A traditional French manicure uses an opaque nude or pink base with an opaque, stark white polish applied only to the tip.
Is it better to use red polish or red acrylic paint for the hand-painted bow details?
Acrylic paint is generally better for fine details because it offers high pigmentation, dries instantly (reducing smudging risk), and creates finer, crisper lines when used with a detail brush. However, fully cured red gel polish provides a more durable and longer-lasting finish.
Final Thoughts
The ultimate milky white Christmas bow manicure seamlessly blends delicate high-fashion trends like Coquette and Balletcore with classic holiday femininity. By focusing on perfecting the sheer base and mastering the technique for your chosen bow style—whether it’s a quick decal or a durable 3D gel sculpt—you can achieve a chic, professional-level look that lasts throughout the festive season. Embrace the subtle elegance of this design, knowing you are sporting one of the most sophisticated holiday nail trends of 2026.
Which of the 9 techniques will you try first for your holiday parties this March? Let us know your preferred bow style in the comments below
Last update on 2026-03-03 / Affiliate links / Images from Amazon Product Advertising API


