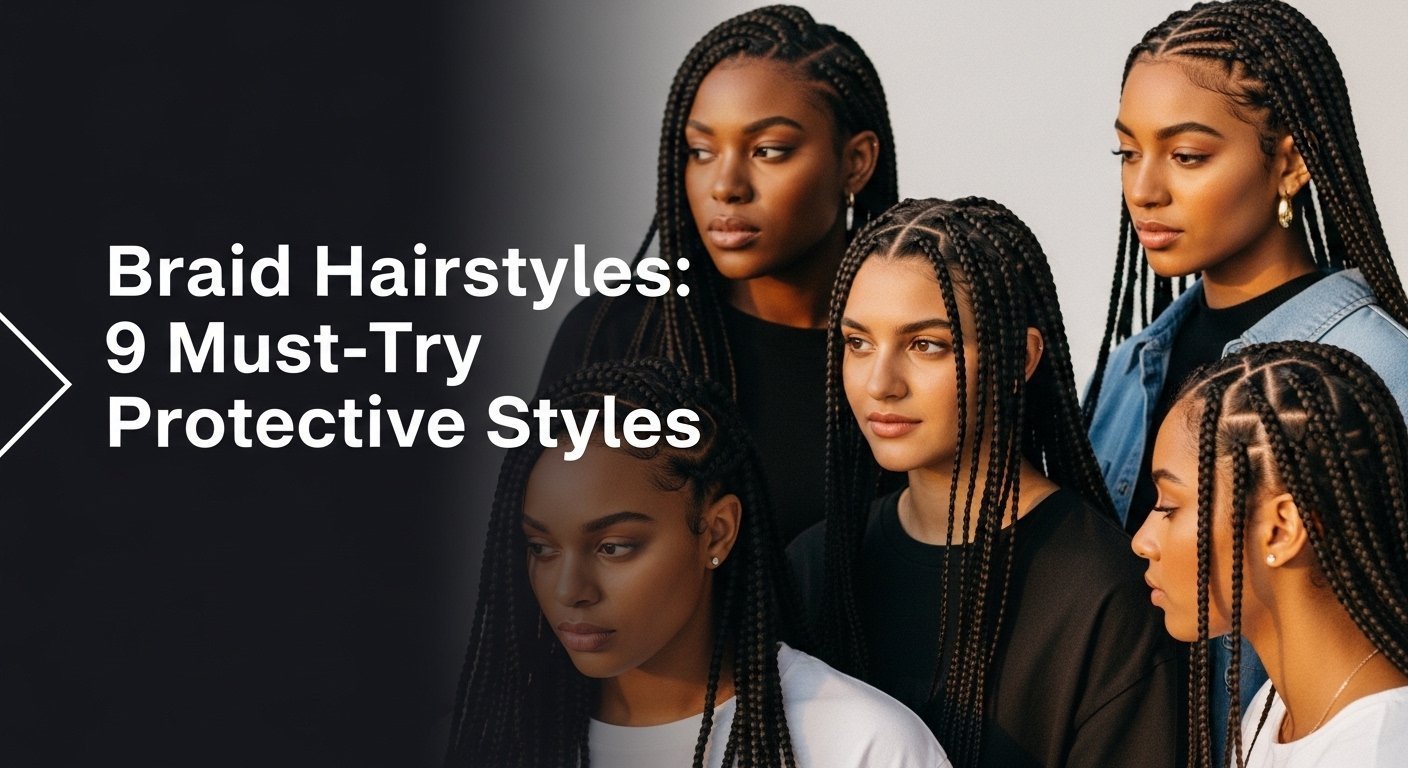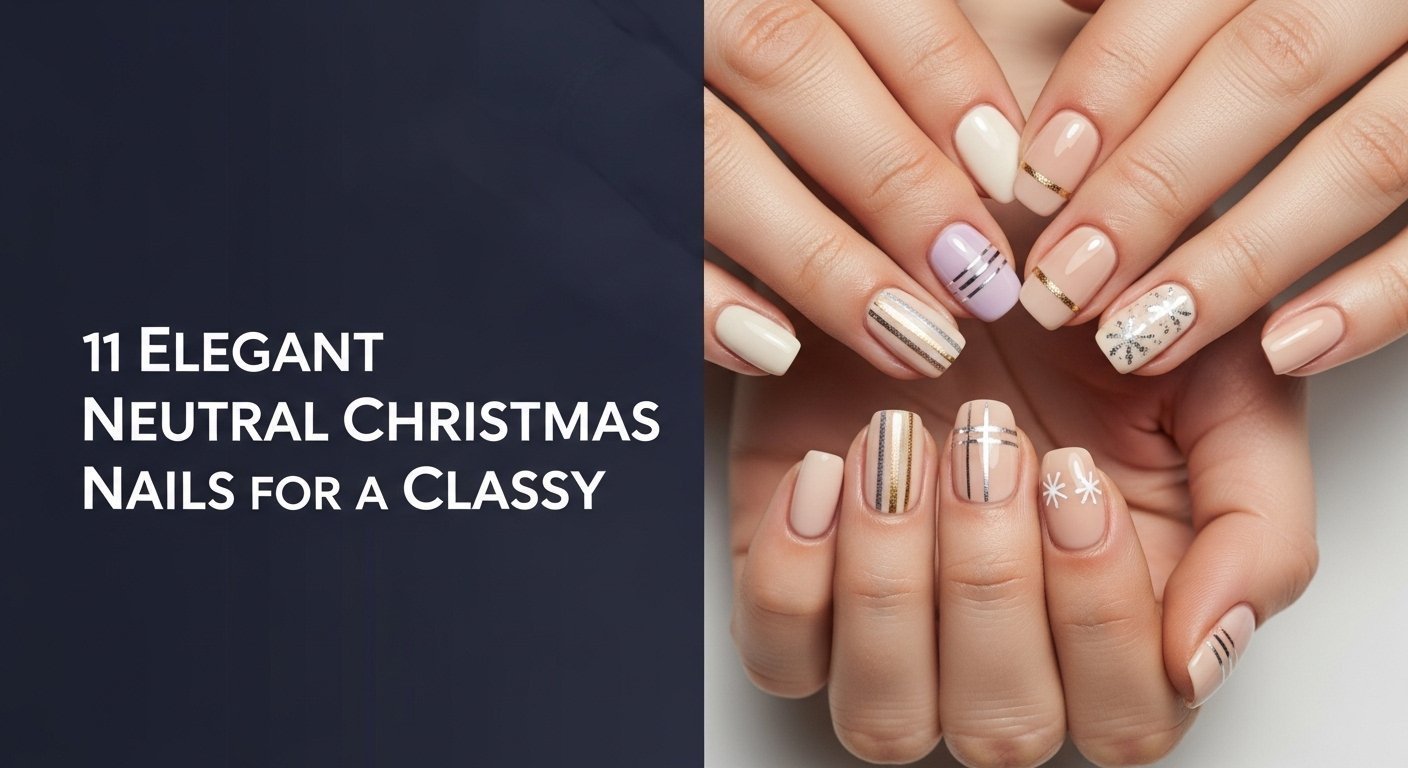
Struggling to find a holiday manicure that’s festive but still feels like you? If you’re tired of the same loud red and green, you’re looking for a way to celebrate the season with elegance and class. It can be a challenge to find inspiration for neutral christmas nails that are sophisticated, not sleepy.
Neutral Christmas nails are the epitome of holiday elegance, offering a sophisticated and versatile alternative to traditional festive colors. These designs use a palette of nudes, beiges, whites, and soft pinks, often enhanced with subtle accents like fine glitter, gold foil, or minimalist art to create a chic, timeless look perfect for the entire winter season. This understated style complements any outfit, transitioning seamlessly from office parties to family gatherings.
Drawing from established best practices and current winter nail trends for 2026, this guide is your key to unlocking chic holiday style. We will explore 11 stunning and achievable designs that prove neutral is the new festive. Get ready to discover your perfect, sophisticated holiday manicure.
Why Are Neutral Christmas Nails the Ultimate in Holiday Elegance?
Choosing chic neutral christmas nails is about embracing an understated sophistication that enhances your festive look without overpowering it. Unlike traditional, bold holiday colors that can feel limiting, elegant christmas neutrals offer unparalleled versatility. These manicures, rooted in a palette of soft nudes, milky whites, gentle grays, and warm taupes, provide a perfect canvas that complements holiday outfits of any color or style. The philosophy behind this trend is simple: achieve a festive feel through subtle details—a hint of shimmer, a delicate piece of art, or a unique texture—rather than loud color. This approach ensures your nails look polished and intentional from the first holiday party of the season right through to the New Year, pairing beautifully with all of your winter fashion choices. By opting for a classy neutral christmas manicure, you’re choosing a timeless style that whispers elegance instead of shouting holiday cheer.
11 Elegant Neutral Christmas Nails for a Classy 2026
Ready for some serious inspiration? We’ve curated 11 distinct and beautiful neutral christmas nail designs that redefine holiday elegance. Each idea is broken down with the products you’ll need and step-by-step instructions to help you or your nail technician achieve the look. These designs range from the incredibly simple to the artistically detailed, ensuring there’s a sophisticated option for every skill level and style preference.
1. Achieve the Perfect Glazed White Christmas Nail

Pin this chic ‘glazed donut’ nail idea to your Holiday Beauty board!
Products & Tools Used
- Sheer milky white gel polish (one coat for translucency)
- High-shine, no-wipe gel top coat
- White or pearl chrome powder (e.g., an aurora powder for an iridescent finish)
- A soft-bristle nail art brush or silicone applicator
- UV/LED nail lamp
Application/Styling Steps
- Prep your nails by filing, buffing, and cleaning the nail plate. Apply a quality base coat and cure.
- Apply one thin coat of the sheer milky white gel polish. Cure under the UV/LED lamp as directed.
- Apply the no-wipe gel top coat and cure for the full recommended time. Do NOT wipe the nail.
- Using the silicone applicator, pick up a tiny amount of chrome powder and gently rub it onto the entire surface of the warm, cured top coat until the glazed effect appears.
- Dust off any excess powder with a soft brush and seal the design with another layer of top coat, making sure to cap the free edge. Cure one final time.
Pro-Tip: For a longer-lasting glazed donut neutral christmas nails trend look, especially on natural nails, consider using a structured gel manicure or BIAB neutral christmas nails technique as your base. This adds strength and prevents chipping.

2. Create a Subtle Champagne Glitter Ombré

Save this sparkling design for your next holiday party!
Products & Tools Used
- A soft nude base or sheer pink polish
- Fine champagne christmas nails glitter polish or loose cosmetic-grade glitter
- A small makeup sponge wedge
- A gel top coat
Application/Styling Steps
- Apply two coats of your chosen soft nude base polish and let it dry completely (or cure if using gel).
- If using glitter polish, apply a small amount to the tip of the makeup sponge. If using loose glitter, apply a layer of wet top coat first.
- Gently dab the sponge onto the top third of your nail, concentrating the glitter at the tip and fading it down toward the middle of the nail.
- Apply a second, lighter layer of dabbing slightly lower than the first to perfect the ombré blend.
- Once satisfied, seal the entire nail with a generous layer of high-gloss top coat for a smooth finish.
Pro-Tip: To avoid a thick, chunky tip, choose a glitter polish with a clear base or use very fine loose glitter. This is key for achieving a truly sophisticated neutral look instead of a heavy glitter explosion nails effect.

3. Design a Minimalist White Snowflake Accent

Pin this winter wonderland nail art for a touch of seasonal charm!
Products & Tools Used
- Taupe christmas nails or greige polish for the base color
- A crisp white nail art polish
- An ultra-fine, long-bristle nail art liner brush
- A matte or glossy top coat
Application/Styling Steps
- Paint all nails with two coats of the taupe polish, allowing them to dry completely (or curing).
- On your chosen accent nail (usually the ring finger), dip the tip of your liner brush into the white polish.
- Draw three thin, intersecting lines to create the basic six-pointed star shape of the snowflake. Start with a vertical line, then an ‘X’ over it.
- Add small ‘V’ shapes to the end of each of the six lines to create the classic snowflake branches. Keep the lines as thin as possible for a delicate gold details feel (but in white).
- Finish with your preferred top coat. A matte neutral christmas nails finish can look especially chic with this design.
Pro-Tip: If your hand isn’t steady enough for free-handing, use a stamping plate neutral christmas designs kit. They offer perfectly intricate snowflake designs that you can easily transfer to your nail.

4. Style a Modern Neutral French Tip with a Twist

Love a modern classic? Pin this chic French manicure idea!
Products & Tools Used
- A sheer soft pink christmas nails or beige base polish
- A metallic silver, gold, or champagne polish for the tip
- Nail art striping tape or a French tip guide sticker (optional)
- A high-gloss top coat
Application/Styling Steps
- Apply two coats of your sheer nude or pink base polish and let it dry completely.
- For a sharp line, place a piece of striping tape or a guide sticker just below where you want the tip to end.
- Carefully paint the tip of your nail with the metallic polish. Apply a second coat if needed for full opacity.
- While the tip polish is still slightly wet, gently peel off the tape or sticker to reveal a crisp line.
- Let the tip dry for a few minutes, then seal the entire nail with a glossy top coat.
Lesson Learned: In my experience, for a micro French look, it’s easier to skip the guides and use the very tip of the polish brush, held perpendicular to your nail, to delicately paint a razor-thin line along the free edge.

5. Add Delicate Gold Foil Accents to Nude Nails

Pin this touch of gold for an effortlessly elegant holiday look.
Products & Tools Used
- A classic nude nails polish in beige or cream
- Nail art gold foil flakes
- A pair of fine-tipped tweezers
- A sticky base coat or specialized foil gel
- A thick gel-like top coat
Application/Styling Steps
- Paint two coats of your nude polish. Let it dry almost completely, until it’s slightly tacky to the touch. (If using gel, cure a layer of foil gel without wiping).
- Using the tweezers, gently pick up small pieces of the gold foil.
- Place the foil flakes onto the tacky nail surface in a random, scattered pattern. Focus on one or two areas, like the base of the nail or one side.
- Gently tap the foil down with your fingertip or a silicone tool to ensure it’s flat.
- Seal the design with one or two thick layers of top coat to completely encapsulate the foil and create a smooth surface.
Pro-Tip: For a more integrated look, apply the foil after the first coat of nude polish, then apply the second coat over it. This makes the foil look like it’s suspended within the color, creating a sophisticated neutral look.

6. Design a Chic Matte Nude with a Tiny Star

Pin this starry night design for a touch of minimalist magic!
Products & Tools Used
- A light mocha or matte caramel nails polish
- A high-quality matte top coat
- A tiny star-shaped nail decal OR white nail art polish and a dotting tool
- Fine-tipped tweezers (for decal)
Application/Styling Steps
- Apply two coats of your mocha base polish and allow it to dry completely.
- Create the star: If using a decal, use tweezers to place it on the nail. If painting, use a dotting tool to create five small dots in a star shape and connect them with a fine brush. Let it dry.
- Carefully apply a thin, even layer of the matte top coat over the entire nail, including the star design.
- Be sure not to over-brush, as this can cause streaks. Let it air dry completely to reveal the velvety finish. If using a gel matte top coat, cure as directed.
Pro-Tip: Matte top coats can highlight any imperfections on the nail surface. For a flawless finish, ensure your base color is perfectly smooth and self-leveled before applying the matte coat.

7. Try a Cozy Cable-Knit Sweater Nail Design

Get cozy this winter! Pin this adorable sweater nail tutorial.
Products & Tools Used
- A cream christmas nails or off-white gel polish
- A matching 3D “puffy” or “sweater” art gel (or use the same gel polish)
- A fine liner nail art brush
- A matte gel top coat
- UV/LED nail lamp
Application/Styling Steps
- On your chosen accent nail, apply two coats of the cream gel polish, curing after each coat.
- Apply a layer of matte top coat and cure. This gives the 3D gel something to grip.
- Using the liner brush and the 3D gel, draw your sweater pattern (e.g., vertical lines, ‘S’ curves, and dots). Make the lines thick. Do NOT cure yet.
- Go back over the pattern with another layer of gel to build up the height.
- Once you’re happy with the 3D effect, cure the nail under the lamp for the full recommended time. There is no need for a final top coat over the 3D design.
Pro-Tip: An even easier method is to draw the pattern, then sprinkle clear acrylic powder over the wet gel before curing. When you cure it and brush off the excess, it creates a fuzzy, textured, and perfectly matte sweater effect.

8. Paint a Simple Dusty Rose with a Bow Accent

Tie your holiday look together! Pin this sweet and simple bow design.
Products & Tools Used
- A dusty rose christmas nails polish
- White or metallic gold nail art polish
- A fine liner nail art brush and a small dotting tool
- A glossy top coat
Application/Styling Steps
- Paint two coats of the dusty rose polish on all nails and let dry (or cure).
- On the accent nail, use the dotting tool to place a single dot where the center of the bow will be (usually near the cuticle).
- Using the liner brush, draw two triangle shapes on either side of the dot to create the main loops of the bow.
- From the center dot, draw two thin, flowing lines downwards to create the ribbon tails.
- Allow the bow to dry completely before sealing with a glossy top coat.
Pro-Tip: For a no-skill, high-impact alternative, use a tiny 3D bow charm. Apply it to the nail with a small bead of nail glue or thick builder gel before applying your final top coat around it. This creates a professional holiday nail design with minimal effort.

9. Master the Greige Nail with a Silver Chrome Tip

For an edgy holiday look, pin this cool-toned chrome tip design!
Products & Tools Used
- A greige neutral nails (gray-beige) gel polish
- Silver chrome powder
- A no-wipe gel top coat
- A silicone applicator or eyeshadow sponge
- A fine-tipped brush for cleanup
Application/Styling Steps
- Apply two coats of the greige gel polish, curing after each.
- Using a liner brush, carefully paint the no-wipe top coat only on the tip of the nail in a French or V-shape. Cure fully. The rest of the nail should remain tacky.
- Dip your silicone applicator into the silver chrome powder and rub it firmly onto the cured top coat area. The powder will only stick to the non-tacky, cured top coat.
- Use a soft, dry brush to dust away all excess powder.
- Seal the entire nail, including the chrome tip, with another layer of top coat and cure.
Pro-Tip: For an even sharper line, apply the no-wipe top coat to the entire nail, cure it, then use a very fine brush with acetone to carefully wipe away the top coat from the area you don’t want the chrome on before applying the powder.

10. Formulate an Ivory Nail with Minimalist Line Art

Pin this for the ultimate minimalist and sophisticated holiday statement.
Products & Tools Used
- An ivory or warm off-white nail polish
- A highly pigmented black nail art polish or gel
- A very long, thin striping nail art brush
- A glossy or matte top coat
Application/Styling Steps
- Apply two coats of the ivory base polish and let it dry completely (or cure).
- Dip the entire length of your long striping brush into the black art polish.
- Position the tip of the brush where you want the line to start, lightly touch the nail, and pull the brush in one smooth, confident motion down or across the nail. Don’t press hard. Let the brush do the work.
- Allow the line to dry completely.
- Seal with your top coat of choice. A matte top coat can look particularly artistic with this design.
Pro-Tip: The key to a clean, single-stroke line is to load the brush with enough polish and commit to the motion. Hesitation causes wobbly lines. Practice on a piece of paper first to get a feel for the pressure and speed needed.

11. Create a “Turtledove” Gray with Delicate Pearl Accents

For timeless elegance, pin this beautiful pearl and gray nail idea.
Products & Tools Used
- A light, soft gray christmas nails polish (“turtledove gray”)
- Tiny, flat-backed nail art pearls
- A wax-tipped gem picker or a pair of tweezers
- Nail glue or a small bead of thick builder gel
- A no-wipe top coat
Application/Styling Steps
- Paint two coats of the gray polish and let dry (or cure).
- Place a tiny dot of nail glue or a small bead of builder gel where you want to place the pearl (e.g., centered near the cuticle).
- Using the wax-tipped picker, pick up a single pearl and gently press it into the glue/gel. If using builder gel, cure it now to secure the pearl.
- Carefully apply a no-wipe top coat around the pearl to seal it in without covering its luster.
- Cure one final time if you used any gel products.
Pro-Tip: To make sure your pearl is extra secure, use the “gel anchor” method. After placing the pearl in the builder gel and curing, take a very fine liner brush with more builder gel and “paint” a tiny ring around the base of the pearl, then cure again. This creates a secure setting.

Key Takeaways
- Embrace Understated Bases: The foundation of elegant neutral nails lies in sophisticated base colors like nude, beige, taupe, milky white, and soft gray. These colors provide a versatile canvas for any holiday occasion.
- Subtlety is Key for Accents: A festive feel is achieved through minimal accents. Focus on a single accent nail or delicate details like a champagne glitter fade, fine lines, or tiny gold foil flakes rather than overwhelming the nail.
- Texture Adds Dimension: Don’t be afraid to play with finishes. A matte top coat can offer a modern, velvety look, while 3D gels can create a cozy winter aesthetic with designs like the cable-knit sweater nail.
- Quality Tools Make a Difference: Achieving salon quality neutral nails at home is easier with the right tools. An ultra-fine liner brush, a wax-tipped gem picker, and nail art sponges are essential for precision.
- The Right Top Coat is Crucial: The final top coat defines the look. Use a high-shine top coat to make glitter and foil pop, a matte top coat for a chic, modern finish, and a no-wipe gel top coat when working with chrome powders.
- Longevity Comes from Prep: To make neutral nails last, proper nail preparation is non-negotiable. Always start with a clean, buffed nail plate and use a quality base coat designed to bond with your chosen polish system (regular, gel, or BIAB).
FAQs About neutral christmas nails
What are neutral nail colors for Christmas?
The best neutral nail colors for Christmas include a range of sophisticated, understated shades. Think milky white, soft beige, creamy nude, taupe, light gray, and dusty rose. You can also include muted metallics like champagne, rose gold, and soft silver. These colors provide an elegant base that feels festive without being overpowering.
How do you make neutral nails festive for Christmas?
You can make neutral nails festive by adding subtle, elegant accents. Popular methods include a fine glitter neutral nails ombré, delicate gold foil flakes, a single hand-painted snowflake or star, tiny pearl or rhinestone embellishments, or a modern French tip using a metallic or glitter polish. The key is to keep the accents minimal for a chic neutral christmas look.
Are short neutral Christmas nails popular?
Yes, short neutral Christmas nails are extremely popular and considered very chic. Designs like a simple nude with a gold foil flake, a matte finish with a tiny star, or a micro French tip work beautifully on shorter nail lengths. These styles emphasize a clean, polished, and practical look that is both elegant and easy to maintain.
What is the difference between neutral and nude nails?
“Neutral” is a broad category of color, while “nude” is a specific type of neutral. Nude polishes are specifically chosen to match or complement your skin tone. The neutral color family is much wider, including whites, grays, taupes, beiges, and soft pinks that aren’t necessarily matched to your skin.
Can you wear neutral nails for Christmas?
Absolutely. Wearing neutral nails for Christmas is a major trend for those who prefer a more sophisticated, timeless, and versatile holiday style. It’s an elegant choice that complements any festive outfit and transitions perfectly from the holidays into the rest of the winter season, embodying a “quiet luxury” aesthetic.
How do you get long-lasting neutral nails?
To get a long-lasting neutral manicure, proper preparation and sealing are essential. Start by cleaning the nail plate with alcohol to remove oils. Use a quality base coat, apply thin coats of polish, and allow each layer to dry. Most importantly, finish with a high-quality top coat and be sure to “cap” the free edge of the nail to prevent chipping.
What nail shapes suit neutral Christmas designs?
Virtually all nail shapes suit neutral Christmas designs, as the style is defined by color and subtlety, not shape. However, almond neutral christmas nails and soft coffin shapes are very popular for elegant looks, while short square neutral nails are perfect for a clean, modern aesthetic. The best shape is the one you feel most comfortable and confident wearing.
Is glitter neutral for Christmas nails?
Yes, glitter can absolutely be neutral when used correctly. The key is to choose fine, subtle glitters in neutral tones like champagne, soft gold, silver, or iridescent white. Applying it as a delicate ombré, a thin line, or on a single accent nail maintains a sophisticated and subtle shimmer christmas nails look rather than being overtly flashy.
What’s the best top coat for neutral Christmas nails?
The best top coat depends on the desired finish. For glitter or foil designs, a thick, gel-like glossy top coat is best to create a smooth surface. For sweater nails or minimalist art, a matte top coat can provide a chic, modern texture. For chrome powder, a no-wipe gel top coat is required for the application process.
How do you do neutral Christmas nails at home?
To do neutral Christmas nails at home, start with a neutral base color like beige or soft white. For a simple design, use a dotting tool to add small gold dots near your cuticle. For a glitter look, use a makeup sponge to dab glitter on your nail tips. For line art, use a thin nail art brush. Always finish with a top coat.
Final Thoughts on Your Classy Holiday Manicure
This 2026, embracing neutral christmas nails is more than a style choice; it’s a statement of sophisticated, timeless elegance. As we’ve explored through these 11 designs, moving beyond the traditional allows for a world of creativity that is both personal and incredibly chic. From the pearlescent shine of glazed white nails to the cozy texture of a sweater design, these ideas prove that subtlety can make the biggest impact.
The beauty of a classy neutral christmas manicure is its versatility. It enhances your festive look without demanding all the attention, pairing beautifully with everything from a cozy sweater to an elegant holiday dress. We encourage you to choose a design that speaks to you, gather your tools, and create a manicure that makes you feel polished and confident all season long.
What’s your favorite way to wear neutral nails for the holidays? Share your ideas or questions in the comments below.
Last update on 2026-04-05 / Affiliate links / Images from Amazon Product Advertising API