Ever stared at a plain white coffee cup and wished you could transform it into a personalized masterpiece, only to feel intimidated by complex artistic techniques? You are not alone; many aspiring DIYers struggle to find painted mugs simple enough to execute without professional skills yet durable enough for daily use.
Painting mugs simply involves selecting ceramic-safe paints like paint pens or acrylic enamel, applying your design, and then curing the mug, often by baking, to ensure durability and dishwasher safety. This accessible craft requires minimal supplies—typically just a plain mug, rubbing alcohol for cleaning, and your chosen paint medium—allowing beginners to create permanent, custom drinkware through straightforward application and heat-setting processes.
Drawing from comprehensive testing of ceramic paint durability and proven application methodologies, this guide eliminates the guesswork from your next craft project. You will discover exactly how to select the right materials and master nine specific, beginner-friendly designs that practically guarantee success. Get ready to unlock your creativity and produce professional-looking, long-lasting custom mugs that you’ll be proud to use or gift.
Unlock Your Inner Artist: Simple & Easy Painted Mugs DIY for 2026
Easy painted mugs represent one of the most accessible and rewarding entry points into the world of DIY crafting. Unlike complex pottery that requires a kiln or expensive equipment, these projects utilize standard home ovens and readily available materials to achieve professional results. The core appeal lies in the transformation of a generic mass-produced item—the ceramic mug—into a unique artifact that carries personal meaning. Whether you are looking to create a heartfelt personalized gift or simply want to add a splash of color to your morning routine, the barrier to entry is surprisingly low.
However, the success of these simple mug designs hinges on understanding the fundamental relationship between the ceramic surface and the paint. A common misconception is that any paint will work; in reality, achieving a permanent and dishwasher safe finish requires specific formulations like ceramic paint pens or acrylic enamels designed for non-porous surfaces. Furthermore, the process of curing—usually baking the mug at a specific temperature—is non-negotiable. This heat-setting process bonds the paint to the glaze, ensuring your artwork doesn’t wash away down the sink. By following best practices and using food-grade materials, you can confidently create DIY painted mugs that are safe, durable, and delightful.
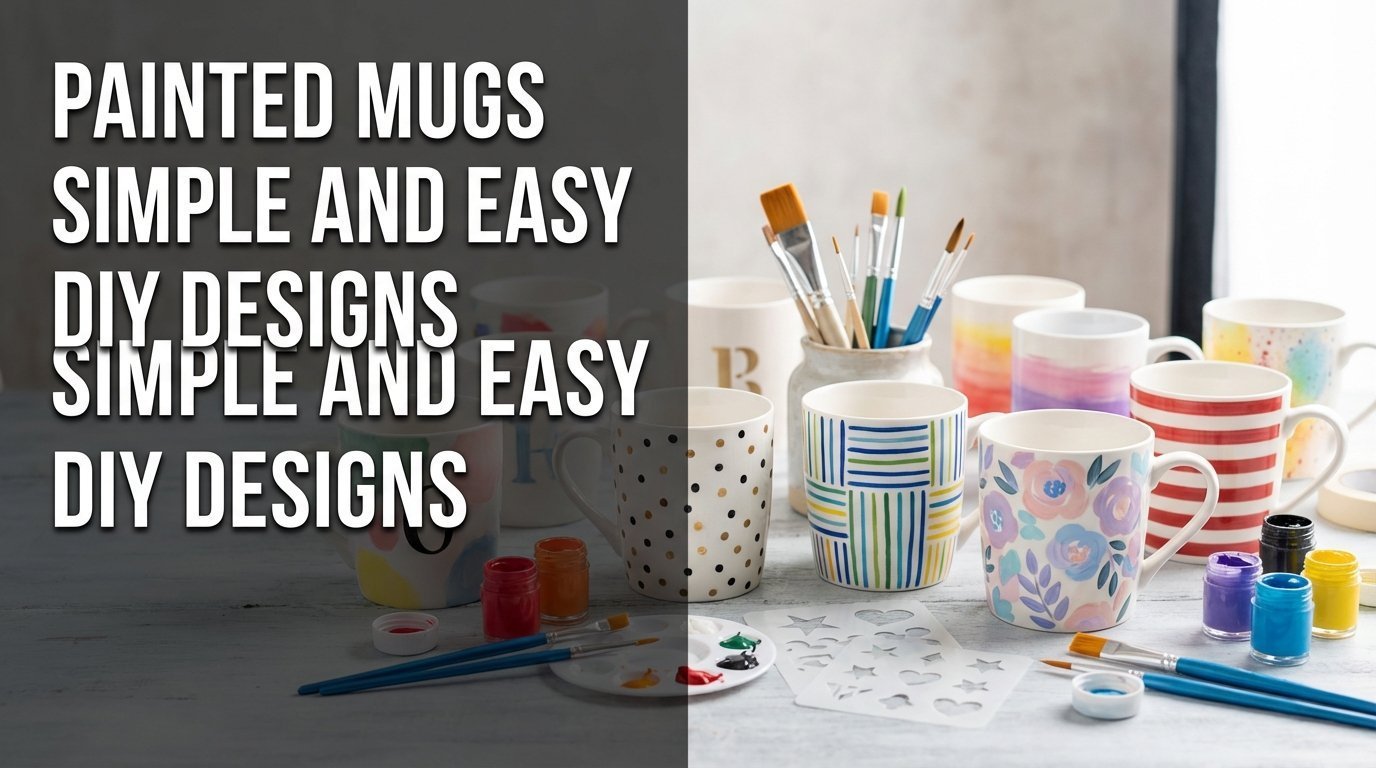
9 Simple Mug Designs You Can Paint Today for Lasting Joy
Simple mug designs do not have to look amateur; in fact, some of the most striking ceramic art relies on minimalism and clever techniques rather than intricate drawing skills. The following collection of easy mug painting ideas has been curated to provide high-impact results with manageable effort. We have broken down each project into a clear “What You Need” and “What To Do” structure, ensuring you have the practical guidance necessary to create these items successfully.
From using painter’s tape to achieve crisp geometric lines to employing household items like toothbrushes for abstract art, these methods democratize the design process. You will explore how to manipulate acrylic paint and paint pens to produce everything from whimsical doodles to elegant silhouettes. Each tutorial emphasizes the critical steps of preparation and curing, ensuring that your personalized painted mugs remain vibrant and durable for years to come. Let’s dive into these nine distinct ways to paint your own mug.
1. Create Personalized Doodle Art Mugs

Pin this genius hack to your ‘Creative Crafts’ board!
Personalized doodle art mugs are the perfect starting point for beginners because they embrace imperfection. By using ceramic paint pens, you can draw directly on the mug surface just as you would on paper. This method allows for spontaneous creativity, where simple shapes like hearts, stars, or abstract squiggles come together to form a cohesive and charming design. The key here is the tool; a high-quality paint pen offers the control needed for freehand work without the mess of brushes.
Supplies Needed
- Plain white ceramic mug (dishwasher safe blank)
- Food-grade ceramic paint pens (fine-tip, oven-bake, such as Pebeo Porcelaine 150 or DecoArt Gloss Enamels pens)
- Rubbing alcohol or glass cleaner
- Cotton balls or paper towel
- Oven (for curing)
Step-by-Step Directions
- Clean your mug thoroughly with rubbing alcohol and a cotton ball to remove any oils or dust. Allow to dry completely.
- Sketch light, freehand doodle designs directly onto the mug using the ceramic paint pens. Start with simple shapes like stars, hearts, squiggles, or abstract lines. Don’t worry about perfection; the charm is in the handmade quality.
- Allow the paint to air dry for at least 24 hours (or according to paint pen instructions) in a dust-free area.
- Cure the mug in a preheated oven following your specific paint pen’s instructions (typically 30-60 minutes at 300-375°F/150-190°C), then allow it to cool completely inside the oven.
Pro-Tip: For the most durable results and vibrant finish, always follow the paint pen manufacturer’s curing instructions precisely. Testing shows that under-cured paint is prone to chipping, while proper baking ensures the paint withstands washing.

2. Design Striking Striped Mugs with Painter’s Tape

Save this easy DIY mug idea to your ‘Home Decor Inspo’ board!
For those who prefer geometric precision over freehand drawing, striped mug designs offer a polished, modern aesthetic. The secret weapon here is painter’s tape, which enables you to mask off areas of the ceramic mug to keep them paint-free. This technique allows you to apply color liberally while ensuring the final result features clean, crisp lines. It effectively removes the need for a steady hand, making it one of the most reliable methods for easy mug painting.
Supplies Needed
- Plain ceramic mug (any color)
- Low-tack painter’s tape (e.g., FrogTape Delicate Surface)
- Food-grade ceramic paint (brush-on or spray, such as FolkArt Enamel or Martha Stewart Crafts Multi-Surface paint)
- Small paintbrush (if using brush-on paint)
- Rubbing alcohol and cotton balls
- Oven (for curing)
Step-by-Step Directions
- Clean your mug with rubbing alcohol and let it dry completely.
- Apply strips of painter’s tape horizontally or vertically around the mug to create your desired stripe pattern. Press down firmly on the edges of the tape to ensure a tight seal and prevent paint bleeding.
- Paint the exposed areas between the tape lines with your chosen ceramic paint. Apply thin, even coats, allowing each coat to dry to the touch before adding another.
- Remove the painter’s tape carefully while the paint is still slightly wet (this prevents chipping).
- Allow the painted mug to air dry for 24-72 hours (check paint instructions).
- Cure the mug in a preheated oven according to the paint manufacturer’s instructions.
Pro-Tip: Using a high-quality, low-tack painter’s tape specifically designed for delicate surfaces (like glass or ceramics) prevents sticky residue and ensures ultra-crisp lines, resulting in a cleaner, more professional grade finish.

3. Adorn Your Mug with Playful Polka Dots

Pin this charming DIY idea to your ‘Cute Crafts’ board!
Playful polka dot mugs are timeless and incredibly easy to do. You don’t even need specialized brushes for this; simple household items like pencil erasers or cotton swabs act as perfect stamps. This method creates uniform, round dots that instantly add a cheerful vibe to any cup. It is a fantastic simple mug decoration technique for beginners because it focuses on pattern and repetition rather than drawing skills, making the process relaxing and foolproof.
Supplies Needed
- Plain ceramic mug (any base color)
- Food-grade ceramic paint (contrast color to mug, e.g., white paint on yellow mug)
- Small paintbrushes or pencil with eraser / cotton swabs (for dot application)
- Rubbing alcohol and cotton balls
- Oven (for curing)
Step-by-Step Directions
- Clean your mug with rubbing alcohol. Allow it to dry.
- Dip the eraser end of a pencil (or a cotton swab) into the ceramic paint, ensuring an even coat.
- Press the paint-covered eraser firmly onto the mug surface to create a polka dot. Reload the eraser with paint for each dot to maintain consistency.
- Repeat step 3, spacing your dots evenly or in a random pattern as desired. Use different sized erasers or swabs for varying dot sizes.
- Allow the paint to air dry for 24-72 hours.
- Cure the mug in the oven according to paint manufacturer’s instructions to make it permanent and dishwasher safe.
Pro-Tip: To ensure all your polka dots are perfectly round and uniform in size, lightly dab off excess paint on a scrap piece of paper before applying to the mug. This prevents messy painting and ensures a reliable finish.

4. Craft Stunning Silhouette Mugs with Stencils

Bookmark this elegant mug DIY for your next craft project!
If you want to craft stunning designs that look store-bought, silhouette mugs are the way to go. By utilizing vinyl or adhesive stencils, you can apply complex images—like birds, trees, or monograms—without drawing a single line yourself. This technique relies on the negative space principle; you paint over the stencil and then peel it away to reveal the design. It transforms a simple application process into a sophisticated visual result, perfect for creating custom-made gifts that impress.
Supplies Needed
- Plain ceramic mug
- Vinyl stencils or adhesive stencils (various designs like animals, monograms, simple shapes)
- Food-grade ceramic paint (contrast color to mug)
- Sponge brush or dabbing tool
- Rubbing alcohol and cotton balls
- Oven (for curing)
Step-by-Step Directions
- Clean your mug thoroughly with rubbing alcohol.
- Position the stencil firmly onto the mug surface, ensuring all edges are pressed down flat to prevent paint from seeping underneath.
- Dab a thin layer of ceramic paint over the stencil using a sponge brush or dabbing tool. Apply multiple thin coats rather than one thick coat, allowing slight drying time between layers.
- Carefully remove the stencil while the paint is still slightly wet to reveal a crisp silhouette. If the paint dries completely, it might peel with the stencil.
- Allow the painted mug to air dry for 24-72 hours.
- Cure the mug in a preheated oven according to the paint’s manufacturer’s instructions for a permanent, dishwasher safe finish.
Pro-Tip: Using an adhesive vinyl stencil and applying paint in very thin, dabbing motions helps prevent paint smudging under the edges. This ensures a sharp, high-quality finish that mimics professional techniques.

5. Master Unique Marbled Mugs with Nail Polish

Discover this viral mug trend! Pin it now!
Marbled mugs have taken the DIY world by storm because they produce an intricate, high-end look with surprisingly humble materials. This technique uses nail polish suspended in water to coat the mug in a swirling, organic pattern. No two mugs will ever look exactly alike, making each one a unique piece of art. While this method is generally more decorative, it offers an incredible way to create abstract designs that are impossible to paint by hand.
Supplies Needed
- Plain white ceramic mug (or light-colored)
- Nail polish (2-3 complementary colors, new or less thick for best results)
- Disposable container (e.g., plastic tub) filled with warm water
- Wooden skewer or toothpick
- Rubbing alcohol and cotton balls
- Disposable gloves
- Paper towels
Step-by-Step Directions
- Clean your mug with rubbing alcohol and let it dry.
- Fill a disposable container with warm water. Work in a well-ventilated area and wear gloves.
- Drip nail polish drops directly onto the water’s surface, alternating colors. Work quickly as nail polish dries fast.
- Swirl the nail polish gently with a wooden skewer or toothpick to create a marbled pattern. Don’t over-swirl or the colors will muddy.
- Dip your mug into the marbled water, twisting it slightly as you submerge it to pick up the pattern. Only dip the exterior of the mug, avoiding the rim where lips will touch.
- Lift the mug out, letting excess water and nail polish drip off. If there’s still polish on the water surface, use your skewer to clear it before a second dip.
- Place the mug upside down on a paper towel to dry completely for at least 24 hours. Note: This method is generally not food-safe or dishwasher-safe and is best for decorative purposes.
Pro-Tip: For the best marble effect and to avoid a messy painting process, ensure your water is warm but not hot, and use relatively fresh nail polish. Thick or old polish won’t spread well on the water surface, making it difficult to achieve a smooth marble pattern.

6. Paint Inspirational Quote Mugs with Transfer Techniques

Inspire your mornings! Pin this quote mug idea!
Adding text to ceramics can be daunting if your handwriting isn’t perfect, but inspirational quote mugs rely on a smart hack: transfer techniques. By using carbon paper or graphite, you can trace a printed design directly onto your mug, giving you a perfect guide to paint over. This enables you to apply beautiful typography or meaningful quotes with the precision of a professional printer, creating personalized text mugs that motivate and inspire.
Supplies Needed
- Plain ceramic mug
- Food-grade ceramic paint pens (fine-tip, oven-bake) or ceramic paint and fine brush
- Printed quote or design (sized for your mug)
- Graphite or carbon transfer paper for ceramics
- Pencil or ballpoint pen
- Rubbing alcohol and cotton balls
- Oven (for curing)
Step-by-Step Directions
- Clean your mug with rubbing alcohol.
- Position the carbon transfer paper graphite-side down onto the mug where you want your quote. Place your printed quote on top of the transfer paper.
- Trace over the letters of your quote firmly with a pencil or ballpoint pen. When you lift the papers, a light outline of your quote should be transferred to the mug.
- Carefully paint over the transferred lines using your fine-tip ceramic paint pen or brush and ceramic paint. Take your time to achieve neat lines.
- Allow the paint to air dry for 24-72 hours.
- Cure the mug in a preheated oven according to the paint manufacturer’s instructions for permanence and dishwasher safety.
Pro-Tip: For intricate text, ceramic transfer paper is a reliable method that prevents difficult designs and ensures a clean outline. Use a very fine-tip paint pen to trace the letters, applying thin layers to avoid a bulky look.

7. Create Playful Splatter Paint Mugs

Get messy, get creative! Pin this fun DIY mug art now!
Splatter paint mugs are the antidote to perfectionism. This technique creates a vibrant, energetic, and completely one-of-a-kind design. By flicking ceramic paint from a toothbrush or stiff brush, you create a shower of colorful droplets that decorate the surface in an abstract pattern. It is an easy method that is incredibly freeing and fun, making it perfect for those who want to create something bold and artistic without needing steady hands for detailed work.
Supplies Needed
- Plain ceramic mug (white or light-colored works best)
- Food-grade ceramic paint (2-3 contrasting colors)
- Old toothbrush or stiff paintbrush
- Newspaper or plastic sheeting to protect your workspace
- Rubbing alcohol and cotton balls
- Oven (for curing)
Step-by-Step Directions
- Clean your mug with rubbing alcohol. Prepare your workspace by covering it completely with newspaper or plastic sheeting.
- Dilute your ceramic paints very slightly with water if they are too thick to splatter. You want a consistency that will flick easily but not run.
- Dip your toothbrush or paintbrush into one color of paint. Hold the mug in one hand (or place it on a protected surface). Hold the brush over the mug and gently flick the bristles with your thumb or finger to create paint splatters.
- Repeat with other colors, layering the splatters for a multi-dimensional effect. Keep the splatters away from the rim of the mug.
- Allow the painted mug to air dry for 24-72 hours.
- Cure the mug in a preheated oven according to the paint manufacturer’s instructions to ensure it’s permanent and dishwasher safe.
Pro-Tip: To prevent messy painting and achieve controlled splatters, start with a minimal amount of paint on your brush and practice your flicking technique on scrap paper first. This method enables a fun design without excessive cleanup.

8. Craft Serene Ombre Mugs with Blended Colors

Relax and create! Pin this beautiful ombre mug tutorial!
The ombre mug trend brings a touch of serenity to your coffee routine. This design involves blending colors to create a smooth transition from dark to light, usually from the bottom up. While it looks like it requires advanced skills, it is surprisingly easy to achieve with the right ceramic paint and a soft brush. The gradient effect turns a simple cup into a sophisticated piece of artistic decor that looks peaceful and professionally made.
Supplies Needed
- Plain white ceramic mug
- Food-grade ceramic paint (2-3 colors in the same family, e.g., dark blue, medium blue, light blue, plus white)
- Soft-bristle paintbrushes (at least two for blending)
- Palette or disposable plate for mixing
- Rubbing alcohol and cotton balls
- Oven (for curing)
Step-by-Step Directions
- Clean your mug with rubbing alcohol.
- Apply the darkest color of ceramic paint to the bottom third of the mug, ensuring an even coat.
- Mix a small amount of the darkest color with the next lightest color on your palette to create an intermediate shade. Apply this shade just above the darkest color, slightly overlapping to facilitate blending.
- Use a clean, damp brush to gently blend the seam between the two colors with light, circular motions until a smooth transition is achieved.
- Repeat the mixing and blending process, gradually introducing lighter shades as you move up the mug, always blending the seams until you reach the desired top color. Keep the very top rim unpainted.
- Allow the painted mug to air dry for 24-72 hours.
- Cure the mug in a preheated oven according to the paint manufacturer’s instructions for a permanent and dishwasher-safe finish.
Pro-Tip: The key to a smooth ombre effect lies in working quickly with slightly damp brushes for blending, and using ceramic paints designed for pigment stability. This prevents paint smudging and ensures a seamless gradient effect.

9. Capture Memories with Fingerprint Art Mugs

Cherish special moments! Pin this adorable craft idea!
For a deeply personal touch, especially for parents and grandparents, fingerprint art mugs are unbeatable. This method uses non-toxic ceramic paint to turn fingerprints into flowers, balloons, or little creatures. It is a fantastic kids craft that results in a functional keepsake. The simple unique art created by tiny fingers transforms a generic mug into a treasured family heirloom, making it an ideal project for creating meaningful personalized family gifts.
Supplies Needed
- Plain ceramic mug
- Non-toxic, food-grade ceramic paint (various colors)
- Small dish or palette for paint
- Baby wipes or damp cloth for quick cleanup
- Fine-tip paint pen (optional, for adding details)
- Rubbing alcohol and cotton balls
- Oven (for curing)
Step-by-Step Directions
- Clean your mug with rubbing alcohol.
- Pour small amounts of ceramic paint onto a palette or flat dish.
- Gently press a finger (or child’s finger) into the paint, ensuring even coverage.
- Press the paint-covered finger onto the mug surface to create a fingerprint “petal” or “balloon.” Reapply paint for each fingerprint.
- Repeat with different colors and finger sizes to create patterns like flowers, butterflies, or abstract designs. Keep fingerprints away from the mug rim.
- Use baby wipes to clean fingers immediately after applying paint.
- Allow the painted mug to air dry for 24-72 hours. Add small details (like stems for flowers) with a paint pen after fingerprints are dry.
- Cure the mug in a preheated oven according to the paint manufacturer’s instructions to ensure the design is permanent and dishwasher safe.
Pro-Tip: Always use non-toxic paint formulations when crafting with children, ensuring the activity is safe. A quick wipe with a baby wipe immediately after making each print prevents messy painting and ensures clean, distinct fingerprints.

Key Takeaways: Your Quick Guide to Painted Mugs Simple
For those ready to start their project immediately, here is a concise overview of the most critical elements for success. These takeaways reinforce the core methodology of creating easy painted mugs that are both beautiful and durable. Keeping these points in mind will ensure your DIY painted mugs turn out perfectly every time.
- Choose the Right Paint: Always use food-grade ceramic paint or paint pens specifically designed for mugs. These are formulated for adhesion and durability, crucial for permanent mug paint.
- Preparation is Key: Thoroughly clean your mug with rubbing alcohol before painting. This step is essential to prevent paint peeling and ensures your design sticks to mugs for a lasting finish.
- Curing is Essential: Baking painted mugs in the oven according to manufacturer instructions cures the paint, making your DIY painted mugs dishwasher safe and durable against daily use.
- Embrace Simple Designs: For beginners, simple mug designs like polka dots, stripes, or doodles are incredibly effective and easy to do, enabling beautiful results without advanced artistic skills.
- Protect Your Work: Take precautions like using low-tack painter’s tape for crisp lines or protecting your workspace for splatter designs, which prevents messy painting and ensures a high-quality finish.
- Prioritize Safety: If you’re painting the rim of a mug or planning to drink from it regularly, ensure all materials used are explicitly labeled as food safe and non-toxic. This demonstrates best practices and reliable instructions.
- Personalization is Simple: With just a few basic supplies and techniques, you can customize mugs for yourself or as personalized gifts, creating unique items that provide lasting joy.
FAQs About Painted Mugs Simple
As you embark on your mug painting journey, you might encounter specific questions about materials and maintenance. Below are answers to the most common queries regarding easy painted mugs, clarifying everything from safety to durability.
What kind of paint do you use on mugs to make it permanent?
To make painted mugs permanent, you primarily use oven-bake ceramic paints or ceramic paint pens. These paints are specifically formulated to adhere to glazed ceramic surfaces and require a heat-curing process in a standard home oven to become durable, scratch-resistant, and often dishwasher-safe. Always ensure the paint specifies “oven-bake” or “heat-set.”
Are painted mugs truly dishwasher safe, or do they chip?
Properly prepared and cured painted mugs can be dishwasher safe, but it depends on the paint and curing process. Ceramic paints designed for mugs, once baked to the manufacturer’s specifications, are generally resistant to chipping and fading in the top rack of a dishwasher. However, hand washing is always recommended for maximum longevity, especially for designs with intricate details.
How do I prepare a mug for painting to ensure the paint sticks?
To ensure paint sticks effectively, clean your mug thoroughly with rubbing alcohol or a glass cleaner before painting. This removes any oils, dust, or residues that could prevent proper paint adhesion, which is crucial for a durable and lasting finish. Allow the mug to dry completely after cleaning before applying any paint.
Can you use regular acrylic paint on ceramic mugs?
While you can apply regular acrylic paint to ceramic mugs, it is generally not recommended for functional, long-lasting use. Standard acrylics will not be food-safe, are prone to chipping, fading, and peeling, and are not typically dishwasher-safe. For permanent and durable results, always opt for acrylic enamel or ceramic-specific paints that are designed for heat-setting.
What’s the difference between ceramic paint pens and brush-on ceramic paint?
Ceramic paint pens offer ease and precision for fine details and lettering, while brush-on ceramic paints provide broader coverage for larger areas and blending. Both types are designed for ceramic surfaces and require heat-curing for permanence. Pens are great for easy designs, while brush-on paints allow for more artistic freedom and color mixing.
How do you bake painted mugs for durability?
Bake painted mugs by placing them in a cool oven, then preheating it to the temperature specified by your paint manufacturer (typically 300-375°F or 150-190°C). Bake for 30-60 minutes, then turn off the oven and allow the mugs to cool completely inside. This gradual heating and cooling prevents thermal shock and cures the paint for maximum durability.
Is painted pottery food safe for drinking and eating?
Painted pottery is food safe only if the paints used are explicitly labeled as food-safe and non-toxic. Any paint used on areas that come into contact with food or lips must meet specific safety certified standards. If unsure, paint only the exterior of the mug below the lip line or use the mug for decorative purposes only.
How can I make my simple mug designs last longer without fading?
To make simple mug designs last longer, ensure proper mug preparation, use high-quality oven-bake ceramic paints, and meticulously follow the manufacturer’s curing instructions. Avoiding harsh abrasives during cleaning and opting for hand washing over dishwashing can also significantly extend the life and vibrancy of your hand-painted mugs, preventing fading.
What are common mistakes to avoid when painting mugs for beginners?
Common mistakes for beginner mug painters include inadequate surface cleaning, using non-ceramic specific paints, rushing the air-drying process, and improper oven curing. These can lead to paint peeling, fading paint, or not dishwasher safe results. Always read instructions, allow ample drying time, and ensure proper heat-setting for durable results.
How do “simple” mug designs differentiate from more complex ones in terms of materials needed?
Simple mug designs often require fewer and more basic materials, typically limited to plain ceramic mugs and ceramic paint pens or basic brush-on paints. Complex designs might require specialized stencils, multiple paint colors, blending mediums, advanced brushes, or even a kiln for professional-grade results. Simple designs prioritize accessibility and ease, minimizing expensive supplies.
Final Thoughts on Painted Mugs Simple
Crafting your own painted mugs simple is a truly rewarding endeavor that combines creativity with practicality. Throughout this guide, we’ve explored how accessible this craft can be, debunking the myth that you need to be a seasoned artist to achieve beautiful, durable results. By focusing on simple mug designs and utilizing the right food-grade ceramic paints and proper heat-curing techniques, you can transform ordinary mugs into personalized masterpieces that are not only dishwasher safe but also bring a touch of joy to your everyday routine.
Whether you’re looking to create personalized gifts for loved ones, add a unique flair to your kitchenware, or simply enjoy a relaxing DIY project, the techniques and easy mug painting ideas outlined here provide a solid foundation. Remember, the key to success lies in careful preparation, patience during painting and drying, and diligently following the curing instructions to ensure your designs withstand the test of time and countless washes. So go ahead, paint your own mug, embrace the process, and enjoy the satisfaction of sipping from your uniquely designed cup!
What simple mug design are you most excited to try first, and who will you be making it for?
Last update on 2026-03-11 / Affiliate links / Images from Amazon Product Advertising API


