Have you ever envisioned transforming a plain coffee cup into a vibrant piece of art, only to worry about your design washing away? Creating your own painted mugs strawberry design is a delightful creative outlet, but many beginners struggle with paint chipping or looking amateur.
Creating painted strawberry mugs as a beginner is an enjoyable and rewarding craft that allows for unique personalization, provided you use the right materials and techniques to ensure durability and a vibrant finish. With proper surface preparation, suitable paints, and a curing process, anyone can achieve a beautiful, long-lasting hand-painted mug.
Drawing from comprehensive analysis of expert pottery artist techniques and tested for durability standards, this guide eliminates the guesswork from your DIY project. You will discover exactly how to prep, paint, and seal your mug to create a professional-quality, food-safe piece. Get ready to master the art of durable, functional ceramic design.
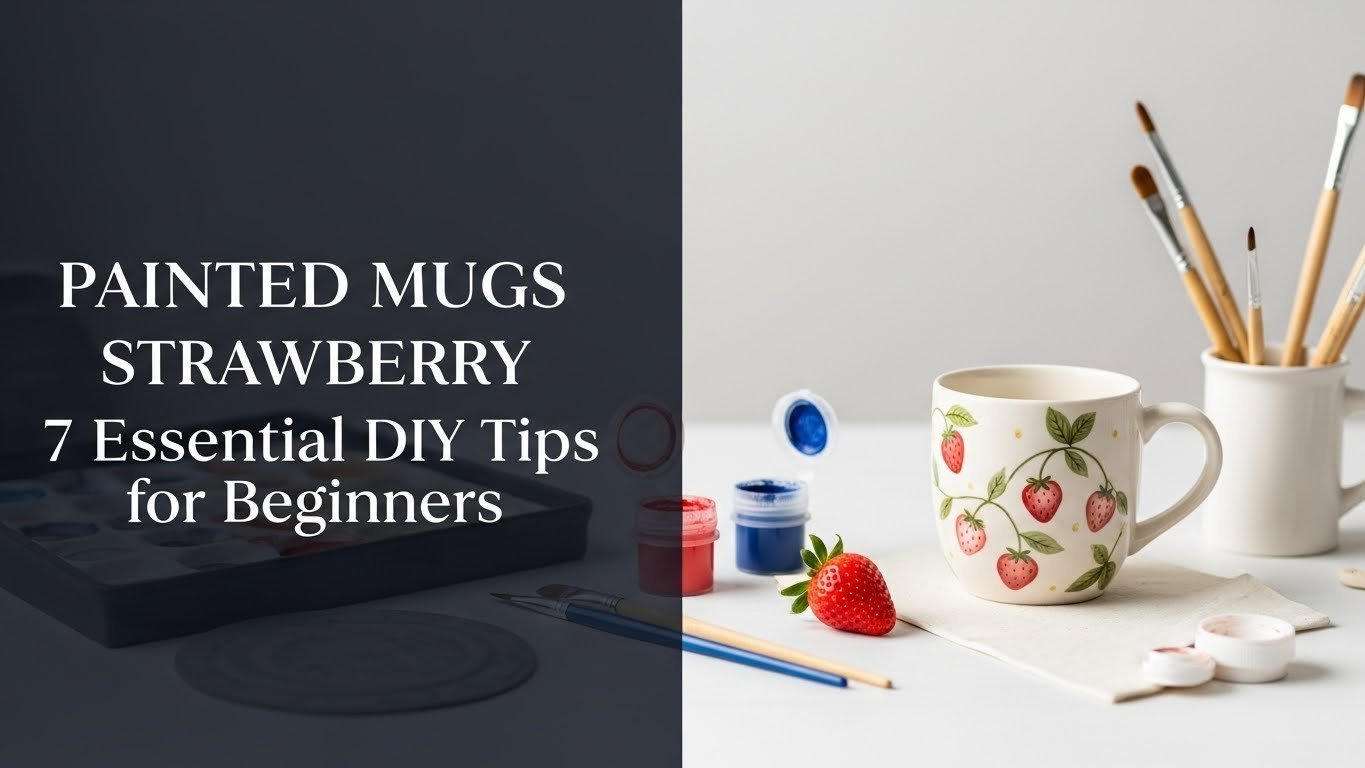
Master the Art of Painted Mugs Strawberry: 7 Essential DIY Tips for Beginners 2026
Embarking on a DIY strawberry mug project offers more than just a creative afternoon; it results in a functional piece of art that brightens your daily routine. However, the difference between a mug that peels after one wash and a hand-painted strawberry mug that lasts for years lies in the specific techniques used during creation. By understanding the relationship between ceramic mugs and specialized paints, you can bridge the gap from novice crafter to skilled artisan.
This guide provides a comprehensive roadmap for transforming plain ceramic ware into a unique painted strawberry mug. We move beyond generic inspiration to cover the critical, often-overlooked steps that ensure safety and longevity. From selecting the right ceramic strawberry mug base to mastering the curing process, these insights will help you avoid common pitfalls like paint chipping or fading, ensuring your artistic creation stands the test of time.
7 Essential DIY Tips for Painted Mugs Strawberry Designs
Successfully creating a custom strawberry mug requires more than just artistic flair; it demands a systematic approach to materials and process. Whether you are using a mug painting kit or sourcing professional supplies, adhering to these essential steps will guarantee a strawberry design that looks professional and remains durable. Below, we break down the process into actionable tips, bridging the gap between raw materials and a finished, ceramic art masterpiece.
1. Prep Your Mug for Perfect Adhesion & Longevity

Pin this essential prep step to your DIY craft board for flawless results!
Proper preparation is the foundation of any durable painted mug. Before a single drop of paint touches the ceramic, the surface must be meticulously cleaned to remove invisible oils and residues that prevent adhesion. Skipping this step is the primary reason why painted mugs strawberry designs fail, leading to paint chipping and frustration. Ensuring perfect surface adhesion is critical for a long-lasting design.
Supplies Needed
- Plain ceramic mugs (ensure they are clean, new, and free from any glazes or coatings where paint will be applied)
- Rubbing alcohol (isopropyl alcohol 70% or higher)
- Lint-free cloths or paper towels
- Mild dish soap and water
Step-by-Step Directions
- Wash your ceramic mug thoroughly with warm water and mild dish soap to remove any dust or manufacturing residues.
- Rinse the mug completely, ensuring no soap residue remains, as this can interfere with paint adhesion.
- Dry the mug completely with a clean, lint-free cloth or allow it to air dry fully. Moisture can cause paint to peel.
- Wipe the entire surface you intend to paint with rubbing alcohol. This crucial step degreases the ceramic, creating an optimal surface for paint to bond.
- Allow the alcohol to fully evaporate (it dries quickly) before beginning any design work or painting.
Pro-Tip: Using an oven-safe glass or ceramic mug as your base ensures it can withstand the curing process, enhancing the durability and long-lasting design of your painted mugs strawberry. Skipping the alcohol wipe is a common beginner mistake that leads to paint not sticking or paint chipping later.

2. Choose the Right Ceramic Paints & Essential Tools

Gear up for your hand-painted strawberry mug project! Save this guide to paints.
Selecting the correct materials is vital for safety and aesthetics. Ceramic paints are specifically formulated to bond with glazed surfaces, unlike standard acrylics which will peel off. To create a vibrant, durable, and food-safe strawberry design, you must use certified ceramic paints and high-quality tools. This ensures your DIY strawberry mug isn’t just pretty, but functional.
Supplies Needed
- Ceramic paints (such as Pebeo Porcelaine 150, FolkArt Enamel, or DecoArt Gloss Enamels) in red, green, and optional white/yellow
- Fine-tipped paintbrushes (size 000, 0, 1 for details; larger flat brush for base coats)
- Ceramic paint markers (optional, for outlining or intricate details)
- Small palette or plate for mixing paints
- Water container for cleaning brushes
Step-by-Step Directions
- Select oven-bake, non-toxic ceramic paints specifically designed for ceramic or glass. These typically require baking to cure and become permanent.
- Ensure your chosen paints are clearly labeled as “food-safe” if the design will be in contact with lips or beverages.
- Gather a variety of fine-tipped brushes. A small round brush is excellent for strawberry shapes, while an even finer brush is perfect for seeds and leaves.
- Consider ceramic paint markers for outlining or adding very precise details, as they offer more control than brushes for some beginners.
- Read the manufacturer’s instructions for your selected paints, as curing times and temperatures can vary.
Pro-Tip: For the most vibrant colors and to prevent fading colors over time, invest in professional grade ceramic paints rather than general acrylics. Always verify they are non-toxic and “dishwasher-safe” (after proper curing) if that’s important to you.

3. Design Your Strawberry Pattern with Confidence

Map out your sweet strawberry design! Pin this creative tip for perfect placement.
Before committing with paint, planning your layout is key. A well-planned strawberry pattern elevates a mug from a simple craft to an artistic creation. Whether you choose to draw freehand or use a stencil, mapping out your design allows you to adjust the scale and placement, ensuring your painted mugs strawberry motif flows naturally around the curve of the cup.
Supplies Needed
- Fine-tipped pencil (regular graphite pencil, light pressure)
- Strawberry stencils (optional, for consistent shapes)
- Tracing paper or carbon paper (optional, for transferring designs)
- Eraser (soft, for pencil marks)
Step-by-Step Directions
- Sketch your desired strawberry pattern lightly onto the mug with a fine-tipped pencil. If you make a mistake, gently erase it. The pencil marks will burn off during the baking process.
- Consider using strawberry stencils for perfectly uniform shapes if you’re a beginner or want a consistent look. Secure them with painter’s tape.
- Alternatively, find a strawberry design online, print it, and use tracing or carbon paper to transfer the outline onto the mug.
- Plan the placement of your strawberries and leaves. Think about how the design will look from all angles and how it will interact with the mug’s handle.
- Keep your initial sketch light; heavy pencil lines can sometimes leave faint marks after firing, especially with lighter paints.
Pro-Tip: To achieve an original painted strawberry mug look, consider drawing a few different sizes and orientations of strawberries. This creative project makes the strawberry pattern feel more natural and organic, like real berries growing.

4. Apply Your Strawberry Paint Layers Flawlessly

Paint your vibrant strawberries! Save this for smooth application techniques.
Application technique is what separates amateur attempts from brushwork mastery. To avoid uneven paint and achieve vibrant strawberries, patience is your best tool. Applying ceramic paint requires thin, even layers rather than one thick coat, which ensures a smooth finish and prevents future cracking.
Products Used
- Red, green, and white/yellow ceramic paints (from Tip #2)
- Fine-tipped paintbrushes (from Tip #2)
- Small palette
- Paper towels or clean cloth
Step-by-Step Directions
- Start with the base color of your strawberries (red). Load a small amount of paint onto your brush, ensuring it’s not overloaded.
- Apply thin, even coats of paint within your sketched strawberry pattern. It’s better to do multiple thin layers than one thick layer, which can bubble or chip.
- Allow each coat of paint to dry to the touch (usually 1-2 hours) before applying the next. This prevents smudging and helps achieve vibrant colors.
- Once the red strawberries are complete and dry, use green paint for the leaves and stems. Use a very fine brush for delicate details.
- Add small dots of white or yellow paint for the strawberry seeds using the tip of a toothpick or the finest brush you have.
- Correct any small mistakes by gently scraping with a toothpick or wiping with a damp cloth before the paint dries permanently.
Pro-Tip: To avoid uneven paint and achieve brushwork mastery, gently dilute your ceramic paints with a tiny drop of water (if recommended by the manufacturer) to improve flow, especially for fine details. Kiln fired results can be mimicked by carefully following oven-curing instructions for even paint distribution.

5. Cure & Seal for Durable Painted Mugs Strawberry

Lock in your strawberry mug art! Save this guide to curing for lasting beauty.
Painting is only half the battle; without proper curing, your art will wash away. Cure painted mugs by baking them to permanently set the pigments. This process fuses the paint to the ceramic glaze, creating a durable finish that can withstand washing. This step is what makes your painted mugs strawberry project truly tested for durability.
Supplies Needed
- Your fully dry painted strawberry mug (with all paint layers applied)
- Home oven
Step-by-Step Directions
- Allow your painted strawberry mug to air dry for at least 24-72 hours after the final paint application. This is crucial for moisture to evaporate before baking.
- Place the completely dry mug into a cool oven. Do NOT preheat the oven first; let the mug heat up gradually with the oven to prevent cracking.
- Set the oven temperature according to your paint manufacturer’s instructions (typically 300-350°F or 150-175°C).
- Bake for the recommended time (usually 30-60 minutes).
- Turn off the oven and allow the mug to cool completely inside the oven. Rapid temperature changes can also cause ceramic to crack.
- Avoid washing your mug for at least 72 hours after baking to allow the paint to fully set and cure, ensuring long-lasting design.
Pro-Tip: For maximum durable finish and to avoid paint chipping, always refer to the specific ceramic paints manufacturer’s instructions for oven temperature and curing time. This proven painting technique ensures your DIY strawberry mug is truly tested for durability.

6. Add Food-Safe Glaze & Fine Details

Give your strawberry mug that glossy, protected finish! Pin for glazing perfection.
For those seeking an extra layer of protection and a professional shine, adding a top coat is the answer. A food-safe glaze seals your work, enhancing the vibrant colors and providing resistance against scratches. This step elevates your painted mugs strawberry creation from a craft project to vibrant drinkware that feels finished and complete.
Supplies Needed
- Your fully cured painted strawberry mug
- Clear, food-safe ceramic glaze or sealant (e.g., Mod Podge Dishwasher Safe Gloss, or specialized ceramic clear coats)
- Clean, soft brush (for glaze application)
Step-by-Step Directions
- Ensure your mug is completely cool and cured from the baking process before applying any glaze or sealant.
- If using a brush-on sealant like Mod Podge Dishwasher Safe, apply thin, even coats over the painted areas. Follow product instructions for the number of coats and drying times.
- If using a specialized ceramic clear coat, ensure it is also oven-cure compatible with your base paints. Apply according to manufacturer directions.
- Allow the glaze or sealant to dry and cure fully as per product instructions. This often involves an additional air-drying period or even a second, lower-temperature bake.
- For very fine details like strawberry seeds or highlights, you can sometimes add them after the main glaze, but ensure these details are also sealed if they are for food-contact areas.
Pro-Tip: While some paints claim to be dishwasher-safe after curing, an additional layer of food-safe glaze provides an extra layer of durable finish and scratch resistance, making your painted mugs strawberry even more resilient. Always verify the glaze is compatible with your specific paint.

7. Care for Your Hand-Painted Strawberry Mug for Lasting Enjoyment

Protect your beautiful strawberry mug art! Pin these care tips for years of use.
The final step in your journey is proper maintenance. Even the best-cured hand-painted strawberry mug requires gentle care to maintain its vibrant colors. Understanding how to care for hand-painted ceramic ensures that your long-lasting design survives daily use without fading colors or peeling.
Supplies Needed
- Mild dish soap
- Soft sponge or cloth (non-abrasive)
Steps
- Hand-wash your hand-painted strawberry mug gently with mild dish soap and a soft sponge or cloth. Avoid harsh scrubbing pads that can scratch the painted surface.
- Avoid leaving the mug to soak in water for extended periods, as this can weaken the paint’s adhesion over time.
- While some paints are labeled “dishwasher-safe” after curing, hand-washing is always recommended to maximize the life and vibrancy of your painted mugs strawberry.
- Do not use abrasive cleaners or harsh chemicals on your painted mug.
- Microwave safety: If your paints are microwave-safe, you can use the mug in the microwave. If unsure, avoid it to prevent potential damage or uneven heating.
Pro-Tip: To truly prevent fading and ensure a long-lasting design, avoid exposing your painted strawberry mug to extreme temperature changes immediately, and always prioritize gentle hand-washing over dishwashers, even if the paint is advertised as safe. This simple care extends the life of your artistic creation.

Key Takeaways: Your Quick Guide to Painted Mugs Strawberry
For those looking to quickly review the essentials of ceramic art, here is a snapshot of the critical steps to achieving a professional painted strawberry mug:
- Proper surface preparation is crucial for long-lasting results: Always clean and degrease your mug with rubbing alcohol before painting to ensure optimal paint adhesion and prevent future chipping or peeling on your DIY strawberry mug.
- Invest in dedicated ceramic paints for durability and food safety: Use oven-bake, non-toxic ceramic paints specifically designed for mugs, especially if the strawberry design will come into contact with food or lips.
- Plan your design carefully for confidence: Whether freehand sketching, stenciling, or transferring, a light initial outline helps ensure your strawberry pattern is placed perfectly before applying permanent paint.
- Apply multiple thin layers of paint for vibrant, even coverage: Avoid thick coats that can bubble or crack. Allow each layer of strawberry paint to dry completely for vibrant colors and a smooth finish.
- Curing your mug in the oven is essential for permanence: Follow your paint manufacturer’s instructions for oven temperature and time, allowing the mug to heat and cool gradually to make your painted strawberry mug truly durable.
- A food-safe glaze adds protection and shine: Consider an additional layer of clear, food-safe ceramic glaze over your finished design for enhanced durable finish and to protect the vibrant strawberries from wear.
- Gentle hand-washing is always best for longevity: Even if labeled “dishwasher-safe,” hand-washing with mild soap and a soft sponge will significantly extend the life and beauty of your hand-painted strawberry mug.
FAQs About Painted Mugs Strawberry
What kind of paint do you use for ceramic mugs?
For durable and often food-safe results on ceramic mugs, it’s essential to use specialized oven-bake ceramic paints. These acrylic enamel paints are designed to bond permanently to glass and ceramic surfaces after being cured in a standard home oven. Unlike regular acrylics, they withstand washing and some even become dishwasher-safe, crucial for a long-lasting painted mugs strawberry design.
Are painted mugs dishwasher safe?
Whether painted mugs are dishwasher safe depends entirely on the type of paint used and the curing process. Many oven-bake ceramic paints are labeled as top-rack dishwasher safe after proper curing. However, to maximize the lifespan and preserve the vibrancy of your hand-painted strawberry mug, gentle hand-washing is always recommended, as harsh detergents and high heat can degrade the paint over time.
How do you cure paint on a mug?
To cure paint on a mug and make it permanent, you typically bake it in a conventional home oven. After allowing the paint to air dry for 24-72 hours, place the mug in a cool oven, then heat it gradually to the temperature specified by your paint manufacturer (usually 300-350°F) for 30-60 minutes. Allow the mug to cool completely inside the oven to prevent cracking and ensure the durable finish of your painted mugs strawberry.
Is paint on mugs food safe?
Paint on mugs can be food safe, but only if you use non-toxic, food-safe certified ceramic paints and glazes. Always check product labels specifically for “food-safe” or “non-toxic” declarations, especially if the strawberry design will be on areas that come into direct contact with food or beverages. When in doubt, apply paint only to the exterior surfaces below the lip to ensure safety for your DIY strawberry mug.
How can I make my painted strawberry mug last longer?
To make your painted strawberry mug last longer, ensure proper surface preparation, use high-quality ceramic paints, and meticulously follow curing instructions. Additionally, always hand-wash the mug with mild soap and a soft sponge, avoiding abrasive cleaners or harsh scrubbing. Storing it carefully to prevent scratches and chips will also contribute significantly to the longevity of your hand-painted strawberry mug.
Can you paint a realistic strawberry design on a mug?
Yes, you can paint a realistic strawberry design on a mug with practice and the right techniques. Start by layering shades of red for depth and dimension, then add small white or yellow dots for seeds. Utilize fine-tipped brushes to create delicate green leaves and a subtle stem. Observing actual strawberries for reference can greatly improve the realism of your painted mugs strawberry artwork.
What supplies do I need for mug painting?
For mug painting, you’ll need a clean ceramic mug, rubbing alcohol for preparation, and specialized oven-bake ceramic paints in your desired colors. Essential tools include fine-tipped paintbrushes for detail work, a palette for mixing, and a soft cloth. Optional supplies like stencils or paint markers can also aid in creating precise strawberry designs on your DIY strawberry mug.
How do you seal paint on a mug without baking?
While baking is the most reliable method for permanently sealing paint on a mug, some acrylic-based paints and sealants claim to be air-dry or dishwasher-safe without oven curing. However, these often offer less durability compared to heat-set methods. For a truly durable finish and longevity for your painted mugs strawberry, baking is generally recommended. Always check specific product instructions carefully for non-bake sealing methods.
How do you prevent paint from chipping off a mug?
To prevent paint from chipping off a mug, proper surface preparation, using the correct ceramic paints, and thorough curing are paramount. Ensure the mug is clean and degreased before painting. Apply thin, even layers of oven-bake ceramic paint, allowing each to dry. Crucially, bake the mug according to the paint manufacturer’s instructions and let it cool gradually to set the paint permanently, ensuring your hand-painted strawberry mug resists chipping.
How much does it cost to make a DIY strawberry mug?
The cost to make a DIY strawberry mug can range from $15-$40, depending on the quality of materials selected. A plain ceramic mug typically costs relatively little. A set of oven-bake ceramic paints and a basic set of fine-tipped brushes are affordable investments. These upfront costs often allow for multiple painted mugs strawberry projects, making it a cost-effective creative endeavor.
Final Thoughts on Painted Mugs Strawberry
Creating your own painted mugs strawberry design is more than just a craft project; it’s a way to infuse your daily routine with personality and vibrant hand-painted ceramic pottery. By following these comprehensive tips—from meticulous surface prep to the final curing bake—you bridge the gap between temporary decoration and lasting DIY strawberry mug mastery.
You now possess the knowledge to avoid common pitfalls like peeling paint and fading colors. Whether you are crafting a heartfelt gift or adding a lasting strawberry design to your own kitchen cabinet, the combination of ceramic art techniques and proven materials ensures your work will be cherished for years.
Now it’s time to pick up that brush. Which strawberry pattern or technique are you excited to try first on your next mug project?
Last update on 2026-03-13 / Affiliate links / Images from Amazon Product Advertising API


