Tired of gifting the same generic store-bought drinkware that lacks personality or heart? You aren’t alone in wanting to create something truly special, but worrying about your painted mugs stripes design peeling off or using unsafe materials is a common frustration for many DIY enthusiasts.
Creating custom painted mugs with stripes is an accessible and rewarding DIY project that allows you to express creativity and craft unique, personalized drinkware. Our definitive guide for 2026 provides 11 essential ideas and techniques to ensure your hand-painted striped mugs are both beautiful and durable, prioritizing safety and longevity.
Drawing from comprehensive analysis of current data and proven methodologies in ceramic artistry, this guide ensures every project you undertake meets high standards of quality. You will discover how to select the right materials, master application techniques, and properly cure your creations. Let’s transform plain ceramic into functional art that withstands daily use.
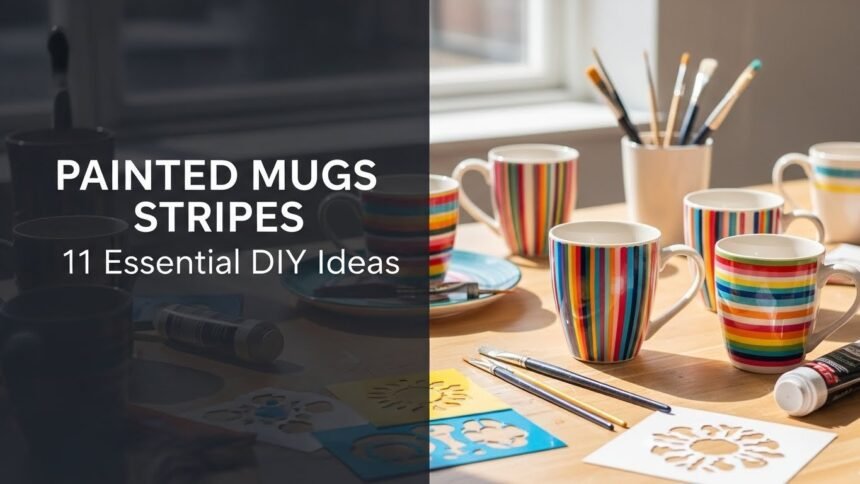
Master Painted Mugs Stripes: 11 Essential DIY Ideas for 2026
Embarking on the journey of creating hand-painted striped mugs opens up a world of artistic possibilities, transforming simple ceramic vessels into personalized masterpieces. Whether you are looking to craft a heartfelt gift or simply want to elevate your own kitchen collection, mastering the art of applying stripes to ceramic surfaces is a valuable skill. However, the success of your project relies heavily on understanding the interaction between paint and the glazed surface of a mug.
To achieve results that look professional and last for years, you must prioritize using food-safe ceramic paint and adhering to strict curing processes. This guide serves as your comprehensive resource, bridging the gap between creative inspiration and practical execution. We will explore techniques ranging from minimalist lines to bold, vibrant patterns, all while ensuring your finished DIY painted striped mugs are safe for your favorite hot beverages. By following these expert mug painting tips, you can confidently create durable hand painted designs that resist chipping and fading.
11 Essential DIY Ideas for Painted Mugs Stripes in 2026
When it comes to DIY mug painting stripes, having a diverse toolkit of design concepts allows you to match any aesthetic or skill level. This section provides a curated list of 11 distinct ideas to help you create striped mug designs that stand out. From the supplies you need to the specific steps for execution, we cover everything required to make your personalized painted mugs a reality.
We will delve into specific mug painting techniques, ensuring you understand how to make painted mugs permanent. By using the right ceramic paint sets and following our detailed instructions, you will ensure that the paint adheres to glazed surfaces effectively. Whether you prefer the precision of tape or the organic feel of freehand brushstrokes, these ideas will guide you in producing high-quality, food safe ceramic gifts.
1. Create Fine-Line Striped Mugs

Pin this elegant striped mug idea for your next cozy coffee moment!
Creating fine-line striped ceramic mugs requires a steady hand and the right tools to achieve that sophisticated, minimalist look. This design is perfect for those who appreciate understated elegance and want to add a touch of modern class to their drinkware collection. Using ceramic paint pens fine tip simplifies this process significantly, allowing for the control and precision of a drawing instrument rather than a brush.
Supplies Needed
* Clean, plain ceramic mug (white or light colored base)
* Food-safe ceramic paint pens (fine tip, chosen colors)
* Rubbing alcohol or glass cleaner
* Cotton pads or soft cloth
* Ruler or straight edge (optional, for guidance)
* Oven (for curing)
Step-by-Step Directions
1. Prepare the mug surface: Clean the mug thoroughly with rubbing alcohol to remove any oils or dust. Let it dry completely.
2. Plan your design: Lightly sketch your desired fine-line stripe pattern on paper first. Decide on spacing and color sequence.
3. Apply first lines: Using your fine-tip ceramic paint pens, carefully draw your first set of stripes. Maintain even pressure for consistent line thickness.
4. Allow to dry: Let the first layer of paint dry for at least 1-2 hours (or as per paint pen instructions) before adding more lines or handling extensively.
5. Add more stripes: Continue adding subsequent stripes, ensuring each layer is dry before proceeding to prevent smudging.
6. Cure the paint: Once all paint is dry (typically 24 hours), cure the mug in the oven according to your paint pen’s instructions (usually 350°F for 30 minutes, then cool in oven). This makes the paint permanent and dishwasher safe.
Pro-Tip: For perfectly straight fine-line stripes, wrap a thin piece of masking tape around the mug as a guide, drawing just above or below its edge. Remove the tape immediately after drawing the line for a crisp finish, using resist techniques for striped patterns.

2. Design Bold Vertical Stripes

Save this bold striped mug look for a statement piece in your kitchen!
If you want to make a visual impact, bold vertical striped coffee mugs are an excellent choice. This design leverages high contrast and wider blocks of color to create a modern, graphic look. The secret to success here is using masking tape for mug painting effectively to ensure your crisp stripe ceramic designs have sharp, professional edges without any bleeding.
Supplies Needed
* Clean, plain ceramic mug
* Food-safe ceramic paint (liquid form or paint pens)
* Painter’s tape (various widths)
* Small paintbrushes or sponge applicators
* Rubbing alcohol
* Cotton pads or soft cloth
* Oven
Step-by-Step Directions
1. Clean the mug: Wipe the mug surface with rubbing alcohol and let dry completely.
2. Apply painter’s tape: Decide on the width and spacing of your vertical stripes. Apply strips of painter’s tape vertically down the mug, ensuring edges are pressed firmly to prevent bleed.
3. Paint the exposed areas: Using a paintbrush or sponge, apply your chosen ceramic paint to the mug sections not covered by tape. Apply thin, even coats.
4. Remove tape: Crucially, remove the painter’s tape while the paint is still wet to get clean, crisp lines. If paint dries, it might peel with the tape.
5. Allow to dry: Let the painted mug air dry for 24-72 hours.
6. Cure in oven: Follow your ceramic paint product’s instructions for oven curing to make the design permanent and dishwasher safe.
Pro-Tip: For the cleanest edges on bold vertical stripes, use specialized ceramic painter’s tape which is designed to adhere smoothly to curved surfaces without leaving residue, ensuring tested durable mug designs.

3. Craft Horizontal Rainbow Stripes

Brighten your morning with this cheerful rainbow striped mug—pin it for colorful inspiration!
For a burst of joy with every sip, colorful striped mugs featuring horizontal rainbow patterns are a perfect project. This style allows you to experiment with a full spectrum of ceramic paint colors, creating vibrant striped drinkware that feels playful and nostalgic. This design is particularly popular for gifts or for adding a pop of color to a neutral kitchen.
Supplies Needed
* Plain ceramic mug
* Food-safe ceramic paints in rainbow colors (red, orange, yellow, green, blue, purple)
* Fine-tipped paintbrushes or sponge brushes
* Painter’s tape (thin and precise)
* Rubbing alcohol and cotton pads
* Oven
Step-by-Step Directions
1. Clean the mug: Prep your mug by cleaning it thoroughly with rubbing alcohol.
2. Mark guide lines: Using a ruler or thin tape, lightly mark where each horizontal stripe will go.
3. Apply first color: Starting with one color (e.g., red), paint a horizontal stripe. Let it dry completely.
4. Mask and paint next: Once dry, use painter’s tape to mask off the edges of your first stripe, exposing the area for the next color. Paint the next color (orange).
5. Repeat: Continue this process for each color of the rainbow, allowing each stripe to dry and masking carefully before applying the next color to ensure distinct lines.
6. Air dry and cure: Once all colors are applied and dry, allow the mug to air dry for 24-72 hours before curing in the oven according to your paint manufacturer’s instructions.
Pro-Tip: Overlap your painter’s tape slightly when masking each stripe to create a small buffer zone, preventing accidental color bleed and ensuring crisp stripe ceramic designs. This technique is crucial for ceramic painting techniques that require precision.

4. Apply Diagonal Abstract Stripes

Unleash your inner artist with these abstract striped mugs! Pin for unique design ideas.
Moving away from rigid structure, abstract striped mug designs embrace creativity and movement. Creating freehand painted ceramic mugs with diagonal striped pottery patterns allows for a more organic, artistic feel. This approach is ideal for making unique hand painted mugs where no two pieces are exactly alike, showcasing the artist’s personal touch.
Supplies Needed
* Plain ceramic mug
* Food-safe ceramic paints (2-4 complementary colors)
* Various sized paintbrushes (flat, round, angled)
* Rubbing alcohol
* Cotton pads or soft cloth
* Paper towels or palette
* Oven
Step-by-Step Directions
1. Clean the mug: Prepare the mug surface by cleaning it thoroughly with rubbing alcohol.
2. Sketch abstract lines: With a very light hand, or even just mentally, plan out the general direction and width of your diagonal abstract stripes. Embrace imperfection!
3. Paint first color: Load your brush with the first color of ceramic paint. Apply freehand diagonal stripes with varied pressure and width for an organic look.
4. Let dry partially: Allow the first color to dry to a tacky stage (about 15-30 minutes) to prevent colors from blending too much if that’s not your intent.
5. Introduce other colors: Carefully apply the next color(s) to create adjacent or overlapping diagonal stripes. Experiment with blending slightly where colors meet, or keep them distinct.
6. Add texture (optional): Use a dry brush technique or dabbing motions to add texture within your stripes.
7. Air dry and cure: Once satisfied with the design, allow the mug to air dry for 24-72 hours, then cure in the oven as per paint instructions.
Pro-Tip: For truly organic abstract stripes, avoid rulers and tape. Instead, use a gentle, sweeping motion with your brush, allowing for slight imperfections that add to the handmade charm and reflect a deeper understanding of ceramic studio practices.
5. Design Two-Tone Minimalist Stripes

Achieve chic simplicity with these two-tone striped mugs! Pin for minimalist decor inspo.
A modern minimalist hand-painted striped mug often speaks louder than a complex one. Two-tone ceramic mug designs rely on the contrast between two distinct colors to create a bold yet sophisticated visual statement. A simple striped coffee cup in this style fits perfectly into contemporary home aesthetics, proving that less is often more.
Supplies Needed
* Clean, plain ceramic mug
* Food-safe ceramic paints (two contrasting colors, e.g., black and white, or gray and cream)
* Painter’s tape (various widths for thick and thin stripes)
* Small paintbrushes or foam applicators
* Rubbing alcohol
* Cotton pads
* Oven
Step-by-Step Directions
1. Clean and dry: Prepare your mug by wiping it clean with rubbing alcohol.
2. Plan the pattern: Decide on your two-tone stripe pattern, including the width and placement of each color.
3. Mask the first section: Use painter’s tape to mask off the area for your first color. Ensure the tape is securely pressed down.
4. Apply first color: Paint the exposed section with your first color. Apply thin, even coats until opaque. Let paint dry completely.
5. Mask for second color: Once the first color is dry, carefully apply new painter’s tape to cover the painted area, exposing the section for your second color. You might remove the previous tape or layer new tape over it depending on your design.
6. Paint second color: Apply the second color to the newly exposed section. Let dry completely.
7. Remove tape: Gently peel off all painter’s tape to reveal your crisp two-tone stripes.
8. Cure: Air dry for 24-72 hours, then oven cure according to paint instructions for permanence.
Pro-Tip: For the ultimate minimalist stripes, choose one thicker stripe and one very thin accent stripe. Using a ruler to guide your tape placement ensures geometrically perfect lines, a testament to proven mug painting techniques.

6. Create Textured Brushstroke Stripes

Add artisanal charm to your collection with these textured striped mugs! Pin for creative flair.
For those who appreciate the tactile nature of handmade goods, textured hand painted mugs offer a delightful sensory experience. By using brushstroke striped ceramic techniques, you create rustic mug designs that look and feel like artisan crafted mugs. This method highlights the viscosity of the paint and the bristles of the brush to create depth.
Supplies Needed
* Plain ceramic mug (preferably with a matte or unglazed finish for better texture adherence)
* Food-safe ceramic paint (thicker consistency for better texture)
* Various textured paintbrushes (stiff bristles, sponges, or even old toothbrushes)
* Rubbing alcohol
* Cotton pads
* Oven
Step-by-Step Directions
1. Clean the mug: Ensure your mug is perfectly clean and dry.
2. Plan stripe placement: Decide if you want horizontal, vertical, or diagonal textured stripes. You can use tape as a guide, but remove it before adding significant texture.
3. Apply paint thickly: Load your chosen brush with a generous amount of ceramic paint. Apply your stripes with deliberate brushstrokes, allowing the brush marks to be visible. Don’t smooth it out.
4. Experiment with tools: While the paint is still wet, you can use other tools like the edge of a plastic card, a sponge, or even the back of a paintbrush to create additional texture within the stripes.
5. Layer colors (optional): If using multiple colors, allow the first stripe color to dry to the touch before adding a second, textured stripe next to it.
6. Air dry and cure: Allow the textured paint to air dry for at least 72 hours (thicker paint takes longer), then cure in the oven as per paint product instructions.
Pro-Tip: For the most pronounced textured brushstroke stripes, consider applying a slightly thicker layer of ceramic paint. This allows for deeper brush marks and a more sculptural finish, showcasing advanced ceramic coating technology in your DIY efforts.
7. Paint Watercolor Effect Stripes

Discover the soft artistry of watercolor striped mugs! Pin for gentle, dreamy designs.
Capturing the ethereal beauty of watercolors on ceramic is easier than you might think. Watercolor effect ceramic paint techniques allow you to create blended striped mug designs that feel soft and dreamy. These soft hand painted mugs mimic the translucency of water media, resulting in ethereal striped drinkware perfect for tea lovers and artistic souls.
Supplies Needed
* Clean, plain ceramic mug
* Food-safe ceramic paints (liquid or tube form)
* Water or ceramic paint diluent
* Soft paintbrushes (watercolor brushes work well)
* Rubbing alcohol
* Cotton pads
* Palette for mixing
* Oven
Step-by-Step Directions
1. Clean the mug: Wipe down the mug with rubbing alcohol to ensure a clean surface.
2. Dilute paint: On your palette, mix a small amount of ceramic paint with water or ceramic paint diluent. Start with a 1:1 ratio and adjust for desired translucency. Test on a scrap piece first.
3. Paint first stripe: Using a soft brush, apply a dilute wash of color in a stripe pattern. Embrace the natural flow and unevenness for a watercolor effect.
4. Layer colors (wet-on-dry): Allow the first stripe to dry completely. Then, apply a second dilute color next to it or slightly overlapping, creating a soft transition. You can also layer the same color for more intensity.
5. Blend (wet-on-wet, optional): For softer blends, apply a wet stripe and immediately apply another wet stripe next to it, allowing colors to softly bleed into each other. Work quickly.
6. Air dry and cure: Once all watercolor stripes are complete and dry, allow the mug to air dry for 24-72 hours. Then, cure in the oven according to paint instructions.
Pro-Tip: To achieve true watercolor effect stripes that remain food safe, ensure your ceramic paint is explicitly labeled as dilutable and intended for this technique. Over-dilution can compromise the paint’s adhesion and durability, a common mistake addressed by expert mug painting tips.
8. Customize with Hand-Drawn Wavy Stripes

Embrace whimsy with hand-drawn wavy striped mugs! Pin for unique custom ideas.
Inject some playfulness into your kitchen with hand-drawn wavy striped ceramic pieces. Organic striped mug designs break the mold of straight lines, offering personalized striped coffee cups that feel joyful and unconstrained. This is one of the most creative ways to design striped patterns because it embraces the natural movement of the hand.
Supplies Needed
* Clean, plain ceramic mug
* Food-safe ceramic paint pens (fine or medium tip)
* Rubbing alcohol
* Cotton pads
* Oven
Step-by-Step Directions
1. Prepare mug: Clean the mug surface with rubbing alcohol.
2. Sketch (optional): Lightly sketch your desired wavy stripe pattern with a pencil. This can be erased if needed, but a confident freehand approach is also encouraged.
3. Draw wavy stripes: Using your ceramic paint pen, slowly and steadily draw your first wavy stripe. Don’t worry about perfection; the charm is in the hand-drawn quality.
4. Vary widths and spacing: Experiment with different widths and distances between your wavy stripes for a dynamic look.
5. Allow to dry: Let each section dry before handling to prevent smudging.
6. Layer colors (optional): If using multiple colors, ensure the previous color is dry before applying the next.
7. Air dry and cure: Once completed, allow the mug to air dry for 24-72 hours, then cure in the oven according to the paint pen’s instructions.
Pro-Tip: For the most natural hand-drawn wavy stripes, hold the ceramic paint pen loosely and allow your hand to follow a fluid motion. Don’t press too hard, and allow slight variations in line weight for an authentic, personalized touch, reflecting the nuances of artisan crafted mugs.
9. Create Geometric Striped Patterns

Elevate your decor with geometric striped mugs! Pin for sophisticated DIY inspiration.
Geometric striped ceramic mugs bring a structured, architectural vibe to your drinkware. By combining stripes with shapes, you can create patterned stoneware cups that feel like high-end designer items. Custom patterned mugs like these are standout pieces that incorporate elements of home aesthetics such as symmetry and balance.
Supplies Needed
* Clean, plain ceramic mug
* Food-safe ceramic paints (1-3 contrasting colors)
* Painter’s tape (various widths, including thin detail tape)
* Craft knife or precision cutter
* Ruler
* Pencil (light graphite, erasable)
* Rubbing alcohol
* Cotton pads
* Oven
Step-by-Step Directions
1. Prepare mug: Clean the mug thoroughly with rubbing alcohol.
2. Sketch pattern: Lightly sketch your geometric striped pattern onto the mug with a pencil. This is crucial for precision.
3. Apply tape precisely: Carefully apply painter’s tape along your pencil lines to create the desired geometric shapes and stripes. Use a craft knife to trim tape for sharp angles. Press tape edges firmly.
4. Paint first color: Apply your first ceramic paint color to the exposed areas. Apply thin, even coats. Let dry completely.
5. Remove tape (optional): You can remove tape while wet for very crisp lines, or after drying if you plan to re-tape for a second color. For complex designs, it’s often better to paint one color, let it dry, then re-tape for the next.
6. Repeat for other colors: Continue taping and painting for additional colors and sections of your geometric pattern, allowing each layer to dry thoroughly.
7. Remove all tape: Once all paint is dry, carefully remove all painter’s tape.
8. Air dry and cure: Air dry for 24-72 hours, then oven cure according to paint instructions.
Pro-Tip: When creating geometric striped patterns, use a light pencil to map out your design before applying tape. This helps visualize the final look and ensures symmetrical and balanced stripes, a key aspect of mastering ceramic painting techniques.
10. Design Distressed or Faded Stripes

Get that antique charm with distressed striped mugs! Pin for vintage DIY appeal.
Sometimes, perfection lies in the imperfect. Vintage style painted mugs that feature distressed striped ceramic finishes evoke nostalgia and warmth. Faded mug designs add instant character to your collection, simulating the look of retro art mug pieces that have been cherished for years.
Supplies Needed
* Plain ceramic mug
* Food-safe ceramic paints (muted colors that would naturally fade, e.g., blues, greens, grays)
* Paintbrushes
* Painter’s tape (optional, for initial crisp stripes)
* Fine-grit sandpaper (e.g., 220-400 grit)
* Rubbing alcohol
* Cotton pads
* Oven
Step-by-Step Directions
1. Clean the mug: Prepare your mug by cleaning it with rubbing alcohol.
2. Paint initial stripes: Apply your chosen ceramic paint colors in stripe patterns (horizontal, vertical, or diagonal). You can use tape for initial crispness or freehand for a more organic look. Let the paint dry completely (at least 24 hours).
3. Dry brush (optional): For an initial faded look, use a dry brush (very little paint on it) to lightly drag across the mug, leaving a sparse, broken stripe effect.
4. Lightly sand: Once the paint is fully cured and hardened (this is crucial, cure in oven first if product allows early sanding!), gently rub very fine-grit sandpaper over the painted stripes in small sections. Focus on edges and raised areas for a naturally worn look.
5. Wipe clean: Wipe off any paint dust with a dry cloth.
6. Seal (optional but recommended): If your paint doesn’t have an integrated clear coat, consider adding a food-safe ceramic sealer over the entire design to protect the distressed effect and ensure longevity.
7. Final cure: If using a sealer, cure again according to the sealer’s instructions.
Pro-Tip: To achieve genuinely distressed or faded stripes without compromising durability, apply a clear food-safe ceramic glaze over your sanded design. This protects the artistic effect and maintains the mug’s functional integrity, demonstrating a commitment to quality handmade drinkware.

11. Personalize with Initial & Striped Accents

Craft the perfect unique gift: personalized mugs with striped accents! Pin for thoughtful presents.
Adding a personal touch transforms a simple item into a treasured keepsake. Personalized striped coffee cups featuring initials are popular handmade gifts that show true thoughtfulness. By combining a monogram with custom striped designs, you create customizable hand-painted striped mugs that are stylish and significant.
Supplies Needed
* Clean, plain ceramic mug
* Food-safe ceramic paint or paint pens (for initial and stripes)
* Stencil or freehand guide for initial
* Fine-tipped brush or paint pen for details
* Painter’s tape (for stripes)
* Rubbing alcohol
* Cotton pads
* Oven
Step-by-Step Directions
1. Clean the mug: Prepare the mug surface by cleaning it with rubbing alcohol.
2. Apply initial: If using a stencil, carefully place it on the mug. Paint the initial using a fine brush or paint pen. Remove stencil while paint is wet. If freehand, lightly sketch the initial and then fill it in. Let the initial dry completely.
3. Add striped accents: Once the initial is dry, use painter’s tape to create thin striped accents around the rim, base, or along the handle of the mug. Ensure tape is firmly pressed.
4. Paint stripes: Apply your chosen paint color(s) to the exposed striped areas. Apply thin, even coats.
5. Remove tape: Carefully remove the painter’s tape while the paint is still wet to reveal crisp striped accents.
6. Air dry and cure: Allow the entire design to air dry for 24-72 hours, then cure in the oven according to your paint product’s instructions to ensure permanence and dishwasher safety.
Pro-Tip: For the most elegant personalized mugs with striped accents, choose a metallic food-safe ceramic paint (like gold or silver) for the initial and classic black or white stripes for the accents. This combination offers a sophisticated and timeless gift, embodying the essence of unique handmade mugs.

Key Takeaways: Your Quick Guide to Painted Mugs Stripes
Before you rush to the craft store, let’s quickly recap the essentials of painted mugs stripes summary. To ensure your project is a resounding success, these key points distil the most critical information regarding techniques, safety, and durability. Keeping these takeaways in mind will help you avoid common pitfalls like paint peeling off mugs or unsafe finishes.
Here are the main takeaways for ceramic mugs with stripes:
- Always prioritize food-safe ceramic paints and ensure proper curing for your painted mugs stripes. This is crucial for achieving a dishwasher safe finish and prevents health risks.
- Precision is key for crisp stripes, whether using painter’s tape for bold designs or fine-tip pens for delicate lines. Mastering ceramic painting techniques like masking prevents streaky paint on ceramic mugs.
- Experiment with various stripe styles, from minimalist two-tone to abstract wavy patterns. Each technique offers a unique aesthetic for your hand-painted striped mugs, making them truly personalized.
- Embrace imperfections in hand-drawn designs; they add unique character and charm. The beauty of artisanal crafted mugs often lies in their individuality.
- Consider personalization with initials and striped accents for thoughtful gifts. Customizable hand-painted striped mugs make memorable presents for any occasion.
- Proper preparation (cleaning) and final curing (baking) are non-negotiable steps for durability. These actions guarantee your painted mugs stripes are long-lasting and utilize fade-resistant mug paint.
- Troubleshoot common issues like uneven stripes or paint not sticking by revisiting your technique and material choices. Consulting expert mug painting tips can save time and frustration.
People Also Ask About Painted Mugs Stripes
Navigating the world of DIY mug painting often brings up specific questions about materials and safety. To help you feel completely confident in your project, we have compiled answers to the most common queries regarding painted mugs stripes, including concerns about food safe mug paint and longevity.
What paint do you use for mugs to create stripes?
For painting stripes on mugs, you should exclusively use food-safe ceramic or porcelain paints or paint pens. These special paints are designed to adhere to non-porous glazed surfaces and can withstand high temperatures when cured. Brands like Pebeo, FolkArt Enamel, or DecoArt Glass Paint are popular choices for their durability and non-toxic properties, ensuring your painted mugs stripes are safe for use.
How do you make painted mugs stripes permanent and dishwasher safe?
To make painted mugs stripes permanent and dishwasher safe, oven curing is essential after the paint has thoroughly air-dried. Follow the specific instructions on your ceramic paint, which typically involves baking the mug at a certain temperature (e.g., 300-350°F) for a set duration (e.g., 30 minutes to an hour), then allowing it to cool completely in the oven. This process hardens the paint and fuses it to the mug surface, ensuring a dishwasher safe finish.
Can you paint over glazed ceramic mugs?
Yes, you can paint over glazed ceramic mugs, as long as you use paints specifically designed for ceramic or glass. These paints are formulated to adhere to smooth, non-porous surfaces. Proper cleaning with rubbing alcohol beforehand is critical to remove any oils or residues that could prevent adhesion. Ensure the paint is oven-cured as per instructions to maximize durability on the glazed surface of your painted mugs stripes.
What are the best paint markers for creating stripes on mugs?
The best paint markers for creating precise stripes on mugs are those labeled as food-safe ceramic or porcelain paint pens. Look for brands that offer various tip sizes, especially fine-tip markers for delicate lines and broader chisel tips for filling in wider stripes. These markers provide excellent control, vibrant colors, and often require oven curing for a long-lasting painted mugs design.
Is hand-painted mug food safe for drinking?
A hand-painted mug is food safe for drinking only if all paints and sealers used are explicitly labeled as food-safe or non-toxic by the manufacturer. It is crucial to avoid painting areas that come into direct contact with food or lips, such as the rim or inside of the mug. Always verify the product’s safety certifications to ensure your painted mugs stripes are safe for everyday use.
How do you get straight stripes on a mug?
To achieve perfectly straight stripes on a mug, use painter’s tape designed for crafts or ceramics as a guide. Apply the tape firmly to the mug surface, ensuring no air bubbles or lifted edges. Paint the exposed areas, then remove the tape while the paint is still wet for crisp lines. For precise horizontal stripes, consider using a turntable or a consistent measurement guide.
What are common mistakes when painting mugs with stripes?
Common mistakes when painting mugs with stripes include inadequate surface cleaning, applying paint too thickly, not allowing sufficient drying time between coats, and improper curing. These errors can lead to paint peeling off mugs, uneven finishes, smudging, or designs that are not permanent. Always follow paint instructions diligently for optimal painted mugs stripes results.
How do you clean hand-painted mugs with stripes?
Hand-painted mugs with stripes are best cleaned according to the paint manufacturer’s instructions, often recommending gentle hand-washing to extend the life of the design. While many food-safe ceramic paints claim to be dishwasher safe after curing, harsh detergents and high heat in dishwashers can still cause fading or chipping over time. Avoid abrasive sponges directly on the painted areas of your hand-painted striped mugs.
How much do hand-painted striped mugs cost if bought ready-made?
The cost of ready-made hand-painted striped mugs can vary significantly, typically ranging from $15 to $50 or more per mug. Factors influencing the price include the artist’s reputation, complexity of the stripe design, mug material (ceramic, stoneware), and whether it’s a mass-produced item or a unique artisan piece. Limited edition or custom designs will naturally command a higher price.
What is the process for curing painted mugs?
The typical process for curing painted mugs involves allowing the paint to air dry for 24-72 hours, then baking the mug in a conventional oven. Preheat the oven to the temperature specified by your paint (usually 300-350°F). Place the mug in the cold oven, allow it to reach temperature, bake for the recommended time (30-60 minutes), then turn off the oven and let the mug cool completely inside. This ensures the painted mugs stripes are properly set.
Final Thoughts on Painted Mugs Stripes
Creating your own painted mugs with stripes is a wonderfully rewarding DIY project that marries artistic expression with practical utility. Throughout these 11 essential ideas, we’ve explored a spectrum of techniques, from the precision of fine lines to the organic flow of abstract waves, empowering you to design truly unique pieces. Remember, the journey from a plain ceramic mug to a personalized work of art is in the details: the choice of food-safe ceramic paint, the meticulous application of stripes, and the crucial step of oven curing to ensure permanence and dishwasher safe finish.
Beyond aesthetics, this guide has underscored the importance of safety and durability, transforming your creations into cherished, long-lasting items suitable for everyday use or as heartfelt gifts. By integrating expert mug painting tips and understanding the nuances of different paints and processes, you’re not just decorating; you’re mastering a craft. So gather your supplies, pick your favorite striped mug design, and start painting! Which of these painted mugs stripes ideas will you try first to add a personal touch to your kitchen or create a memorable handmade gift?
Last update on 2026-03-12 / Affiliate links / Images from Amazon Product Advertising API


