Are you tired of sipping coffee from generic, mass-produced cups that lack personality? Many DIY enthusiasts struggle with the fear that their homemade creations won’t hold up to daily use or the dishwasher, preventing them from exploring the rewarding art of painted pottery mugs.
Creating durable and beautiful painted pottery mugs at home involves selecting the right food-safe paints, applying them with essential design techniques, and properly curing the artwork to ensure it’s dishwasher and microwave safe. This guide offers 9 essential design ideas for 2026 to transform your drinkware into personalized art.
Drawing from comprehensive analysis of ceramic durability and tested application methods, this guide bridges the gap between artistic expression and practical functionality. We will explore specific techniques to help you master painted pottery mugs, ensuring your creations are not only visually stunning but also safe for your morning brew. You will discover exactly how to prepare, paint, and cure your mugs for professional-quality results that last.
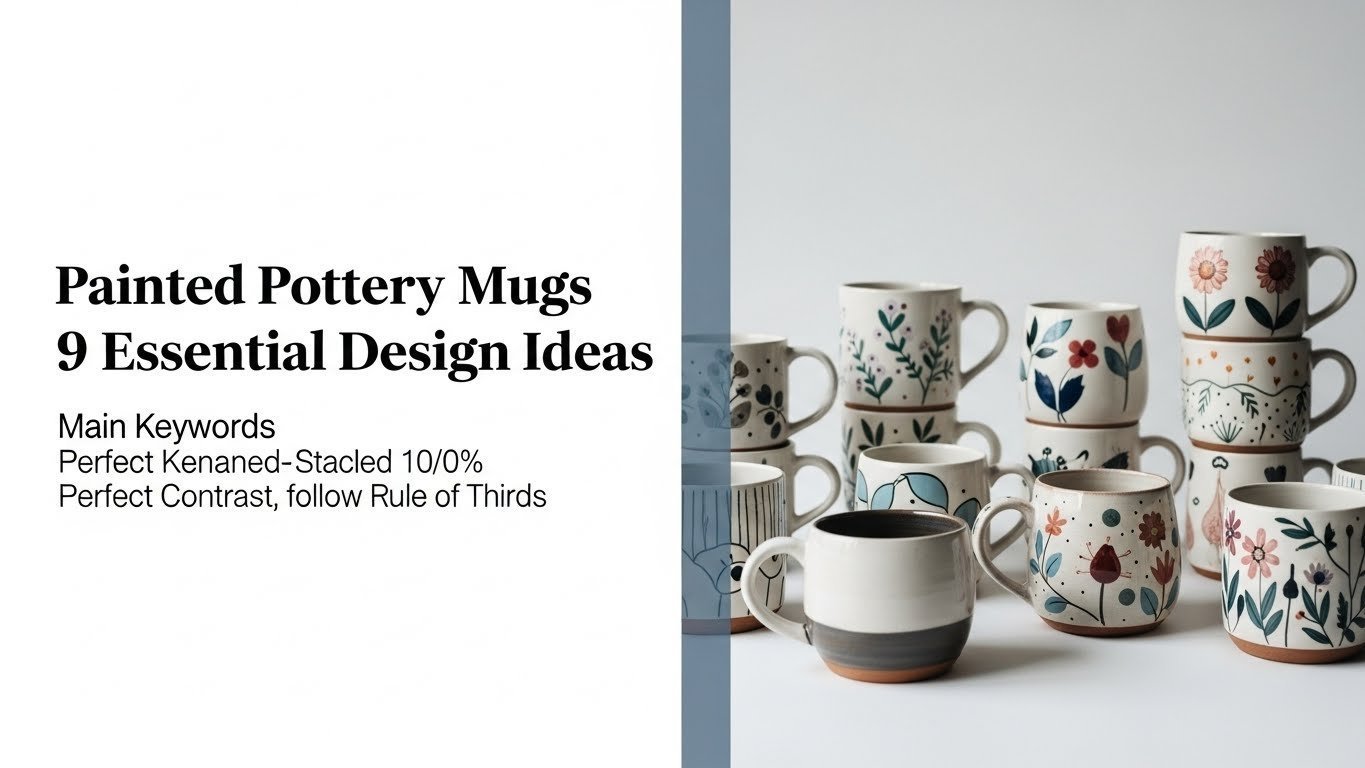
Painted Pottery Mugs: 9 Essential Design Ideas for 2026
Painting ceramic mugs offers a unique opportunity to turn a simple household item into a canvas for your creativity. Whether you are looking to create a heartfelt gift or simply want to upgrade your kitchen cupboard, the process begins with a standard mug blank and transforms it through artistic mug decoration. However, the success of your project relies not just on artistic talent, but on understanding how to apply these designs effectively so they withstand heat and washing.
Below, we detail nine distinct design concepts ranging from modern minimalist styles to intricate organic patterns. Each section provides a comprehensive breakdown of the supplies needed and the specific mug design ideas to execute the look, along with expert tips to ensure your DIY painted mug looks professional and remains durable.
1. Crafting Modern Geometric Painted Pottery Mugs

Pin this clean, modern design to your ‘DIY Home Decor’ board!
Geometric patterns are a fantastic starting point for painted pottery mugs because they rely on structure rather than freehand drawing skills. By utilizing masking tape mug art techniques, you can achieve sharp lines and modern aesthetics that look store-bought. This method focuses on the process of applying paint within defined boundaries to create striking visual contrast.
Supplies Needed
- Blank ceramic mug: A smooth, clean surface, ideally a white or light-colored ceramic bisque blank for vibrant colors.
- Food-safe ceramic paint pens: Fine-tip for detailed lines, in your chosen geometric palette. Look for non-toxic paint for mugs.
- Painter’s tape or masking tape: High-quality, low-tack ceramic paint tape for clean edges.
- Ruler or straight edge: For precise line guidance.
- Rubbing alcohol: To clean the mug surface before painting ceramic mugs.
- Oven: For baking and curing the painted design, ensuring dishwasher safe painted mugs.
Step-by-Step Directions
- Prepare the mug: Thoroughly clean the mug surface with rubbing alcohol and let it dry completely. This ensures optimal paint adhesion.
- Plan your design: Use a pencil to lightly sketch geometric shapes (triangles, stripes, chevrons) onto the mug.
- Apply tape: Carefully apply painter’s tape along your pencil lines to create crisp boundaries for your shapes. Press firmly to seal the edges.
- Paint the shapes: Using the ceramic paint pens, color in the exposed areas of your design. Apply thin, even coats, allowing each coat to dry slightly before adding another to prevent streaking.
- Remove tape: Once the paint is dry to the touch (check paint instructions), carefully peel off the tape to reveal sharp geometric patterns.
- Cure the mug: Follow the specific paint instructions for baking the mug in the oven. This typically involves placing the mug in a cold oven, heating to a specific temperature (e.g., 350°F / 175°C), baking for a set time (e.g., 30-60 minutes), and allowing it to cool completely in the oven to ensure permanently painted mugs.
Pro-Tip: For truly crisp lines on your painted pottery mugs, apply a thin layer of clear glaze over the edges of your tape before painting. This seals any microscopic gaps, preventing paint bleed and demonstrating expert pottery painting tips for durable finish for painted ceramics.

2. Creating Smooth Ombre Painted Pottery Mugs

Save this beautiful ombre technique for your next DIY mug project!
If you want to create visually appealing drinkware that looks soft and professional, the ombre technique is ideal. This involves blending ceramic paints directly on the surface of the mug to create a seamless gradient. While it requires a bit of speed to blend while wet, the result is a sophisticated ombre painted mug that rivals professional glazing pottery process results.
Supplies Needed
- Blank ceramic mug: A smooth, clean surface, preferably white, for the colors to pop.
- Food-safe ceramic paints: 2-3 shades of the same color family (e.g., light blue, medium blue, dark blue) or complementary colors for a bold transition. Look for non-toxic paint for mugs.
- Soft-bristle paintbrushes: Various sizes, including a wider brush for blending and a detail brush.
- Small mixing palette: For thinning and blending paints.
- Sponge or foam brush: Optional, for stippling and further blending.
- Rubbing alcohol: For mug preparation.
- Oven: For curing the painted pottery mugs.
Step-by-Step Directions
- Prepare the mug: Clean the mug thoroughly with rubbing alcohol and allow it to dry.
- Apply lightest shade: Paint the top third of the mug with your lightest color. Ensure even coverage. Let it dry partially (tacky, not fully dry).
- Apply medium shade: Paint the middle third with your medium color, slightly overlapping the lightest shade. While the paint is still wet, use a clean, dry brush or sponge to gently blend the two colors where they meet, creating a soft transition.
- Apply darkest shade: Paint the bottom third with your darkest color, overlapping the medium shade. Immediately blend the medium and darkest colors together.
- Refine blending: Work quickly, blending any harsh lines as needed. You can use a very slightly damp brush for stubborn transitions.
- Dry and cure: Allow the ombre painted mug to air dry completely (typically 24-72 hours). Then, bake the mug in the oven according to your paint manufacturer’s instructions to ensure it’s dishwasher safe and permanently painted.
Pro-Tip: For the smoothest ombre on your painted pottery mugs, try thinning your ceramic paints slightly with a ceramic paint medium. This increases flow and blendability, a trick often used by experienced ceramic decorator to avoid streaky mug paint.

3. Personalizing with Quote & Typography Painted Pottery Mugs

Get inspired: Pin this beautiful typography idea for your own custom painted ceramicware!
Adding text transforms a simple vessel into a personalized painted mug that speaks volumes. Whether it’s a name, a witty phrase, or a meaningful date, typography is a powerful entity attribute of custom drinkware. Using fine-point ceramic paint pens simplifies the process of applying paint for text, allowing for control similar to writing on paper.
Supplies Needed
- Blank ceramic mug: A smooth, clean surface, ideal for intricate lettering.
- Food-safe ceramic paint pens: Extra fine or fine tip for detailed work, in your chosen colors.
- Pencil: A soft lead pencil for light sketching.
- Tracing paper or carbon paper: For transferring designs.
- Printer: To print out your chosen quote or font.
- Rubbing alcohol: For mug preparation.
- Oven: For curing the design.
Step-by-Step Directions
- Prepare the mug: Clean the mug thoroughly with rubbing alcohol.
- Choose your quote/font: Select a quote and print it in your desired font and size.
- Transfer the design:
- Method 1 (Tracing): Place tracing paper over your printout, trace the letters firmly with a pencil to create an impression on the back. Then, tape the tracing paper (pencil-side down) onto your mug and re-trace the letters to transfer them.
- Method 2 (Carbon Paper): Place carbon paper between your printout and the mug, then trace over the letters.
- Paint the typography: Carefully go over your transferred pencil lines with the ceramic paint pens. Take your time, applying thin, even coats. Allow for drying between coats if needed.
- Erase pencil marks: Once the paint is completely dry (after curing), gently erase any visible pencil marks.
- Cure the mug: Follow the paint manufacturer’s instructions for baking the mug in the oven to make your painted pottery mugs permanently painted and dishwasher safe.
Pro-Tip: For perfect alignment on your personalized painted mugs, use a flexible ruler or piece of string to measure and mark a straight guideline around your mug before tracing. This expert pottery painting tip helps avoid streaky mug paint or uneven text.

4. Designing Nature-Inspired Painted Pottery Mugs

Bring the outdoors in! Pin this natural design for your next painted ceramic mugs project!
Botanical designs are timeless and bring a sense of calm to your morning routine. Nature-inspired painted pottery mugs often feature organic shapes like leaves, vines, or flowers, which are forgiving for beginners as nature itself is rarely perfectly symmetrical. Success here lies in layering ceramic paints to create depth and utilizing proper sealing mug paint techniques for longevity.
Supplies Needed
- Blank ceramic mug: A smooth, clean surface, good for detailed artwork.
- Food-safe ceramic paints: In various natural colors (greens, browns, blues, soft yellows). Look for non-toxic paint for mugs.
- Fine-tip paintbrushes: For details like veins on leaves or delicate flower petals.
- Pencil: For light sketching.
- Nature stencils: Optional, for consistent shapes (leaves, birds, flowers).
- Rubbing alcohol: For mug preparation.
- Oven: For curing.
Step-by-Step Directions
- Prepare the mug: Clean the mug thoroughly with rubbing alcohol.
- Sketch your design: Lightly sketch your nature motifs (leaves, flowers, trees, simple animals) onto the mug with a pencil. If using stencils, position them securely.
- Outline and fill: Using your fine-tip brush and ceramic paints, carefully outline your sketched designs. Once outlined, fill in the shapes with color. Apply thin, even coats, allowing drying time between layers for depth.
- Add details: Use a contrasting or darker color to add small details like leaf veins, flower centers, or animal features.
- Dry and cure: Allow your painted pottery mugs to air dry for 24-72 hours. Then, bake according to the paint instructions to ensure the design is durable and dishwasher safe.
Pro-Tip: When painting ceramic mugs with nature themes, try adding a light wash of thinned paint over a dried base color to create a soft, translucent effect for leaves or petals, enhancing the natural look. This advanced ceramic painting technique creates depth without being overly complex.
5. Creating Playful Abstract Splatter Painted Pottery Mugs

Unleash your creativity! Pin this fun splatter paint idea for your DIY painted mug collection!
For those who prefer expressive, energetic art over precise lines, the abstract splatter design is perfect. This technique transforms the mug into a piece of modern art by applying paint to mugs in controlled bursts. It’s a fantastic method for artistic mug decoration that hides imperfections easily and creates a truly unique texture.
Supplies Needed
- Blank ceramic mug: Any smooth, clean mug will work, but white provides the best contrast for splatters.
- Food-safe ceramic paints: 2-3 contrasting or complementary colors. Consider vibrant painted ceramics colors.
- Old toothbrush or stiff-bristle paintbrush: For creating the splatter effect.
- Small mixing cups: For diluting paints if needed.
- Rubbing alcohol: For mug preparation.
- Protective covering: Newspaper, drop cloth, or cardboard for your workspace.
- Oven: For curing.
Step-by-Step Directions
- Prepare the mug and workspace: Clean the mug with rubbing alcohol. Cover your work surface completely with protective covering. You might also want to protect surrounding walls or objects.
- Dilute paints (optional): If your ceramic paints are too thick for splattering, dilute them very slightly with water or a ceramic paint medium in your mixing cups. Test the consistency on a scrap piece of paper.
- Apply first color splatters: Dip your toothbrush or stiff brush into the first paint color. Hold the mug at arm’s length (or wear gloves) and gently flick the bristles towards the mug, allowing paint to splatter. Experiment with distance and flicking motion for different splatter sizes.
- Repeat with other colors: Allow the first color to dry slightly before applying the next, or go immediately for an overlapping effect. Continue with your other chosen colors until you’re happy with the abstract design on your painted pottery mugs.
- Dry and cure: Let the mug air dry completely (24-72 hours). Then, bake according to the paint manufacturer’s instructions to ensure permanently painted mugs that are dishwasher safe.
Pro-Tip: To control the direction and density of your splatters on abstract painted mugs, create a “shield” from cardboard. This expert pottery painting tip allows you to target specific areas and avoid messy mug design where you don’t want it.
6. Achieving Artistic Faux Watercolor Painted Pottery Mugs

Capture the beauty of watercolor! Pin this dreamy design for your next painted pottery mugs project!
True watercolor paint doesn’t work on ceramics, but you can achieve a stunning faux watercolor effect using thinned food-safe ceramic paints. This technique creates translucent, airy designs that look incredibly high-end. The key to this artistic pottery mug style is understanding how to thin your medium without compromising its ability to adhere to the glaze.
Supplies Needed
- Blank ceramic mug: White or a very light color is best for the translucent watercolor effect.
- Food-safe ceramic paints: In various watercolor-esque shades. Look for non-toxic paint for mugs.
- Ceramic paint thinning medium or water: For diluting the paints.
- Soft-bristle watercolor brushes: Various sizes for washes and details.
- Small mixing palette: For diluting and blending colors.
- Paper towels: For blotting excess paint/water.
- Rubbing alcohol: For mug preparation.
- Oven: For curing.
Step-by-Step Directions
- Prepare the mug: Clean the mug thoroughly with rubbing alcohol.
- Mix your paints: On your palette, mix small amounts of ceramic paint with a few drops of ceramic paint thinning medium or water (start with a 1:1 ratio and adjust) until it reaches a translucent, watercolor-like consistency. Test on a scrap surface.
- Apply first wash: Using a soft, wide brush, apply a light wash of your chosen color onto the mug. Work quickly to spread the paint before it dries.
- Layer and blend: While the first wash is still slightly wet (or after it’s mostly dry for sharper layers), apply another color next to it or slightly overlapping. Use a clean, damp brush to gently blend the edges, creating soft transitions.
- Add details (optional): Once the base layers are dry, use a more concentrated (less diluted) paint with a fine brush to add small details, lines, or darker accents, similar to artistic mug decoration.
- Dry and cure: Allow your faux watercolor painted mug to air dry completely (24-72 hours). Then, bake according to the paint instructions for permanently painted mugs that are dishwasher safe.
Pro-Tip: To achieve the classic watercolor “bloom” effect on your painted pottery mugs, apply a drop of slightly thinned darker paint onto a still-wet lighter wash. The colors will spread and blend organically. This underglaze painting technique is an artistic way to create unique designs.
7. Designing Unique Marbled Effect Painted Pottery Mugs

Achieve stunning swirls! Pin this marbled mug idea for a truly unique painted mug design!
The water marbling technique creates artistic pottery mugs that look impossible to paint by hand. By floating food-safe ceramic paints on water and dipping the mug, you capture organic swirls that are completely unique to each piece. This method of decorating pottery cups is fast and yields professional-looking results with minimal drawing skill.
Supplies Needed
- Blank ceramic mug: White or light-colored mugs work best for a visible marbled effect.
- Food-safe ceramic paints: 2-3 contrasting colors.
- Small, shallow container: Wider than your mug, deep enough to submerge the area you want to marble (e.g., plastic food container, disposable aluminum pan).
- Water: To fill the container.
- Stirring sticks or skewers: For swirling paints.
- Rubbing alcohol: For mug preparation.
- Oven: For curing.
- Gloves: To protect hands from paint.
Step-by-Step Directions
- Prepare the mug: Clean the mug with rubbing alcohol.
- Prepare marbling bath: Fill your shallow container with water. (Optional: Some techniques use a borax-water solution or specific marbling medium to help paints float better).
- Add paint drops: Wearing gloves, gently drip small amounts of your ceramic paints onto the surface of the water. Start with one color, then add others.
- Swirl the paints: Using a stirring stick or skewer, gently swirl the paint drops on the water surface to create a marbled pattern. Do not overmix.
- Dip the mug: Hold the mug by its handle and slowly dip the desired section of the mug (e.g., the bottom half, or the entire exterior) into the marbled water. As you pull it out, the paint will adhere to the mug’s surface.
- Remove excess paint: Carefully lift the mug out. You can use a paper towel to gently blot any excess water/paint from the rim or untouched areas.
- Dry and cure: Allow the marbled painted mug to air dry completely (24-72 hours). Then, bake according to the paint instructions for dishwasher safe painted mugs and permanently painted mugs.
Pro-Tip: When creating a marbled design on your painted pottery mugs, ensure your paints are not too thick; thin them slightly if necessary, but avoid making them watery. A good consistency allows them to float and swirl beautifully, a key for unique painted mug designs and avoiding paint not sticking to ceramic fix.

8. Mastering Stenciled Silhouette Painted Pottery Mugs

Achieve crisp designs! Pin this stencil idea for your DIY painted mug project!
Stencils are the secret weapon for perfect imagery when customizing ceramicware. They allow you to add precise stenciled silhouettes to your painted pottery mugs, from animals to complex patterns, without freehand drawing. The trick to successful stenciled mugs lies in the application method: pouncing rather than brushing to keep lines sharp.
Supplies Needed
- Blank ceramic mug: A smooth surface for good stencil adhesion.
- Food-safe ceramic paints: Your chosen color for the silhouette.
- Stencils: Self-adhesive vinyl stencils specifically designed for curves or flexible mylar stencils.
- Sponge pouncer or firm-bristle brush: For applying paint without bleeding.
- Painter’s tape: To secure non-adhesive stencils.
- Rubbing alcohol: For mug preparation.
- Oven: For curing.
Step-by-Step Directions
- Prepare the mug: Clean the mug thoroughly with rubbing alcohol.
- Position the stencil: Carefully place your stencil onto the mug. If it’s self-adhesive, press firmly to ensure all edges are sealed. If it’s a regular stencil, use painter’s tape to hold it securely in place, especially around the edges of the design.
- Apply paint: Dip your sponge pouncer or firm brush into a small amount of ceramic paint. Blot off any excess. Use an up-and-down dabbing motion (pouncing) to apply thin, even coats of paint over the stencil opening. Avoid brushing, as this can cause paint to bleed under the edges.
- Layer coats: Apply 2-3 thin coats, allowing each to dry for a few minutes before the next, until the color is opaque.
- Remove stencil: While the final coat is still slightly wet (but not fully dry), carefully peel off the stencil. This helps prevent jagged edges.
- Touch up (if needed): Use a fine-tip brush to touch up any small bleeds or imperfections if necessary.
- Dry and cure: Allow your stenciled silhouette mug to air dry completely (24-72 hours). Then, bake according to the paint instructions to ensure permanently painted mugs that are dishwasher safe.
Pro-Tip: For the cleanest stencil lines on your painted pottery mugs, apply a thin layer of your base ceramic paint color (the color of your mug itself) over the stencil edges before applying your chosen silhouette color. This expert pottery painting tip seals the stencil, preventing paint from bleeding underneath.

9. Crafting Minimalist Two-Tone Dipped Painted Pottery Mugs

Simple elegance! Pin this minimalist two-tone design for your next painted ceramic mugs update!
The two-tone dipped design is a staple of modern ceramics, offering a clean, minimalist mug design that works in any kitchen. This method involves masking and dipping to create color block pottery. It focuses on the contrast between the raw mug (or a base color) and the dipped section, resulting in stylish designer mugs.
Supplies Needed
- Blank ceramic mug: A smooth, clean surface is key for a sharp dipped line.
- Food-safe ceramic paints: Two contrasting or complementary colors.
- Painter’s tape: High-quality, low-tack for a super-sharp dividing line.
- Container for dipping: Taller than the section you want to dip, just wide enough for the mug.
- Rubbing alcohol: For mug preparation.
- Oven: For curing.
Step-by-Step Directions
- Prepare the mug: Clean the mug thoroughly with rubbing alcohol.
- Tape off the dividing line: Decide where you want your two-tone separation to be. Apply painter’s tape firmly around the mug to create a straight, clean line. Press down the edges well.
- Paint the first section: Paint the area above the tape with your first color. Apply thin, even coats until opaque. Allow to dry completely.
- Prepare for dipping: Once the first painted section is completely dry, you can proceed to dip. Pour your second paint color into the dipping container. Ensure the paint level is just below your tape line.
- Dip the mug: Holding the mug by the handle (or the already painted and dried section), slowly and steadily lower the unpainted part of the mug into the second paint color. Dip only up to the tape line.
- Lift and drain: Slowly lift the mug straight up. Allow any excess paint to drip off. You may need to gently dab the very bottom edge with a paper towel.
- Remove tape: While the second coat is still slightly wet (but not flowing), carefully peel off the painter’s tape to reveal a crisp dividing line.
- Dry and cure: Allow your two-tone dipped mug to air dry completely (24-72 hours). Then, bake according to the paint instructions to ensure dishwasher safe painted mugs that are permanently painted.
Pro-Tip: For an ultra-sharp dividing line on your painted pottery mugs, apply a thin layer of clear ceramic medium along the edge of the painter’s tape before dipping or painting. This professional pottery studio method acts as a seal, preventing paint from bleeding under the tape.

Key Takeaways: Your Quick Guide to Painted Pottery Mugs
Now that you’ve explored these creative techniques, it’s helpful to recap the core principles that ensure success for any DIY painted mugs project. Mastering these fundamentals bridges the gap between a fun afternoon craft and creating lasting, functional custom painted mugs.
- Always use food-safe ceramic paints and follow curing instructions to ensure your painted pottery mugs are safe for use. This addresses critical safety and durability concerns, making your hand painted mugs functional art.
- Proper mug preparation, including cleaning with rubbing alcohol, is crucial for optimal paint adhesion and a lasting design. Skipping this step can lead to paint chipping on mugs solution issues.
- Experiment with various techniques like geometric patterns, ombre blends, or stenciled silhouettes to create truly unique painted mug designs. Each method offers a distinct aesthetic for artistic pottery mugs.
- Leverage tools like painter’s tape, fine-tip brushes, or sponge pouncers for precision, especially in detailed designs or clean lines. These expert pottery painting tips help in decorating pottery cups effectively.
- Patience is key: allow sufficient drying time between coats and before curing to prevent smudging or uneven finishes. This is vital for permanently painted mugs and avoiding fading mug paint prevention.
- Always bake your painted pottery mugs in the oven according to the paint manufacturer’s guidelines to make them dishwasher and microwave safe. This ensures durable painted mugs that can withstand daily use.
- Don’t be afraid to personalize your mugs with quotes, nature motifs, or abstract splatters to reflect your style and make them great gifts. Custom painted ceramicware adds a special touch.
People Also Ask About Painted Pottery Mugs
Even with a solid plan, questions often arise about the specifics of materials and safety when painting ceramic mugs. Below, we address the most common queries to clarify ceramic art techniques and ensure you feel confident in your process.
What kind of paint stays on ceramic mugs permanently?
For permanent results on painted pottery mugs, you must use oven-bake ceramic paints or paint pens specifically designed for ceramics, which cure and adhere strongly after heat treatment. These are typically acrylic-based or enamel paints formulated to be durable and resistant to washing once properly baked. Unlike regular acrylics, these paints create a hard, chip-resistant finish.
Are hand painted mugs dishwasher safe?
Many hand painted mugs can be made dishwasher safe, but it depends entirely on the type of paint used and the curing process. Only paints explicitly labeled as “dishwasher safe” after oven curing should be used, and always follow the manufacturer’s specific baking instructions to achieve maximum durability and wash resistance for your painted pottery mugs.
What materials do I need for mug painting?
Essential materials for painting ceramic mugs include a clean blank ceramic mug, food-safe ceramic paints or paint pens, rubbing alcohol for surface preparation, and an oven for curing. Depending on the design, you might also need paintbrushes, painter’s tape, stencils, or tracing paper. Always ensure paints are non-toxic paint for mugs.
How do you make painted ceramic mugs food safe?
To make painted ceramic mugs food safe, only use paints that are explicitly labeled as “food-safe” by the manufacturer, and ensure you paint only on the exterior surfaces of the mug, avoiding areas that will touch lips or food. While some external paints are food-safe after curing, internal painting often requires specific glazes and firing methods not typically done at home.
Can you use regular acrylic paint on mugs?
While you can apply regular acrylic paint to mugs, it is generally not recommended for functional painted pottery mugs that will be washed or used for drinking, as it is not food-safe and will chip, peel, or wash off easily. For decorative-only mugs or temporary projects, regular acrylics might suffice, but they lack the durability and safety features of specialized ceramic paints.
How long do painted pottery mugs need to dry before baking?
Painted pottery mugs typically need to air dry for at least 24-72 hours before baking, though specific drying times can vary by paint brand and climate. Always consult the ceramic paint manufacturer’s instructions, as adequate air drying ensures the paint is completely set and prevents bubbling or cracking during the oven-curing process.
What is the best ceramic paint for beginners?
For beginners, ceramic paint pens are often the best choice for painting ceramic mugs due to their ease of use, control, and minimal mess. They offer precision similar to drawing with markers, making it simple to create clear lines, dots, and text. Look for non-toxic paint for mugs that are oven-bake for permanence.
How do I fix mistakes when painting ceramic mugs?
Small mistakes on painted pottery mugs can often be gently scraped off with a craft knife or cotton swab dipped in rubbing alcohol while the paint is still wet. If the paint has dried, you might need to use a bit more rubbing alcohol and a firmer scrub, or carefully re-prime and repaint the area if the mistake is extensive, a common troubleshooting ceramic paint solution.
What is the difference between oven-bake paint and air dry ceramic paint?
Oven-bake ceramic paints for painted pottery mugs require heat treatment in a conventional oven to cure and become permanent, durable, and often dishwasher safe, whereas air-dry ceramic paints simply cure over several days at room temperature. Air-dry paints are generally less durable and not typically food-safe or dishwasher safe, making oven-bake paints superior for functional mugs.
Where can I find blank ceramic mugs for painting projects?
You can find blank ceramic mugs for painting projects at craft stores, online retailers like Amazon, pottery supply stores, or even discount stores. Look for ceramic bisque blanks or plain white ceramic mugs that are unglazed and suitable for decoration, ensuring they are clean and free of imperfections before you begin painting ceramic mugs.
Final Thoughts on Painted Pottery Mugs
Transforming ordinary blank mugs into extraordinary, personalized pieces of art with painted pottery mugs is a wonderfully rewarding craft. As we’ve explored through these 9 essential design ideas for 2026, the possibilities for creative expression are truly endless, from crisp geometric patterns to dreamy watercolor effects and bold typography. Beyond the aesthetic appeal, the process of painting ceramic mugs allows for a unique blend of creativity and practicality, resulting in custom painted ceramicware that’s not only beautiful but also functional, adding a personal touch to your daily routine or making thoughtful gifts.
Remember, the key to successful and durable painted pottery mugs lies in selecting the right food safe ceramic paints, diligently preparing your surface, applying techniques with care, and meticulous following the curing instructions to ensure your creations are dishwasher safe painted mugs and long-lasting. Whether you’re a beginner dabbling in DIY painted mugs or a seasoned crafter, each project offers a chance to refine your skills and bring your unique vision to life. So grab your blank mugs and paints—it’s time to create some art! Which design idea are you most excited to try first?
Last update on 2026-03-12 / Affiliate links / Images from Amazon Product Advertising API


