Struggling to find the perfect romantic manicure for the season of love? You’re not alone in searching for the ideal pink valentines day nails that feel both festive and chic. It can be overwhelming to sort through endless designs to find one that truly fits your style.
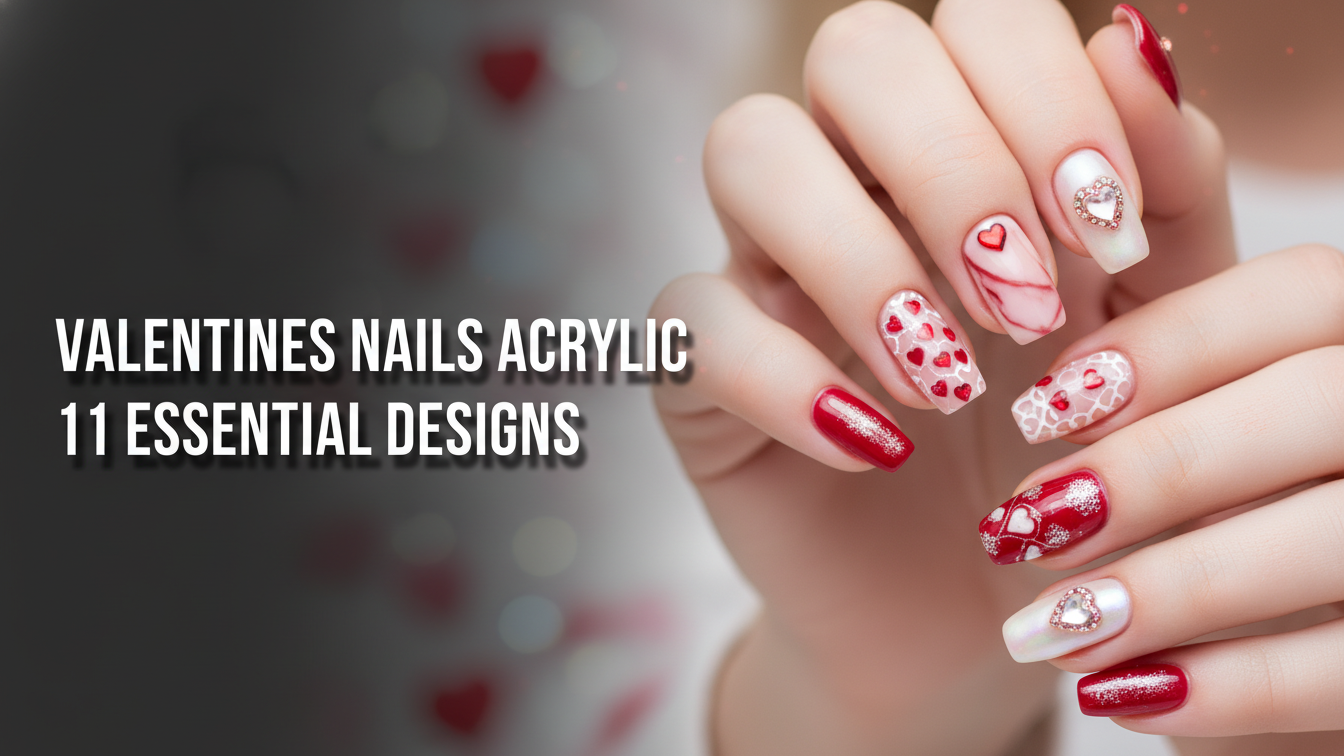
The best pink Valentine’s Day nails for 2026 blend classic romance with modern trends, featuring designs like minimalist short nails with tiny hearts, elegant pink chrome nails, and romantic pink and red ombre effects. These styles offer a perfect way to celebrate the season with a chic and festive manicure.
Drawing from current (2026) nail art trends and established best practices, this guide delivers the ultimate curated list. We’ll explore 11 expert-tested designs, from simple and sweet to bold and glamorous. Get ready to discover your new favorite way to wear pink for Valentine’s Day.
What Are The Best Pink Valentines Day Nails for 2026?
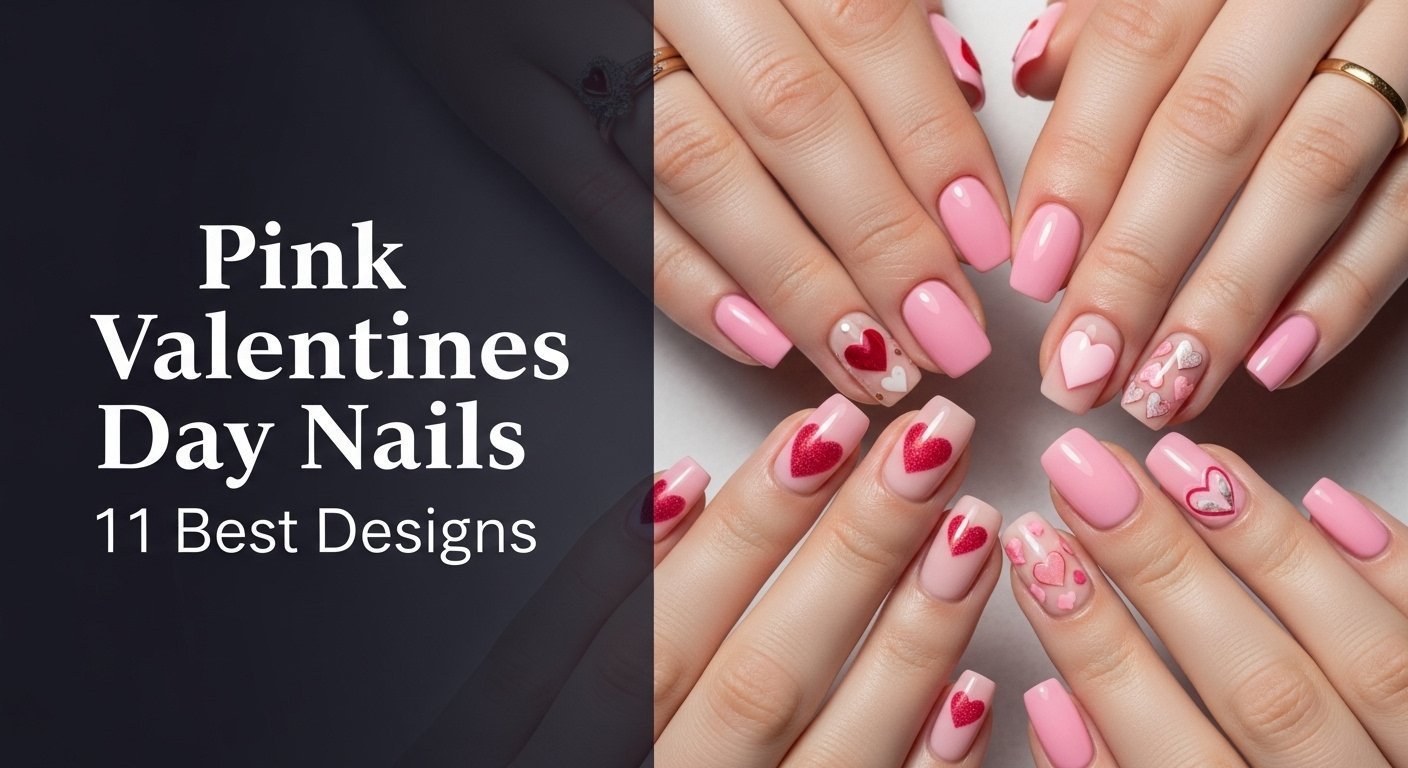
Choosing the perfect pink valentine’s day nail ideas is all about finding a style that captures the romantic spirit of the holiday while reflecting your personal taste. For 2026, the trends are beautifully diverse, offering something for everyone. We’re seeing a strong emphasis on texture and finish, with looks like mirror-like pink chrome nails and velvety cat eye effects taking center stage. At the same time, the charm of minimalist pink nails remains undeniable, with delicate heart accents on short nails proving that subtlety can make a powerful statement. This curated list celebrates that variety, showcasing the 11 best designs that blend timeless romance with modern flair, ensuring you’ll find the perfect inspiration for your V-day manicure.
Pink Valentines Day Nails: 11 Best Designs for 2026
Ready to find your perfect match? This listicle is your ultimate guide to the most beautiful and on-trend pink valentine nail art for the season. We’ve gathered 11 distinct and gorgeous designs, complete with the products you’ll need and the step-by-step instructions to achieve the look, whether you’re a DIY pro or taking inspiration to your favorite salon. From simple pink valentine styles that are easy for beginners to stunning pink and red nails that make a statement, you’re sure to fall in love with one of these looks.
1. Create a Minimalist Short Pink Manicure with a Tiny Heart Accent

Pin this subtle and sweet look to your ‘Valentine’s Day Style’ board!
This short simple pink manicure proves that less is more. It’s an elegant, understated option perfect for anyone seeking a touch of festive spirit without going over the top. The beauty of this design lies in its simplicity, making it a fantastic choice for easy diy pink valentines day nails for beginners. The soft light pink nails provide a clean and classic base, while the single tiny heart adds a delicate, romantic touch that’s both sweet and sophisticated.
Products & Tools Used
- Base Coat (e.g., Orly Bonder)
- Light pink nails polish (e.g., OPI Nail Polish in ‘Bubble Bath’ or ‘Funny Bunny’)
- White or red accent polish for the heart
- Fine-tipped nail art brush or a dotting tool
- High-gloss top coat application (e.g., Seche Vite Dry Fast Top Coat)
Application Steps
- Prepare nail bed by cleaning, filing nails to a neat, short shape, and pushing back cuticles.
- Apply one thin layer of base coat and let it dry completely.
- Paint two coats of your chosen light pink nail polish, allowing each coat to dry.
- On your ring finger, use the dotting tool or fine brush to create two small, equal-sized dots side-by-side.
- Drag each dot downwards at a 45-degree angle to meet at a point, forming a heart shape.
- Once the heart is dry, seal glitter (if any) and the design with a generous layer of high-gloss top coat.
Pro-Tip: For a perfectly symmetrical heart, use the smallest dotting tool you have. If you don’t have one, the tip of a toothpick or a bobby pin works great. This is a key part of micro-french tip precision adapted for nail art.

2. Achieve a Stunning Pink and Red Ombre Effect

Save this gorgeous gradient look for your next salon appointment!
Why choose one color when you can have both? A pink and red ombre effect is a passionate and eye-catching choice that perfectly captures the romantic energy of Valentine’s Day. This design, which often features hot pink and red valentine’s day nails acrylic styles, creates romantic vibe by blending the two iconic colors of the holiday into a seamless gradient. Learning to create ombre effect at home is easier than it looks and delivers a professional-quality finish that’s sure to turn heads.
Products & Tools Used
- Base Coat
- A pastel pink or baby pink nail polish
- A classic red nail polish
- A disposable makeup sponge
- Liquid latex or tape for around the nail
- Glossy Top Coat
Application Steps
- Prepare nail bed and apply a base coat.
- Paint two coats of the light pink polish as your base color and let it dry completely.
- Apply liquid latex or tape to the skin around your nail to make cleanup easier.
- On the flat surface of a makeup sponge, paint a stripe of the pink polish and a stripe of the red polish right next to it, slightly overlapping.
- Gently dab the sponge onto your nail, moving it slightly up and down to blend pink shades. Repeat for more color intensity.
- Remove the latex/tape and clean up edges with a brush dipped in acetone.
- Finish with a thick glossy top coat to smooth out the gradient.
Pro-Tip: To achieve a seamless blend, slightly dampen the makeup sponge before applying the polish. This helps the colors merge more smoothly and prevents the sponge from absorbing too much product. This is a form of gradient airbrushing mimicry.

3. Design Elegant Pink Chrome Nails with a Heart Accent

Pin this ultra-luxe chrome design to your ‘Dream Nails’ board!
For a truly modern and luxurious look, pink chrome nails are the answer. This trend achieves chrome look with a stunning mirror-like finish that feels futuristic and incredibly chic. A pink chrome nails for valentine’s day manicure feels special and high-fashion. The process involves using a special chrome powder over a gel base, and it requires UV lamp for proper curing. Adding a negative space heart accent on one finger takes this trendy look and makes it perfectly romantic.
Products & Tools Used
- UV nail lamp
- Gel Base Coat
- Pink Gel Polish (any shade)
- No-Wipe Gel Top Coat
- Pink chrome powder
- A silicone applicator or eyeshadow sponge
- A heart-shaped nail vinyl or sticker (optional)
- A soft, fluffy brush for dusting
Application Steps
- Perform a gel manicure as usual: apply and cure the gel base coat, followed by two coats of pink gel polish, curing after each layer.
- If creating a negative space heart, place the heart vinyl firmly on the nail now.
- Apply a thin layer of No-Wipe Gel Top Coat and cure for the time recommended by the manufacturer (usually 30-60 seconds). Do not over-cure.
- Dip your silicone applicator into the chrome powder and rub it firmly onto the nail surface until the mirror effect appears.
- If you used a vinyl, carefully peel it off now.
- Gently dust off any excess powder with a fluffy brush.
- Seal the design by applying another layer of No-Wipe Gel Top Coat and curing one final time.
Pro-Tip: The key to a perfect chrome finish is the top coat application before the powder. It must be a no-wipe formula and must be cured just right. If it’s under-cured, it will be sticky and clumpy. If it’s over-cured, the powder won’t stick at all. I recommend testing on a swatch stick first. This is a critical step in apres gel-x application as well.

4. Paint Sweet Pink and White “Candy Heart” Nails

How adorable is this candy-inspired look? Pin it for a super sweet V-Day!
Embrace nostalgia with this playful and cute pink valentine nail design inspired by classic conversation hearts. Using various shades of pastel pink nail polish and a matte finish gives this manicure an authentic candy-like texture. This pink and white nails look is all about fun and personality. The lettering utilizes stamping kit technology for an easy, clean look, or can be hand-painted for a more personal touch, making it a standout piece of valentine nail art.
Products & Tools Used
- Base Coat
- Various pastel pink nail polishes
- A high-quality matte top coat
- Red nail polish for lettering
- An ultra-fine striping brush or a Valentine’s-themed nail stamping kit
- Nail stamping plate with words/phrases (if using that method)
Application Steps
- After your base coat, paint each nail with a different shade of pastel pink and allow to dry completely.
- Apply a layer of matte top coat. This is crucial for the candy-like finish and helps the lettering adhere better. Let it dry fully.
- Freehand Method: Using your ultra-fine brush and red polish, carefully paint short words like “LOVE,” “XOXO,” or “BE MINE” onto each nail.
- Stamping Method: Apply red polish to your chosen word on the stamping plate, scrape off the excess, pick up the design with your stamper, and roll it onto your nail.
- Because you already used a matte top coat, you can choose to leave the design as-is for a true candy look, or seal it with another thin layer of matte top coat.
Pro-Tip: When free-handing letters, use a polish that is highly pigmented so you only need one stroke. Water-based acrylic paint can also be easier to work with for fine details, as you can wipe away mistakes with water before sealing. This is a trick used in hand-painted negative space art.

5. Style Classy Pink French Tips with a Heart-Shaped Smile Line

A romantic twist on a classic! Pin this chic heart-tipped French manicure.
Take the timeless French manicure and give it a romantic update for Valentine’s Day. This classy pink valentines day nails design replaces the traditional white tip with a vibrant hot pink and cleverly shapes the smile line like the top of a heart. This pink french tip is sophisticated, modern, and undeniably festive. It’s the perfect answer to “how to do a pink french tip for valentine’s?” in a way that feels both classic and fresh, especially on elegant pink and white valentines day nails almond shape.
Products & Tools Used
- Base Coat
- A sheer, natural nude + pink polish for the base (e.g., Essie ‘Mademoiselle’)
- A hot pink or other vibrant pink polish for the tip
- A fine-tipped nail art brush
- Glossy Top Coat
Application Steps
- Apply your base coat and two coats of the sheer pink polish. Let it dry completely.
- Using the fine-tipped brush and your hot pink polish, design nail art by drawing two small, curved arches starting from the center of your nail tip, dipping down slightly and then sweeping up to the corners of the nail.
- This should create a shape resembling the top two curves of a heart.
- Fill in the area above this line to the tip of the nail with the hot pink polish.
- Use your nail art brush dipped in acetone to clean up edges and perfect the heart shape of the smile line.
- Finish with a glossy top coat to seal the design and add shine.
Pro-Tip: For a super crisp line, use a high-quality builder gel in a bottle for your base. After curing, wipe the inhibition layer, paint your French tip design with gel polish, cure, and then apply top coat. The firm, non-sticky surface of the cured builder gel makes painting precise lines much easier.

6. Apply Easy and Glamorous Pink Glitter Fade Nails

Add some sparkle to your V-Day! Pin this easy glitter fade tutorial.
Nothing says “celebration” quite like glitter. This pink glitter nails design is glamorous, fun, and surprisingly easy to create. By concentrating the glitter at the cuticle and fading it out towards the tip, you create an effortlessly chic and sparkly pink nails look. This technique is perfect for beginners who want maximum impact with minimal fuss. For a luxe touch, consider baby pink valentines day nails with gold glitter, which adds warmth and sophistication.
Products & Tools Used
- Base Coat
- A creamy baby pink nail polish
- A pot of loose pink or rose gold nail glitter, or a dense glitter polish
- A small, flat brush or a makeup sponge
- A smoothing top coat (optional but recommended)
- Glossy Top Coat
Application Steps
- After your base coat, apply two coats of the pink polish and let it dry.
- Using Glitter Polish: Apply the glitter polish heavily at the cuticle area. Then, wipe most of the polish off the brush and lightly drag the remaining glitter down the nail to create the fade.
- Using Loose Glitter: While the second coat of pink polish is still tacky, use a small brush to pick up loose glitter and press it onto the nail, concentrating the glitter at the cuticle. Use a clean, dry fan brush to lightly sweep the glitter downwards.
- Wait for the design to dry as much as possible.
- Seal glitter with a smoothing top coat to even out the bumpy texture.
- Finish with a final layer of glossy top coat for shine and durability.
Pro-Tip: For a truly professional look, use the encapsulated glitter designs technique. Apply a layer of clear builder gel over the glitter before your final top coat. This creates a smooth, glass-like finish and ensures the glitter never feels rough or snags on clothing.

7. Rock Edgy Matte Pink and Black Heartbeat Nails

Not your average Valentine’s look! Pin this edgy matte pink and black design.
If sweet and romantic isn’t your vibe, this edgy pink and black design is the perfect alternative. Combining a vibrant hot pink nail polish with a sharp, graphic heartbeat line in black creates a look that’s cool, modern, and totally unique. The matte pink nails finish enhances the edgy aesthetic, making the black line art pop. It’s a fantastic choice for a matte pink and black valentines day nails coffin shape, offering a bold take on the traditional holiday theme.
Products & Tools Used
- Base Coat
- A vibrant hot pink nail polish
- A highly pigmented black nail art liner polish
- A long, thin striping brush
- A high-quality matte top coat
Application Steps
- Apply your base coat and two coats of the hot pink polish. Let it dry completely.
- Apply a layer of matte top coat and allow it to dry fully. This creates the perfect canvas.
- Using the black liner polish and a long striping brush, paint a continuous “EKG” line across your nails. To do this, lay the brush flat and drag it in a single motion.
- On the ring finger, interrupt the line and draw a small, sharp heart before continuing the line.
- Allow the black line art to dry completely.
- You can leave the black line glossy for a cool mixed-texture look or go over it carefully with more matte top coat for a uniform finish.
Pro-Tip: The trick to a straight line is to load your striping brush with polish, place the tip where you want to start, and pull the brush towards you in one confident, fluid motion without stopping. Don’t “draw” it like a pencil; let the brush do the work. This is a fundamental professional nail artist tip.

8. Master the Pink “Aura” or “Blush” Nail Trend

Get the look of the moment! Pin this dreamy aura nails tutorial.
Capture the ethereal, glowing trend of the moment with aura nails. This design, also known as blush pink nails, achieves a soft, radiant glow from the center of the nail, mimicking a spiritual aura or a delicate blush. While it looks like a complex airbrush effect, it can be easily recreated at home using blooming gel. The result is a dreamy, otherworldly manicure that’s perfect for a romantic, pink aesthetic nails vibe and is a softer alternative to a rose quartz manicure.
Products & Tools Used
- Gel Base Coat and UV Nail Lamp
- Sheer milky white or nude pink gel polish
- “Blooming” Gel Polish
- A pigmented magenta fingertips or hot pink gel polish
- A dotting tool or small brush
- Gel Top Coat
Application Steps
- Apply and cure your gel base coat, followed by one or two coats of the sheer milky white polish, curing each layer.
- Apply a layer of Blooming Gel. Do not cure this layer.
- Place a small dot of the pigmented pink gel polish in the center of the uncured blooming gel.
- Watch as the blooming gel causes the pink dot to disperse and spread out, creating the soft aura effect. Allow it to “bloom” to your desired size.
- Once you are happy with the effect, cure gel nails immediately to set the design.
- Finish with a layer of glossy top coat and cure one last time.
Pro-Tip: The thickness of your blooming gel layer and the amount of color you add will determine the final look. A thicker layer of blooming gel will cause the color to spread faster and wider. Practice on a swatch stick to master your aesthetic coherence before moving to your nails.

9. Craft Romantic Pink Velvet “Cat Eye” Nails

Pure luxury! Pin this mesmerizing pink velvet cat eye nail tutorial.
For a manicure that’s pure luxury and magic, look no further than pink cat eye nails. This technique uses a special magnetic polish and requires a nail magnet to create a mesmerizing, shifting line of light that mimics the look of crushed velvet. The velvet effect cat eye is deeply dimensional and looks incredibly luxe, making it one of the most romantic pink nails you can choose. It’s a show-stopping look that’s guaranteed to get you compliments.
Products & Tools Used
- Gel Base Coat and UV Nail Lamp
- Black or dark purple gel polish (optional, as a base)
- Pink Cat Eye Gel Polish
- A nail art magnet wand (often comes with the polish)
- Gel Top Coat
Application Steps
- Apply and cure your gel base coat. For a more dramatic effect, apply and cure one coat of black polish.
- Apply a thick coat of the pink cat eye gel polish. Do not cure yet.
- Hold the magnet wand close to the nail for 5-10 seconds. Hover it over the center to create the “velvet” look, or hold it at an angle to create a sharp diagonal line.
- Experiment with the magnet’s position to manipulate the magnetic particles into your desired design.
- Once you are happy with the effect, cure gel nails immediately to lock the magnetic particles in place.
- Finish with a layer of glossy top coat and cure.
Pro-Tip: For the popular “velvet” or “crushed velvet” effect, use a strong bar magnet and hover it over the center of the nail. Then, quickly move the magnet to each of the four sides (top, bottom, left, right) for a second each. This pushes all the shimmer to the middle, creating a universal glow. This is an industry-standard technique for this specific look.

10. Use Pink and Gold Flake for a Delicate, Luxe Look

So chic! Pin this pink and gold foil design for an effortlessly elegant manicure.
The combination of pink and gold nails is eternally elegant. This design uses delicate gold foil flakes suspended within a sheer, milky blush pink nail polish to create a look of effortless luxury. It’s a perfect example of a classy pink valentines day nails look that feels expensive and sophisticated but is surprisingly simple to achieve at home. The “sandwich” technique of layering the foil between coats of polish creates beautiful depth and dimension.
Products & Tools Used
- Base Coat
- A sheer, milky blush pink nail polish
- Gold foil flakes
- A pair of fine-tipped tweezers
- Glossy Top Coat
Application Steps
- Apply your base coat and one coat of the sheer pink polish.
- While the polish is still tacky, use tweezers to pick up small pieces of gold foil and gently place them onto the nail in a random pattern.
- Gently press the foil down so it lies flat against the nail.
- Apply another one or two coats of the sheer pink polish over the top of the foil. This creates a beautiful, suspended, “in-cased” look.
- Allow the layers to dry completely.
- Finish with a glossy top coat to smooth everything out and add a final layer of shine.
Pro-Tip: This technique is central to creating a rose quartz manicure. To enhance that effect, use the “blooming” gel technique from idea #8 with a tiny bit of white polish after placing the foil to create subtle white veins before your final top coat.

11. Apply Effortless Pink Valentine’s Day Nail Wraps

The easiest Valentine’s mani ever! Pin these nail wrap tips for a perfect application.
Want a flawless, intricate manicure with zero artistic skill required? Nail wraps are your best friend. These nail strips come with pre-printed designs, offering an incredibly easy and affordable valentine’s nails option. They are the ultimate quick dry pink polish alternative and come in endless Valentine’s themes, from hearts and glitter to stripes and flowers. The application simplifies nail art to a simple stick-and-file process, giving you a perfect manicure in minutes.
Products & Tools Used
- Alcohol prep pad
- A set of pink Valentine’s Day nail wraps or strips
- A wooden cuticle stick
- A nail file
- Top Coat (optional, but recommended for longevity)
Application Steps
- Prepare nail bed thoroughly. Push back cuticles and wipe each nail with an alcohol prep pad to remove any oils. This is the most important step for a long lasting valentine’s manicure.
- Select the nail wrap that best fits your nail size.
- Peel the clear protective layer off the wrap, then peel the wrap from its backing.
- Align the rounded edge of the wrap with your cuticle and press it down firmly, smoothing it from the center outwards. Use the cuticle stick to seal the edges.
- Fold the excess wrap material over the tip of your nail.
- Using a nail file, file downwards at a 90-degree angle to the nail tip. The excess wrap will tear away cleanly. Do not file up and down, as this can lift the wrap.
- For extra protection and shine, apply a layer of top coat.
Pro-Tip: For gel nail wraps, which offer superior durability, a quick 60-second cure under a UV nail lamp after application will give you a rock-hard, salon-quality finish that can last for over two weeks. This combines the ease of a sticker with the durability of a gel manicure.

Key Takeaways
- Trends for 2026 Focus on Texture and Subtlety: The most popular pink valentine’s nail trends are moving beyond simple glitter. Look for finishes like pink chrome nails, velvet cat eye nails, and ethereal “aura” nails for a modern look.
- Minimalism is Chic: You don’t need complex art for a festive look. A minimalist pink nail design on short nails with a single, tiny heart accent is one of the most elegant and popular styles.
- Nail Prep is Non-Negotiable: For any long lasting valentine’s manicure, whether it’s polish, gel, or nail wraps, properly cleaning the nail plate with alcohol to remove oils is the most critical step.
- The Right Top Coat is Everything: A manicure’s finish is defined by its top coat. Use a matte top coat for a candy-heart look, a no-wipe gel top coat for chrome, and a smoothing top coat to tame chunky glitter.
- DIY-Friendly Options Abound: Don’t be intimidated by complex designs. Techniques like glitter fades, ombre sponging, and especially nail wraps make achieving salon-grade results at home easier than ever.
FAQs About pink valentines day nails
Is pink or red better for Valentine’s Day nails?
Both pink and red are classic Valentine’s Day choices, but pink is often more versatile and trendy. Pink offers a wider range of moods, from a soft and romantic pink nail to a bold hot pink. For 2026, many are choosing to combine them in pink and red nails designs like ombre or by having an accent nail of the opposite color.
What nail shape looks best with pink heart designs?
Almond and oval shapes beautifully complement the soft curves of heart designs. The tapered tip of an almond pink nail provides a perfect canvas for placing a single heart or multiple tiny ones. However, a well-placed heart accent looks lovely on any shape, including classic short simple pink square nails.
Are short pink nails in style for Valentine’s?
Absolutely. Short pink nails are incredibly chic and practical for Valentine’s Day. A minimalist pink nail design on short, well-manicured nails is a timeless and popular look. Designs like a simple glitter fade, a micro French tip, or a single tiny heart are perfect for short pink nails.
How do I make my Valentine’s manicure last longer?
The key to a long lasting valentine’s manicure is proper preparation and sealing. Always start by wiping your natural nails with alcohol to remove oils. Use a quality base coat. When wrapping the tip of your nail with polish and top coat, you create a seal that helps in fixing chipped pink nails before they start.
Can you combine matte and glossy pink for Valentine’s?
Yes, combining matte and glossy finishes is a modern and stylish way to add texture to your manicure. A popular technique is to use a matte pink nail polish as the base and then paint a glossy tip (a matte French manicure) or a glossy heart design on top. The contrast is subtle yet very eye-catching.
Final Thoughts on Your Perfect Pink Manicure
From elegant chrome to playful candy hearts, it’s clear that the perfect pink valentines day nails for 2026 are all about expressing your personal style. Whether you opt for a simple DIY design with a single heart or go all-out with a luxurious velvet cat eye, the most important thing is to choose a look that makes you feel festive and confident. With the right tools and techniques, achieving salon-grade results at home has never been more accessible.
Which of these pink nail designs will you be trying for Valentine’s Day?
Last update on 2026-04-09 / Affiliate links / Images from Amazon Product Advertising API