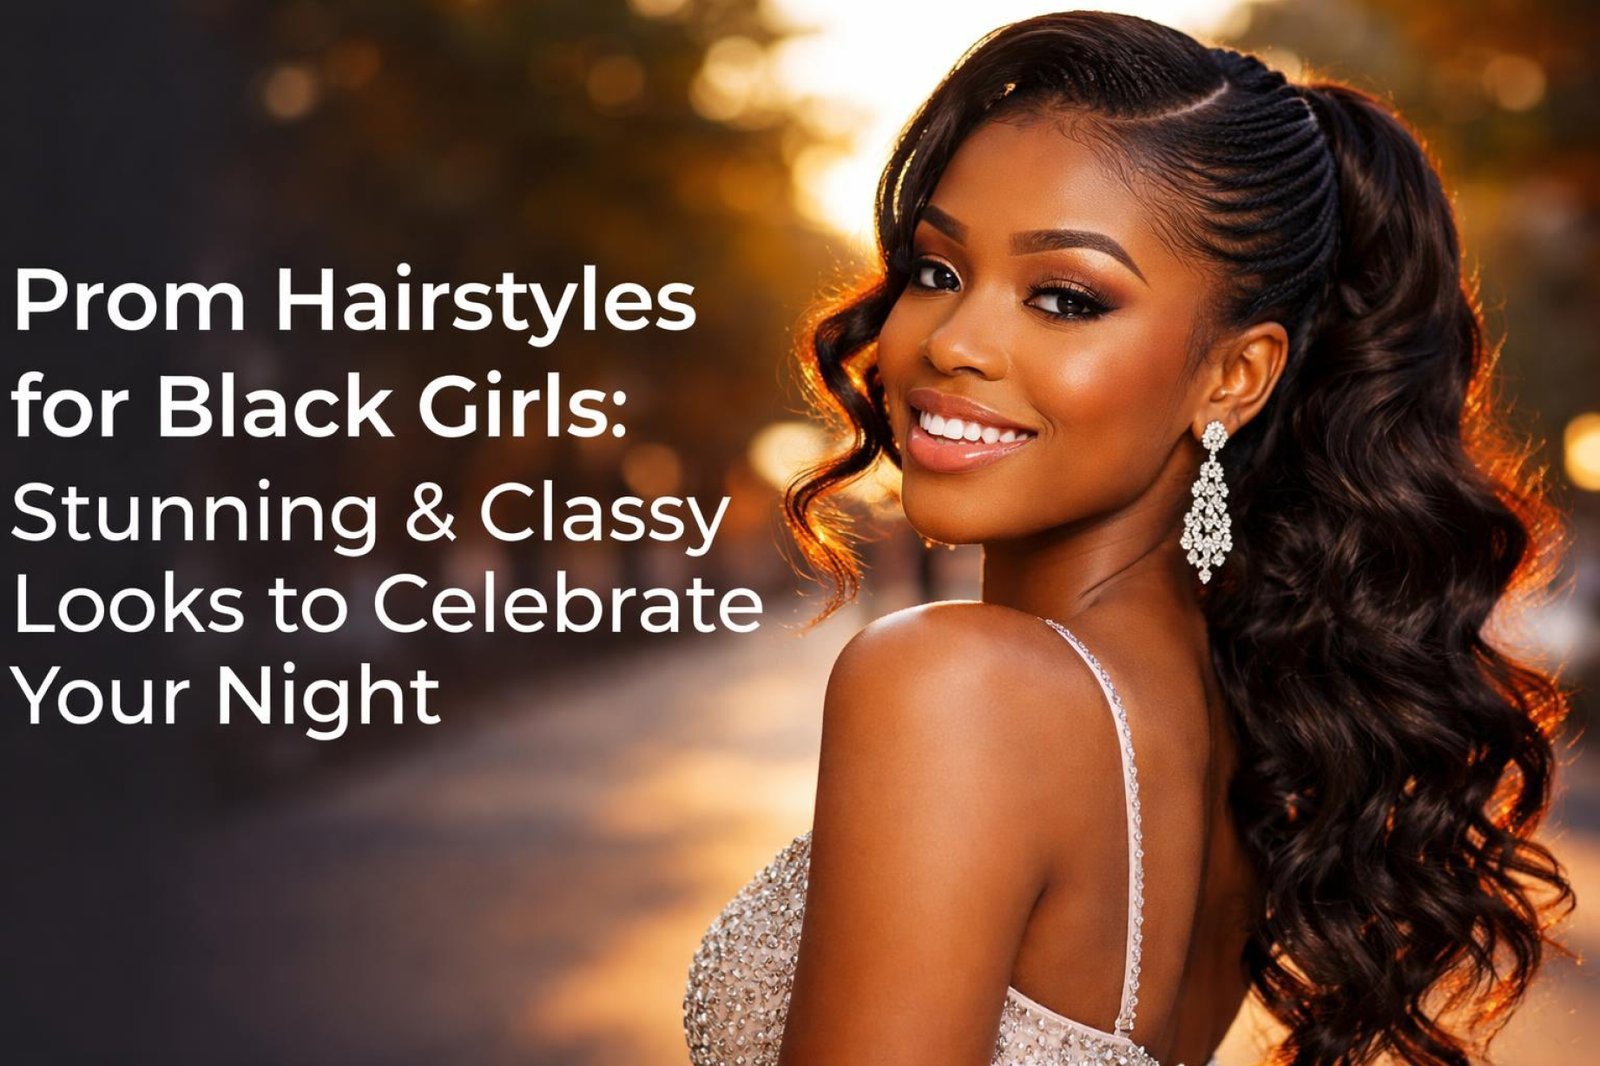
Struggling to find the perfect look for the big night? Choosing the right Prom Hairstyles for Black Girls can feel like the most important decision, a final touch that brings your whole look together and lets your personality shine.
Choosing the perfect prom hairstyle involves finding a look that complements your dress, expresses your personality, and celebrates your unique hair texture. This guide provides stunning and classy options, from elegant updos and goddess braids to glamorous ponytails, with actionable steps to achieve each look for your unforgettable night.
Drawing from expert hairstylist tips and verified style techniques, this guide is your key to unlocking a show-stopping look. We’ll explore a variety of styles that prioritize hair health and provide clear, achievable steps. Get ready to discover the perfect hairstyle that will make you feel confident and beautiful all night long.
What Are the Best Prom Hairstyles for Black Girls?
The quest for the best prom hairstyle is an exciting part of the celebration. It’s about finding a style that not only looks stunning in photos but also feels comfortable and secure while you’re dancing the night away. The ideal hairstyle is a harmonious blend of your personal taste, the style of your prom dress, and the unique beauty of your hair, whether it’s a natural hair texture or a sleek, straightened look. This involves considering everything from elegant updos that show off a detailed neckline to flowing curls that add a touch of romance. Ultimately, the best styles are those that make you feel like the most confident and radiant version of yourself, celebrating this major milestone with grace and flair.
9 Stunning & Classy Prom Hairstyles for Black Girls to Celebrate Your Night
Exploring your options is the best part of prom prep. From timeless updos to trendy braids, there’s a perfect style waiting for you. This curated list is designed to provide both visual inspiration and the practical, actionable steps needed to bring your vision to life. Each hairstyle is broken down into the specific products and tools required and a step-by-step guide to ensure you or your stylist can achieve a flawless finish. We’re focusing on looks that are not only beautiful but are also achievable and designed to last through every photo, dance, and memorable moment of your special evening, including protective prom hairstyles and easy prom hairstyles you’ll love.
1. Create an Elegant High Bun Updo

Pin this classic and timeless look to your ‘Prom Beauty’ board!
Products & Tools Used
- Strong-hold hair gel for a slicked-back base
- High-quality edge control for flawless edges
- A boar bristle brush for smoothing
- Hair elastics and bobby pins
- Donut bun maker (optional, for perfect shape)
- Shine spray for a polished finish
- Kanekalon braiding hair (optional, for added volume)
Application/Styling Steps
- Prep your hair by ensuring it’s detangled and moisturized.
- Slick your hair back into a high ponytail using your strong-hold gel and boar bristle brush. Secure tightly with a hair elastic.
- Smooth a generous amount of edge control along your hairline and style your baby hairs as desired.
- If using a bun maker, pull your ponytail through it. Wrap the hair around the donut, tucking the ends underneath and securing with bobby pins.
- If not using a maker, twist or braid your ponytail, then wrap it around the base to create the bun. Pin it securely in place, ensuring all ends are hidden.
- Finish with a light mist of shine spray for a camera-ready look.
Pro-Tip: For superior 4c moisture retention and to prevent breakage, apply a leave-in conditioner before the gel. To ensure an all-night hold, tie a silk scarf around your edges for 10-15 minutes after applying edge control to set them perfectly.

2. Style Stunning Goddess Braids

Save this regal look for your ultimate prom night inspiration!
Products & Tools Used
- Packs of pre-stretched kanekalon or X-pression braiding hair
- A rat-tail comb for precise parting
- Braid and scalp pomade or a thick styling cream
- Edge control
- Bobby pins
- Optional: Rhinestone clips or gold hair cuffs for decoration
Application/Styling Steps
- Start with stretched, dry hair. Prep by applying a moisturizing pomade throughout.
- Use the rat-tail comb to part your hair where you want the braids to lie. For a crown, a popular option is a deep side part.
- Begin creating a large cornrow along your hairline, feeding in small pieces of the braiding hair as you go to build the ‘Goddess braids‘ size.
- Continue the braid around the perimeter of your head, keeping the tension firm but not tight to avoid protective style tension.
- Once the braid is complete, secure the end with a small elastic or by dipping it in hot water (with caution).
- Pin the end of the braid discreetly under another section of the braid to complete the crown look.
- Accessorize with hair cuffs or clips as desired.
Pro-Tip: To keep the style looking fresh and reduce frizz, sleep with a satin bonnet or use a silk pillowcase. A key to knotless braid longevity (and this style) is minimizing friction. A light spritz of oil sheen can also revive the look before the event.

3. Rock a Sleek High Ponytail with Curls

This glam ponytail is a showstopper! Pin it now for your prom look.
Products & Tools Used
- A drawstring curly ponytail or bundles of human hair sew-in weave
- Strong-hold gel and edge control
- A boar bristle brush
- Heat protectant spray
- A 1 to 1.5-inch barrel curling iron
- Hairspray with a flexible hold
Application/Styling Steps
- Begin by gelling your natural hair into a small, tight, and very sleek high bun. Use the boar bristle brush to eliminate all flyaways.
- Apply edge control to perfect your hairline.
- Install the drawstring ponytail by securing it over your natural bun, pulling the drawstring tight, and securing the combs.
- Take a small piece of hair from the ponytail and wrap it around the base to conceal the drawstring or tracks. Secure with a bobby pin.
- If using bundles that aren’t pre-curled, apply a heat protectant spray.
- Curl the hair in small sections, holding the curling iron for 8-10 seconds per section. For a uniform look, curl all sections in the same direction.
- Once all hair is curled, gently separate the curls with your fingers for more volume and finish with a light-hold hairspray.
Pro-Tip: To ensure your silk press or natural hair base is protected from heat, especially if you need to flat iron it first, use a high-quality heat protectant. For added security, use bobby pins to anchor the base of the weave to your natural hair bun.

4. Define Your Look with Glamorous Side-Swept Curls

Add this Hollywood glam style to your prom board for a truly elegant vibe!
Products & Tools Used
- Hair extensions (clip-ins or a sew-in)
- Heat protectant spray
- A curling wand or iron (1.5-inch barrel recommended)
- Strong hold gel or pomade
- Bobby pins that match your hair color
- A wide-tooth comb for separating curls
- Styling mousse for volume
Application/Styling Steps
- Start with clean, dry, and stretched hair (or a finished sew-in). Apply styling mousse for volume and a heat protectant.
- Create a deep side part with a rat-tail comb.
- On the side with less hair, apply a strong hold gel and brush it back tightly. You can secure this section with a small, decorative braid or twist, pinning it at the nape of your neck.
- On the side with more hair, begin curling one-inch sections away from your face.
- For extra hold, pin each fresh curl with a clip and let it cool completely before releasing (pin curls).
- Once all sections are curled and cooled, remove the clips. Gently use a wide-tooth comb or your fingers to separate the curls and create a soft, voluminous wave.
- Arrange the curls to sweep over your shoulder and finish with a strong-hold hairspray.
Pro-Tip: The choice between synthetic vs human hair properties is critical here. For this style, 100% human hair is recommended as it holds curls better and looks more natural. To prevent the slicked-back side from puffing up due to humidity, use an anti-frizz serum over your gel.

5. Style a Chic Half Up, Half Down Look

The perfect mix of elegant and fun! Pin this half up, half down style.
Products & Tools Used
- A rat-tail comb for parting
- Gel and edge control
- Hair elastic
- Leave-in conditioner and curl cream (for natural texture)
- Flat iron or curling wand (for straightened styles)
- Hair extensions for added length/volume
Application/Styling Steps
- Part your hair horizontally from ear to ear. Clip the bottom section out of the way.
- On the top section, apply gel generously and brush it up into a high ponytail. Secure with a hair elastic.
- You can leave the ponytail as is, or create a small top knot bun for a different look.
- Lay your edges with edge control for a polished finish.
- Release the bottom section.
- For Natural Hair: Apply leave-in conditioner and curl cream to define your curls or coils.
- For Straightened Hair/Extensions: Style the bottom section as desired, either by flat ironing it bone-straight or adding loose waves with a curling wand.
Pro-Tip: To make a ponytail look fancy for prom, wrap a small strand of hair from the ponytail (or a piece of extension hair) around the elastic band and secure it with a bobby pin. This instantly elevates the style from casual to formal.

6. Accessorize a Natural Hair Fro-Hawk

Showcase your beautiful natural hair with this edgy and chic fro-hawk! Pin it now.
Products & Tools Used
- Styling mousse or curl cream for definition
- Strong-hold gel
- A multitude of bobby pins
- An afro pick for volume
- Decorative hair pins or floral hair pieces
Application/Styling Steps
- Start on a freshly washed and defined twist-out or wash-and-go for maximum texture.
- Apply a strong-hold gel to the sides of your hair, from your hairline to just behind your ears.
- Using a boar bristle brush, smooth the gelled sides upwards towards the center of your head.
- Secure the slicked-up sides tightly with bobby pins. Use as many as needed to get a firm hold.
- Use an afro pick to gently fluff the loose hair in the center, creating the ‘hawk’ shape with lots of volume.
- Artfully place your decorative hair pins or other accessories along the line where the slicked sides meet the voluminous center.
Pro-Tip: For short natural hair, this style is perfect. Use a very strong gel and interlocking bobby pins (creating ‘X’ shapes) for extra hold. This is a great way to create an updo illusion without a lot of length.

7. Form a Jumbo Braided Low Bun

So chic and sophisticated! Pin this jumbo braided bun for a classic prom look.
Products & Tools Used
- Packs of Kanekalon or similar braiding hair
- Strong-hold gel
- A boar bristle brush
- Hair elastics
- Bobby pins
- A rat-tail comb for a sharp part
Application/Styling Steps
- Part your hair neatly down the middle (or on the side).
- Apply gel liberally and brush your hair down into a very sleek, low ponytail at the nape of your neck. Secure tightly with a hair elastic.
- Accessorize your natural ponytail by adding the braiding hair. You can do this by folding the braiding hair around your elastic and securing it with another elastic.
- Combine your natural hair with the extensions and create one large, thick braid. Secure the end.
- Gently wrap the jumbo braid around the base of the ponytail to create a large, coiled bun.
- Pin the bun securely in place with large bobby pins, making sure to tuck the end of the braid underneath.
- Apply edge control to your hairline for a flawless finish.
Pro-Tip: To make the bun look extra full, gently pull on the edges of the braid to ‘pancake’ it before you wrap it into a bun. This adds volume and a softer, more intricate appearance without adding more hair. This is a common stylist advice for creating fuller-looking updos.

8. Embrace Boho Knotless Braids with Curls

Capture that free-spirited vibe for prom! Pin these gorgeous boho braids.
Products & Tools Used
- For maintenance: Styling mousse for curls
- For styling: Gold or wooden beads, hair string, or rhinestone clips
- For maintenance: Oil-based scalp spray
- For installation: Pre-stretched braiding hair and bundles of human or high-quality synthetic curly hair
Application/Styling Steps
- This style is best installed by a professional hairstylist who specializes in knotless braids. Communicate that you want ‘boho’ or ‘goddess’ knotless braids, which involves leaving curly pieces out.
- Once installed, you can style the braids for prom. A simple and elegant option is a half-up style.
- Gather the top quarter of your braids and pull them back into a high ponytail, securing with a hair elastic.
- Take a few braids from the ponytail and wrap them around the elastic to conceal it.
- Accessorize by adding beads, string, or cuffs to a few braids around your face to frame it.
- Maintain the curly pieces by applying a small amount of water and styling mousse and scrunching them gently.
Pro-Tip: To ensure knotless braid longevity, always sleep in a satin bonnet or use a silk pillowcase. Ask your stylist about the best way to care for the specific type of curly hair they use, as human hair requires different care than synthetic.

9. Go for a Classic, Sleek Silk Press

Timeless, elegant, and simply stunning. Pin this silk press inspo for a classic prom look.
Products & Tools Used
- For prep: A clarifying shampoo and a deep conditioning treatment
- For styling: A high-quality, salon-grade heat protectant spray
- For styling: A titanium flat iron
- For maintenance: A light, anti-reversion serum or oil
- For maintenance: A silk or satin scarf/bonnet
Application/Styling Steps
- For best and safest results, have your silk press done by a professional hairstylist 1-2 days before prom.
- The process involves a thorough wash and deep conditioning treatment to ensure hair is moisturized.
- A powerful heat protectant is applied before blow-drying the hair straight.
- The stylist will then flat iron your hair in very small sections (the ‘chase method’ is often used) to get it silky and straight.
- To maintain the style for prom night, avoid water and humidity at all costs.
- For nighttime hair protection, wrap your hair or use a satin bonnet to keep it smooth and prevent reversion. A light serum can be used to tame flyaways before the event.
Pro-Tip: Discuss hair porosity management with your stylist. Low porosity hair may require a different type of heat protectant than high porosity hair. To prevent your hair from reverting from sweat while dancing, carry a small amount of a light, humidity-blocking oil to smooth over your hair if needed.

Key Takeaways
- Prioritize Hair Health: The best prom hairstyle is one that makes you feel beautiful without causing heat damage. Always use a heat protectant for styles like a silk press and choose protective styles like braids to give your hair a break.
- Preparation is Everything: A flawless style starts before you even pick up a tool. Ensure your hair is properly cleaned, deep-conditioned, and moisturized to provide the perfect canvas for any updo or braid-out.
- Products Make the Style: Using the right products, like a strong-hold edge control for sleek looks and a quality styling mousse for defining curls, is non-negotiable for achieving a polished, long-lasting style.
- Accessories Elevate the Look: Simple hair accessories like rhinestone clips, pearl pins, or gold cuffs can instantly transform a simple style into a formal, prom-ready look.
- Master the Maintenance: To keep your style perfect all night, understand how to combat humidity and protect it while you sleep. A satin bonnet or silk pillowcase is your best friend for maintaining braids, updos, and silk presses.
- Don’t Be Afraid to Get Help: For intricate styles like goddess braids or a perfect silk press, booking a professional hairstylist can ensure a stress-free experience and flawless, photo-ready results.
FAQs About Prom Hairstyles for Black Girls
How to choose a prom hairstyle for my dress?
A great rule of thumb is to create balance: choose a hairstyle that complements your dress’s neckline. For high-neck or detailed-back dresses, an elegant updo like a high bun or braided crown showcases the design. For strapless or simple necklines, you can opt for more dramatic down-styles like side-swept curls or a long, sleek ponytail.
How to keep edges laid all night at prom?
The key to an all-night hold is a three-step process: product, application, and setting. Use a high-quality, strong-hold edge control. Apply it with a small brush for precision. Most importantly, after styling your edges, tie a silk or satin scarf firmly around your hairline for 15-20 minutes. This uses heat and pressure to lock them in place.
What protective styles are good for prom?
Excellent protective styles for prom include Goddess braids, boho knotless braids, and elegant braided updos. These styles not only look stunning and formal but also protect your natural hair from manipulation and potential damage. They can be installed before prom week, saving you time and stress on the big day.
Is it better to wear a wig or natural hair for prom?
This is a personal choice, as both have benefits; it depends on your desired look and maintenance level. A lace front wig offers endless versatility in color, length, and texture with zero manipulation of your natural hair. Wearing your natural hair, whether in an updo or fro-hawk, is a beautiful way to celebrate your unique texture. Choose what makes you feel most confident.
How do I style short natural hair for prom?
Styling short natural hair for prom is all about definition and accessories. A defined twist-out or wash-and-go can be elevated with a chic fro-hawk by slicking up the sides. You can also create a beautiful look by adding rhinestone clips, a decorative headband, or floral hair pieces to your defined curls.
How do you make a ponytail look fancy for prom?
You can elevate a simple ponytail by focusing on the base and the texture. Create an ultra-sleek base using a strong-hold gel. Then, wrap a piece of hair around the elastic to conceal it. Adding voluminous curls to the ponytail itself using extensions or a curling wand instantly transforms it into a glamorous, formal style.
How do I prevent frizz during prom?
Frizz control starts with moisture and ends with the right finishing products. Ensure your hair is well-moisturized with a deep conditioner before styling. Use an anti-frizz serum or a light oil as the final step in your styling routine. For updos, a good hairspray with humidity resistance is crucial.
How far in advance should I do my prom hair?
This depends on the style. For a silk press, get it done 1-2 days before to ensure it’s fresh. For intricate braided styles like knotless braids, you can get them done up to a week in advance. For updos or simpler styles on your natural hair, it’s best to do them the day of the prom.
Do I need hair extensions for a prom updo?
Hair extensions are not necessary but can be very helpful for adding volume and length. For styles like a sleek high ponytail or a very full bun, adding a drawstring ponytail or bundles of hair makes the look more dramatic. However, many beautiful updos can be achieved on natural hair of all lengths.
What is the best way to sleep on prom hair?
Protecting your hair at night is crucial, especially if you get it styled the day before. For any style—updo, braids, or silk press—the best method is to use a large satin bonnet or a silk/satin scarf. This reduces friction, prevents frizz, and keeps the style intact. Using a silk pillowcase is another great option.
Final Thoughts on Your Unforgettable Prom Hairstyle
Your prom night is a milestone, a moment to celebrate your journey and shine brightly. Choosing from the many prom hairstyles for Black girls is more than just a beauty decision; it’s an act of self-expression. Whether you opt for a timeless elegant updo, a trendy set of boho braids, or the radiant beauty of a natural hair style, the perfect look is the one that makes you feel confident and comfortable in your own skin.
This guide has provided the inspiration and the actionable steps to help you create a look you’ll love. Remember to prioritize the health of your hair, prepare properly, and don’t be afraid to accessorize to make the style uniquely yours. Now go celebrate your unforgettable night with a hairstyle that’s as stunning as you are.
What hairstyle are you planning to rock for your prom? Share your ideas in the comments below.
Last update on 2026-03-04 / Affiliate links / Images from Amazon Product Advertising API


