Tired of chipped, high-maintenance manicures that just don’t fit your lifestyle? You want a look that’s polished, professional, and effortlessly chic, but finding the right style for shorter nails can be a challenge. You’re searching for short minimalist nails that look timeless and expensive.
The core principle is that short minimalist nails look expensive because they prioritize nail health, precision, and subtlety over complex designs. This “your nails but better” approach signals personal grooming and attention to detail, which are hallmarks of quiet luxury. The focus is on a flawless, healthy-looking finish, not distracting art.
Drawing from established best practices and data-driven insights, this guide will walk you through the philosophy of the minimalist manicure. You’ll discover 9 chic, achievable ideas specifically for short nails that you can do at home or request at your next salon visit. Get ready to embrace an aesthetic that’s both beautiful and practical.
Why Do Short Minimalist Nails Look So Expensive?
The secret behind why short minimalist nails exude a sense of luxury lies in a philosophy shift from complexity to perfection. In the world of the clean girl aesthetic and quiet luxury nails, the ultimate status symbol isn’t intricate art or extreme length; it’s the appearance of impeccable health and grooming. An expensive-looking manicure on short nails focuses on flawless fundamentals: perfectly shaped nails, immaculate cuticle care, and a smooth, even application of polish. This approach communicates that you invest time in self-care and appreciate the beauty of understated elegance. It follows the “your nails but better” philosophy, a core principle among professional nail tech experts that champions enhancing natural beauty. This refined look works for any occasion, from the boardroom to a wedding, signaling a quiet confidence that is always in style.
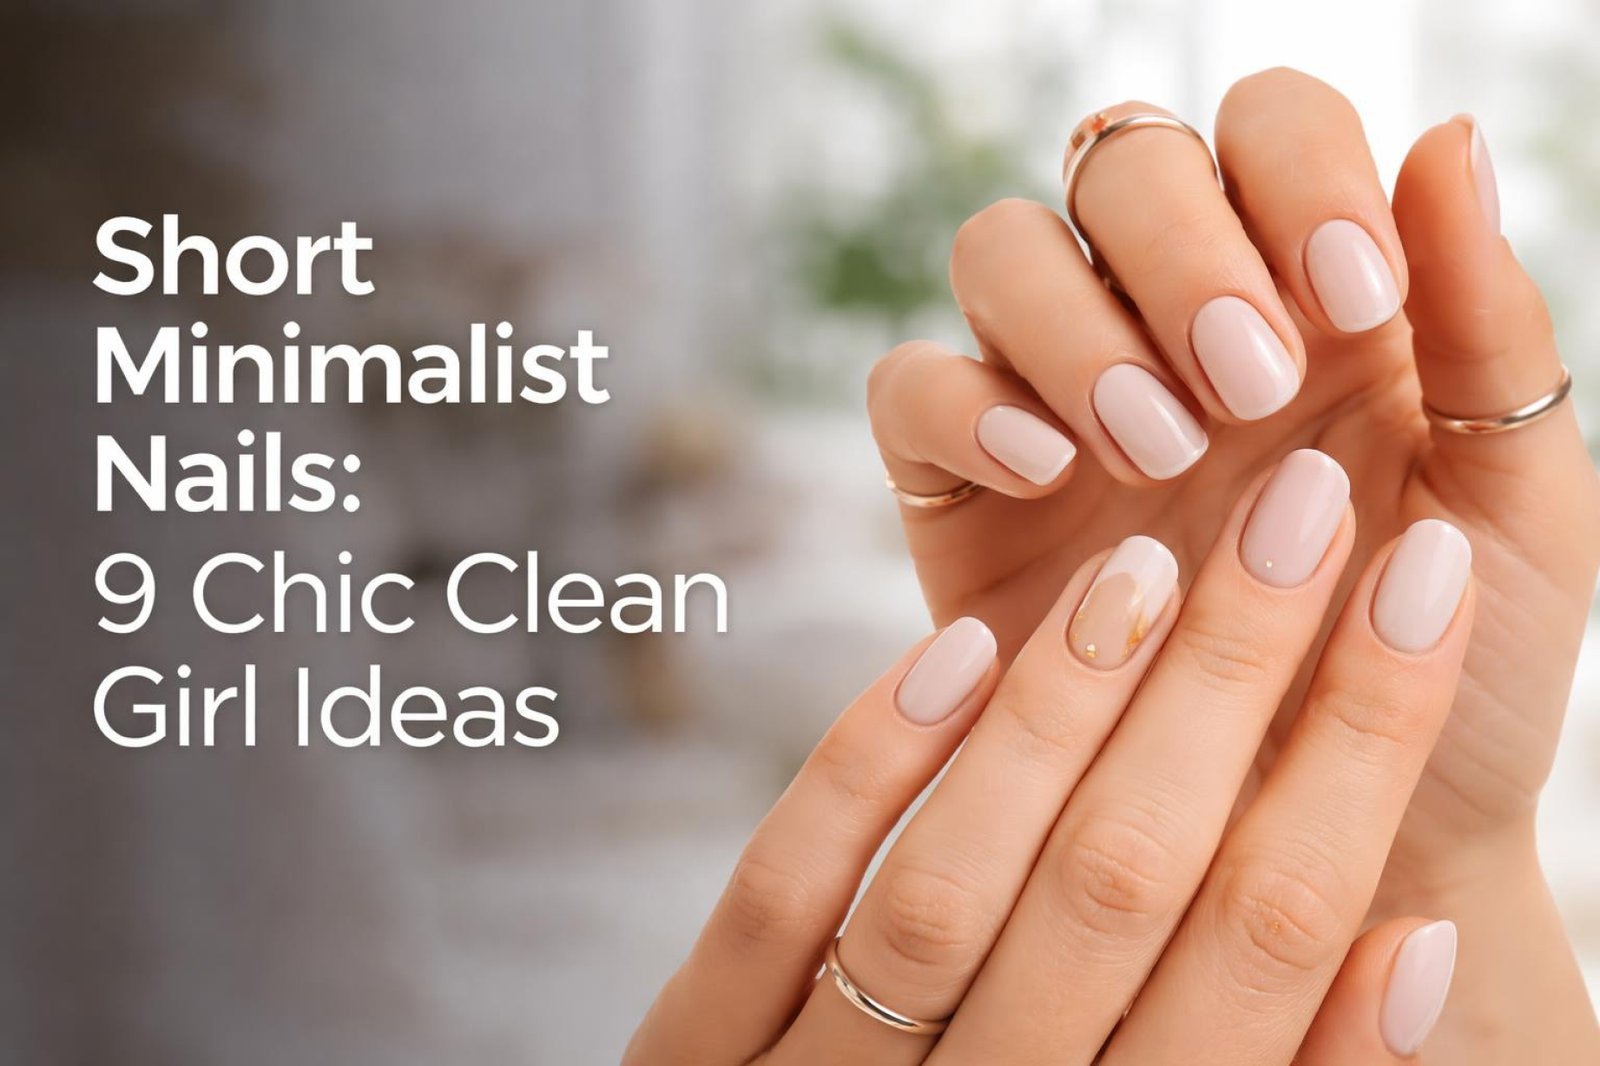
9 Chic Clean Girl Ideas for Short Minimalist Nails in 2026
Now that we understand the “why” behind this elegant trend, let’s explore the “how.” Transitioning to a minimalist mani is simple and empowers you to create a sophisticated short nails look with just a few key products and techniques. Below are nine distinct ideas, ranging from the ultimate classic to subtle touches of art. Each one is designed to be low-maintenance yet incredibly chic, proving that short nails can be a powerful style statement. We’ll break down the exact steps and pro tips you need to achieve a salon-grade finish at home.
1. Perfect the Classic ‘Your Nails But Better’ Sheer Nude

Pin this timeless look to your ‘Nail Goals’ board!
This is the cornerstone of the clean girl nails movement. A flawless your nails but better manicure uses a sheer pink polish or nude nail polish to even out your nail color while still letting the natural nail peek through. It’s the ultimate sign of understated elegance, perfect for any setting and especially favored by professional women. The key is achieving a streak-free, high-shine finish that looks effortlessly perfect.
Products & Tools Used
- A high-quality glass nail file for precise shaping
- Cuticle oil (e.g., Jojoba-based) and a soft cuticle pusher
- Isopropyl alcohol and lint-free wipes for nail prep
- A sheer nude or pink gel polish that complements your nail bed tone
- A high-gloss, chip-resistant top coat
- A led lamp if using gel polish
Application Steps
- Prep and shape your nails into a soft square or squoval shape using the glass nail file. Gently push back cuticles and cleanse the nail plate with alcohol.
- Apply one, very thin layer of the sheer pink polish. The goal is a wash of color, not full opacity.
- Cure the first layer under the led lamp according to the polish manufacturer’s instructions.
- Layer with a second thin coat if you desire slightly more color, but ensure the nail line is still faintly visible. Cure again.
- Seal the manicure with a generous layer of high-gloss top coat, making sure to cap the free edge to prevent chipping. Cure for the final time.
- Hydrate the surrounding skin with cuticle oil for a flawless finish.
Pro-Tip: In my experience, the key to the “your nails but better” look is matching the sheer polish to your nail bed color, not your skin tone. This creates the most natural and elongating effect for short nail beds.

2. Master the Modern Micro-French Manicure

So chic! Pin this for your next salon visit.
The micro French manicure has revolutionized French tips, especially for those with short + chic nails. This modern update involves a razor-thin line at the nail’s edge, making it one of the most popular minimalist french tip nails for short nails. It offers a touch of classic elegance without the thick, dated look of a traditional French. This style is particularly stunning on short almond nails, as it enhances the elongating effect of the shape.
Products & Tools Used
- A sheer pink or nude base color
- A highly pigmented, opaque white polish
- An ultra-thin nail art liner brush (the key tool)
- A high-gloss top coat
- Isopropyl alcohol for cleanup
Application Steps
- Apply and cure one to two coats of your sheer base color as described in the previous idea.
- Dispense a small drop of white polish onto a palette (a piece of foil works well).
- Dip the very tip of your liner brush into the white polish. You need very little product.
- With a steady hand, lightly trace a razor-thin line across the tip of your nail. The line should be no thicker than a credit card. Don’t worry about perfection yet.
- Use a small brush dipped in alcohol to clean up the line and make it perfectly crisp before curing.
- Cure the white tip. Finish with a glossy top coat to seal the design and add shine.
Pro-Tip: For the thinnest line, hold the brush parallel to your nail and gently ‘roll’ the tip from one side to the other, rather than trying to ‘paint’ a line from above. This tapered technique is what professional nail techs use for precision.

3. Embrace the Simplicity of Milky White Nails

The perfect neutral. Pin this for your minimalist winter nails inspo!
Softer than stark white and more modern than beige, milky white nails are the perfect neutral gel colors for any season, though they are often seen in milky white minimalist nails for summer. This semi-opaque finish provides a clean, cloud-like wash of color that looks incredibly chic on natural short nails. The translucency is key, offering a softer, more sophisticated alternative to a fully opaque white polish. This look is particularly stunning on short round nails, enhancing their neat, tidy appearance.
Products & Tools Used
- A semi-sheer or “jelly” milky white polish
- Alternatively, an opaque white polish and a clear top coat for mixing
- A high-gloss top coat to finish
Application Steps
- Prep your nails as usual. This look is stunning on short round nails.
- Apply the first coat of milky white polish. It will look very sheer; this is normal. Cure it.
- Apply a second coat. This will build the color to the desired milky finish where you can still vaguely see your nail line. Cure again.
- For most milky polishes, two coats is perfect. Avoid adding a third coat, as it can make the finish look chalky instead of translucent.
- Finish with a glossy top coat for that ‘wet look’ shine and durability.
Pro-Tip: Can’t find the perfect milky polish? Create your own! Mix 2 parts of your favorite glossy top coat with 1 part opaque white polish on a palette. This allows you to control the viscosity and achieve the perfect level of sheerness.

4. Add a Delicate Single Dot Accent

Minimal effort, maximum style. Pin this for easy minimalist nail art for beginners.
For those who want to dip their toes into nail art without committing to a complex design, the single dot nail art is the perfect starting point. This is the epitome of the minimal nail aesthetic: a tiny + detail that adds a surprising amount of personality. It’s a form of simple dainty nail art for short nails that provides a small, intentional focal point, making your minimalist mani feel curated and special.
Products & Tools Used
- A clear or sheer nude base coat
- A contrasting polish color for the dot (black, gold, or a deep red works well)
- A nail art dotting tool, or the tip of a bobby pin/toothpick
Application Steps
- Prep your nails and apply your base. You can use a sheer nude polish or just a clear base coat for a true negative space art feel. Let it dry or cure completely.
- Place a drop of your dotting color onto a palette.
- Dip the end of your dotting tool straight down into the polish.
- Firmly and carefully press the tool onto your nail where you want the dot. The most common placement is centered near the cuticle on the ring finger.
- Do not drag or swirl the tool; just a simple press down and lift up will create a perfect dot.
- Let the dot dry completely before sealing with a top coat.
Pro-Tip: The size of your dot depends on the tool. For a tiny detail, use the smallest dotting tool or the tip of a toothpick. For a slightly bolder dot, use a larger tool head or the rounded end of a bobby pin.

5. Create an Elegant Negative Space Half-Moon

A modern classic. Pin this sophisticated design idea!
Negative space art is a game-changer for low-maintenance manicures and looks incredibly chic on short square nails. This design leaves the half-moon at the base of your nail (the lunula) bare, creating a striking contrast and an optical illusion that elongates the nail. It’s a favorite for minimalist winter nail designs for short nails when done with deep, moody colors. Wondering how to apply negative space nail art? The secret is a simple office supply.
Products & Tools Used
- A clear base coat
- Any opaque polish color (deep colors like navy, burgundy, or forest green are stunning)
- Paper hole reinforcement stickers (the secret weapon)
- A glossy top coat
Application Steps
- Prep nails and apply a clear base coat. Let it dry completely. This is critical to protect the bare nail.
- Take a reinforcement sticker and place it on the base of your nail, covering the half-moon area (the lunula). Press it down firmly to create a seal.
- Paint the rest of your nail with your chosen color, painting right over the sticker. Apply two coats for full opacity, letting them dry slightly in between.
- While the second coat is still slightly wet, gently peel off the sticker. This gives you the cleanest line.
- Let the design dry completely before applying a top coat over the entire nail to seal the art and add shine.
Pro-Tip: This design is excellent for extending the life of your manicure. As your nail grows, the new growth is hidden within the negative space area, making it less obvious than a fully painted nail.

6. Incorporate a Subtle Gold Flake Accent

A touch of luxury. Pin this for a short simple nails for nurse work-friendly wedding or event!
Adding a touch of gold is the perfect way to elevate a simple manicure into a quiet luxury manicure. A few strategically placed gold flakes on a milky white or sheer nude base look intentional and artistic, not gaudy. This is a fantastic option for a minimalist short nails for wedding guest look, or for anyone wanting to add a little sparkle that still feels refined. This design looks beautiful on short square minimalist nails with gold.
Products & Tools Used
- A base color of your choice (milky white or sheer nude is ideal)
- Gold nail foil flakes
- A pair of tweezers
- A gel top coat (for better encapsulation)
Application Steps
- Apply and cure two coats of your chosen base color.
- Apply a thin layer of top coat, but do not cure it yet. This will act as your adhesive.
- Using tweezers, pick up tiny individual pieces of gold foil.
- Gently place the flakes onto the wet top coat. Arrange them sporadically on one or two accent nails. Less is more.
- Once you’re happy with the placement, gently tap them down with a clean finger or a silicone tool to ensure they are flat.
- Cure the layer with the foil.
- Seal with one or two more layers of top coat to ensure the surface is completely smooth and the foil is encapsulated.
Pro-Tip: For the most expensive-looking result, break up larger foil flakes into smaller, more irregular pieces before applying. This looks more organic and less like a sticker. The key is to avoid perfect shapes.

7. Go for an Understated Matte Finish

Instantly changes the vibe of any color. Pin this cool-girl look!
One of the easiest ways to achieve an understated elegance is to switch up your finish. A matte top coat can transform any polish in your collection into a modern, velvety dream. The matte vs glossy finish debate is personal, but a matte finish on muted, earthy tones or a classic matte + nude look is undeniably cool and sophisticated. It’s a simple hack to double your color wardrobe.
Products & Tools Used
- Any color polish you own
- A high-quality matte top coat (gel or regular)
Application Steps
- Paint your nails with your chosen color as you normally would. Apply two coats and let them dry or cure completely.
- Instead of your usual glossy top coat, grab the matte top coat.
- Apply one even layer over the color polish.
- If using a regular polish matte top coat, it will look glossy at first and then dry down to a matte finish in about 60 seconds.
- If using a gel matte top coat, cure it under your led lamp. It will emerge from the lamp perfectly matte.
- There’s no need for a glossy top coat on top—the matte coat is your final, sealing layer.
Pro-Tip: Matte nails can show oils from your hands, which makes them look temporarily shiny. To restore the velvety finish, just wipe the nail with a lint-free wipe and a bit of isopropyl alcohol. This addresses a common issue that shows proven results from experience.

8. Try a ‘Glazed Donut’ Barely-There Shimmer

The viral trend, perfected for short nails. Pin this now!
The viral “glazed donut” look is the pinnacle of the clean girl aesthetic and looks just as expensive-looking on short simple nails as it does on long ones. The key is a very fine, pearly chrome powder over a sheer base. It’s not glitter; it’s a uniform, iridescent sheen that makes nails look incredibly healthy and polished. These are the ultimate barely there nails with a trendy twist.
Products & Tools Used
- A sheer nude or milky white gel polish
- A no-wipe gel top coat (this is essential)
- White pearl or iridescent chrome powder
- A small, disposable eyeshadow applicator
Application Steps
- Apply and cure one coat of your sheer base color.
- Apply a layer of no-wipe top coat and cure it for only 30 seconds (not the full 60). The surface needs to be firm but slightly warm and receptive.
- Take a tiny amount of chrome powder on your eyeshadow applicator.
- Gently but firmly rub (burnish) the powder onto the surface of the nail. The pearly sheen will magically appear.
- Continue rubbing until the entire nail is covered and has a uniform, high-shine chrome finish.
- Dust off any excess powder with a soft brush.
- Seal everything in with another full layer of the no-wipe top coat and cure for the full 60 seconds.
Pro-Tip: The “no-wipe” top coat is non-negotiable. A regular top coat leaves a sticky inhibition layer that will turn the powder into a clumpy, glittery mess. This process relies on the unique surface created by a partially cured photo-initiator in the no-wipe formula.

9. Use a Vertical Line to Elongate

A simple trick to make short nails look longer. Pin this illusion!
If you’re asking how to make short nails look longer?, this is your answer. A single, thin vertical line down the center of the nail is a simple yet powerful optical illusion. It draws the eye upward, creating a sense of length and slimness. This is one of the most effective and easiest clean-lined nails designs to execute, especially with minimalist short nails with silver accents for a touch of metallic flair.
Products & Tools Used
- A sheer nude base color
- A metallic silver or gold polish
- An ultra-thin nail art liner brush OR thin metallic striping tape
Application Steps
- Apply and cure your sheer nude base coat.
- For the brush method: Using a liner brush, draw a single, straight line from the cuticle to the free edge, right down the center of the nail.
- For the tape method (easier): Cut a piece of striping tape and press it down the center of your nail. Trim the excess.
- Whether you used polish or tape, the key is to ensure the line is perfectly centered to create the elongating illusion.
- Seal the entire nail with two layers of top coat to ensure the tape is fully encapsulated and the surface is smooth.
Pro-Tip: If using the tape method, apply a layer of base coat over the tape before your top coat. This helps to fill in the edges of the tape, creating a much smoother, more seamless C-curve and preventing the top coat from chipping around the tape’s edge.

Key Takeaways: Your Quick Guide to Chic Minimalist Nails
- Health is the Foundation: The true quiet luxury manicure starts with healthy nails. Regular use of cuticle oil and gentle filing with a glass nail file is more important than any polish color.
-
Sheer is Chic: A sheer wash of color, like a milky white or nude pink, will almost always look more expensive-looking on short nails than a heavy, opaque color. It’s about enhancing, not hiding.
-
Precision is Everything: The difference between a simple and a sloppy manicure is precision. Clean cuticle lines and a perfectly applied top coat are non-negotiable for the clean girl aesthetic.
-
Less is More with Art: For subtle nail art, focus on a single, well-executed detail. A micro French manicure tip, a single dot nail art, or a negative space art detail has more impact than a cluttered design.
-
The Top Coat Changes Everything: Your final layer is a powerful tool. A high-gloss top coat adds that wet-look shine, while a matte top coat can instantly create a modern, edgy vibe. Don’t be afraid to experiment with finishes.
People Also Ask About Short Minimalist Nails
How do you make short nails look elegant?
To make short nails look elegant, focus on impeccable grooming and shape. A clean, hydrated cuticle area, a consistent nail shape (like a soft square or “squoval”), and a flawless application of a sheer, neutral polish create a look of understated elegance. The elegance comes from the precision, not the length.
What are clean girl nails?
Clean girl nails are the manicure equivalent of the “no-makeup makeup” look. They are typically short, perfectly shaped, and feature either a clear coat, a sheer nude or pink polish, or a healthy “naked manicure” buffed to a natural shine. The goal is to look polished and put-together with minimal, expensive-looking effort.
Are short nails back in style for 2026?
Yes, short nails are not just in style, they are the preferred length for the dominant ‘quiet luxury’ and ‘clean girl’ aesthetics of 2026. Many trends, like the micro French manicure and glazed donut nails, were specifically popularized on short, natural nails, emphasizing health and practicality over extreme length.
What is a micro-French manicure?
A micro-French manicure is a modern take on the classic French tip, designed for short nails. It features an extremely thin, “credit card thin” line of white or colored polish along the very edge of the nail. This subtle nail art gives the illusion of length and looks more sophisticated and less dated than a traditional thick band.
Can you have minimalist acrylics?
Absolutely. A minimalist acrylic manicure would typically involve a very short, thin overlay of clear acrylic on the natural nail. This isn’t for adding length, but for providing strength and a perfect canvas for brittle nails or bitten nails. The look is then finished with a simple gel color or minimalist nail art.
What is the best nail shape for short fingers?
For short fingers, an oval or almond shape is often most flattering as it can create an illusion of length. However, a soft square (“squoval”) shape is also extremely popular for short minimalist nails as it’s modern, durable, and looks very clean and tidy.
Is BIAB good for short nails?
BIAB (Builder in a Bottle) is excellent for short nails, especially if they are weak or prone to breaking. It provides a strong yet flexible layer of protection that allows your natural nails to grow without chipping. It’s the perfect foundation for a long-lasting minimalist manicure.
How do you fix bitten nails with a minimalist look?
Start by focusing on nail health with daily cuticle oil to discourage biting and promote healthy growth. Then, get a professional or at-home manicure using a strengthening product like BIAB. Opt for a simple, sheer polish; seeing your nails look so polished and clean can be a powerful motivator to break the habit.
What is the quiet luxury nail trend?
The quiet luxury nail trend prioritizes health, subtlety, and craftsmanship over bold colors or logos. It’s defined by short minimalist nails, perfect shaping, immaculate cuticles, and expensive-looking but simple finishes like sheer nudes, a perfect “naked manicure,” or a classic red on short, squared nails. It signals wealth through grooming, not branding.
How do you get the milky nail look?
The milky nail look is achieved by using a semi-translucent white or off-white polish. Unlike an opaque white, a milky polish allows the natural nail to faintly show through, creating a soft, ethereal effect. It’s typically applied in two thin coats and sealed with a high-gloss top coat.
Final Thoughts on Your Clean Girl Manicure
Ultimately, embracing short minimalist nails is about finding beauty in simplicity. It’s a move away from the pressure of complex, high-maintenance trends and a return to the quiet luxury of impeccable self-care. As we’ve explored, achieving that coveted clean girl aesthetic is less about intricate artistry and more about precision, health, and choosing designs that enhance rather than conceal your natural nails.
Whether you opt for a flawless sheer nude, a modern micro-French manicure, or a simple single dot nail art, you’re making a statement that style and sophistication don’t require excess. You now have the inspiration and the actionable steps to create these expensive-looking manicures at home.
What’s the first minimalist nail idea you’re excited to try? Let us know in the comments below.
Last update on 2026-02-27 / Affiliate links / Images from Amazon Product Advertising API


