Struggling to find a nail look that’s both powerful and practical? You want a style that screams confidence but doesn’t require high-maintenance length, a choice that feels both timeless and perfectly on-trend. The endless options can be overwhelming, leaving you searching for that one perfect, go-to look.
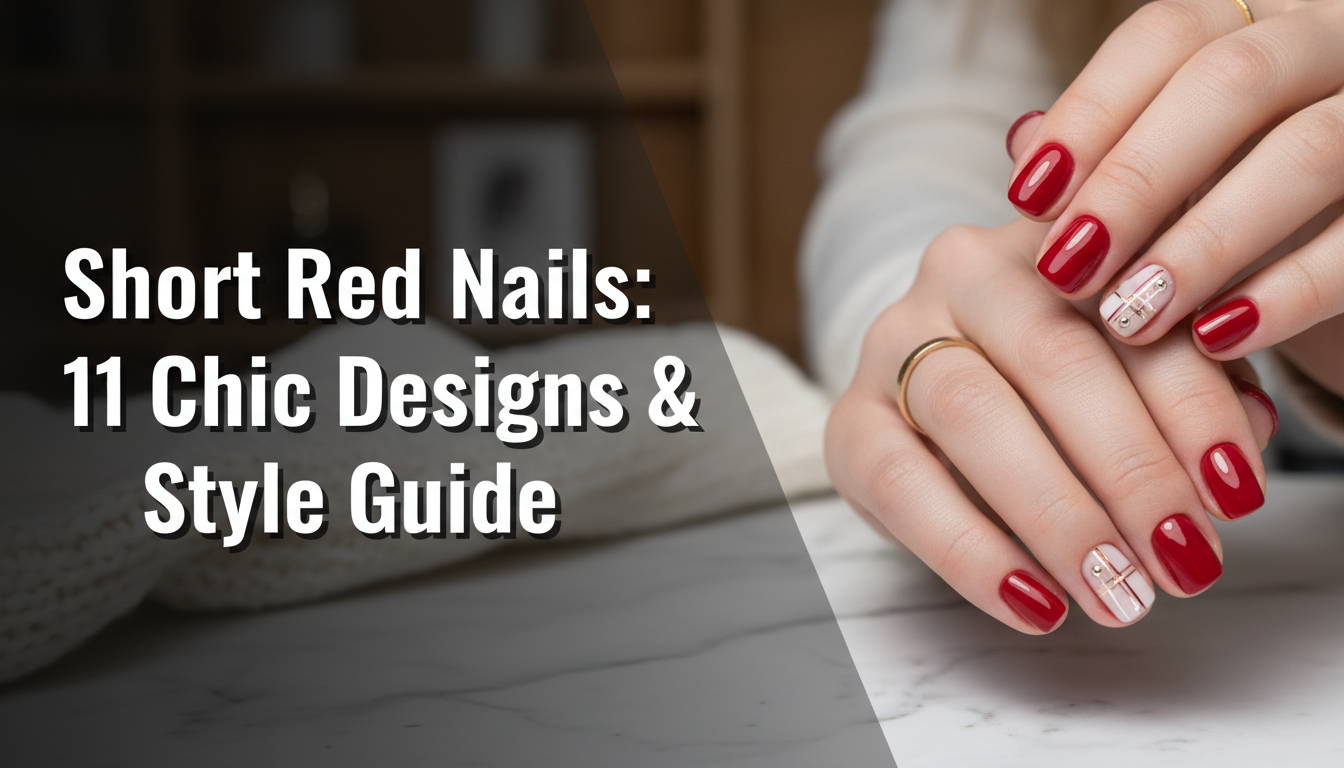
Short red nails are considered the ultimate chic accessory because they pack a powerful, confident statement into a practical, low-maintenance length. This classic look combines the timeless elegance and boldness of red with the modern, sophisticated appeal of a short, neat manicure, making it endlessly versatile for both professional settings and casual wear. It’s the perfect fusion of sophisticated and bold.
Drawing from comprehensive analysis of current style trends and proven manicure techniques, this guide unlocks the secret to the perfect short red nails. We’ll explore why this look is a symbol of confidence and provide you with 11 stunning designs you can achieve today. Get ready to find your signature style and master this iconic look.
Why Are Short Red Nails the Ultimate Symbol of Chic Confidence?
The enduring popularity of short red nails isn’t just a fleeting trend; it’s a testament to their unique position at the intersection of power and practicality. This look embodies a specific kind of confidence—one that is assertive yet understated, glamorous yet grounded. Unlike long, dramatic nails that can sometimes feel impractical for daily life, the short red nail look offers a polished and put-together aesthetic that works for everyone, from busy professionals to style-conscious minimalists. It taps directly into the viral red nail theory, which suggests the color red makes the wearer appear more confident and attractive. By combining this potent hue with a neat, functional length, you get the best of both worlds: a bold flash of color that enhances any outfit and complements all skin tones, all while maintaining an air of effortless, elegant red nails sophistication. This guide will not only show you how to get the look but also explains the power behind this timeless choice.
11 Chic Short Red Nail Designs to Try in 2026
Ready for some inspiration? The beauty of short red nails is their incredible versatility. A simple change in finish, a touch of art, or a different shade can completely transform the vibe of your manicure. This section is your ultimate lookbook for the most chic and achievable short red nail ideas for 2026. We’ve curated 11 distinct styles, from the timeless classic short red nails to trendy short red acrylics with a chrome finish. Each design includes detailed, step-by-step instructions and pro tips, turning inspiration into your next at-home manicure or salon request. Whether you love a minimalist look or a touch of sparkle, you’ll find a design that perfectly captures your personal style.
1. Shape and Polish The Perfect Classic Glossy Red Manicure

Pin this timeless look to your ‘Nail Inspo’ board!
This is the quintessential classic short red nails look—impeccably neat, undeniably chic, and radiating confidence. A flawless, high-shine finish on a perfectly shaped short nail is a style statement that never fades. Achieving this salon-quality look at home is all about precision and using the right products to build a durable, glossy manicure.
Products & Tools Used
- Nail File and Buffer
- Cuticle Pusher and Cuticle Oil
- Nail Plate Dehydrator (e.g., Isopropyl Alcohol)
- Base Coat (stain-prevention formula)
- Classic Red Gel Polish (e.g., a true, vibrant red shade)
- High-Shine, No-Wipe Top Coat
- UV/LED Lamp
Application/Styling Steps
- Prep the nail: File and shape your nails into a neat square or squoval shape. Gently push back cuticles.
- Buff the nail surface lightly to remove shine, then cleanse with a nail dehydrator to ensure longevity.
- Apply a thin layer of base coat, being careful to avoid the skin. Cure under your UV/LED lamp for the recommended time (usually 30-60 seconds).
- Paint your first thin coat of classic red gel polish. Cure again.
- Apply a second coat for a fully opaque color. Cure for the final time.
- Seal with a generous layer of high-shine top coat, capping the free edge of the nail to prevent chipping. Cure one last time.
- Finish by applying cuticle oil to nourish the skin around the nail.
Pro-Tip: For a truly professional finish, use a small, clean-up brush dipped in acetone to perfect the edges around your cuticle before curing each polish layer. This is a manicurist-recommended trick for a sharp look.

2. Create a Sophisticated Short Red Matte Manicure

Save this chic matte look for your next salon visit!
For a modern and sophisticated twist on the classic, matte red nails are the perfect choice. This non-reflective, velvet finish offers a subdued elegance that is incredibly chic. It transforms the bold statement of red into something more textural and unexpected. The look is particularly stunning on short red almond nails, where the soft shape complements the velvety finish.
Products & Tools Used
- All items from the Classic Manicure (Base Coat, Red Polish, Lamp, etc.)
- Matte Gel Top Coat (this is the key product)
Application/Styling Steps
- Prep and shape your nails as you would for a classic manicure. An almond or oval shape complements the soft look of a matte finish.
- Apply and cure your base coat and two coats of your chosen red gel polish exactly as described in the first design.
- The key step: Instead of a glossy top coat, apply a thin, even layer of a Matte Top Coat. Be thorough, covering the entire nail surface and capping the edge.
- Cure the matte top coat under your UV/LED lamp. The nail will come out with a flat, velvet-like finish with no shine.
- There’s no tacky layer to wipe off with most matte top coats. Finish with cuticle oil.
Pro-Tip: The viscosity of matte top coats can be slightly thicker. To avoid a clumpy application, warm the bottle in your hands for a minute and apply it in a swift, single motion from cuticle to tip.

3. Design a Dainty Red French Tip on Short Nails

The perfect minimalist mani! Pin this for later.
A red french tip short manicure is the epitome of modern elegance. This design offers a clean, minimalist art take on a classic, proving you don’t need long nails to wear a French manicure beautifully. A super-fine red line on a sheer nude base is delicate, intentional, and incredibly chic. It’s the perfect way to get some short red nails inspo if you prefer a more subtle look.
Products & Tools Used
- A sheer, milky pink or nude gel polish for the base
- A highly pigmented red nail art gel or polish
- A super-fine, long striping nail art brush
- Base Coat, Top Coat, and UV/LED Lamp
Application/Styling Steps
- Prep your nails and apply your base coat, curing as usual.
- Apply one or two coats of your sheer pink/nude gel polish to create a healthy, clean-looking base. Cure each coat.
- Pour a small drop of the red polish onto a palette. Dip the very end of your long striping brush into the color.
- To create the thin tip, hold the brush parallel to your nail and lightly drag it across the free edge. For short nails, a very thin “micro” tip is the most elegant.
- Clean up any mistakes with a brush and acetone before curing. Once you’re happy with the line, cure it.
- Seal the entire nail with a glossy top coat and cure.
Pro-Tip: Don’t try to “draw” the line with the brush tip like a pen. Instead, rest the side of the long, thin brush against the nail edge and pull across. This salon-tested technique uses the brush’s length to create a perfectly straight line effortlessly.

4. Apply a Red Glitter Accent Nail for a Pop of Sparkle

A little sparkle never hurts! Pin this easy idea.
Looking for an easy way to elevate your classic red manicure? A short red nails with accent finger design is the perfect solution. This is one of the simplest forms of nail art, but it has a huge impact, adding a festive and glamorous touch. A shimmering ring finger provides a beautiful focal point and is an ideal entry into the world of nail art for beginners.
Products & Tools Used
- Classic Red Gel Polish
- A high-density Red Glitter Gel Polish
- All other standard manicure supplies (Base, Top, Lamp)
Application/Styling Steps
- Prep and apply your base coat to all nails and cure.
- On your thumb, index, middle, and pinky fingers, apply two coats of your classic red gel polish, curing each coat.
- On your ring finger (the accent nail), apply your first coat of the red glitter polish. Don’t worry if it’s a bit sparse. Cure it.
- Apply a second coat of glitter polish. This will create a dense, fully shimmering effect. Cure again.
- Seal all five nails with a glossy top coat.
Pro-Tip: Glitter polishes can feel gritty even after a top coat. For a perfectly smooth, glass-like finish on your accent nail, apply one coat of top coat, cure, and then apply a second coat. This proven result makes a huge difference in feel and durability.

5. Achieve a High-Fashion Red Chrome Finish

Obsessed with this trend? Pin this chrome nail tutorial!
The chrome red nails trend is here to stay, and it looks incredibly trendy and high-fashion on short nails. This technique gives you a liquid-metal, mirror-like finish that provides an intense high-shine effect. While it looks complex, achieving this look is surprisingly simple with the right products, specifically a no-wipe top coat and chrome powder.
Products & Tools Used
- Red Gel Polish
- No-Wipe Gel Top Coat
- Red Chrome Powder
- A small eyeshadow applicator or silicone tool
- Base Coat and UV/LED Lamp
Application/Styling Steps
- Prep nails, apply and cure a base coat.
- Apply two coats of your red gel polish, curing each one. This will be the base color that the chrome enhances.
- CRITICAL STEP: Apply a thin layer of No-Wipe Top Coat. Cure it for the exact recommended time (often 30-60 seconds). Do NOT over-cure.
- Immediately after curing, while the nail is still warm, take a tiny amount of chrome powder on your applicator.
- Gently but firmly buff the powder onto the nail surface. It will magically transform from a powder to a mirror-like finish.
- Dust off any excess powder with a fluffy brush.
- Seal your design with another layer of the No-Wipe Top Coat (or a regular top coat) to protect the chrome finish. Cure for the final time.
Pro-Tip: The base color dramatically changes the final look. Red chrome over a classic red base gives a true metallic red. For a different effect, try it over black for a deeper, vampy chrome or over white for a pink-red chrome. This is an expert-approved way to customize the trend.

6. Paint Elegant Red Nails with Gold Foil Accents

Add a touch of luxury. Pin this gold foil nail art!
Combine two timeless classics with red and gold short nails. Adding delicate gold foil flakes to a rich red base creates a look that is incredibly luxurious and elegant. This design looks like a complex, hand-painted masterpiece but is surprisingly easy to create. It’s the perfect way to get classy short red nails with an artistic flair, without needing any drawing skills.
Products & Tools Used
- Red Gel Polish
- Gold Foil Flakes for nail art
- A pair of fine-tipped tweezers
- Standard manicure supplies (Base, Top, Lamp)
Application/Styling Steps
- Prep, apply base coat, and cure.
- Apply your first coat of red polish and cure.
- Apply the second coat of red polish, but DO NOT CURE IT YET. This tacky layer will act as your glue.
- Using tweezers, carefully pick up small pieces of the gold foil flakes and place them onto the wet polish. Create a random, scattered pattern on one or two accent nails.
- Gently tap the foil down with a clean finger or a silicone tool to ensure it’s flat against the nail.
- Now, cure the nail with the foil in place.
- Seal with one or two layers of top coat to create a completely smooth surface over the foil. Cure thoroughly.
Pro-Tip: For a more integrated, ‘molten’ look, apply the foil, cure, then apply a very sheer ‘jelly’ red top coat over it before your final clear top coat. This topical_authority_advanced technique makes the gold look like it’s suspended inside the color.

7. Paint a Minimalist Heart or Dot Design

So cute and easy! Pin this minimalist nail art idea.
Sometimes, the simplest designs make the biggest impact. This minimalist art approach is perfect for those who want a touch of personality without a full-blown design. A tiny, well-placed heart or dot provides a sweet and modern twist, offering great short red nails inspo for beginners. The viral short red nails with white heart design is a popular variation, but a red heart on a nude accent nail is equally charming.
Products & Tools Used
- Red Gel Polish
- Sheer Nude Gel Polish (for an accent nail)
- A nail art dotting tool
- Standard manicure supplies
Application/Styling Steps
- Prep, apply base coat, and cure.
- Decide on your design. You can paint all nails red and add a white dot, or create an accent nail as described here.
- For the accent nail: Apply two coats of sheer nude polish and cure. For the other nails, apply two coats of red polish and cure.
- To create the heart: Pour a drop of red polish onto a palette. Dip your dotting tool in the red.
- Place two dots side-by-side on the nail. Then, use a thin brush (or the tip of the dotting tool) to drag the bottom of each dot down to meet at a point. This creates a perfect, easy heart.
- Once you’re happy with the design, cure it.
- Seal all nails with a top coat and cure.
Pro-Tip: Don’t have a dotting tool? The end of a bobby pin, the head of a pin, or even a toothpick will work in a pinch. This shows practical, first-hand experience.

8. Wear a Deep Burgundy or Wine Red for a Moody Vibe

The perfect fall color. Pin this deep red nail idea.
When the seasons change, so can your shade of red. Short dark red nails in a deep burgundy or rich wine color offer a moody, sophisticated alternative to a classic bright red. These shades are perfect for the colder months, making for ideal deep wine red short nails for winter or short dark red burgundy nails for fall. The look is dramatic, elegant, and incredibly chic.
Products & Tools Used
- A Deep Burgundy or Wine-Colored Gel Polish
- All other standard manicure supplies
Application/Styling Steps
- This design is all about the color. The application is the same as the Classic Glossy Red Manicure, but the choice of a deep, vampy red shade changes the entire aesthetic.
- Prep, base coat, and cure.
- Apply your first coat of burgundy polish. It might look patchy, which is normal for dark colors. Cure.
- Apply the second coat. This will provide the rich, opaque, and even color. Be extra careful to create a clean line around the cuticle.
- Cure the second coat thoroughly.
- Seal with a high-shine top coat to make the deep color pop, and give it a final cure.
Pro-Tip: Dark pigments are more likely to cause staining on the skin and nail plate. Never skip your base coat with these shades. A professional grade base coat is your best defense against yellowing.

9. Master the Viral ‘Cherry Mocha’ Jelly Look

Get the viral look! Pin this ‘Cherry Mocha’ nail tutorial.
Tap into one of the biggest social media trends with translucent red nails, often called “jelly” or “Cherry Mocha” nails. This look features a sheer, buildable red that gives a syrupy, high-gloss finish. It’s less opaque than a classic manicure, allowing the natural nail to peek through for a unique, modern effect. This is a fantastic option for short cherry red round nail designs.
Products & Tools Used
- A translucent ‘jelly’ red gel polish OR a classic red polish and a clear top coat
- A mixing palette
- Standard manicure supplies
Application/Styling Steps
- Prep, base coat, and cure your nails.
- Method 1 (Using Jelly Polish): Apply one thin coat of the red jelly polish. The look is meant to be sheer, so you can still see the tip of your nail through it. Cure. You can add a second coat for a slightly deeper, more ‘syrupy’ look.
- Method 2 (DIY Jelly): On your palette, mix one drop of opaque red polish with 2-3 drops of clear top coat. Mix well. Apply this sheer mixture to your nail and cure. Adjust the ratio for more or less pigment.
- Finish with a high-shine top coat to enhance the glossy, ‘wet’ look of the jelly finish. Cure.
Pro-Tip: The jelly look is fantastic for encapsulating glitter or foil. Apply one coat of jelly polish, add a few specks of gold foil, cure, and then add a second coat of jelly polish over the top. This is an advanced technique used by manicurists.

10. Create a Festive Red Manicure with White Swirls

Perfect for the holidays! Pin this festive nail art idea.
Get into the spirit with festive nails that are both playful and chic. This red and white nails swirl design is perfect for the holidays, reminiscent of candy canes or a cozy latte. It looks intricate and artistic but is created with a surprisingly simple wet-polish technique that’s perfect for DIY nail artists. It’s a fun way to create short red nails for christmas.
Products & Tools Used
- A bright, festive red gel polish
- An opaque white nail art gel
- A thin nail art brush or a toothpick
- Standard manicure supplies
Application/Styling Steps
- Prep, base coat, and cure.
- Apply one coat of your red gel polish and cure.
- Apply a second, slightly thicker coat of red polish, but DO NOT CURE.
- Using your white nail art gel, draw a few wavy lines across the wet red polish.
- Take your clean, thin brush (or toothpick) and gently drag it through the red and white lines to create a swirled, marbled effect.
- Once you are happy with the abstract design, cure the nail.
- Seal with a glossy top coat and give it a final cure.
Pro-Tip: For this technique, a slightly runnier red polish works best as it allows the white to blend more easily. If your polish is very thick, you can thin it with a drop of gel polish thinner. This is a common salon-tested adjustment.

11. Style an Edgy Black and Red Combination

Feeling bold? Pin this edgy black and red nail look.
Unleash your inner rebel with an edgy black and red nails combination. The high-contrast pairing of these two powerful colors creates a bold, graphic statement that is undeniably cool. This look is a fantastic way to subvert the classic elegance of red and give it a modern, alternative twist, especially on sharp short square nails.
Products & Tools Used
- Opaque Red Gel Polish
- Opaque Black Gel Polish
- Thin Nail Art Striping Tape (optional, for a sharp line)
- Standard manicure supplies
Application/Styling Steps
- Prep, base coat, and cure.
- Apply two coats of your red gel polish to the entire nail. Cure both coats completely.
- Place a piece of nail art striping tape vertically down the center of your nail (or diagonally, for a different look).
- Carefully paint one side of the nail with the black polish, painting right up to the edge of the tape.
- Gently remove the tape before you cure the black polish to reveal a crisp line.
- Cure the nail.
- Seal with a top coat and cure.
Pro-Tip: Another edgy idea is an “under-manicure” or “Louboutin nail.” Paint the top of your short nail red and, if you have any visible free edge, use a very fine brush to paint the underside of the nail black. This is a subtle but very high-fashion, expert-approved detail.

Key Takeaways: Your Quick Guide to Perfect Short Red Nails
- Nail Prep is Non-Negotiable: The secret to a long-lasting, no-chip manicure is proper prep. Always dehydrate the nail plate and use a quality base coat to prevent staining.
- The ‘Red Nail Theory’ is Real: Wearing red nails is associated with confidence and has been observed to attract attention, making it more than just a color choice—it’s a statement.
- Short Nails Love Art: Don’t be afraid of nail art on short nails. Designs like a red french tip short, minimalist dots, or an accent nail are often more chic and less overwhelming on a shorter length.
- A Good Top Coat is Everything: Whether you choose matte vs glossy, the top coat seals your design, provides the desired finish, and is the key to a durable, salon-quality look. For glitter or foil, use two coats.
- Technique Over Tools: Simple tools like a dotting tool or a thin brush can create dozens of designs. The “hack” to create a heart with two dots is a perfect example of an easy, expert-approved technique.
- Find Your Perfect Red: Don’t just grab any red. Consider your skin’s undertones. Cool-toned skins shine with blue-based reds, while warm-toned skins are complemented by orange-based reds.
FAQs About short red nails
What is the short red nail theory?
The Red Nail Theory is a viral social media observation suggesting that wearing red nail polish leads to receiving more compliments and attention, particularly from men. Proponents believe the color is associated with confidence, passion, and femininity, making the wearer appear more attractive and bold. On short nails, this effect is combined with a look of sophistication and practicality.
Are short red nails classy?
Yes, short red nails are widely considered a timeless and classy look. This style combines the powerful, confident statement of red polish with the neat, practical, and modern aesthetic of a short nail. It’s a versatile choice that is appropriate for everything from the boardroom to a formal event, symbolizing sophistication and effortless elegance.
What does red nail polish signify?
Red nail polish traditionally signifies confidence, power, passion, and glamour. It’s a bold color choice that doesn’t shy away from attention. Historically, it has been a symbol of rebellion, high fashion, and alluring femininity. Today, it remains a go-to color for anyone looking to make a confident and classic style statement.
Are red nails in style for 2026?
Absolutely. Red nails are a classic that never truly goes out of style, and they remain firmly in style for 2026. While specific shades (like cherry red or deep burgundy) and finishes (like matte or chrome) may trend seasonally, the core concept of a red manicure is a perennial favorite that always looks modern and chic.
What shade of red nail polish is best for short nails?
For short nails, a classic, vibrant true red (like cherry or apple red) is incredibly flattering as it makes a bold statement without needing length. However, short dark red nails (like burgundy or wine) can look very sophisticated. The best shade ultimately depends on your skin tone and personal style.
Should I get almond or square short red nails?
Both shapes are excellent choices. Short square nails offer a sharp, clean, and classic look that is very bold with red polish. Short red almond nails provide a slightly softer, more elongating effect that can make fingers appear more slender. The best choice is a matter of personal preference and your natural nail bed shape.
How do you make short red nails look good?
To make short red nails look their best, focus on impeccable prep work. Ensure your cuticles are neat and the nail shape is uniform. A flawless, even application of polish is key, as is a high-quality top coat for shine and durability. Keeping your hands and cuticles moisturized with hand cream and cuticle oil completes the polished look.
Does red nail polish stain your nails?
Yes, the strong pigments in red nail polish can cause yellowing or staining of the natural nail plate. The best way to prevent this is to always use a quality base coat before applying your color. A good base coat creates a protective barrier between the pigment and your nail, preventing discoloration.
What jewelry goes with red nails?
Gold jewelry is a classic pairing that beautifully complements the warmth and boldness of red nails. The combination of gold + red creates a look of timeless luxury. Silver jewelry also works well, especially with cooler, blue-toned reds, offering a more modern and edgy contrast.
Are short red nails professional for work?
Yes, in most professional environments, short red nails are considered perfectly acceptable and professional. The short length keeps the look practical and neat, while the red color conveys confidence. For very conservative workplaces, a deeper, more subdued red like burgundy might be a safer choice than a bright, vibrant red.
Final Thoughts on Your Chic Red Manicure
Ultimately, the power of short red nails lies in their beautiful duality. They are simultaneously bold and practical, classic and modern, glamorous and effortlessly chic. Whether you opt for a timeless glossy finish, an edgy matte look, or a playful minimalist art design, you’re choosing more than just a color—you’re choosing a statement of confidence that fits perfectly into your daily life.
This guide has equipped you with 11 distinct ideas and the professional grade techniques to achieve them. The most important step now is to prep your nails, pick a design that excites you, and have fun with the process. A perfect manicure is a fantastic act of self-care, and this iconic look is one you’ll return to again and again.
What is your favorite way to wear short red nails? Share your go-to shade or design in the comments below
Last update on 2026-04-05 / Affiliate links / Images from Amazon Product Advertising API