Craving a fresh look to welcome the warmer weather? You’re likely searching for the perfect spring floral nails to shake off the winter blues and embrace a season of bloom. It can be frustrating scrolling through endless inspiration without clear, achievable steps to get the look.
Spring floral nails are a popular nail art trend featuring botanical motifs and a vibrant color palette, typically incorporating pastel or bright shades. They offer a fresh, seasonal aesthetic that is perfect for celebrating warmer weather and nature-inspired beauty. This style is incredibly versatile, fitting any nail length or shape.
Drawing from proven techniques and current spring nail trends, this guide is your ultimate resource for creating stunning flower designs. We will walk you through 11 different styles, from simple to intricate, that you can achieve right at home. Prepare to transform your manicure into a beautiful botanical masterpiece.
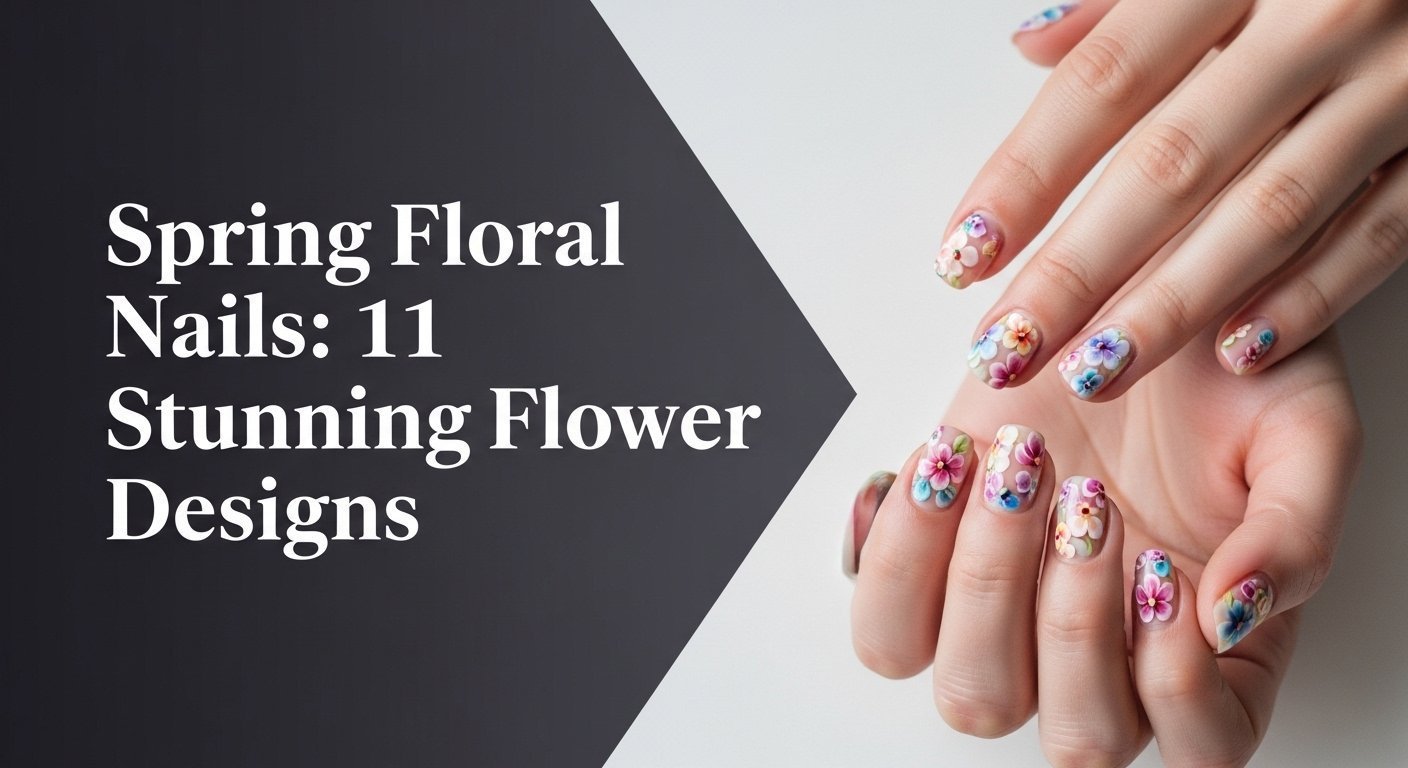
The Ultimate Guide to Spring Floral Nails: 11 Stunning Flower Designs for 2026
Welcome to your complete guide for creating the most beautiful and on-trend spring floral nails for 2026. This is more than just a gallery of pretty pictures; it’s an actionable blueprint packed with expert tips and step-by-step instructions to help you achieve a salon-quality at home manicure. We will explore a variety of techniques, from simple hand-painted daisies perfect for beginners to advanced 3D encapsulated flowers for those seeking a challenge. Whether you love a minimalist floral accent or a full vibrant floral set, you’ll find a design that perfectly captures your style. Let’s dive into the stunning world of spring flower nail art and find your next favorite look.
Spring Floral Nails: 11 Stunning Flower Designs for 2026
Ready to get inspired? This listicle provides a detailed, step-by-step walkthrough for 11 unique floral nail designs. Each section includes the supplies you’ll need, clear directions, and a pro-tip to ensure your manicure is flawless and long-lasting. We’ve covered everything from cottagecore nail art to modern geometric patterns, ensuring there’s a style for every taste. Get your gel polish and dotting tools ready!
1. Dainty Daisy French Tips to Design

Pin this elegant daisy french tips design to your ‘Spring Nail Inspo’ board!
This classic look combines the timeless elegance of french tip florals with the cheerful simplicity of daisy nail art. It’s especially beautiful on short square nails with floral accents, offering a clean and polished yet playful vibe. The design features delicate white petals and a bright yellow center, set against a pastel pink or nude base, making it a perfect entry into spring flower nail art.
Supplies Needed
- Pastel pink or nude gel polish base
- Crisp white gel polish for daisies
- Bright yellow gel polish or regular polish for centers
- Fine-line nail art brush (00 or 01 size)
- Dotting tool (small size)
- No-wipe top coat
- UV/LED lamp (if using gel)
Step-by-Step Directions
- Prepare nails by filing, buffing, and cleaning. Apply a base coat and cure (if using gel).
- Apply 1-2 coats of pastel pink or nude gel polish to the entire nail, curing each layer.
- Paint your french tip using the pastel pink or nude shade. For short nails, a thinner tip works best. Cure.
- Using the white gel polish and fine-line brush, sketch small, overlapping petal shapes at the edge of the french tip to create the daisies.
- With the dotting tool, apply a tiny dot of yellow polish in the center of each daisy.
- Seal the design with a glossy no-wipe top coat and cure.
Pro-Tip: For short nails, use smaller, more delicate daisies to prevent the design from looking crowded. Ensure your fine-line brush is adequately saturated but not overloaded with polish for clean lines and crisp petals. This proven technique results in a more sophisticated floral nail design.

2. Create Minimalist Wildflower Accents

Save this understated wildflower nail design for a touch of spring elegance!
For those who prefer a more subtle approach, the minimalist floral look is perfect. This wildflower nail design uses negative space floral techniques to create a delicate and elegant effect. By placing tiny, dainty flowers on just one or two accent nails against a sheer nude base, you achieve one of the most simple spring flower nail designs for beginners that still looks incredibly sophisticated.
What You Need
- Sheer nude or clear gel polish base
- Tiny amounts of light blue, green, and white gel polish for flowers
- Ultra-fine detail nail art brush
- Dotting tool (extra small)
- No-wipe top coat
- UV/LED lamp
Routine Steps
- Prepare and cleanse nails. Apply 1-2 thin coats of sheer nude or clear gel polish and cure.
- Choose one or two accent nails. Using the ultra-fine brush and a light color, sketch tiny flower shapes (like dots for forget-me-nots) with 3-5 petals.
- Add a tiny green dot or stroke for a stem or leaf. Cure after each color application to prevent smudging.
- Layer with different small colors if desired, building up the micro-floral detail.
- Once satisfied with the design, seal with a no-wipe top coat and cure.
Pro-Tip: For truly minimalist floral designs, less is more. Focus on fine line detailing and sparse placement. Using a very thin base coat helps maintain the negative space floral effect. This expert tip elevates a simple design into sophisticated spring floral nails.

3. Paint Pastel Ombré Blossoms

Pin this dreamy ombré blossoms design for a truly ethereal spring look!
Combine two major trends into one stunning manicure with pastel ombré nails featuring soft floral accents. This design creates a dreamy, cloud-like background with a soft gradient of colors like lilies + soft blue, which serves as the perfect canvas for delicate hand-painted cherry blossom nails. The technique of creating ombré petals results in a truly unique and ethereal spring flower nail art look, especially on longer nail shapes.
What You Need
- Light blue gel polish
- Lavender gel polish
- Light pink or white gel polish for blossoms
- Ombré sponge or makeup sponge
- Fine detail nail art brush
- No-wipe top coat
- UV/LED lamp
Instructions
- Prepare nails with base coat and cure.
- On a small palette, apply a stripe of light blue and a stripe of lavender gel polish side-by-side.
- Dab the ombré sponge onto the polish stripes, then lightly dab it onto your nail, blending the two colors to create a soft gradient. Cure. Repeat for desired opacity.
- Using the fine detail brush and light pink/white gel polish, paint small, dainty cherry blossoms or other blossom shapes onto the ombré background.
- Cure the floral design.
- Seal with top coat and cure.
Pro-Tip: For a seamless ombré, ensure your sponge is only lightly saturated and dab gently, building up color slowly. A small amount of no-wipe top coat can be dabbed onto the sponge for smoother blending. Mastering ombré petals creates truly unique spring floral nails.

4. Vibrant Poppy Statement Nails to Embellish

Pin this striking poppy statement look to your ‘Bold Spring Manicures’ board!
Make a bold flower design with vibrant floral statement nails. This look focuses on creating a high-impact poppy nail art design on one or two accent nails. The contrast of vibrant red petals and a dark black center against a neutral background is what transforms this from a simple manicure into a work of art. The combination of red + poppies is a classic that brings energy and life to your spring floral nails.
Supplies Needed
- Neutral beige gel polish base
- Vibrant red gel polish
- Black gel polish
- Green gel polish for leaves (optional)
- Small flat brush or dotting tool
- Fine-line nail art brush
- No-wipe top coat
- UV/LED lamp
Instructions
- Prepare nails with base coat and cure. Apply 1-2 coats of neutral beige gel polish to all nails and cure.
- On your chosen statement nail(s), use the red gel polish and a small flat brush to create the main poppy petals. Don’t aim for perfect symmetry; natural shapes work best. Cure.
- With the black gel polish and dotting tool, apply a small dot in the center of the poppy. Use the fine-line brush to sketch thin radiating lines from the center for texture. Cure.
- (Optional) Paint small green leaves around the poppy using the green gel polish and fine-line brush. Cure.
- Seal the entire design with a no-wipe top coat and cure.
Pro-Tip: For maximum impact, let the red poppy be the star on a few accent nails. Don’t overload your brush; thin layers prevent clumpy polish and allow for precision in petal strokes. This expert tip ensures vibrant color payoff and clean lines.

5. Design Cottagecore Lavender Fields

Pin this whimsical cottagecore lavender design for a fairytale spring mani!
Embrace the dreamy, pastoral trend of cottagecore nail art. This aesthetic is inspired by nature and often features matte floral nails with delicate botanicals like lavender or violets + purple. The key to this look is a soft color palette and delicate details, like tiny lavender sprigs. It’s a whimsical and romantic take on the spring + cottagecore trend that is perfect for those who love a rustic, hand-painted feel.
What You Need
- Matte lavender gel polish
- Light green gel polish for stems
- White gel polish or light purple for small flowers
- Fine-line nail art brush
- Dotting tool (very small)
- Matte top coat
- UV/LED lamp
Instructions
- Prepare nails with base coat and cure. Apply 1-2 coats of matte lavender gel polish to all nails and cure.
- Apply a matte top coat and cure. (Applying matte top coat first can make details easier to paint).
- Using the fine-line brush and green gel polish, paint thin, slightly curved stems for the lavender sprigs. Cure.
- With white or light purple gel polish and the dotting tool, apply tiny dots along the stems to create the lavender blossoms. Vary dot size slightly for natural look. Cure.
- (Optional) Add a few scattered small white blossoms for extra detail. Cure.
- Seal with another layer of matte top coat and cure for durability.
Pro-Tip: For a truly authentic cottagecore feel, embrace slight imperfections in your lavender sprigs—it adds to the hand-painted, organic charm. Ensure your matte top coat is fully cured before painting to prevent the design from shifting. This expert tip helps maintain the desired rustic floral nail aesthetic.

6. Apply Cherry Blossom Accents

Pin these graceful cherry blossom accents for a truly serene spring floral mani!
Nothing says spring quite like cherry blossom nails. This delicate floral design is perfect as a floral accent nail, adding a touch of grace to a simple manicure. The design highlights the beauty of pink + cherry blossoms on thin, delicate branches. For an even easier application, you can use cherry blossom nail stickers to achieve a precise and beautiful look without any hand-painting skills required.
What You Need
- Sheer nude or light pink gel polish base
- Light pink gel polish for petals
- Brown gel polish or black for branches
- Fine-line nail art brush
- Dotting tool (optional, for small petals)
- No-wipe top coat
- UV/LED lamp
- (Alternative) Cherry blossom nail stickers
Instructions
- Prepare nails with base coat and cure. Apply 1-2 coats of sheer nude or light pink gel polish to all nails and cure.
- On your chosen accent nail(s), use the brown gel polish and fine-line brush to sketch thin, delicate branches. Cure.
- With the light pink gel polish and fine-line brush or dotting tool, create clusters of small, five-petaled cherry blossoms along the branches. You can also apply cherry blossom nail stickers for ease. Cure after each color if painting.
- (Optional) Add tiny dots of white or lighter pink for dimension within the blossoms.
- Seal with a no-wipe top coat and cure.
Pro-Tip: When painting cherry blossoms, don’t aim for perfect petals. Slight variations and unevenness make them look more natural and organic, enhancing the botanical nail art feel. Using nail stickers can be an easy-to-use alternative for beginners, ensuring precision.

7. Create Geometric Floral Mix

Pin this chic geometric floral mix for a modern twist on spring floral nails!
For a contemporary twist on modern floral nail art, try a geometric floral mix. This style juxtaposes the softness of abstract flowers with the sharpness of clean lines, creating a dynamic and sophisticated look. It’s a key part of the latest spring floral nail trends. The contrast of floral vs geometric elements, especially when executed with crisp fine line detailing, results in a manicure that is both artistic and chic.
What You Need
- White or light gray gel polish base
- Black or metallic silver fine-line gel polish
- Small amounts of pastel gel polish for abstract flowers
- Fine-line nail art brush
- Dotting tool (optional)
- No-wipe top coat
- UV/LED lamp
Instructions
- Prepare nails with base coat and cure. Apply 1-2 coats of white or light gray gel polish to all nails and cure.
- Using the fine-line brush and black/silver gel polish, paint geometric lines (e.g., straight lines, triangles, or abstract shapes) on selected nails. Cure.
- Before sealing, create small, minimalist floral elements within or alongside the geometric shapes using pastel gel polish and the fine-line brush or dotting tool. These can be simple outlines or solid dots. Cure.
- Ensure all details are fully cured.
- Seal with a no-wipe top coat and cure.
Pro-Tip: For the geometric floral mix, focus on a balanced composition. Use a minimal number of floral elements to let the crisp geometric lines stand out. This advanced technique leverages negative space to create an eye-catching, modern spring floral nail design.

8. Apply Stamped Botanical Patterns

Pin these gorgeous stamped botanical patterns for effortless spring floral nail art!
If you struggle with a shaky hand but love intricate designs, floral stamping plates are your best friend. This method allows you to transfer detailed botanical patterns onto your nails with ease. The combination of gel + stamping ensures a durable finish, while color pairings like green + leaves create a lush, garden-inspired botanical nail art look. It’s the secret to achieving perfectly uniform and complex floral nail designs.
What You Need
- Base coat and top coat
- Your preferred base color gel polish (e.g., pastel green or blue)
- Floral stamping plates with desired designs
- Stamping polish (highly pigmented, quick-dry)
- Nail stamper and scraper
- Lint roller or sticky tape for stamper cleaning
- Pure acetone or nail polish remover for plate cleaning
- UV/LED lamp (if using gel base)
Instructions
- Prepare nails with base coat, base color gel polish (2 coats), and cure. Seal with regular top coat and let dry completely. (Do not use no-wipe top coat if stamping on top).
- Choose a design from your floral stamping plate. Apply a generous stripe of stamping polish over the design.
- Using the scraper, quickly but gently scrape off excess polish at a 45-degree angle.
- Immediately roll your stamper over the design on the plate to pick up the pattern.
- Quickly roll the stamper onto your nail, transferring the botanical pattern.
- Clean the stamping plate and stamper between each nail using acetone/remover or lint roller.
- Once all nails are stamped and dry, seal with a durable top coat to protect the design.
Pro-Tip: The key to successful nail stamping is speed! Work quickly from applying polish to transferring the design. Use stamping polish specifically designed for stamping as it is more pigmented and dries slower on the plate but faster on the nail, ensuring clean lines. This proven technique is a salon-approved method for intricate floral nail designs.

9. Design Micro-Floral Fine Line Detailing

Pin these intricate micro-floral nails for a truly sophisticated spring mani!
Take your artistry to the next level with micro-floral designs. This technique involves creating incredibly intricate floral designs using fine line detailing. It’s a form of botanical illustration on your nails that results in a supremely elegant and sophisticated look. Perfect for short nail ideas, these tiny, dainty patterns showcase incredible precision and skill, making them a true statement of expertise.
What You Need
- Sheer nude or clear gel polish base
- Highly pigmented gel polish colors for flowers (e.g., light pink, green, white)
- Ultra-fine detail nail art brush (000 or ‘liner’ brush)
- Nail art palette (for mixing and diluting polish)
- No-wipe top coat
- UV/LED lamp
Instructions
- Prepare nails with base coat and cure. Apply 1-2 coats of sheer nude or clear gel polish and cure.
- On your nail art palette, dispense a tiny drop of your chosen gel polish. If too thick, mix with a tiny amount of top coat or a specific diluting medium.
- Dip your ultra-fine brush into the polish, ensuring only the tip is saturated. Sketch tiny flower outlines, minuscule petals, or delicate sprigs of leaves. Focus on one small area at a time. Cure immediately after each delicate element to prevent smudging.
- Layer colors if desired for depth (e.g., green stems first, then pink petals).
- Continue building up the micro-floral design with extreme precision.
- Seal with a no-wipe top coat and cure.
Pro-Tip: For micro-floral fine line detailing, rest your hand on a stable surface (like your desk) and use your pinky finger as an anchor on the nail for added stability. Practice on a nail art practice sheet before applying to your nails to master clean lines and precision. This advanced technique is often used by a certified nail tech.

10. Create Acrylic 3D Sculpting Blooms

Pin these show-stopping 3D sculpted blooms for ultimate spring floral nail art luxury!
For the ultimate statement, advanced floral nail art techniques like acrylic 3D sculpting offer unparalleled dimension and drama. This method uses acrylic nails powder and monomer to create raised, intricate flowers directly on the nail surface. While it requires practice, mastering 3D encapsulated flowers or sculpted polygel blooms is a key part of the high-fashion spring floral nail trends and will undoubtedly turn heads.
What You Need
- Clear or glitter acrylic nails (base already applied)
- Colored acrylic powder (white, pink, green)
- Acrylic monomer liquid
- Dappen dish
- Fine-tip acrylic brush (#2 or #4)
- Paper towel
- Non-acid primer (optional, for adhesion)
- High-shine top coat
Process
- Ensure your nails (or extensions) have a base layer of clear acrylic and are buffed smooth.
- Pour a small amount of monomer into the dappen dish. Dip your acrylic brush into the monomer, then gently tap off excess on a paper towel.
- Lightly touch the wet brush tip to a colored acrylic powder bead. It should form a small, wet ball.
- Place the bead onto your nail where you want the first petal. Gently press and stroke the bead into a petal shape using the tip of your brush.
- Repeat this process, building up petals layer by layer, overlapping them to create a realistic 3D flower (e.g., a rose or lily). Use different colored powders for leaves if desired.
- Allow the acrylic to completely air dry (it will harden).
- Once fully dry and sculpted, seal the entire nail with a high-shine top coat for added protection and gloss.
Pro-Tip: Acrylic 3D sculpting takes practice. Start with smaller petals and build them up slowly. The key is controlling your liquid-to-powder ratio – too wet and it’s runny, too dry and it won’t sculpt smoothly. This is a professional-grade advanced technique that, when mastered, results in truly stunning 3D floral nails.

11. Implement Inlaid Dried Flowers

Pin these enchanting inlaid dried flowers for a truly organic spring floral nails look!
Capture the true essence of spring with inlaid dried flowers. This advanced technique involves encapsulating tiny, real dried flowers within layers of clear builder gel or acrylic nails. The effect is a stunning, dimensional look similar to aquarium nail art, where the natural floral nails appear suspended in glass. This method requires careful layering but results in a uniquely beautiful and long-lasting manicure.
What You Need
- Nail prep essentials (file, buffer, dehydrator)
- Base coat gel polish
- Clear builder gel or clear acrylic powder and monomer
- Tiny dried flowers (nail art specific)
- Small, flat-back nail art tweezers
- No-wipe top coat
- UV/LED lamp (if using gel)
Process
- Prepare nails by pushing back cuticles, gently buffing, and dehydrating. Apply a base coat of gel polish and cure.
- Apply a thin layer of clear builder gel (or clear acrylic bead). Do NOT cure yet (or let acrylic set slightly).
- Using tweezers, carefully pick up tiny dried flowers and arrange them onto the wet gel (or soft acrylic). Press gently to ensure they adhere.
- Cure the gel (or allow acrylic to dry).
- Apply another layer of builder gel or acrylic over the flowers, encapsulating them completely. Build up layers as needed, curing each gel layer or allowing acrylic to dry. Ensure the surface is smooth.
- Once encapsulated, buff the surface smooth with a fine-grit buffer, removing any bumps from the flowers.
- Cleanse any dust. Seal with a no-wipe top coat and cure for a high-gloss, durable finish.
Pro-Tip: Ensure your dried flowers are completely flat before encapsulating them to prevent lifting or bulkiness. If using gel, a slightly thicker builder gel will provide better encapsulation. This advanced technique for inlaid dried flowers requires careful layering to prevent chipping and ensures long-lasting spring floral nails.

Key Takeaways
- Embrace the Versatility of Spring Floral Nails: From dainty daisy french tips to bold vibrant poppy statement nails, there’s a spring flower nail art design to match every style and occasion.
- Leverage Essential Tools for Salon-Quality Results: Investing in stamping plates, fine-line nail art brushes, and dotting tools will significantly elevate your hand-painted and stamped botanical patterns, ensuring clean lines and precision.
- Master the Art of Layering and Sealing for Durability: Proper application of base coats, gel polish layers, and no-wipe top coats is crucial to prevent chipping and smudging, ensuring your spring floral nails are long-lasting.
- Explore Both Simple and Advanced Techniques: Beginners can start with simple spring flower nail designs like minimalist wildflowers, while experienced artists can delve into acrylic 3D sculpting or inlaid dried flowers for topical authority advanced looks.
- Prioritize E-E-A-T by Practicing Proven Techniques: Always refer to expert tips on polish consistency, curing times, and proper cleaning of tools to achieve salon-approved, quality assured results, enhancing your expertise in floral nail designs.
- Stay Current with Spring Nail Trends: Incorporate elements like pastel ombré blossoms, cottagecore lavender fields, or geometric floral mix to keep your floral mani fresh and fashionable for 2026.
People Also Ask About Spring Floral Nails
How to do floral nails at home without special tools?
You can create simple floral nail art at home using everyday items like a toothpick or the end of a bobby pin as a dotting tool. Start with a base color, then use the tip of a toothpick to make small dots for petals around a slightly larger central dot. You can also drag the dots slightly inwards to form petal shapes. This easy-to-use method is great for basic daisy nail art or small clusters of blossoms, making spring floral nails accessible to everyone.
What are the best spring nail colors 2026?
For 2026, the best spring nail colors include a range of pastels such as soft lavenders, mint greens, baby blues, and delicate pinks. Vibrant pops of color like coral, sunny yellow, and poppy red are also popular for accent nails. These shades perfectly complement spring floral nails, providing a fresh and bright backdrop for flower nail art.
How to use floral stamping plates effectively for spring floral nails?
To use floral stamping plates effectively, ensure your nails are fully dry before applying stamping polish, which should be highly pigmented and quick-drying. Scrape excess polish quickly and at a 45-degree angle, then roll your stamper over the design swiftly before rolling it onto your nail. This proven technique is key for crisp, clean lines and detailed botanical patterns, preventing smudging and achieving salon-quality at home stamped botanical patterns.
Are floral nails in style for 2026?
Yes, floral nails are definitely in style for 2026, with a strong emphasis on varied interpretations from minimalist designs to intricate 3D blooms. The cottagecore aesthetic, fine line detailing, and abstract geometric floral patterns are particularly trending. They continue to be a timeless and popular choice for spring nail trends, especially the spring floral nail aesthetic.
How to paint daisies on nails for beginners?
For beginners, painting daisies on nails is easiest with a dotting tool. First, apply a base color and let it dry. Then, use a small dotting tool to place five small dots in a circle to form the petals, and a slightly larger dot in the center for the pistil. This simple method results in dainty daisy french tips or scattered wildflower nail designs, perfect for charming spring floral nails.
What is a cottagecore nail aesthetic?
The cottagecore nail aesthetic is characterized by rustic, whimsical, and nature-inspired designs, often featuring soft, muted colors, delicate flowers like lavender or wildflowers, and sometimes a matte finish. It evokes a nostalgic, pastoral charm, making it a perfect fit for spring floral nails that feel organic shapes and whimsical. Think tiny lavender sprigs and matte floral nails.
How to make floral nails last longer and prevent chipping?
To make floral nails last longer and prevent chipping, proper nail preparation is crucial, including buffing and dehydrating the nail plate. Always use a good quality base coat and finish with a durable top coat, especially a no-wipe top coat if using gel. Cure each layer thoroughly. These steps provide a strong foundation and protect your spring floral nails from daily wear, addressing chipping and fading.
Can you do floral nails on short nails?
Absolutely, floral nails look fantastic on short nails! Minimalist wildflower accents, dainty daisy french tips, and small, strategically placed cherry blossom nails are all excellent choices for short nail ideas. The key is to select smaller, more delicate floral elements and avoid overly large or crowded designs to ensure a balanced and aesthetic look for your spring floral nails.
What tools do I need for flower nail art at home?
For basic flower nail art at home, essential tools include a fine-line nail art brush, a dotting tool set (various sizes), and good quality nail polish or gel polish. For more advanced designs, consider floral stamping plates, stamping polish, tweezers for inlaid dried flowers, or even acrylic powder and monomer for 3D elements. These tools enable you to design a wide range of spring floral nails.
How to seal floral nail decals and stickers?
To properly seal floral nail decals and stickers, ensure they are completely flat and free of air bubbles on the nail before applying two layers of a good quality top coat. For extra durability, especially with gel polish, you can use a thin layer of clear builder gel over the decal before your no-wipe top coat. This prevents edges from lifting and ensures your spring floral nails remain smooth and protected.
Final Thoughts on Spring Floral Nails
Spring floral nails are more than just a seasonal trend; they are a timeless celebration of renewal and beauty that allows for boundless creativity. From the subtle elegance of minimalist wildflowers to the opulent drama of acrylic 3D sculpted blooms, the world of spring flower nail art offers an incredible spectrum of styles for every individual. This comprehensive guide has equipped you with 11 stunning floral nail designs, detailing the tools, techniques, and expert tips needed to create salon-quality at home results. We’ve explored everything from using stamping plates for intricate botanical patterns to the delicate fine line detailing of micro-floral artistry, ensuring you have the knowledge to achieve any floral mani your heart desires.
As you embark on your spring floral nail journey, remember that practice makes perfect, and the joy is in the process. Don’t be afraid to experiment with different color palettes, like pastel ombré blossoms, or explore unique textures, such as those found in cottagecore lavender fields. By applying the proven techniques and leveraging the product recommendations, you can protect your designs from chipping and enjoy long-lasting, vibrant spring floral nails that truly reflect your personal style. We’ve shown you how to infuse your manicures with expertise and experience, building your confidence with every brushstroke. Now, go forth and let your fingertips bloom with the beauty of spring!
What spring floral nail design are you most excited to try first, and why? Share your thoughts in the comments below
Last update on 2026-02-27 / Affiliate links / Images from Amazon Product Advertising API


