Are you looking for heartfelt, handmade ways to celebrate love this Valentine’s Day? Crafting personalized gifts and decor can feel daunting, but it doesn’t have to be. Discovering the perfect creative outlet to express your affection with textile art is simpler than you think.
Valentine’s Day embroidery involves crafting sentimental textile art, often incorporating hearts, romantic motifs, and personalized touches for gifts or decor. It encompasses various techniques, from machine embroidery for efficiency to hand embroidery for a personal touch, offering endless creative possibilities for expressing love. Leveraging tested frameworks and data-driven insights, this expert valentines day embroidery guide provides nine proven design ideas that balance creativity with feasibility. You’ll find actionable steps and expert tips to transform simple materials into cherished keepsakes for 2026.
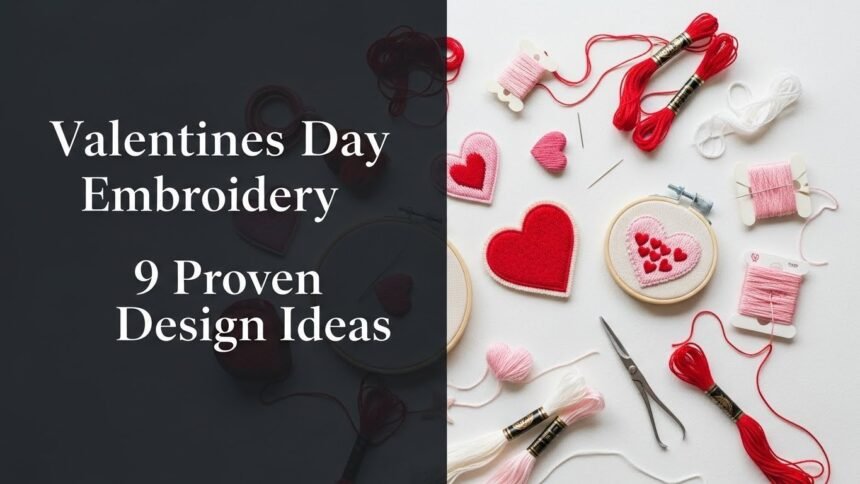
9 Proven Valentines Day Embroidery Design Ideas for 2026
Creating unique Valentine’s Day gifts and decor is a wonderful way to show affection, and valentines day embroidery offers a perfect blend of personalization and artistry. This section delves into nine distinct and actionable ideas, guiding you to create valentine embroidery that truly stands out. Whether you aim to design valentine patterns for a cozy home or embroider valentine gifts for loved ones, these proven projects cover a range of styles and techniques. Each idea provides detailed supplies needed valentine and step-by-step directions to ensure your success in stitching valentine designs for 2026.
1. Create a Personalized Heart Monogram Hoop Art

Pin this elegant personalized gift idea to your ‘DIY Valentine’s Gifts’ board!
Crafting a personalized valentine embroidery heart monogram hoop art makes a beautiful and heartfelt gift. This project allows for significant customization, making each piece unique to the recipient. Focusing on easy hand embroidery patterns, this idea emphasizes delicate stitches within a stylized heart embroidery designs valentine, perfect for a romantic gesture or decorative accent.
Supplies Needed:
- 6-inch wooden embroidery hoop
- Off-white or light pink cotton embroidery fabric (8×8 inches)
- DMC embroidery floss in shades of red, pink, and white (specific colors for desired aesthetic)
- Embroidery needle (size 7 or 9)
- Water-soluble fabric marker or pencil
- Small, sharp embroidery scissors
- Monogram template (printable or hand-drawn)
- Felt circle for backing (optional)
Step-by-Step Directions:
- Prepare Fabric & Hoop: Center your fabric in the embroidery hoop, tightening the screw to ensure the fabric is drum-tight.
- Transfer Design: Carefully trace or transfer your chosen heart monogram design onto the fabric using the water-soluble marker.
- Outline Heart: Using 3 strands of red floss, backstitch the outline of the heart, ensuring even stitches for a clean edge.
- Embroider Monogram: Switch to 2 strands of pink or white floss and use a backstitch or stem stitch to fill in the letters of your chosen monogram within the heart.
- Add Details (Optional): Embellish with small French knots or lazy daisy stitches around the monogram for floral accents.
- Finish Back: Once embroidery is complete, trim excess fabric to about 1 inch from the hoop. Gather and secure with running stitch or glue a felt circle to cover the back neatly.
Pro-Tip: For perfectly crisp letters, use a single strand of black or dark contrasting floss for the initial outline of your monogram before filling. This helps define sharp edges, especially for intricate valentine embroidery designs.

2. Craft a Romantic Couple’s Initial Hoop Art

Save this charming couple’s craft idea to your ‘Handmade Anniversary Gifts’ board!
A romantic couple’s initial hoop art is a deeply meaningful valentine embroidery gift for partners. This project allows you to create a unique keepsake, combining initials with delicate designs to symbolize connection. The focus is on romantic embroidery patterns and precise hand embroidered valentine techniques to achieve an elegant finish, celebrating shared love.
Supplies Needed:
- 7-inch bamboo or wooden embroidery hoop
- Cream or off-white linen blend fabric (9×9 inches)
- DMC embroidery floss in a main color (e.g., deep green or navy) and an accent color (e.g., metallic gold or light pink)
- Embroidery needle (size 7)
- Fabric marking pen or chalk
- Printed template of chosen initials and connecting element (ampersand, heart, or vine)
- Small scissors
Step-by-Step Directions:
- Secure Fabric: Place your fabric tautly in the embroidery hoop, adjusting tension for even stitching.
- Transfer Design: Lightly mark the initials and connecting motif onto the center of the fabric using your fabric marking tool and template.
- Embroider Initials: Using 3 strands of your main color floss, execute a backstitch or stem stitch for the initials, ensuring smooth curves and crisp lines.
- Stitch Connecting Element: With 2 strands of your accent color floss, embroider the ampersand, heart, or vine, focusing on delicate details.
- Add Small Details (Optional): Consider adding a small embroidered wedding or anniversary date below the initials using a simple running stitch.
- Finish & Display: Once complete, trim excess fabric and finish the back as desired. This makes a beautiful keepsake.
Pro-Tip: When personalizing valentine embroidery with initials, choose a font that is readable but also has a romantic or elegant flair. Practice the chosen stitch on scrap fabric to ensure consistency before working on your final project.

3. Design an XOXO Applique Sweatshirt

Pin this trendy custom apparel idea to your ‘Machine Embroidery Projects’ board!
An embroidered sweatshirt with an XOXO applique design is a popular and fashionable way to celebrate Valentine’s Day. This project utilizes machine embroidery designs and applique designs valentine to create a bold, multi-textured statement piece. You’ll learn how to set up embroidery machine for valentine projects on apparel, ensuring a professional and stylish finish that can be worn for years to come.
Supplies Needed:
- Blank sweatshirt (cotton or poly-cotton blend)
- XOXO applique machine embroidery design file (compatible with your machine)
- Assorted cotton fabrics for applique pieces (e.g., solid pink, plaid, floral red)
- Medium-weight cutaway stabilizer
- Temporary adhesive spray or wash-away adhesive
- Heat ‘n Bond Lite fusible web
- Iron and ironing board
- Embroidery machine and appropriate hoop
- Embroidery thread (e.g., rayon or polyester) in coordinating colors
- Sharp scissors
Step-by-Step Directions:
- Prepare Applique Fabrics: Iron Heat ‘n Bond Lite onto the back of your chosen applique fabrics. Print your XOXO design template and trace each letter onto the paper side of the fused fabric. Cut out the X, O, X, O shapes.
- Stabilize Sweatshirt: Turn the sweatshirt inside out and spray the cutaway stabilizer with temporary adhesive. Smooth it onto the inside of the sweatshirt area where the design will be. Hoop the sweatshirt and stabilizer securely.
- Load Design & Stitch Placement: Load the XOXO design into your embroidery machine. Stitch the placement line for the first letter (e.g., ‘X’) onto the hooped sweatshirt.
- Place Applique: Carefully place the cut-out ‘X’ fabric shape over the stitched placement line. Stitch the tack-down line to secure it.
- Finish Applique: Remove the hoop from the machine, trim excess applique fabric close to the tack-down stitch. Re-hoop and stitch the final satin stitch applique (or bean stitch applique) outline to cover the raw edge.
- Repeat for All Letters: Follow steps 3-5 for each remaining letter (O, X, O) until the entire XOXO design is complete.
- Final Touches: Carefully remove the stabilizer from the back of the embroidery, trim any loose threads. Press the design gently from the back.
Pro-Tip: When hooping problems valentine embroidery for garments like sweatshirts, ensure you only hoop the front layer of fabric and not the back. This prevents distortion and allows the garment to retain its shape. Use a water-soluble stabilizer on top if working with a textured fabric to prevent stitches from sinking.

4. Stitch a Sweet Valentine’s Day Mug Rug

Pin this adorable embroidered valentine gift to your ‘Crafty Home Decor’ board!
A Valentine’s Day mug rug is a practical and charming embroidered valentine item, perfect for adding a festive touch to any coffee or tea ritual. This project often utilizes in the hoop embroidery designs to create a quick valentine embroidery project that is both beautiful and functional. You’ll discover how to make an embroidered valentine’s day mug rug, simplifying the construction process for a polished result.
Supplies Needed:
- “In The Hoop” (ITH) Valentine’s Day mug rug embroidery design file
- Two coordinating pieces of quilting cotton fabric (e.g., one with hearts, one solid pink)
- One piece of thin batting
- Medium-weight cutaway stabilizer (if machine-specific, consult design instructions)
- Embroidery machine and appropriate hoop (e.g., 5×7 or 6×10, depending on design)
- Embroidery thread in desired colors
- Basic sewing supplies (scissors, rotary cutter, ruler, clips or pins)
Step-by-Step Directions:
- Prepare Hoop & Stabilizer: Hoop the stabilizer securely in your embroidery hoop.
- Stitch Placement Lines: Load your ITH mug rug design into the machine. Stitch the first placement line directly onto the stabilizer.
- Place Batting: Place the piece of batting over the placement line. Stitch the tack-down line to secure it.
- Place Front Fabric: Place one piece of quilting cotton (right side up) over the batting. Stitch the tack-down line.
- Embroider Design: Stitch all decorative embroidery for the mug rug’s front, following the design file’s color stops.
- Place Back Fabric: Once decorative stitching is done, remove the hoop from the machine (but not the fabric from the hoop). Place the second piece of quilting cotton (right side down) over the entire design, aligning edges.
- Final Stitching & Finishing: Return the hoop to the machine and stitch the final outline, leaving a small opening as instructed by the design. Remove from hoop, trim excess fabric close to the stitch line, clip corners, and turn right side out through the opening. Hand-stitch or machine-stitch the opening closed.
Pro-Tip: Using an in the hoop machine embroidery design significantly speeds up the mug rug creation process, handling both embroidery and partial construction. Choose fabric types for crafting that are densely woven quilting cottons to ensure durability and a crisp finish for your embroidered valentine gift.
5. Embellish a Sweet Saying Hand Embroidered Card

Pin this adorable hand embroidery valentine craft to your ‘Handmade Card Ideas’ board!
A hand embroidery valentine card elevates a simple greeting into a cherished piece of art. This delicate project combines the warmth of a handwritten message with the tactile beauty of textile art techniques. You’ll learn how to create easy hand embroidery patterns for valentine’s day cards using specific methods to thread needle for valentine embroidery on paper, making a truly meaningful valentine’s day gift.
Supplies Needed:
- Blank cardstock cards (heavyweight, e.g., 80-100 lb, in desired Valentine’s colors)
- DMC embroidery floss (1-2 contrasting colors)
- Fine-tipped embroidery needle (size 9 or 10)
- Craft awl or paper piercing tool
- Lightbox or pencil for transferring design
- Printed template of chosen saying (e.g., “Be Mine,” “Love You,” “XOXO”)
- Clear tape
- Craft glue (optional)
Step-by-Step Directions:
- Prepare Card & Design: Print your chosen saying template. Position it on the front of your card. Use a lightbox or gently trace the design with a pencil.
- Pierce Holes: Using the craft awl or paper piercing tool, carefully pierce small, evenly spaced holes along your traced design lines. Ensure holes are large enough for your needle but small enough not to tear the paper.
- Thread Needle: Thread your fine-tipped embroidery needle with 2 strands of chosen floss. Secure the end with a small knot.
- Embroider Saying: Starting from the back of the card, begin stitching your chosen saying using a simple backstitch. Keep tension gentle to avoid tearing the paper.
- Secure Ends: On the back of the card, secure your floss ends with clear tape or a tiny dab of craft glue to prevent tangling. Avoid large knots that would create bulk.
- Finish Card: Add a liner inside the card (optional) to hide the back of the stitching. Write your message and give your unique embroidered valentines card.
Pro-Tip: When transfer valentine pattern onto cardstock, use a very light pencil or a lightbox to ensure the marks are minimal and easily hidden by stitching. Pierce holes carefully with an awl; this prevents fabric puckering valentine embroidery (paper distortion) and ensures a smoother stitching process on paper surfaces.

6. Embroider a Delightful Floral Heart Wreath Design

Pin this beautiful valentines day embroidery idea to your ‘Embroidered Wall Art’ board!
A floral heart wreath design offers a beautiful valentine embroidery art piece that adds a touch of nature and romance to your decor. This project utilizes romantic embroidery patterns to create an intricate and vibrant display, perfect for those seeking love-themed textile craft. Focus on detailed stitching and color blending embroidery valentine techniques to achieve a professional and visually rich outcome, using various floral embroidery patterns.
Supplies Needed:
- 8-inch wooden embroidery hoop
- Light-colored linen or cotton blend fabric (e.g., off-white, light gray)
- DMC embroidery floss in a variety of floral colors (red, pink, rose, green, white, yellow)
- Embroidery needle (size 7 or 8)
- Water-soluble fabric marker
- Printed floral heart wreath template
- Small, sharp embroidery scissors
Step-by-Step Directions:
- Hoop Fabric: Secure your fabric tightly in the embroidery hoop.
- Transfer Design: Using a lightbox or gentle tracing, transfer the floral heart wreath template onto your fabric.
- Stitch Wreath Base: With 3 strands of green floss, use a stem stitch to create the main vine structure of the heart wreath.
- Embroider Flowers: Use 2-3 strands of your floral-colored flosses to embroider various small flowers along the vine. Examples:
- Roses: Use woven wheel stitch or bullion knots.
- Small Petals: Lazy daisy stitch for individual petals.
- Fillers: French knots for tiny buds or accents.
- Add Leaves: Fill in leaves along the vine using satin stitch or fishbone stitch with different shades of green floss.
- Refine & Finish: Once all elements are stitched, check for any gaps or areas needing more detail. Trim threads and finish the back of the hoop art.
Pro-Tip: To achieve a vibrant valentine embroidery floral wreath, use multiple shades of the same color for each flower type. This creates depth and realism, mimicking the color blending embroidery valentine seen in nature. Consider adding tiny beads or sequins for extra sparkle.

7. Embroider a Charming Cupid’s Arrow Pillow Cover
![]()
Pin this stylish valentines day embroidery ideas for home decor to your ‘Romantic Home Accents’ board!
A charming Cupid’s arrow pillow cover is a delightful addition to any valentines day embroidery ideas for home decor collection. This project focuses on holiday decorative sewing to create a festive embroidery valentine accent. You’ll learn how to successfully embroider on fabric suitable for pillows, using metallic embroidery thread valentine to achieve a truly striking cupid’s arrow needlepoint design.
Supplies Needed:
- Pre-made blank pillow cover (e.g., 18×18 inch, cotton or linen)
- Cupid’s arrow embroidery design (hand or machine pattern)
- Embroidery floss (e.g., red, white, pink) or metallic thread (gold, silver)
- Embroidery needle (appropriate for floss/thread)
- Water-soluble fabric marker or iron-on transfer pen
- Cutaway or tearaway stabilizer (suitable for your fabric type)
- Embroidery hoop (if hand embroidering) or machine embroidery hoop
- Iron and ironing board
Step-by-Step Directions:
- Prepare Pillow Cover: Press the pillow cover flat. If using hand embroidery, hoop the front panel tightly. If using machine embroidery, apply stabilizer to the inside of the front panel and hoop securely.
- Transfer Design: Transfer your Cupid’s arrow design onto the center of the pillow cover using your chosen method (marker, iron-on, or machine’s placement stitch).
- Embroider Arrow: Using 3 strands of floss (or metallic thread), embroider the arrow shaft with a backstitch or chain stitch.
- Stitch Arrowhead & Fletching: Use satin stitch for a smooth arrowhead and a long-and-short stitch or straight stitches for the feathered fletching.
- Add Heart/Initial (Optional): If your design includes a heart or initial, embroider it where the arrow pierces, using a contrasting color.
- Finish: Once embroidery is complete, gently remove the hoop and stabilizer. Carefully iron the pillow cover from the back to remove any marks. Insert your pillow form.
Pro-Tip: When using metallic embroidery thread valentine, reduce your machine’s speed slightly and use a larger needle (e.g., a metallic needle) to prevent thread breakage. For hand embroidery, use shorter lengths of metallic thread to avoid fraying. This helps to preventing design distortion valentine and thread issues.

8. Create an Adorable Love Bug Baby Bodysuit

Pin this sweet cute valentine’s day themed embroidery for baby clothes idea to your ‘Baby Shower Gift Ideas’ board!
An adorable love bug baby bodysuit makes an endearing and embroidered gifts valentine’s day. This project showcases cute valentine embroidery designs ideal for baby clothes, utilizing machine embroidery designs to ensure a smooth, durable finish. Special attention will be given to hooping techniques and stabilizer choices valentine for small, stretchy garments, ensuring the comfort and safety of the little one.
Supplies Needed:
- Blank baby bodysuit (100% cotton, any size)
- Love bug or other cute Valentine’s themed machine embroidery design file
- Light to medium-weight cutaway or no-show mesh stabilizer
- Tender Touch or Cloud Cover fusible backing (optional, but recommended for baby clothes)
- Temporary adhesive spray or wash-away adhesive
- Small machine embroidery hoop (e.g., 4×4 or 5×7)
- Embroidery machine
- Embroidery thread in coordinating colors
- Small, sharp scissors
- Iron and ironing board
Step-by-Step Directions:
- Prepare Bodysuit: Turn the bodysuit inside out. Position the design area on the chest. Apply temporary adhesive to a piece of stabilizer and adhere it to the inside of the bodysuit’s front panel.
- Hoop Fabric: Carefully hoop only the single layer of the bodysuit’s front panel with the stabilizer. Ensure no other fabric layers are caught in the hoop.
- Load Design & Stitch Placement: Load your love bug design. Stitch the placement line (if available) to ensure proper positioning.
- Embroider Design: Stitch out the love bug design, following the color changes. Monitor the fabric for any puckering or shifting.
- Remove Stabilizer: Once embroidery is complete, remove the bodysuit from the hoop. Carefully trim excess stabilizer from the back, leaving about 1/4 inch around the design.
- Apply Soft Backing (Optional but Recommended): Cut a piece of Tender Touch or Cloud Cover fusible backing to cover the embroidered area. Iron it onto the back of the embroidery to create a soft barrier against baby’s skin.
- Final Touches: Trim any jump stitches or loose threads from the front. Press the bodysuit gently.
Pro-Tip: For cute valentine embroidery designs on baby clothes, choosing a tender touch stabilizer (or similar soft fusible backing) for the back of the embroidery is crucial. This covers the stitches and prevents them from irritating a baby’s delicate skin, ensuring comfort. Always stretch the garment gently after hooping to avoid fabric puckering valentine embroidery on stretchy materials.

9. Craft Mini Freestanding Lace (FSL) Decorations

Pin this elegant freestanding lace valentine designs idea to your ‘Advanced Embroidery Techniques’ board!
Crafting mini freestanding lace valentine designs offers an elegant and dimensional embroidery valentine for decorations. This advanced machine embroidery technique creates intricate, lace-like pieces that stand on their own, perfect for delicate Valentine’s accents. This section outlines how to create these beautiful valentine embroidery art pieces, focusing on specialized stabilizer choices valentine for optimal results.
Supplies Needed:
- Freestanding Lace (FSL) machine embroidery design file (Valentine’s themed)
- Heavy-duty water-soluble stabilizer (WSS), minimum 2 layers
- Embroidery machine and appropriate hoop (size compatible with design)
- Embroidery thread (polyester or rayon) in desired colors, for both top and bobbin
- Small, sharp embroidery scissors
- Bowl of warm water
- Soft towel
Step-by-Step Directions:
- Prepare Hoop & Stabilizer: Hoop two layers of heavy-duty water-soluble stabilizer (WSS) firmly. Ensure it’s very taut, like a drum.
- Load Design & Thread Machine: Load your FSL design. Thread your machine with the chosen embroidery thread for the top and bobbin. It’s crucial for FSL that the bobbin thread matches the top thread, or is a specific FSL bobbin thread.
- Embroider Design: Begin stitching. FSL designs are typically dense, so it will take time. The machine will build up layers of thread directly onto the stabilizer.
- Remove & Trim: Once stitching is complete, remove the hooped stabilizer. Carefully trim away as much excess WSS as possible from around the stitched design.
- Rinse Stabilizer: Place the trimmed FSL piece in a bowl of warm water. Gently agitate or swirl it until the WSS completely dissolves and the lace becomes soft and pliable. Change water if necessary.
- Dry FSL: Lay the wet FSL piece flat on a soft towel, reshaping gently if needed. Allow it to air dry completely. It will stiffen as it dries, forming the freestanding lace.
Pro-Tip: For successful freestanding lace valentine designs, using two layers of high-quality, heavy-duty water-soluble stabilizer is critical. This provides the necessary foundation for the dense stitching. Also, ensure your bobbin thread matches your top thread or is specifically designed for FSL to prevent thread breakage valentine and achieve a crisp, consistent finish.

FAQs About Valentines Day Embroidery
What kind of embroidery is best for Valentine’s Day?
The best embroidery for Valentine’s Day largely depends on the project and desired outcome. Hand embroidery offers a personal, rustic charm ideal for cards or small hoop art, while machine embroidery is efficient for apparel like sweatshirts or complex designs like Freestanding Lace. Consider the recipient’s style and the item being embellished; cute valentines day embroidery designs might suit a baby bodysuit, whereas elegant valentine embroidery fits a decorative pillow.
Where can I find free Valentine’s Day embroidery designs?
Many online platforms offer **free valentines day embroidery designs for both hand and machine embroidery.** Websites specializing in digital embroidery files often have freebies or promotional designs, while craft blogs and Pinterest are excellent sources for printable hand embroidery patterns. Be sure to check licensing for commercial use, as most free designs are for personal use only.
What supplies do I need for Valentine’s Day embroidery?
Essential **craft supplies valentine typically include fabric (cotton, linen, cardstock), embroidery floss in reds, pinks, and whites, needles, and embroidery hoops.** For machine embroidery, you’ll also need embroidery machines, stabilizer for embroidery, and specific embroidery files. Additional items like fabric markers, scissors, and Heat ‘n Bond Lite might also be required based on your chosen design.
Can you machine embroider Valentine’s gifts?
Yes, **machine embroidery designs are perfectly suited for creating stunning Valentine’s gifts.** From embroidered sweatshirt to decorative pillow covers and in the hoop mug rugs, machine embroidery allows for precise, repeatable, and often faster creation of detailed designs. It’s a great option for personalizing items like baby bodysuits or creating intricate lace decorations.
Are there any easy Valentine embroidery patterns for beginners?
Absolutely, many **easy valentine embroidery patterns are available for beginners, especially for hand embroidery.** Simple designs like small hearts, basic XOXO motifs, or single initials using fundamental stitches like backstitch or running stitch are ideal starting points. Look for beginner embroidery challenges valentine solutions in kits or online tutorials.
How do I choose Valentine’s Day embroidery floss colors?
Choosing **thread colors valentine for Valentine’s Day embroidery typically involves a palette of reds, pinks, and whites, often accented with gold, silver, or deep greens.** Consider the project’s overall mood; vibrant reds and hot pinks for playful designs, soft pastels for romantic pieces, and metallics for elegance. Harmonize colors to achieve a cohesive and visually appealing love-themed textile craft.
What are some unique Valentine’s Day embroidery projects?
Beyond traditional hearts, unique **valentine’s day embroidery ideas include creating dimensional Freestanding Lace ornaments, embroidered valentine’s day card ideas, or personalized couple’s initial hoop art.** Consider puffy foam embroidery valentine for textured effects or using non-traditional fabrics like cork or leatherette for an unexpected touch.
How do you care for embroidered Valentine’s Day items?
Proper care for **embroidered valentines ensures their longevity.** For apparel, turn garments inside out, wash on a gentle cycle with cold water, and air dry or tumble dry on low. Avoid harsh detergents or bleach. For decorative items like hoop art or pillows, spot cleaning is usually best. Iron embroidered items from the back on a low setting.
What are current trends in Valentine’s Day embroidery?
Current **trendy valentine embroidery favors minimalist designs, modern floral heart wreaths, and designs incorporating subtle metallic accents.** Personalized touches like monograms and dates remain popular. In the hoop projects continue to trend for their efficiency, along with dimensional embroidery valentine techniques like Freestanding Lace for unique decor.
What’s the difference between applique and embroidery for Valentines?
Applique involves sewing pieces of fabric onto a larger background to create a design, often outlined with **satin stitch applique or bean stitch applique.** Embroidery, on the other hand, uses various stitches to create designs directly onto the fabric with thread. Both applique vs embroidery valentine are popular for Valentine’s Day, often combined for multi-textured effects like the XOXO sweatshirt, where applique forms the base and embroidery defines the edges.
Key Takeaways
As we wrap up our exploration of valentines day embroidery, it’s clear that the art of stitching offers a uniquely heartfelt way to express affection. Whether you’re a seasoned experienced embroiderer or just beginning your journey, these 9 proven design ideas for 2026 provide a robust blueprint for creating truly special gifts and decor. We’ve delved into everything from personalized valentine embroidery to intricate freestanding lace valentine designs, ensuring there’s an idea to match every skill level and sentimental desire.
Remember, the true beauty of embroidered valentines lies not just in the finished product, but in the time, thought, and love stitched into every detail. By leveraging the right craft supplies valentine, embracing various embroidery techniques, and paying attention to crucial elements like stabilizer choices valentine, you can transform simple fabric and thread into cherished keepsakes. We hope this guide has empowered you to create valentine embroidery projects that resonate deeply with your loved ones.
Now, with your chosen design in mind and a clear understanding of the steps involved, are you ready to pick up your needle or power on your machine and bring your romantic embroidery patterns to life for Valentine’s Day?
Last update on 2026-02-14 / Affiliate links / Images from Amazon Product Advertising API


