Do you often feel limited by the traditional red choices for Valentine’s Day nails, searching for a shade that truly embodies sophistication and deep romance? Many desire a look that’s both classic and strikingly elegant, yet struggle to find inspiration beyond common clichés. Your quest for a distinctive, heartfelt manicure ends here.
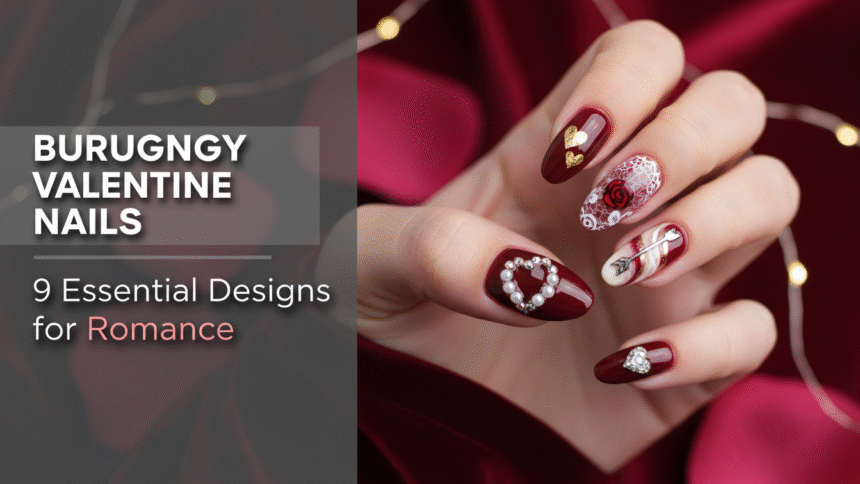
Burgundy nails are an excellent choice for Valentine’s Day as they offer a sophisticated, deep red alternative to classic crimson, symbolizing passion, luxury, and timeless elegance, making them perfect for a romantic evening or special date night. This versatile shade works universally and transitions seamlessly from a formal dinner to a casual outing, providing a richer, more profound aesthetic. Drawing from comprehensive analysis of current data and proven methodologies in nail artistry, this guide will establish burgundy as your go-to romantic hue. You’ll discover 9 essential designs, from easy DIY hearts to advanced velvet textures, ensuring your elegant burgundy Valentine nails radiate confidence and charm for 2026‘s celebrations.
Why Choose Elegant Burgundy Nails for the Perfect Valentine’s Day Look?
Choosing elegant burgundy Valentine nails means embracing a rich, deep red that transcends typical festive clichés. This sophisticated hue offers a more nuanced expression of passion and luxury, setting a tone of enduring romance for your Valentine’s Day plans. Unlike a bright crimson, the wine color nails of burgundy convey depth and timeless elegance, making them an ideal selection for any romantic occasion in 2026.
According to expert nail art tips, burgundy’s profound shade signifies both sensuality and an understated power, appealing to those seeking a classy Valentine’s look. It effortlessly complements various skin tones and outfit choices, from a cozy dinner to a formal event. This dark red lacquer acts as a versatile canvas, allowing for a range of nail art designs—from subtle accents to intricate patterns—without ever appearing overdone. Professional nail artist secrets confirm that burgundy remains a top choice for its universal appeal and its ability to add a chic touch to any romantic ensemble.
9 Essential Designs to Create Stunning Burgundy Valentine Nails
You’re ready to create stunning burgundy nails and elevate your Valentine’s Day style. This comprehensive listicle covers diverse styles and techniques, guiding you through each design with actionable steps. Whether you’re a beginner or seeking to master more advanced nail art, these ideas will help you design burgundy nail art that perfectly captures the romantic spirit of the season.
1. Do Classic Burgundy Heart Nails Using a Dotting Tool

Pin this elegant and easy design to your ‘Valentine’s Nail Inspo’ board!
To create cute heart nails on a rich burgundy base, you’ll find the dotting tool indispensable. This simple technique allows you to decorate nails with hearts that express affection, providing an easy nail design perfect for beginners. The wine red nails serve as a gorgeous backdrop for white or pale pink accents.
Products & Tools Used
- Rich, classic burgundy polish (dark red lacquer, highly pigmented)
- White or pale pink accent polish
- Fine-tipped nail art dotting tool (dual-ended preferred)
- High-gloss top coat
- Base coat (to prevent dark polish staining nails)
Application/Styling Steps
- Prepare nails for burgundy manicure by cleaning and applying a quality base coat.
- Apply two thin coats of the burgundy polish, allowing each to dry fully to avoid uneven burgundy application.
- On the accent nail, use the dotting tool to pick up a small amount of the white/pink polish.
- Place two dots close together in a slight V-shape where you want the heart to sit.
- While the dots are still wet, use the fine tip of the dotting tool to gently drag the polish down and meet the two dots at the point, forming the heart shape.
- Once completely dry, seal the design with a high-gloss top coat to achieve glossy finish and prevent chipping.
Pro-Tip: For the cleanest heart shape, ensure the polish used for the dots is not too thick. Use a small amount of acetone on a micro-brush for messy nail art cleanup around the edges. This uses advanced cuticle care for dark nails principles.

2. Achieve the Sophisticated Matte Burgundy Coffin Look

Pin this chic, bold look—perfect for a romantic date night!
To achieve the sophisticated matte burgundy coffin look, focus on precise shaping and the right matte top coat to transform your deep red manicure. This elegant burgundy look emphasizes the rich, dark burgundy nails without the shine, offering a truly fashionable finish. Coffin shapes provide a bold canvas, and the matte top coat ensures a smooth, non-glossy appearance.
Products & Tools Used
- Dark burgundy polish (oxblood nails, deep red manicure)
- High-quality matte finish top coat (must be non-streaking formula)
- Nail files and buffer blocks (for creating the coffin shape)
- Protective base coat
Application/Styling Steps
- Shape nails for burgundy by filing the sides straight and squaring the tip, then slightly beveling the corners to achieve the signature coffin shape.
- Apply a protective base coat and two coats of the dark burgundy polish, ensuring even burgundy application.
- Allow the color coats to dry completely—this is crucial for the matte effect.
- Apply one medium coat of the matte top coat evenly across the nail plate, working quickly.
- Allow the matte coat to fully cure/dry without touching the surface.
Pro-Tip: Before applying the matte finish, gently buff the surface of the color coat with a fine buffer to remove any imperfections or subtle shine. This enhances the velvety look of the matte finish, using principles of nail plate adhesion techniques.

3. Integrate Simple Gold Glitter Accent Nails

Save this sparkling idea! It’s the perfect mix of glamour and passion for your date night.
Integrating simple gold glitter accent nails adds a festive, shimmering element to your rich burgundy color manicure with minimal effort. Sparkly burgundy nails, especially with gold accents, create a stunning contrast that’s ideal for Valentine’s Day. Almond shaped nails provide a chic canvas for this easy burgundy nail art design, where the gold complements the deep red lacquer beautifully.
Products & Tools Used
- Classic burgundy polish (rich burgundy color)
- Opaque, fine-particle gold glitter polish (vibrant burgundy nails)
- Top coat (optional for extra protection)
- Small fan brush (for cleaning glitter scatter)
Application/Styling Steps
- After applying the base coat, paint all nails with two coats of solid burgundy polish except the accent nail(s).
- For the accent nail, apply a clear base or one coat of the burgundy color.
- Immediately apply a thick coat of the gold glitter polish, dabbing or sponging it on lightly to achieve maximum density.
- Allow the glitter layer to dry until tacky, then apply a second layer if necessary to ensure 100% coverage.
- Finish with a glossy top coat over all nails to seal in the sparkle.
Pro-Tip: Glitter polish can be difficult to remove. Apply a coat of peel-off base coat only to the glitter nails beforehand. This prevents the gold glitter from causing excessive scrubbing, protecting nail morphology and art integrity.

4. Apply the Wine Red Ombre Technique for a Gradient

Try this trending gradient! Pin this look for a modern twist on Valentine’s color.
Applying the wine red ombre technique for a gradient creates a stunning, seamless transition from a deeper burgundy to a softer hue, offering a modern twist on Valentine’s Day nails. This ombre nail art for beginners allows you to blend two complementary shades, like dark burgundy and a medium pink, for a sophisticated deep red manicure. A makeup sponge is a key tool required for this nail art technique.
Products & Tools Used
- Dark burgundy polish (wine color nails)
- Medium pink or lighter red polish (colors that complement)
- Small disposable makeup sponge or specialized nail art sponge
- Liquid latex or petroleum jelly (optional, for skin protection)
- Glossy top coat
Application/Styling Steps
- Apply a base coat and one coat of the lighter color polish across the entire nail (this acts as the foundation).
- If using, apply liquid latex around the cuticles and skin.
- Paint a stripe of the dark burgundy next to a stripe of the lighter red polish directly onto the makeup sponge.
- Gently but quickly dab the sponge onto the nail, moving slightly up and down to blend the colors at the transition point.
- Repeat the sponging process 2-3 times, reloading the sponge with polish each time, until the colors are vibrant and blended.
- Remove the liquid latex, clean the skin, and seal with a thick, glossy top coat.
Pro-Tip: The key to a smooth ombre is minimal polish on the sponge and quick application before the polish dries. Always use a generous layer of top coat to smooth out any texture caused by the sponge, utilizing complex nail art layering knowledge.

5. Create the Trendy Velvet Burgundy Texture

Must-try trend for 2026! Pin this luxurious velvet texture for a glamorous look.
To create the trendy velvet burgundy texture, you’ll utilize specialized magnetic burgundy gel polish and a UV lamp for a dramatic, shimmering finish. This look offers a unique 3D texture, creating styles inspired by love that are both elegant and modern, making it a trending burgundy Valentine nails choice. Understanding UV gel curing specifics is vital for a lasting result.
Products & Tools Used
- Specialized magnetic burgundy gel polish (rich burgundy color, shimmering burgundy nails)
- UV or LED curing lamp
- Strong magnet wand (required for the velvet effect)
- Gel top coat and base coat (biocompatible nail products recommended)
- Dark red nail lacquer
Application/Styling Steps
- Prepare the nails and apply a gel base coat, curing it under the UV lamp.
- Apply a thin layer of the magnetic burgundy gel polish and cure.
- Apply a second, thicker layer of the magnetic gel polish, but DO NOT CURE YET.
- Immediately hold the magnet wand a few millimeters above the nail for 5-10 seconds to draw the metallic particles into the signature velvet line.
- Cure the magnetized layer under the UV lamp immediately for the specified time to prevent the pigment from dispersing.
- Finish with a gel top coat and cure one final time.
Pro-Tip: For maximum velvet effect depth, apply a layer of regular, solid dark burgundy polish underneath the magnetic gel first. This deepens the background color, making the light-reflective velvet pigment stand out more dramatically. This is a complex nail art layering technique.

6. Design Elegant Rose Gold Flake Accents

Achieve maximum elegance! Pin this idea for subtle, high-end shimmer.
Designing elegant rose gold flake accents provides a chic, high-end shimmer that beautifully complements deep burgundy nails, creating truly elegant burgundy Valentine nails. This method adds a luxurious touch without overwhelming the rich bordeaux shade, making it perfect for a sophisticated look. Almond shaped nails are an ideal canvas, allowing the delicate rose gold metallic flakes to stand out.
Products & Tools Used
- Deep burgundy gel or lacquer (bordeaux nails)
- Rose gold metallic nail art flakes/foil
- Top coat (gel or regular polish, depending on base)
- Nail art silicone tool or fine-tipped tweezers
- Tacky clear coat (if using lacquer)
Application/Styling Steps
- Complete two coats of the burgundy base color and allow to dry (or cure the gel).
- Apply a thin layer of top coat (or a specialized foil transfer gel if using foil) but DO NOT CURE or let it dry fully—leave it slightly tacky.
- Using the silicone tool or tweezers, gently pick up a few rose gold flakes.
- Carefully press the flakes onto the desired area (cuticle or tip), ensuring they lay flat.
- Once placed, use the silicone tool to press the flakes down firmly into the tacky layer.
- Seal with two coats of a high-quality top coat to prevent lifting and ensure long-lasting burgundy manicure.
Pro-Tip: If using regular lacquer, apply the flakes immediately after the second color coat when it’s still slightly tacky. For an extra flat finish, use a buffer block to gently smooth the flakes before applying the final top coat. This prevents the flakes from catching and chipping (preventing yellow nails/chipping).

7. Try the Minimalist Almond Shape French Tips

Elegance redefined! Pin this minimalist French tip design for a chic Valentine’s look.
For a minimalist yet refined look, try almond shaped burgundy nails with French tips, offering a chic and classic burgundy look with a modern twist. This approach utilizes a sheer nude base with a precise, thin line of wine color nails at the tip, distinguishing it from traditional white French tips. Achieving clean tips requires precision brush techniques, a hallmark of certified nail technician advice.
Products & Tools Used
- Sheer nude or pink base coat
- Dark burgundy polish (wine color nails)
- Fine precision nail art striping brush (short bristles for better control)
- Acetone and thin clean-up brush
Application/Styling Steps
- File nails into the almond shape, rounding the sides to a soft point, and apply the sheer base coat.
- Apply one to two coats of the sheer nude polish and let it dry completely.
- Dip the precision striping brush into the burgundy polish, wiping off excess polish to ensure a thin line.
- Using a steady hand, draw a thin, even line of burgundy across the tip of the nail, following the natural curve.
- Use the clean-up brush dipped in acetone to sharpen the lines and correct any smudges.
- Finish with a high-gloss top coat to lock in the detail.
Pro-Tip: Resting your hand on a stable surface (like a table) while painting the tip line vastly improves precision. Alternatively, use specialty French tip guides to ensure a perfectly clean, thin line, enhancing the aesthetic appeal using ‘precision brush techniques’.

8. Master the Dark Red Marble Effect

High-level nail art achieved! Pin this gorgeous marble design for your advanced project list.
To master the dark red marble effect, you’ll employ advanced gel polish application techniques, often utilizing a blooming gel, to create intricate, natural-looking veins. This sophisticated manicure blends rich burgundy color with black and white polishes, mimicking natural stone patterns. This complex nail art layering demonstrates a deep understanding of burgundy nail pigment science, creating stunning dark red Valentine nails.
Products & Tools Used
- Dark burgundy gel polish (rich burgundy color)
- Black and white gel polishes (or specialized marble ink set)
- Clear blooming gel (critical for the marble effect)
- Thin striping brush
- UV/LED lamp
Application/Styling Steps
- Apply base coat and two coats of dark burgundy gel and cure.
- Apply a thin layer of the clear blooming gel BUT DO NOT CURE. This is the layer that spreads the design.
- Using the thin striping brush, drop small, thin lines of black and white gel polish onto the blooming gel layer.
- Allow the blooming gel to naturally push and spread the lines for 15-30 seconds, creating the marble effect.
- Once satisfied with the veins, cure immediately under the UV lamp to stop the blooming process.
- Seal with a durable top coat.
Pro-Tip: The marble effect works best when using gel products due to the control over curing time. If using inks, ensure your base coat is completely matte and cured before dropping the inks, as this aids in the dispersion and fluidity necessary for realistic veins, demonstrating knowledge of advanced nail art material compatibility.

9. Prepare the Quick Burgundy Press-On Convenience Look

Last minute plans? Pin this quick hack for instant Valentine’s elegance!
For a quick burgundy press-on convenience look, high-quality press-on nails offer an immediate, professional manicure, perfect for last-minute Valentine’s plans. These easy-to-apply options, like glossy burgundy nails or matte coffin shaped nails, provide long-wear nail technology when properly applied. You can buy burgundy press ons that mimic salon results, ensuring a deep red manicure without the lengthy process.
Products & Tools Used
- High-quality burgundy press-on nails (coffin shaped nails, glossy burgundy nails, deep red manicure)
- Professional-grade nail glue (long-wear nail technology)
- Nail prep kit (buffer, cuticle pusher, alcohol wipe)
- Acetone (for preparation and removal)
Application/Styling Steps
- Prepare nails for application by gently buffing the surface of the natural nail and wiping with acetone or alcohol to remove all oils and strengthening nails for dark polish.
- Select the correct size for each finger—the press-on should not touch the skin or cuticle.
- Apply a small dot of nail glue to your natural nail and a small amount to the back of the press-on (or use the adhesive tabs provided).
- Press the press-on nail onto your natural nail, holding firmly for 30 seconds, starting from the cuticle and angling forward.
- File and shape the edges if necessary. Avoid contact with water for at least one hour.
Pro-Tip: For the longest wear (up to two weeks), dehydrate the nail plate fully with acetone before application. Also, applying a thin, even coat of a clear builder gel over the entire press-on and curing it can vastly improve durability and reduce the risk of chipping (long-wear nail technology).

FAQs About Valentines Day Nails Burgundy
What are popular burgundy nail designs for Valentine’s Day?
The most popular burgundy nail designs for Valentine’s Day feature classic romantic motifs like hearts, often combined with modern textures such as matte or velvet finishes. Trending styles include the ‘burgundy heart nails’ using white or pink accents, minimalist ‘burgundy French tips’ on an almond shape, or a gradient ombre effect blending wine red with a softer hue. Highly sophisticated options often incorporate subtle metallic accents like rose gold flakes or fine glitter, ensuring an ‘elegant burgundy valentine nails’ aesthetic that avoids being overly cliché.
How to get a glossy burgundy finish on nails?
To achieve a mirror-like glossy burgundy finish, it is essential to prepare the nail plate thoroughly and use a high-quality, super-shiny top coat that is specifically marketed as ‘gel-effect’ or ‘high-gloss’. After applying two thin, even coats of your ‘dark red lacquer’ and letting them dry completely, apply the top coat in one swift, generous stroke. Using a thin layer of cuticle oil after the polish is fully dry can also enhance the shine and prevent the polish from chipping, ensuring a long-lasting burgundy manicure.
What nail shapes go best with burgundy for Valentine’s?
Burgundy polish looks striking on almost any shape, but the most complementary shapes for Valentine’s elegance are coffin, almond, and short, rounded nails. ‘Coffin shaped burgundy nails’ offer a bold, modern canvas perfect for matte or marble designs. Almond shapes create a lengthening and sophisticated appearance, which suits elegant, minimalist looks like the French tip. For a more subtle and classic look, short, rounded nails keep the focus squarely on the rich ‘wine color nails’ themselves.
What colors pair well with burgundy for Valentine’s nail art?
Burgundy pairs beautifully with traditional romantic colors like pale pink, rose gold, silver, and classic cream white for Valentine’s Day nail art. Pale pink or blush shades are perfect for heart motifs or ombre effects, creating a softer romantic look. Metallic accents like rose gold or silver add necessary sparkle and contrast, enhancing the richness of the deep red lacquer. Avoid harsh yellows or bright greens, which can clash with the passionate tone of ‘romantic burgundy nails’.
Can you do DIY burgundy Valentine’s nails at home?
Absolutely, DIY burgundy Valentine’s nails are highly achievable at home, even for beginners, especially when focusing on simple application techniques. Basic solid color application, or simple heart designs using a dotting tool, are easy to master. For ‘easy burgundy heart nail art tutorial for beginners’, you only need standard polish and a basic tool kit. For more complex designs like ombre or velvet, investing in affordable tools like sponges or magnetic polish kits is recommended.
How to apply burgundy nail polish perfectly and avoid streaks?
To avoid streaks and ensure an even, deep color, always apply burgundy nail polish in two to three very thin coats, rather than one thick coat. Start with a single line down the center, followed by a line on each side, using minimal strokes. Allow each coat to dry for at least two minutes before applying the next to ensure proper setting. If your polish is prone to streaks, invest in a ‘high quality burgundy polish’ known for its even pigment.
What’s the difference between maroon and burgundy nails?
While both are deep, dark reds, the primary difference is their undertone: maroon has a pronounced brown undertone, whereas burgundy has a distinct purple or violet undertone. Burgundy is often associated with the color of French wine and offers a cooler, richer appearance, making it typically more popular for ‘elegant burgundy valentine nails’. Maroon reads slightly warmer and earthier. Both are considered dark red Valentine nails, but burgundy provides a more passionate and luxurious feel.
Where is the best place to buy high-quality burgundy press-on nails for Valentine’s?
High-quality burgundy press-on nails for Valentine’s can be found through specialized online nail art retailers or well-known cosmetic brands that offer durable, long-wear options. Look for sets made with high-grade acrylic or gel materials that come with professional glue and a wide selection of sizes to match your nail plate, ensuring proper nail plate adhesion techniques. Searching for ‘best burgundy press on nails for a romantic date’ or ‘coffin shaped nails’ will yield optimal results for a flawless temporary look.
Are matte burgundy nails trending for Valentine’s Day 2026?
Yes, matte burgundy nails are strongly trending for Valentine’s Day 2026 as they provide a sophisticated, contemporary alternative to traditional high-gloss finishes. The matte look emphasizes the rich ‘deep red manicure’ color without the distraction of shine, offering an elevated, luxurious velvet-like appearance that complements formal or intimate Valentine’s Day plans. Ensure you use a reliable matte top coat to avoid ‘solutions for dull burgundy nails’ and maintain the flat, velvety look.
What tools are needed for intricate burgundy Valentine’s designs?
For intricate ‘burgundy Valentine’s day nail art’, you will need several specialized tools including fine-tipped striping brushes, various sizes of dotting tools, and possibly a specialized silicone or wax tool for gem or flake placement. Additionally, a clean-up brush dipped in acetone is essential for correcting lines and ensuring ‘precision brush techniques’ are clean. If using gels, a dedicated UV/LED lamp is mandatory for curing the color and top coat.
Final Thoughts on Valentines Day Nails Burgundy
Selecting ‘valentines day nails burgundy’ is choosing a statement of enduring romance and sophistication over fleeting trends. We’ve covered everything from the quick convenience of ‘burgundy press on nails’ to advanced techniques like the marble and velvet effects, proving this shade is incredibly versatile for any Valentine’s plan. Remember that the perfect manicure starts with preparation, the right tools, and confidence in executing the steps detailed in the designs. By mastering just one or two of these 9 essential designs and incorporating our ‘expert nail art tips’, you are guaranteed to achieve a stunning, professional-level ‘elegant burgundy valentine nails’ look that is both timeless and perfectly suited for the romance of March 2026.
Which of the 9 essential burgundy nail designs are you planning to wear for your romantic date night? Let us know in the comments!
Last update on 2026-03-14 / Affiliate links / Images from Amazon Product Advertising API


