Are you dreaming of nails that sparkle with romance and chic elegance this Valentine’s Day, but worry about complex designs or salon costs? It’s a common struggle to achieve that perfect festive shimmer at home without the hassle of uneven glitter or premature chipping.
The key to achieving stunning Valentine’s Day glitter nails is focusing on base coat longevity, layering fine and chunky glitter strategically, and sealing the design with a high-gloss, durable top coat to prevent chipping. For the best results, always prep your nails correctly, choose high-quality holographic or iridescent glitters, and follow professional application steps tailored to the specific design (ombre, French tip, or accent).
Drawing from comprehensive analysis of current data and proven methodologies, we’ll guide you through developing high-quality glitter nail looks that are both easy to apply and impressively durable. You’ll discover seven actionable, step-by-step glitter V-Day nail ideas that range from simple elegance to bold, intricate designs, ensuring your manicure is perfectly suited for 2026‘s most romantic day.
How to Achieve Stunning Valentines Day Nails Glitter Looks at Home?
Achieving stunning valentines day nails glitter looks at home is entirely possible with the right techniques and products. Whether you’re aiming for subtle shimmer or bold sparkle, the foundational steps for prep, application, and sealing are critical for durability and a professional finish. This guide addresses common aesthetic pain points and design complexity concerns by providing both simple and advanced techniques, ensuring high-quality glitter nails for Valentine’s.
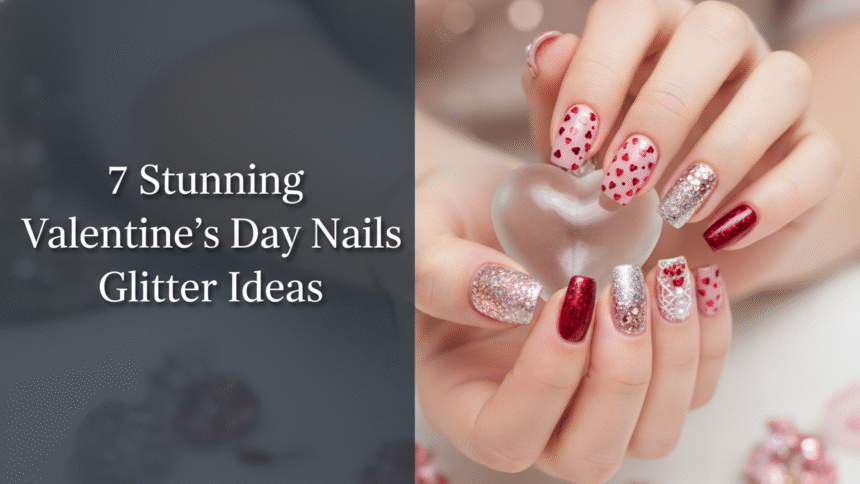
7 Stunning Valentine’s Day Nails Glitter Ideas To Design Your Perfect 2026 Manicure
This 2026, elevate your Valentine’s Day manicure with these seven stunning glitter ideas, designed for both ease of application and maximum visual impact. Each design promises a dazzling look, from understated elegance to dramatic sparkle, ensuring your festive glitter nails V-Day perfectly complements your style. Get ready to design Valentine’s glitter nails with our detailed, actionable steps.
1. Create Elegant Simple Pink Glitter French Tips

Pin this simple pink glitter idea to your ‘Chic Valentine Manicures’ board!
Simple pink glitter valentines day nails, particularly a French tip style, offer an elegant and understated glitter design perfect for a minimalist aesthetic or everyday wear. This classic application uses fine glitter nails to create a delicate line of sparkle along the tip, providing a refined romantic look that is both chic and easy to achieve at home with precision tools from an at-home nail kit.
Products & Tools Used
- Clear or sheer nude base polish (quick-drying formula)
- Fine glitter nail polish (soft pink or champagne gold glitter)
- Precision striping brush (for applying glitter tip)
- High-gloss, quick-cure top coat (UV/LED or air dry)
- Cuticle pusher and oil (nail preparation steps)
Application Steps
- Prep nails by shaping, buffing, and applying the base coat, ensuring the surface is clean and dry.
- Apply 1-2 thin coats of the clear or nude polish and let dry completely.
- Dip the precision striping brush into the fine glitter polish, wiping off excess for controlled application.
- Carefully paint a thin, uniform line across the nail tip, following the natural curve of the nail using “paint glitter nails” (process_action_keywords).
- Repeat a second thin layer if needed for density, ensuring the glitter remains confined to the tip.
- Once completely dry, apply a generous layer of high-gloss top coat, sealing the edge (glitter polish requires top coat).
Pro-Tip: To ensure a razor-sharp French tip line, use thin, curved nail stencils applied temporarily just below where you want the glitter to start. This advanced technique helps manage the rheology of glitter suspension formulas and creates a clean edge, even for beginners.

2. Achieve a Bold Red Glitter Ombre Fade Manicure

Double-tap and save this dramatic red glitter look for your Valentine’s date night!
A bold red glitter ombre fade manicure offers a dramatic and classic yet technical design for your Valentine’s Day nails glitter. This technique smoothly transitions a rich red base color into a dense layer of chunky red glitter, creating maximum visual impact for special occasions. Understanding how to create a glitter ombre nail look effectively involves specific application methods to ensure a seamless fade.
Products & Tools Used
- Red cream nail polish (base color)
- Red glitter nail polish (chunky glitter or loose glitter powder)
- Small makeup sponge or nail art sponge (for blending)
- Liquid latex or petroleum jelly (optional, for skin protection)
- Tweezers (for precise glitter placement)
Application Steps
- Apply 2 coats of the red cream base color and allow them to dry fully.
- Apply a generous layer of liquid latex around the cuticles and sides of the nails to prepare nails for glitter.
- Apply the red glitter polish directly onto the sponge, concentrating the product near one edge.
- Gently dab the sponge onto the nail, starting at the tip and lightly moving downward toward the center to create a gradual fade effect (create glitter nail art).
- Repeat dabbing, focusing only on the tips for the second layer to enhance opacity.
- Seal with 2 layers of clear top coat to smooth the texture of the chunky glitter nails, ensuring maximum durability.
Pro-Tip: When dealing with chunky glitter, apply a bead of clear builder gel or a specialized glitter top coat over the cured design before your final high-gloss seal. This advanced method of glitter encapsulation techniques fills the gaps and ensures a smooth, long-lasting finish, solving the ‘glitter nails not smooth’ problem.

3. Design Dark and Daring Black Anti-Valentine’s Glitter Accent Nails

If romance isn’t your thing, try this dark glitter manicure! Save it now.
For a non-traditional, edgy, or rebellious design for V-Day, consider black Valentine nails with glitter accents. This look strategically contrasts matte black nails with a single accent nail featuring dense, holographic black glitter, creating a striking ‘anti-Valentine’s Day’ aesthetic. It explores the glitter vs matte Valentine’s nails dynamic for a unique and bold statement.
Products & Tools Used
- Black gel polish (pigment load in glitter gels)
- Black holographic fine glitter (loose glitter or highly pigmented polish)
- Matte top coat (for non-accent nails)
- High-gloss top coat (for accent nails)
- Detail brush (for cleaning up edges)
Application Steps
- Apply 2 coats of black gel polish to all nails and cure under a UV lamp for gel.
- Apply the matte top coat to 3-4 non-accent nails and cure again.
- For the accent nail, apply a thin layer of top coat (no-wipe formula works best) and sprinkle the black holographic glitter evenly over the entire nail (apply glitter nail polish).
- Gently pat down the glitter with a finger or silicone tool to set it and remove excess from skin.
- Cure the accent nail, then apply a layer of high-gloss top coat over the glitter to seal glitter nails.
- Cure the high-gloss layer one final time and clean the cuticles.
Pro-Tip: For the maximum ‘pop’ on the accent nail, apply a layer of black nail polish, then cure. Next, apply a sticky base (or regular top coat) and dip the nail directly into loose holographic glitter powder, tapping off the excess. This method ensures maximum pigment load in glitter gels and provides a 3D glitter nail sculpting effect.

4. Apply Thematic Chunky Heart Glitter Accent Nails

These chunky heart glitter nails are the ultimate V-Day expression! Pin them now!
Chunky heart glitter accent nails offer a highly thematic, expressive, and detailed design for your Valentine’s Day nails glitter. This look focuses on precision application of heart-shaped glitter, creating a playful yet intricate romantic look. It’s an ideal way to incorporate hearts with glitter nails, often paired with rhinestones adorn glitter nails for extra sparkle.
Products & Tools Used
- Light pink or white base polish (or gel)
- Loose chunky heart-shaped glitter (red and pink glitter)
- Dotting tool or wax-tipped pencil (for picking up shapes)
- Clear builder gel or thick top coat (for adhesion)
- Tweezers (for final placement adjustments)
Application Steps
- Apply 2 coats of your chosen base color and cure/dry.
- Apply a thin layer of builder gel or thick top coat only to the area where you want the heart placement.
- Using the dotting tool, carefully pick up the chunky heart glitters and place them onto the wet gel/top coat in the desired pattern (decorate with glitter).
- Once satisfied with the placement, cure the gel/top coat layer if applicable.
- Apply a thick layer of top coat over the entire nail, ensuring the edges of the heart glitters are completely covered and encapsulated (seal glitter nails).
- Cure the final top coat and wipe off any tacky layer.
Pro-Tip: To ensure optimal placement and long-lasting results, place the chunky glitter pieces on a layer of uncured gel. Then, use a fine detail brush dipped in the same gel to trace around the perimeter of each heart before the final cure. This advanced method strengthens the molecular bonding of glitter to polish and prevents sharp edges from snagging.

5. Perfecting a Holographic Glitter Gel Overlay Manicure

This holographic glitter shine is mesmerising! Save this look for your next professional manicure.
A holographic glitter gel overlay manicure provides a high-shine, long-lasting look using gel polish technology, often associated with a salon-quality finish. Holographic glitter nails are achieved by applying gel polish that is packed with highly reflective fine glitter, cured under a UV lamp for gel. This technique promises long-lasting glitter vs temporary glitter, making your DIY glitter manicure exceptionally durable.
Products & Tools Used
- Nail dehydrator and primer
- Gel base coat (UV/LED cure)
- Holographic glitter gel polish (high pigment load)
- UV or LED curing lamp (gel glitter needs UV lamp)
- Lint-free wipes and alcohol solution
- High-gloss non-wipe gel top coat
Application Steps
- Prepare nails and apply a thin layer of gel base coat, ensuring proper coverage of the nail plate. Cure according to the manufacturer’s directions (cure gel glitter nails).
- Apply the first thin layer of holographic glitter gel polish. Keep the polish away from the cuticle line and side walls. Cure again.
- Apply a second, slightly thicker coat for full opacity (if desired) and cure again. Layer glitter effects for depth.
- Apply the non-wipe gel top coat, ensuring it encapsulates the glitter entirely (seal glitter nails).
- Cure the final layer under the lamp, ensuring the cure time is sufficient for maximum shine and hardness.
- Wipe the nails with alcohol (if required by the polish type) to remove any stickiness.
Pro-Tip: The key to true holographic diffraction glitter theory is ensuring the surface is perfectly smooth before the final top coat. After the glitter layers are cured, lightly buff the surface to eliminate any texture, then cleanse before applying the final layer. This minimizes chromatic shifts in glitter nails and guarantees a brilliant, intense prismatic effect.

6. Execute a Rose Gold Glitter Encapsulation Design

Encapsulated rose gold glitter is the height of luxury! Click to learn the process.
A rose gold glitter encapsulation design is an advanced, durable, and long-wear technique often involving nail extensions or hard gel application, requiring detailed expertise. This method submerges loose rose gold glitter or glitter gold beneath a clear layer of builder gel or acrylic, creating a smooth, glossy 3D effect. It’s a sophisticated way to achieve acrylic nails glitter that offer exceptional durability.
Products & Tools Used
- Clear builder gel or clear acrylic powder and monomer (for encapsulation)
- Fine loose rose gold glitter (custom glitter blend formulations)
- Clean dappen dish and sable brush (for product pickup)
- Nail forms or tips (if creating extensions)
- Electric file (optional, for shaping encapsulated layer)
Application Steps
- Prep the nail and apply the base layer (or create the extension structure).
- Apply a thin, sticky layer of clear gel/acrylic over the nail bed.
- Sprinkle the loose rose gold glitter or gently press it onto the sticky layer, concentrating the density as desired (mix glitter colors).
- Apply a generous bead of clear builder gel or clear acrylic over the glitter to completely cover and encapsulate it (advanced glitter encapsulation techniques).
- Cure the encapsulation layer (if using gel). If using acrylic, allow the polymer to fully set.
- File and shape the nail, removing any bulkiness and ensuring a smooth surface over the glitter.
- Finish with a high-gloss top coat and cure/dry.
Pro-Tip: Proper encapsulation requires understanding the polymer chemistry in glitter polishes and gels. When building the clear layer, ensure the viscosity is high enough to suspend the glitter without letting it sink or clump. File carefully using a medium-grit file (150-180) to shape the nail without exposing the encapsulated glitter prematurely.

7. Try Easy Subtle Shimmer Press-On Application for V-Day

Need a quick V-Day look? Pin this simple press-on hack!
Subtle shimmer press-on nails offer a quick, non-committal DIY option that provides the glitter aesthetic without the time commitment of liquid polish or gel. For those wondering, “Are press-on glitter nails available?”, the answer is yes, and they provide an excellent solution for express glitter manicure ideas for busy schedules. Learning to install nail wraps or press-ons correctly ensures a flawless temporary glitter look for Valentine’s Day.
Products & Tools Used
- Boxed set of shimmer glitter press-on nails (in various sizes)
- Nail glue or adhesive tabs (substrate adhesion in glitter wraps)
- Nail file and buffer block
- Alcohol wipe or dehydrator pad
- Wooden cuticle stick
Application Steps
- Size the press-on nails to fit each natural nail width accurately, ensuring a flush fit at the cuticle.
- Gently buff the surface of your natural nails to create adhesion and wipe clean with the alcohol wipe to ensure the nail plate is dry.
- Apply a thin, even layer of nail glue (or apply adhesive tab) to the back of the press-on nail, avoiding excess that could ooze out.
- Align the press-on nail carefully with the cuticle line and press firmly down the center and then the sides for at least 30 seconds (install nail wraps).
- Repeat for all nails, trimming or filing gently once applied if needed.
- Avoid submerging hands in hot water for the first few hours to maximize longevity.
Pro-Tip: For maximum wear time (often 10+ days), use both an adhesive tab AND a small amount of liquid nail glue in the center of the nail. This method utilizes two types of substrate adhesion in glitter wraps, dramatically extending the life of the press-ons and solving the ‘glitter nail polish chipping’ problem.

FAQs About valentines day nails glitter
What colors pair best with glitter for Valentine’s Day nails?
The most popular and effective colors to pair with glitter for Valentine’s Day nails are classic red, vibrant pink, soft blush nude, and sometimes black for an anti-Valentine’s look. Red glitter valentines and glitter pink valentines are timeless and romantic, complementing the love day glitter nails theme. Nudes and whites provide an excellent neutral base for holographic or iridescent glitter, allowing the shimmer to truly stand out. Always ensure the base coat is fully opaque before applying glitter layers for maximum visual impact and adherence.
How to apply loose glitter onto nails without creating a mess?
To apply loose glitter (often used for designs like glitter ombre or encapsulation) cleanly, use a soft, wide fan brush and the ‘pour-over’ method, or the ‘pat-down’ technique using a sticky base. Before starting, apply liquid latex or petroleum jelly around the cuticle area (how to get glitter off skin) to contain stray particles. Apply a sticky top coat, quickly sprinkle the loose glitter over the nail (decorate with glitter), then firmly pat it down with a silicone tool before sweeping away the excess with the fan brush.
How long do glitter gel nails last compared to traditional polish?
Glitter gel nails typically last much longer than traditional glitter polish, ranging from two to three weeks without significant chipping or fading. This superior longevity is due to the process of curing the gel polish and glitter under a UV lamp for gel, which creates a durable, hard-set polymer structure. Regular polish, even with a long-lasting glitter top coat for Valentine’s, usually lasts only 5–7 days before natural wear starts causing separation or chipping.
What is the best way to remove stubborn glitter nail polish?
The best way to remove stubborn glitter polish (removing stubborn glitter polish) is the ‘foil method,’ which involves saturating a cotton ball with 100% acetone and wrapping it securely around the nail with aluminum foil. Allow the foil to sit for 5–10 minutes; the acetone will dissolve the adhesive bonds of the fine glitter nails, allowing the polish to slide off in a single piece. This proven glitter removal method is far safer and more effective than aggressively scraping or filing the glitter off.
Are there eco-friendly glitter options for nails for Valentine’s Day?
Yes, several companies now offer biodegradable or eco-friendly glitter options for nails that use plant-derived materials instead of plastic microparticles. Traditional cosmetic glitter contributes to environmental pollution, but sustainable glitter nail innovations offer the same sparkling finish using materials like cellulose film that naturally decompose. When shopping for professional nail glitter, look for ‘bioglitter’ or ‘plant-based’ labels to ensure you’re choosing a safer alternative.
How do I prevent glitter from making my nails feel too thick or bulky?
To prevent glitter nails from feeling too thick or having an uneven glitter application, always apply thin layers and cure/dry thoroughly between coats, especially when using chunky glitter. The goal is layering glitter effects for sparkle without adding excessive bulk (glitter nails too thick). For gel applications, use the minimal amount of builder gel necessary for advanced glitter encapsulation techniques, ensuring you file the structural layer thinly before the final top coat application.
What is the difference between fine and chunky glitter for nail art?
Fine glitter consists of tiny particles, typically resulting in a smooth, subtle shimmer finish (subtle glitter nails), while chunky glitter contains larger, noticeable shapes like hearts, stars, or large flakes. Fine glitter is often mixed directly into polish formulas, perfect for simple pink glitter valentines day nails. Chunky glitter, however, usually requires strategic placement using tweezers and must be fully encapsulated beneath a clear layer for a smooth, glossy result, demanding more sophisticated application techniques.
Can you use regular craft glitter on your nails for Valentine’s Day?
No, you should avoid using regular craft glitter on your nails as it is typically made from heavier materials (like plastic or aluminum) with sharp edges that can scratch the nail plate or cause skin irritation. Craft glitter is not formulated for cosmetic use and may contain toxic dyes or chemicals that pose a safety risk. For safe glitter nail products, always use glitter specifically labeled as cosmetic-grade or professional nail glitter, which is chemically safe and finely cut for smooth application.
How do I achieve a perfectly smooth finish when working with glitter polish?
Achieving a perfectly smooth finish with glitter polish often requires multiple applications of a specialized top coat, as glitter particles tend to create texture (glitter nails not smooth). After the color/glitter layers are fully dry or cured, apply a thick layer of a glitter top coat (which is often slightly thicker to fill gaps), allow it to dry/cure, and then follow up with a second layer of a high-gloss, self-leveling top coat. This technique ensures the glitter is fully sealed beneath a glass-like finish.
Are press-on glitter nails or glitter nail wraps a good alternative to liquid polish?
Press-on glitter nails and glitter nail wraps are excellent alternatives for those seeking a quick, mess-free solution for Valentine’s Day glitter nails without a long drying time or complex art techniques. Nail wraps simplify application and often come pre-designed with intricate patterns, offering the convenience of a quick glitter manicure. While liquid polish offers superior durability (long-lasting glitter vs temporary glitter), wraps and press-ons are ideal for short-term festive sparkle.
Key Takeaways
- Select Glitter Type Based on Intent: Chunky glitter offers maximum thematic impact (hearts), while fine glitter achieves elegant looks (French tips, subtle shimmer). Always choose professional glitter over craft glitter for better adhesion and nail health.
-
Prioritize Proper Encapsulation: When applying loose or chunky glitter (macro-glitter design principles), use a structural builder gel or thick top coat, ensuring the entire piece is fully encased. This prevents snagging and chipping (glitter nail polish chipping) and ensures long-term wear.
-
Master the Ombre Technique: Use a dense sponge and precise dabbing motions for glitter application to achieve a smooth gradient fade, especially with challenging colors like red glitter valentines. Focus the highest density at the tip to maximize the sparkle effect.
-
The Finish Defines the Style: Contrast is key. Pair matte black nails with glossy holographic glitter accent nails for a modern, anti-Valentine’s aesthetic, utilizing advanced color contrast strategies.
-
Ensure Gel Cure Time is Exact: For gel glitter applications (gel glitter needs UV lamp), strictly adhere to the manufacturer’s curing times for both base and top coats. Insufficient cure time leads to lifting and compromises the long-lasting glitter vs temporary glitter comparison.
-
Prep is Essential for Press-Ons: Maximizing the longevity of quick sparkly nails for february 14th relies on meticulous natural nail prep—buffing and dehydrating are non-negotiable steps to improve the substrate adhesion in glitter wraps and press-ons.
-
Use Precision Tools for Clean Lines: Achieve professional results, even with DIY glitter manicure techniques, by utilizing precision striping brushes, wax pencils, and liquid latex to keep edges clean and prevent uneven glitter application.
Final Thoughts on Valentines Day Nails Glitter
The quest for the perfect valentines day nails glitter design ultimately comes down to mastering a few key techniques and ensuring your product choices align with your wear-time goals. Whether you opt for the playful depth of a chunky heart glitter accent nail, the bold elegance of a red glitter valentines ombre fade, or the ease of a quick sparkly nails for february 14th press-on application, the detailed steps and product recommendations provided here should empower your DIY glitter manicure. Remember that proper preparation and diligent sealing (seal glitter nails) are the professional secrets to ensuring your sparkling romantic glitter nails last well beyond Valentine’s Day. By following these expert glitter nail tips, you can confidently express your chosen aesthetic, be it fiercely romantic or anti-Valentine’s chic.
We’d love to know: Which of these 7 stunning Valentine’s Day nails glitter ideas are you trying first this 2026? Share your favorite look in the comments below!
Last update on 2026-03-05 / Affiliate links / Images from Amazon Product Advertising API


