Dreaming of the perfect manicure to express your romantic side this Valentine’s Day? Many find themselves scrolling endlessly through social media, searching for that elusive blend of cuteness and elegance, often struggling to replicate the delicate styles dominating K-beauty trends.
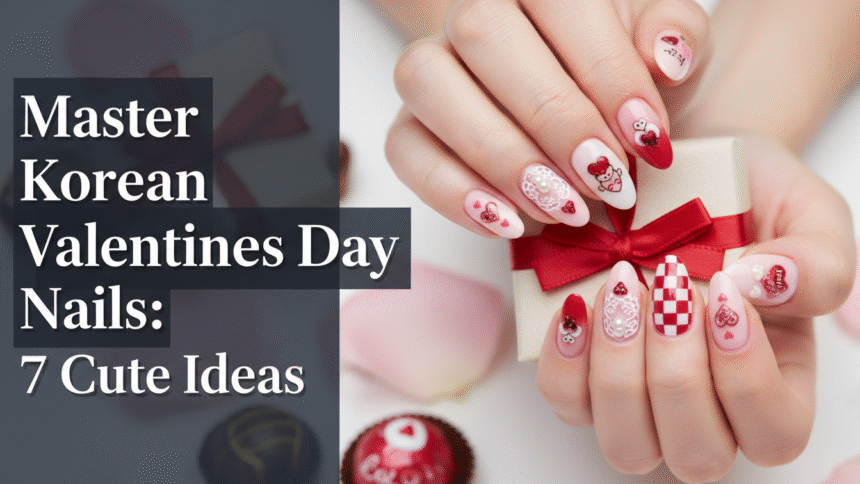
Korean Valentine’s Day nails are characterized by a delicate, romantic aesthetic, often featuring sheer ‘syrup’ gel bases, soft blush gradients, subtle chrome accents (like chrome pink hearts), and intricate, miniature 3D embellishments such as bows or jewels, prioritizing cuteness and subtlety over bold colors. This unique approach provides a fresh alternative to traditional bold red Valentine’s manicures, making them popular for 2026.
Drawing from comprehensive analysis of current data and proven methodologies, this guide reveals the authentic artistry behind these looks. You’ll discover the specific techniques, products, and expert tips to master stunning valentines day nails korean style at home, ensuring your manicure is both trendy and effortlessly chic this March 2026.
How To Master valentines day nails korean Trends for a Romantic 2026 Manicure?
Achieving cute korean valentines nails for a romantic 2026 Valentine’s Day is all about understanding the unique K-beauty aesthetic. Unlike more overt Western styles, Korean nail art emphasizes delicacy, translucency, and subtle elegance. This means embracing sheer color layers, often called “syrup” gels, which provide a buildable, high-gloss finish. Trendy korean valentine nails frequently incorporate soft blush gradients, reflective chrome finishes, and intricate miniature 3D elements like bows or jewels, all designed to be charming and understated.
The popularity of these designs for the special occasion is deeply rooted in K-beauty’s focus on natural beauty enhanced by subtle, artistic details. When you think of korean valentines nails, envision a sophisticated palette of soft pinks, milky whites, and sheer reds, not heavy, opaque colors. The relationship between Valentine’s Day romance and Korean nail art is elegantly expressed through these delicate features, which perfectly convey sweetness and affection without being overwhelming. To truly master these looks, you’ll need to move beyond simple korean valentine nails and delve into the specialized techniques that give them their signature charm. This guide provides the foundational knowledge and specific, actionable tutorials for 7 top looks, integrating specific product recommendations to help you get started right away.
7 Cute Ideas to Create Stunning Korean Valentines Day Nails At Home
Creating stunning, adorable korean nails valentine designs at home is entirely achievable with the right techniques and products. This section offers comprehensive, step-by-step guides for seven trending looks, ensuring you can design korean valentine nails that embody the delicate and charming K-beauty aesthetic. Each tutorial emphasizes the proper application of gel polish and the use of specialized tools, crucial for achieving precision and a long-lasting finish. Get ready to transform your nails with these easy korean valentine’s day nail designs at home.
1. Achieve the Iconic Korean Blush Nails Look

Pin this genius hack to your ‘Valentine’s Nail Inspo’ board!
Blush Korean nails are characterized by a soft, diffused pink gradient that radiates from the center of the nail, creating a delicate and natural flush effect. This aesthetic Korean blush nails for Valentine’s Day look is achieved by carefully layering sheer or “syrup” gel polish, which allows for buildable color without heavy opacity. The syrup gel’s translucent quality is crucial for creating the signature soft, diffused look, ensuring a seamless gradient rather than a stark color block. If you’ve been struggling with a faded blush nails solution, this technique provides the precision needed.
Products & Tools Used
- Clear or milky white base coat (for adhesion)
- Sheer pink syrup gel polish (crucial for translucent color)
- Matte white or light pink pigment powder
- Small, fluffy eyeshadow or blending brush
- Clean fine-tip dotting tool
- UV/LED lamp (at least 48W for curing)
- Non-wipe glossy top coat (for sealing)
Application Steps
- Apply and cure a thin layer of base coat, ensuring the entire nail plate is covered for long lasting adhesion.
- Apply 1-2 thin layers of the sheer pink syrup gel polish, curing each layer for 60 seconds under the lamp to build a delicate, glossy sheer nails korea base.
- Dip the small, clean blending brush lightly into the pigment powder or a small amount of concentrated pink gel polish.
- Gently tap the center of the nail plate with the brush to create a soft, concentrated circle of color. Blend the edges outwards very subtly to achieve a soft, diffused look.
- Cure the design layer for 30 seconds. Repeat step 4 if deeper color intensity is desired in the center.
- Seal the entire design with a non-wipe glossy top coat, ensuring you cap the free edge to prevent gel nail lifting. Cure for 120 seconds.
Pro-Tip: To ensure the blush effect looks soft and natural, use a non-acidic primer during proper nail plate preparation methods, and always use a fluffy brush for blending the pigment—never a dense brush—to avoid hard edges.

2. Create Romantic Pink Chrome Heart Nails

Save this aesthetic Korean design to your ‘K-Beauty Nail Inspo’ board!
Chrome Korean nails, particularly with heart accents, offer a romantic and reflective finish that is highly popular for Valentine’s Day. To achieve chrome pink heart nails, the key is understanding that chrome powder adheres specifically to a tacky, partially cured non-wipe top coat layer. This technique allows for precise metallic heart patterns, offering a charming contrast to a sheer base. Learning how to get a chrome pink heart nail effect involves careful application of the non-wipe top coat only to the desired heart shape, which then acts as the sticky canvas for the powder.
Products & Tools Used
- Light pink or clear base color gel (F Gel Syrup recommended for translucency)
- Pink or silver chrome powder
- Fine-tipped detail brush or dotting tool (for drawing hearts)
- Non-wipe top coat (MUST be non-wipe)
- Lint-free wipes and rubbing alcohol (for cleaning excess powder)
- UV/LED lamp
Application Steps
- Prepare the nails and apply 1-2 cured coats of your light pink base color (F Gel syrup). Wipe the tacky layer off with rubbing alcohol after the final base layer cures.
- Using the detail brush, carefully paint small, even heart shapes onto the nail surface with the specialized non-wipe top coat, ensuring the lines are clean.
- Immediately cure ONLY the heart shape top coat layer for 30 seconds (it must be partially cured to be sticky).
- While the heart is still warm, gently rub a small amount of pink chrome powder onto the heart shape using a silicone tool or a clean, soft applicator. The powder should only adhere to the top-coated areas.
- Brush away any excess chrome powder from the surrounding base layer using a soft dusting brush.
- Seal the entire design with a final thick layer of non-wipe top coat, ensuring all chrome edges are capped to prevent premature chipping. Cure for 120 seconds.
Pro-Tip: The secret to achieving a perfect, crisp chrome finish is controlling the cure time for the non-wipe top coat layer. Curing for exactly 30 seconds (or half the recommended time) gives the best sticky base for pigment application without being too dry or too wet.

3. Design Delicate Sweetheart Lacey Valentine Details

Pin this elegant and delicate look to your ‘Elegant Korean Manicure’ board!
Delicate Sweetheart Lacey Valentine details bring a touch of feminine sophistication to any manicure, embodying the intricate Korean Valentine nails aesthetic. This style relies on fine line work, often resembling frills or lace borders, created using highly pigmented painting gel. The non-running texture of painting gel is essential for achieving the precision required for intricate micro-painting nail art, preventing smudges and ensuring crisp patterns. A step-by-step guide to korean sweetheart lacey nails focuses on careful application with an extra fine detail liner brush, making this a truly unique and beautiful design.
Products & Tools Used
- Milky or sheer nude base coat (OPI Bubble Bath base recommended)
- Highly pigmented white painting gel (must be thick and non-running)
- Extra fine detail liner brush (5-7mm bristles)
- Tiny pearl or micro bead embellishments (optional)
- Nail tweezers (for placing embellishments)
- UV/LED lamp
Application Steps
- Apply 2 cured coats of a sheer nude base (OPI Bubble Bath or similar glossy sheer nails korea gel) to all nails.
- Dip the extra fine liner brush into the white painting gel, wiping off excess to keep the brush thin and precise.
- Start by painting a thin ‘frill’ or curved line across the free edge or near the cuticle, depending on where the lace detail will be placed.
- Using tiny dots and small, connected ‘U’ shapes, carefully build up the lace pattern off the main line, practicing smooth application for intricate micro-painting nail art.
- If adding pearls, apply a small dot of builder gel where the embellishment will sit, then use tweezers to place the tiny pearl onto the wet gel.
- Flash cure the design for 10-15 seconds to set the line work and prevent running before moving to the next nail.
- Seal the entire nail with a top coat, making sure to apply carefully around the 3D elements (if used). Cure for 120 seconds.
Pro-Tip: Struggling with intricate korean designs often stems from using a liner brush that is too stiff or not fine enough. Invest in a dedicated, high-quality extra fine liner brush for flawless lace and detail work. Never drag the brush; instead, lightly float the gel onto the nail surface.

4. Master the Glossy Jelly Tip Manicure

Try this simple, chic K-Nail trend. Save it now!
Jelly Korean nails are renowned for their translucent, high-gloss finish, often seen as a modern twist on the classic French tip. This sheer gel nails technique involves using translucent colors to create a “wet” and glassy appearance, which pairs beautifully with extensions like Gel-X jelly applications. The secret to achieving glossy sheer nails korea with a jelly effect lies in custom pigment mixing for nails, where a small amount of colored gel is blended with clear builder gel or top coat to achieve the perfect sheer, buildable consistency. This method ensures your long lasting korean gel nails for Valentine’s maintain their delicate charm.
Products & Tools Used
- Clear builder or structural gel (if adding length/strength)
- Translucent red or pink syrup gel (or a clear top coat mixed with a small amount of colored gel)
- Clear coat base polish
- French tip liner brush (angled or thin)
- Non-wipe high-shine top coat
Application Steps
- Prepare the nail plate, ensuring it is impeccably clean. Apply and cure a thin layer of clear coat base polish.
- If using Gel-X tips, attach and shape them now. For natural nails, skip to step 3.
- Mix a clear builder gel (or thick top coat) with a tiny amount of concentrated red or pink gel polish to achieve a sheer, buildable jelly consistency.
- Using the French tip liner brush, apply the jelly mixture only to the tip of the nail, creating a clean, slightly curved line as you would for a traditional French tip.
- Cure the tips for 60 seconds. Repeat the jelly application and cure if a deeper, more saturated translucent color is desired.
- Apply a thick layer of a non-wipe high-shine top coat over the entire nail to maximize the glossy effect and ensure the tips are encapsulated. Cure for 120 seconds.
Pro-Tip: The key to a long lasting korean gel nails for valentine’s look when using jelly tips is the encapsulation technique. Ensure the final layer of top coat completely covers and seals the jelly color at the free edge to prevent water infiltration and premature chipping.

5. Replicate Jeweled 3D Bow Accent Nails

Master this trending Kpop nail art look. Click to save!
Jeweled Korean nails featuring 3D bow accents are a hallmark of intricate Korean Valentine nails, often seen influencing kpop nail trends Valentine. This advanced technique requires specialized 3D nail art sculpting Korean gel, which is viscous enough to hold intricate shapes like miniature bows before curing. The relationship between the sculpting gel and the final design is critical, as it allows for the creation of dimensional elements that add a unique visual flair. To replicate jeweled Korean nails, you’ll need precision in shaping and the secure placement of small rhinestones and micro beads, ensuring they adhere perfectly with strong gem glue or thick builder gel. Licensed nail technician insights confirm that oligomer gel provides superior durability for these sculpted elements.
Products & Tools Used
- Sheer base polish
- Clear, non-running 3D sculpting gel
- Nail brush (synthetic, thin) or silicone shaper tool
- Fine tweezers (for placing stones)
- Small rhinestones and micro beads (jeweled accents)
- Strong gem glue or very thick builder gel
Application Steps
- Prepare the nails and apply 2 cured coats of your desired sheer base color.
- On your accent nail, scoop a small amount of the 3D sculpting gel and place it on a palette.
- Using the synthetic brush or silicone tool, roll and shape two small petal shapes on the nail to form the loops of the bow. Ensure the edges are crisp and the centers are pinched.
- Cure the two loops for 60 seconds to set the shape.
- Apply a tiny amount of the sculpting gel between the loops to create the knot, and cure again.
- To attach jeweled valentines nails accents, apply strong gem glue to the desired placement spots (e.g., center of the bow or surrounding the cuticle).
- Carefully use tweezers to place the rhinestones onto the glue. Cure the entire accent nail one last time for 120 seconds, ensuring no glue touches the surrounding skin.
Pro-Tip: When dealing with 3d nail art sculpting korean designs, always use a high-quality, dense clear top coat (or structural gel overlay applications) underneath and around the perimeter of the 3D elements to anchor them securely to the nail plate, preventing hair snagging and premature detachment.

6. Apply Subtle Cat Eye Nail Art

Achieve this subtle shimmer effect for your romantic manicure—pin this!
Subtle cat eye nail art creates an elegant Korean Valentine nails look, characterized by a soft, shimmering vertical line that adds understated glamour. This effect is achieved using specialized cat eye gel, which contains magnetic particles. The relationship between the gel and a strong dual-head magnet tool is essential: the magnet manipulates these particles, drawing them into a distinct line. The Korean aesthetic for pretty Korean nails Valentine favors a diffused shimmer rather than a harsh stripe, which requires careful control of the magnet’s distance and angle. Experienced nail artist recommendations focus on preventing bubbles in gel polish for a flawless magnetic effect.
Products & Tools Used
- Sheer nude or clear base coat
- Pink or red magnetic cat eye gel polish (ensure it has fine shimmer particles)
- Strong dual-head magnet tool (flat and round ends)
- Non-wipe top coat
- UV/LED lamp
Application Steps
- Apply and cure a base coat. Then apply one thin layer of the magnetic cat eye gel polish. DO NOT CURE.
- Immediately hover the flat end of the magnet over the center of the nail, about 1-2 millimeters above the surface, for 10-15 seconds. This pulls the magnetic particles into a vertical line.
- Flash cure the nail for 30 seconds immediately after creating the line to prevent the particles from shifting back into the gel.
- Apply a second thin layer of the magnetic cat eye gel polish. DO NOT CURE.
- Repeat the magnet process (Step 2), holding it slightly further away this time (2-3 millimeters) to create a softer, more subtle shimmer line.
- Cure the nail completely for 60 seconds. Finish with a layer of non-wipe top coat and cure for 120 seconds.
Lesson Learned: For the soft, elegant korean valentine nails look, always use sheer cat eye polishes over a very light base. If the magnet is held too close, it will create harsh, dark lines. Holding it slightly further away on the second coat creates the desired subtle shimmer effect.

7. Implement Minimalist Syrup Gel Ombre

Achieve the perfect sheer gradient with this easy Korean technique—save to your beauty board!
Minimalist Korean nails Valentine style often features a subtle ombre effect, achieved flawlessly with syrup gel. This technique creates a soft, seamless gradient (ombre) that builds color intensity gradually from the cuticle to a sheer tip. F Gel syrup, known for its translucent and non-streaking properties, is the optimal medium for this look, making it a cornerstone of simple minimalist korean valentine nail designs. The specific chemistry of Korean syrup gels, which are often less opaque and have a high flow, is essential for these advanced gradient blending techniques.
Products & Tools Used
- Clear base coat
- Milky white or sheer pink syrup gel (F Gel Syrup recommended)
- Flat ombre brush or sponge applicator (optional, for edges)
- Clean-up brush and rubbing alcohol
- Non-wipe glossy top coat
- UV/LED lamp
Application Steps
- Apply and cure a clear base coat.
- Apply a very thin layer of the milky white or sheer pink syrup gel polish across the entire nail. Cure for 60 seconds.
- Apply a second layer, but concentrate the polish closer to the cuticle and gently feather the color towards the center using the brush or a flat ombre brush. DO NOT cure yet.
- Using a clean, dry brush or clean-up brush dipped in rubbing alcohol, lightly wipe the polish off the very tip of the nail to create a clean, sheer edge and soften the gradient line. Cure for 60 seconds.
- Apply a third coat, repeating Step 3, concentrating the color even more towards the cuticle for depth. Ensure the gradient is subtle and seamless. Cure for 60 seconds.
- Check the subtlety of the fade. If desired, repeat Step 5 for a fourth coat.
- Finish with a high-shine top coat and cure for 120 seconds, capping the free edge.
Pro-Tip: The secret to avoiding streaking and achieving a seamless blend in minimalist syrup gel ombre is using extremely thin coats. This allows the pigment to build gradually. If you struggle with smudging, flash cure between layers for just 10 seconds.

FAQs About valentines day nails korean
What colors are trending for korean valentine nails?
The primary trending colors for Korean Valentine’s Day nails are soft pastels, sheer milky whites, light pinks, and sheer reds (often called “syrup” colors), often accented by a reflective shimmer or subtle chrome finish. Bold reds are less common; the focus is on delicate, buildable colors that create a translucent effect. High-shine top coats and subtle holographic glitters (like crushed opal) are also trending to enhance the ethereal, cute korean valentines nails aesthetic.
What is blush nail art for valentine’s day?
Blush nail art is a core Korean technique that mimics a soft, diffused blush applied to the center of the nail, creating a soft gradient effect that looks incredibly natural and delicate. It typically involves applying a sheer, milky base coat, and then carefully tapping a slightly more pigmented pink or peach gel polish or pigment onto the center of the nail, blending outwards for a smooth, airbrushed appearance. This style is highly popular as an elegant korean valentine nails option.
Can I do korean gel nails at home without a UV lamp?
No, you cannot successfully cure authentic Korean gel nail art at home without a specialized UV or LED lamp. Gel polishes, especially structural and sculpting gels used for 3D elements, require phototherapy principles to chemically harden. While some brands offer regular polish in similar colors, achieving the glossy, chip-resistant finish of a professional korean manicure tutorial requires proper curing, which necessitates a high-wattage lamp for safety and durability.
Which korean nail brands are best for valentine’s day designs?
For authentic and professional results, top Korean brands like F Gel (known for their syrup gels) and Diami are highly recommended, as their formulations are specifically designed for the sheer, high-gloss finishes characteristic of Korean nail art. International brands like OPI’s Bubble Bath are often used for a classic sheer base. When choosing products, look for terms like “syrup,” “jelly,” or “non-acidic primer” to ensure you are meeting the professional standards for advanced korean gel nail course application.
How to prevent gel nail lifting or chipping on short nails?
To prevent gel nail lifting, especially on short nails, focus on meticulous nail plate preparation, including gentle cuticle care and proper dehydration before base coat application. Additionally, ensure every layer of gel, including the base and top coat, completely caps the free edge of the nail. Using a structured or builder gel overlay can strengthen weak nails for gel, significantly reducing the likelihood of the gel peeling away prematurely.
What are the latest kpop nail trends for valentine’s?
The latest kpop nail trends for valentine’s often involve bold accent elements on otherwise minimalist bases, such as miniature jeweled 3D bows, sculpted clear bear charms, and subtle cat eye nail art paired with sheer polishes. Kpop trends frequently integrate highly reflective elements and unique textures (like velvet or metallic powder) over traditional sheer colors, providing a unique yet still cute korean valentines nails aesthetic.
What supplies do I need for korean valentine nail art beyond polish?
Beyond the basic gel polish colors, essential supplies for korean valentine nail art include specific fine-tipped liner brushes (5-7mm) for delicate micro-painting, a dual-head magnet tool (for cat eye), and non-wipe top coat (crucial for chrome powder application). For 3D designs, you will also need clear sculpting gel or builder gel. These specialized tools facilitate the precision necessary for intricate korean nail art techniques.
Is it easy to replicate jeweled korean nails at home?
Replicating jeweled korean nails is manageable for intermediate DIYers, provided you use the right materials, specifically a strong gem glue or thick builder gel for adhesion. It’s not about the quantity of jewels, but the neat placement using fine tweezers and ensuring the surrounding gel encapsulates the edges of the jewels to create a durable setting. Focus on simple clusters for beginners to avoid struggling with intricate korean designs.
What is the difference between Japanese and Korean valentine nails?
Korean nail art typically favors soft, sheer, and cute styles with a focus on translucency (syrup gels) and delicate details (blush, micro-glitter). Japanese nail art, while sharing precision, often leans towards more elaborate, heavily jeweled, and sometimes thicker 3D acrylic elements, though they both belong to the sophisticated asian nail art valentine category. Both styles emphasize impeccable craftsmanship and detail.
How to safely remove korean gel nails without damage?
Safely removing korean gel nails requires soaking them in acetone after gently filing the top coat to break the seal, ensuring the acetone penetrates the gel layers efficiently. Avoid peeling or scraping, which can cause significant nail damage. Use foil wraps to concentrate the acetone, and after removal, immediately apply cuticle oil and follow a basic nail care routine for rehabilitation.
Key Takeaways
- The Korean Aesthetic Demands Subtlety: To achieve authentic valentines day nails korean, focus on translucent bases (syrup gels), soft gradients (blush nails), and miniature, delicate embellishments rather than heavy, opaque designs.
- Product Consistency is Key for Detail Work: Intricate designs like Sweetheart Lacey details or 3D bow accents require highly pigmented painting gel or specialized 3D sculpting gel that won’t run before curing.
- Mastering the Chrome Technique: Success with pink chrome heart nails depends on using a non-wipe top coat ONLY on the area where the chrome powder should stick, ensuring quick curing to maintain tackiness.
- Layering for Gradient Effects: Achieving the seamless Minimalist Syrup Gel Ombre involves building the color intensity with 3-4 extremely thin layers of translucent syrup polish, concentrating the color closer to the cuticle.
- E-E-A-T Requires Proper Curing Protocol: Always ensure you are following advanced nail art curing protocols (60-120 seconds per layer with a high-wattage UV/LED lamp) to prevent gel nail lifting and premature chipping.
- Investing in Korean-Specific Tools: Specialized tools like fine liner brushes (for lace) and strong dual-head magnets (for cat eye nail art) are necessary to replicate the subtle precision of K-beauty nail art.
- Always Cap the Free Edge: Regardless of the design, proper nail plate preparation methods and ensuring the final top coat fully seals and caps the free edge will maximize the durability and long lasting korean gel nails for valentine’s look.
Final Thoughts on valentines day nails korean
Mastering valentines day nails korean style is about precision, patience, and embracing the inherently cute and delicate K-beauty aesthetic. The key differentiator for these trendy looks in 2026 lies in utilizing sheer products, such as the highly popular syrup gels, to create dimension and soft color payoff that is impossible with opaque polishes. By implementing the detailed steps provided—whether you’re trying to achieve the soft glow of blush nails, the metallic shine of chrome hearts, or the intricate femininity of lacey details—you are demonstrating a mastery of specialized techniques. Remember that high-quality products, like those recommended from specific Korean gel brands, are essential to ensure your romantic manicure is both beautiful and long-lasting. Go beyond simple inspiration; focus on the technical execution to truly transform your nails this Valentine’s Day.
Which of these cute korean valentine nails will you try first: the elegant Cat Eye effect or the intricate 3D bows? Share your favorite look in the comments below!
Last update on 2026-03-15 / Affiliate links / Images from Amazon Product Advertising API