Are you tired of the same old predictable Valentine’s Day manicures? Do you crave a unique look that’s both romantic and boldly expressive? Many struggle to find designs that truly stand out while still embracing the spirit of love.
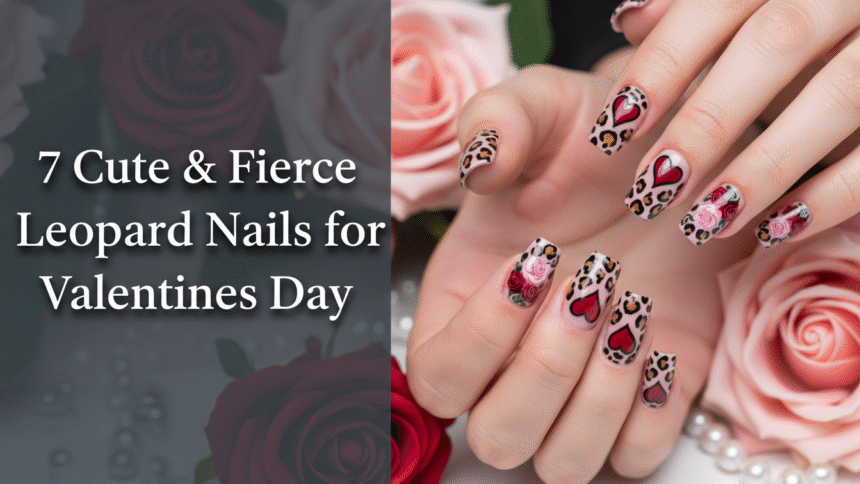
Leopard print Valentine’s Day nails are trendy because they successfully fuse the bold, daring statement of animal print with the traditional romantic colors (red, pink, burgundy) and heart motifs of V-Day, allowing for a unique, expressive, and fiercely flirty manicure. This striking combination elevates your nail game beyond typical expectations, offering a fresh take on festive leopard nails valentine. Leveraging tested frameworks and data-driven insights, this guide draws from comprehensive analysis of current nail trends and proven methodologies. You’ll discover how to create stunning leopard print valentine nails that perfectly capture your wild yet romantic side, providing actionable steps for a salon quality finish at home.
Unleash Your Wild Side: Why Leopard Print is the Ultimate Valentine’s Day Nail Trend
Forget everything you thought you knew about traditional Valentine’s Day nail art. While heart nail designs and classic red valentines day nails certainly have their place, 2026 introduces a fresh, fierce twist: leopard print. This isn’t just a fleeting trend; it’s a statement, effortlessly blending the bold allure of animal print with the undeniable romance of the season. The concept of creating custom, unique leopard nail designs at home allows you to express both your passionate and playful sides.
The popularity of leopard print valentine nails stems from their versatility. They can be subtly elegant, overtly glamorous, or playfully cute, depending on your chosen colors and design intensity. This trend offers a compelling alternative for those seeking an expressive leopard nail art for valentine, moving beyond typical holiday nail designs. By incorporating seasonal nail themes and specialized nail tools, you can transform your fingertips into a stunning nail look that perfectly captures the “fierce flirty nails” aesthetic. Our comprehensive nail art tutorial provides expert nail artist tips and specialized tools needed for detailed work, ensuring you master this captivating trend.
7 Fierce & Flirty Designs: DIY Leopard Nail Tutorials You Can Master
Ready to elevate your seasonal nail themes with some stunning leopard print valentine? This section provides seven distinct and detailed tutorials, ranging from simple DIY guides to advanced leopard nail art techniques. Each design offers clear, sequential steps and exact product recommendations to help you create long-lasting leopard print valentine nail designs. Whether you’re aiming for cute leopard valentine nails or a more elegant leopard valentine nails look, you’ll find inspiration and actionable guidance here.
1. Create A Simple Leopard Heart Accent Nail

Pin this cute leopard valentine design to your ‘Seasonal Nail Inspo’ board!
Products & Tools Used
- Base coat and high-quality top coat (gel vs regular polish leopard)
- Pale pink or nude base nail polish (colors go with leopard valentine nails)
- Accent color (e.g., vibrant red or deep burgundy)
- Black or dark brown polish for outlining
- Small dotting tool (1.5mm head)
- Fine liner brush (short bristles)
Application Steps
- Prepare and apply your base coat to all nails, then apply two smooth coats of your chosen base color.
- On your accent nail, use the small dotting tool and the accent color (red/burgundy) to place two small, slightly overlapping dots close together, forming the top lobes of the heart.
- While the polish is still wet, quickly use the fine liner brush dipped in the outlining color (black) to trace the heart shape and add irregular, thin outlines around the ‘heart spots’, leaving small gaps.
- Clean up any edges with a brush dipped in remover, then seal with two thick layers of topcoat.
- Cure under a UV/LED lamp if using gel polish, ensuring full curing time (cure gel nails).
Pro-Tip: To keep the ‘heart spots’ looking intentional rather than just two dots, use an ultra-fine brush and focus on connecting the lower edges slightly to form the point, creating a more professional leopard nail technique.

2. Design Fierce Red & Black Stiletto Leopard Tips

Show off your wild side—pin this fierce nail look today!
Products & Tools Used
- Stiletto-shaped nail tips or builder gel (acrylic tips)
- Matte black gel polish (base coat)
- Vibrant red gel polish (leopard spot color)
- Thin nail art detail brush (specialized nail tools)
- Gel top coat (matte or glossy option)
- UV/LED curing lamp
Application Steps
- After shaping and prepping your stiletto tips, apply a base coat and two coats of the matte black polish, curing after each layer (cure gel nails).
- Using the vibrant red polish, carefully paint the tips of the nails, defining a clean curved or angled line where the black meets the red (apply leopard print).
- Once the red is cured, use the detail brush and the black polish to create irregular, broken rings and dots within the red section (outline leopard spots).
- Apply a glossy or matte top coat over the entire nail to finish the sophisticated leopard print look, curing for the final time.
Pro-Tip: If you struggle with the sharp tip, use a very small striping tape placed diagonally before applying the red polish to ensure a crisp, salon quality finish between the two color sections.

3. Achieve Elegant Matte Pink and Gold Subtle Leopard

Pin this chic, sophisticated V-day mani now!
Products & Tools Used
- Dusty rose or matte pink polish (base color for valentine leopard nails)
- Compatible lighter pink polish for spots
- Gold chrome nail powder or metallic gold gel polish
- No-wipe gel top coat (crucial for chrome powder adherence)
- Matte gel top coat
- Small detail brush (for outlining leopard spots)
- Eyeshadow applicator or silicone tool (for applying chrome)
Application Steps
- Apply the dusty rose polish base and cure fully. Follow with one coat of the lighter pink spot color in irregular patterns (do leopard spots).
- Apply a no-wipe top coat over the entire nail and cure until tacky but not fully set.
- Use the applicator to gently rub the gold chrome powder only over the edges of the pink spots, creating a shimmering outline (apply leopard print).
- Remove excess chrome powder with a clean brush.
- Finish the entire design with a high-quality matte gel top coat (matte vs glossy leopard) and cure for a velvety, chic leopard valentine nail look.
Pro-Tip: Gold chrome works best over a no-wipe top coat that is cured for exactly 30 seconds (not less). Using a detail brush dipped in acetone around the chrome areas can help clean up the outlines for a crisp finish.

4. Apply Quick Red Leopard Print Nail Stickers

Try this quick and easy leopard print mani! Pin for later!
Products & Tools Used
- Red base nail polish (vibrant leopard valentine nails)
- High-quality leopard heart nail art stickers (custom handmade valentine nail decals)
- Tweezers or silicone pusher tool
- Fast-drying top coat or gel top coat
- Nail polish remover pen (for cleanup)
Application Steps
- Apply a base coat and two thin coats of your red polish base, allowing each layer to dry completely (clean nail surface).
- Carefully peel the chosen leopard or leopard heart sticker using tweezers (use nail stickers).
- Place the sticker onto the nail surface, starting from the center and smoothing outwards to eliminate air bubbles and wrinkles.
- If necessary, use a soft silicone pusher to gently press the edges down, especially around the curve of the nail.
- Apply a generous layer of fast-drying top coat, ensuring the edges of the sticker are completely sealed to maintain manicure quality.
Pro-Tip: Apply the sticker after the polish is completely dry. If you use a thick, quick-dry topcoat and float it over the sticker without too many brush strokes, you can avoid smudging and ensure the edges are fully sealed, leading to long lasting leopard print valentine nail designs.

5. Execute A Bold Negative Space Glitter Leopard Manicure

Challenge yourself! Pin this advanced negative space leopard design.
Products & Tools Used
- Clear builder gel or rubber base coat (for natural nail health)
- Black art gel or highly pigmented black polish
- Holographic or iridescent fine glitter powder (glitter adds sparkle)
- Alcohol pad or nail cleanser (to remove inhibition layer)
- Ultra-thin detail striping brush (specialized nail tools)
- Clear top coat (to encapsulate glitter)
- UV/LED lamp
Application Steps
- Prep the nail surface meticulously. Apply the clear builder gel/base coat and cure. Leave the tacky inhibition layer (clean nail surface).
- Using the ultra-thin detail brush and black art gel, freehand the irregular, broken outlines of the leopard spots directly onto the cured layer (practice leopard designs). Do not fill the spots.
- Before curing, use a fluffy brush to gently sprinkle the glitter powder into the open spaces of the leopard outlines and the negative space surrounding them.
- Gently cure the nail. Dust off the excess glitter with a soft brush.
- Apply a layer of clear top coat to seal the glitter and design, ensuring smooth edges, followed by a final cure.
Pro-Tip: The key to perfect negative space is ensuring the black outline is cured fully before dusting the glitter. If you find the glitter sticking outside the lines, use an acetone-soaked cleanup brush to erase the mistakes quickly before the final top coat application.

6. Try Bold Burgundy Cheetah Print Press-Ons

Need a quick fix? Pin these beautiful burgundy press-ons!
Products & Tools Used
- High-quality, custom handmade leopard heart press on nails (or cheetah print)
- Strong nail glue (products ensure quality)
- Nail file and buffer
- Alcohol wipes or nail dehydrator
- Wooden cuticle pusher (to prep nails for leopard)
Application Steps
- Gently push back cuticles using the pusher tool and lightly buff the natural nail surface to remove shine (prep nails for leopard).
- Clean the nail plate with alcohol or dehydrator to ensure a clean surface.
- Select the correct press-on size for each finger. If necessary, file the sides of the press-on for a perfect fit.
- Apply a small bead of strong nail glue to your natural nail and the back of the press-on nail (press on vs salon leopard nails).
- Press the nail on firmly, holding for 20-30 seconds, ensuring no air bubbles are trapped. Repeat until all nails are applied.
Pro-Tip: Using both a dehydrator and a strong adhesive will significantly increase the wear time of your press-ons. For removal, soak nails in warm, soapy water for 15 minutes before gently lifting them off the nail plate (remove gel polish substitute).

7. Blend A Vibrant Ombré Leopard Gradient

Love this blended look? Save this Ombré Leopard tutorial!
Products & Tools Used
- Base coat and no-wipe top coat
- Bright pink gel polish (for the cuticle end)
- Deep red gel polish (for the tip end)
- Small makeup sponge or nail blending sponges (to blend colors for leopard)
- Black art gel or high-pigment black polish (for spots)
- Detail brush
Application Steps
- Apply and cure the base coat. Apply one coat of the lighter pink base color and cure.
- Paint stripes of the pink and red polishes next to each other onto the edge of the blending sponge.
- Gently dab the sponge onto the nail, moving slightly up and down to create a gradient effect (ombré leopard blend techniques). Cure. Repeat this step 2-3 times until the ombré is smooth.
- Use the detail brush and black polish to paint the leopard spots over the dried/cured ombré gradient (achieve stunning look).
- Finish with a glossy top coat and cure fully for a vibrant leopard valentine nails finish.
Pro-Tip: Always apply a fresh layer of polish to the sponge between each coat on the nail. If the blend looks patchy, apply a clear polish or base coat over the color before the last sponge coat to help the colors merge more seamlessly.

Key Takeaways
- The leopard print outline should always be broken and irregular. This differentiates it from other animal prints and ensures the design looks organic and fierce, using high-quality nail supplies and specialized nail brushes for detail.
- Choose a base color that provides high contrast for maximum impact. Traditional Valentine colors like red, pink, and burgundy work best for a romantic leopard nails look, contrasting sharply with black or dark brown outlines.
- Always seal nail stickers completely with a top coat. Encapsulating the edges prevents lifting and chipping, guaranteeing a durable nail solution and extending the life of your press on nails valentine or DIY manicure.
- Invest in a fine liner brush and dotting tool set. These specialized nail tools are essential for achieving both simple leopard heart nail art and intricate designs like negative space or micro painting.
- Prep the nail surface thoroughly, regardless of technique. Whether you buff for press-ons or dehydrate for gel, proper nail care is the foundation for avoiding common mistakes and ensuring your manicure lasts longer.
- Cheetah spots are solid; leopard spots are outlined. Understanding this difference allows you to execute specific animal print nails designs tailored to your preferred fierce or flirty style, utilizing comparison alternative keywords.
- If opting for advanced techniques (Ombré or Negative Space), practice the steps on a nail wheel first. This helps achieve a salon quality finish and builds proficiency before applying the design to your final Valentine’s Day set.
FAQs About valentines day nails leopard
What colors go best with leopard print for Valentine’s Day?
The best color palettes for Valentine leopard nails incorporate the traditional romantic shades of pink, red, and burgundy, often paired with black, white, or metallic gold. These colors provide the necessary contrast for the animal print outlines while keeping the look festive. A bold red base with black spots creates a fierce look, while a dusty rose base with tone-on-tone spots offers a chic, sophisticated leopard print. You can also integrate glitter or holographic shades for extra sparkle.
How do I make the leopard spots look realistic and not messy?
The trick to making leopard spots look realistic is using an irregular pattern and leaving gaps in the outline. First, use a small dotting tool or detail brush to create imperfect, irregular blobs with your spot color (e.g., pink). Once dry, use an ultra-fine detail brush and black polish to trace broken, partial rings around these blobs. Avoid connecting the rings completely or making the spots uniform, ensuring the process builds proficiency.
What is the difference between leopard and cheetah print nails?
Leopard print features irregular, broken rings surrounding a filled center (often a lighter color than the outline), whereas cheetah print consists of solid, smaller, more uniform black or dark brown dots. For your Valentine leopard nails, using the classic broken rings allows for more creative customization with colors like red and pink spots. Cheetah spots (solid dots) tend to create a more uniform, often simpler animal print nail look.
Can I do DIY leopard print nails if I am a beginner?
Yes, beginners can easily achieve leopard print nails by utilizing high-quality nail art stickers or water decals. These products simplify application, remove the need for intricate hand-painted work, and ensure clean lines. Alternatively, use the ‘dot and drag’ method with a dotting tool for a simple leopard valentine nail art technique. Always seal the finished design with a professional-grade topcoat for long-lasting wear.
How long do leopard gel nails last compared to regular polish?
Leopard gel nails typically last 2 to 3 weeks without chipping, significantly longer than regular polish which often chips within 3 to 7 days, depending on the top coat and preparation. Gel polish provides increased durability and high-quality nail supplies resistance to wear, which is especially important for complex designs like leopard print, ensuring your time investment results in a durable nail solution. Proper prep and professional curing are essential for maximizing the longevity of gel manicures.
What tools are essential for creating professional-looking leopard nail art at home?
The most essential specialized nail tools for professional leopard nail art include a high-quality, ultra-thin detail liner brush (short bristles preferred) and a set of various-sized dotting tools. These allow for precision in outlining the spots and creating the base blobs. Additionally, a nail art clean-up brush dipped in acetone is critical for perfecting edges and correcting mistakes, leading to a salon quality finish.
Are cheetah print nails appropriate for Valentine’s Day?
Absolutely. While leopard print is more commonly searched, cheetah print nails are a perfectly appropriate and trendy alternative for Valentine’s Day, especially when combined with classic V-Day colors. Cheetah print (solid dots) offers a slightly simpler, cleaner aesthetic compared to the broken rings of leopard print. Using burgundy cheetah print press on nails or pink spots ensures the animal print maintains a romantic theme.
How can I make my DIY leopard nails last longer and prevent chipping?
To prevent nail chipping and extend the life of your fierce leopard nails, focus on meticulous nail preparation and generous top coat application. Always file and buff the nail surface, clean it with alcohol/dehydrator before polish application, and apply thin, even coats of polish. Use a high-quality, protective top coat that wraps completely around the nail tips, sealing the design fully.
What base color should I choose if I want a subtle leopard look?
For a subtle leopard valentine nails design, choose a nude, pale pink, or sheer milky white base polish and execute the spots using a color only two to three shades darker than the base. The key is minimizing the color contrast between the spot fill and the background, with only a very fine outline in black or gold chrome, creating an elegant leopard valentine nails effect that is less high-contrast than traditional designs.
What are some good alternatives to leopard print nails for Valentine’s Day?
If you want a fierce and flirty nail look without leopard print, excellent alternatives include ombré designs using red and pink, classic heart nail designs, or other romantic animal prints like snake or crocodile texture. Focusing on the key Valentine colors (red, pink, burgundy) combined with glitter accents and stiletto nails remains a strong way to achieve a bold, seasonal manicure.
Final Thoughts on Valentine Leopard Nails
The blend of romance and wildness inherent in valentines day nails leopard makes this one of the most expressive and popular seasonal trends of 2026. Whether you decide to master the simple DIY guide for heart accent nails or tackle the advanced leopard nail art techniques like negative space or ombré, the key to success lies in preparation and patience. We’ve provided the professional nail art guide—now it’s your turn to choose your favorite of the 7 fierce and flirty designs and start applying the techniques.
Remember to prioritize high-quality nail supplies and tools, utilize the correct process action keywords in your routine, and always seal your finished design with a durable top coat for a long-lasting leopard print valentine manicure. By following these expert tips, you can effortlessly achieve a stunning nail look that perfectly balances cute and chic for the special day.
Which fierce or flirty design will you create first? Share your favorite style in the comments below!
Last update on 2026-03-15 / Affiliate links / Images from Amazon Product Advertising API