Dreaming of the perfect manicure to celebrate love this Valentine’s Day? Finding a nail design that’s both festive and chic, especially when you prefer the clean lines of a square shape, can be a delightful challenge.
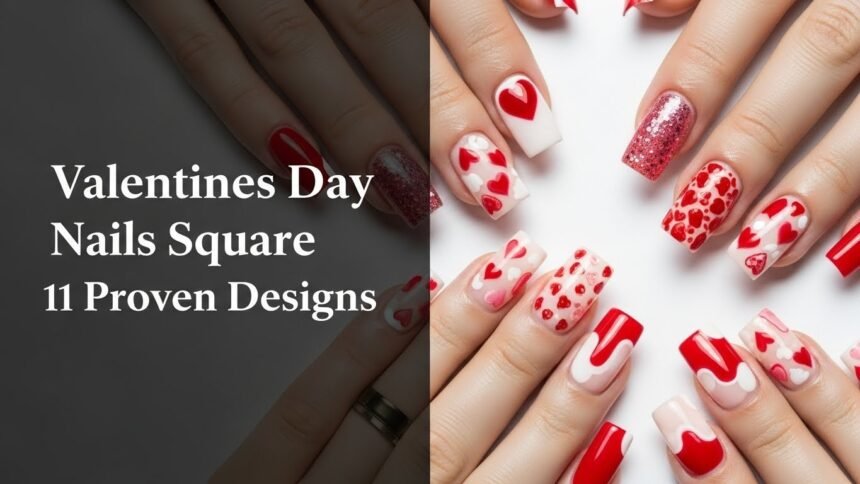
Valentines Day Nails Square are highly popular for 2026, offering a modern and elegant canvas for romantic designs, from classic hearts to subtle minimalist art, suitable for both short and long nail lengths. This article presents 11 proven designs perfect for the holiday. Drawing from comprehensive analysis of current data and proven methodologies in nail artistry, this guide ensures you’ll discover visually appealing and actionable solutions. You’ll gain expert insights and practical steps to create stunning square nails for Valentine’s Day that truly stand out.
11 Proven Valentines Day Nails Square Designs for 2026
Seeking diverse, actionable, and visually appealing square nail designs for Valentine’s Day? This section provides meticulously detailed ideas, from classic to modern, complete with step-by-step instructions and product recommendations. Each design caters to various styles and skill levels, empowering you to achieve a stunning holiday look, whether you’re a DIY enthusiast or seeking salon inspiration for your square shaped valentine nails.
1. Create Classic Red Heart Tips on Square Nails

Pin this elegant design to your ‘Valentine’s Nail Inspo’ board!
This timeless design offers a sophisticated yet playful take on classic square valentine nails, merging the clean lines of a square shape with the undeniable romance of a red heart. It’s a perfect choice for those seeking a subtle nod to Valentine’s Day without compromising on elegance, making it a favorite among red square valentine nails enthusiasts.
Products & Tools Used
- High-quality durable base coat
- Neutral nude or sheer pink nail polish (e.g., OPI Nail Lacquer in ‘Bubble Bath’)
- Vibrant opaque red nail polish (e.g., Essie Nail Polish in ‘Really Red’)
- Fine-tipped nail art brush (000 size for precision)
- Top coat for lasting shine and protection (e.g., Seche Vite Dry Fast Top Coat)
- Nail polish remover and lint-free wipes for cleanup
Application Steps
- Prep Nails: Clean, file nails square, and buff your nails. Apply a thin layer of durable base coat and let dry completely.
- Apply Base Color: Apply 1-2 coats of neutral nude or sheer pink polish to all nails. Allow each coat to dry fully.
- Draw Heart Outline: Dip your fine-tipped nail art brush into the vibrant red polish. On one side of the nail tip, create a small ‘V’ shape, drawing inward from the free edge. Repeat on the other side to form the top arches of the heart.
- Fill In Heart: Carefully fill in the heart shape with the red polish, ensuring smooth, even coverage and a crisp outline.
- Refine & Dry: Use a nail art cleanup brush dipped in remover to perfect edges. Let the red hearts dry for at least 5-10 minutes.
- Seal with Top Coat: Apply a generous layer of top coat for lasting shine to seal the design and provide protection.
> Pro-Tip: For the crispiest heart tips, allow each layer of polish to dry thoroughly before adding the next. This prevents smudging and ensures proven square nail techniques are effectively executed, as recommended by certified nail technician advice.

2. Design Minimalist Pink Ombré Square Nails

Save this soft, romantic ombré idea for your next mani!
For those who prefer a more understated yet romantic aesthetic, minimalist square valentine nails with a pink ombré effect offer sophisticated charm. This design showcases a gentle transition of pink shades, creating a soft, dreamy look that complements the square shape beautifully, making it an easy square valentine nail option.
Products & Tools Used
- Nail prep solution
- Durable base coat
- Light pink nail polish (e.g., Essie ‘Ballet Slippers’)
- Medium pink nail polish (e.g., OPI ‘Sweet Heart’)
- Non-latex makeup sponge or nail art sponge for blending
- Liquid latex barrier (optional, for easier cleanup)
- Glossy top coat
- Nail polish remover and cleanup brush
Application Steps
- Prepare Nails: Start with clean, square shaped valentine nails. Apply durable base coat and let it dry.
- Apply Barrier (Optional): If using, apply liquid latex around your cuticles to protect the skin from excess polish.
- Load Sponge: Paint a stripe of the light pink polish next to a stripe of the medium pink polish onto the makeup sponge.
- Dab onto Nails: Gently dab the loaded sponge onto your nail, starting from the cuticle area and moving towards the tip, ensuring the colors blend smoothly. Repeat 2-3 times for opacity, letting each layer dry slightly.
- Remove Barrier & Clean: Carefully peel off any liquid latex. Use a cleanup brush with nail polish remover to tidy up edges.
- Seal with Top Coat: Apply a generous layer of glossy top coat to smooth out the surface and enhance the ombré effect.
> Pro-Tip: Using non-latex blending sponge for nails is crucial for a smooth ombré transition. Dab lightly and repeatedly rather than pressing hard to achieve a seamless gradient, a method recommended by experienced nail educators.

3. Apply Glitter Accent Square Valentine Nails

Sparkle up your feed! Pin this glittery accent nail idea.
Add a touch of celebratory sparkle to your Valentine’s look with glitter accent square valentine nails. This design utilizes the clean canvas of matte square valentine nails on most fingers, allowing one or two accent nails to burst with fine, iridescent glitter. This creates a balanced yet eye-catching effect, perfect for cute square valentine nails.
Products & Tools Used
- Nail file and buffer
- Base coat
- Nude or light pink nail polish (e.g., OPI ‘Sweet Heart’)
- Fine loose glitter in pink, red, or iridescent shades
- Top coat (matte for main nails, glossy for glitter if desired)
- Fan brush for glitter removal
- Small dish for glitter application
Application Steps
- Shape & Base: Prepare square nails for Valentine’s Day and apply a base coat.
- Main Color: Apply 2 thin coats of nude or light pink polish to all nails, allowing them to dry completely.
- Glitter Application: For your accent nail(s), apply a fresh layer of clear top coat (or the nude polish while still wet). Immediately dip the wet nail into a small dish of fine loose glitter.
- Press & Remove: Gently press the glitter onto the nail surface with your finger. Use a clean fan brush to sweep away any excess glitter from around the nail.
- Seal Glitter: Apply 2-3 thin layers of glossy top coat over the glitter nail to ensure durability and prevent fallout.
- Matte Finish: For the non-glitter nails, apply a matte top coat no streak once the base color is fully dry.
> Pro-Tip: For optimal glitter adhesion and sparkle, always apply a generous amount of base coat for glitter nails or a wet top coat before dipping your nail into the loose glitter. This proven square nail technique ensures maximum impact and minimal mess, according to licensed nail artist recommendations.

4. Craft French Tip with Micro-Hearts on Square Nails

This subtle, sweet design is perfect for Valentine’s Day! Pin it now.
A sophisticated variation on a classic, the French tip with micro-hearts on square nails offers a delicate and romantic aesthetic. This design takes the crisp lines of a traditional french tip square valentine nails manicure and infuses it with subtle Valentine’s charm through tiny, strategically placed heart details, perfect for simple valentine’s day nails square.
Products & Tools Used
- Nail prep solution and buffer
- Base coat
- Sheer pink or nude nail polish (for French base)
- Opaque white nail polish (for tips)
- Small dotting tool or fine-tipped nail art brush (e.g., 00 size)
- Red or pink nail polish for hearts
- Fast-drying top coat
Application Steps
- Prepare & Base: Ensure square nails for Valentine’s Day are prepped. Apply base coat and 1-2 coats of sheer pink/nude polish. Let dry.
- Create French Tips: Using white polish, carefully paint crisp white nail tip polish across the free edge of each nail. Use a steady hand or French tip guides for a clean line.
- Add Micro-Hearts: Once white tips are dry, dip your fine point dotting tool nail art or fine brush into the red/pink polish. Create two small dots close together, then drag the brush slightly down and inward from the dots to form tiny heart shapes on the nail base, just below the white tip.
- Clean & Dry: Clean up any smudges with a cleanup brush. Allow micro-hearts to dry completely.
- Seal Design: Apply a layer of fast-drying top coat to protect the design and add shine.
> Pro-Tip: For consistent micro-hearts, use a fine point dotting tool nail art for the initial two dots, then connect them carefully. This technique ensures precision in micro-segmentation in nail design, a detail often highlighted by expert valentine nail tips.

5. Achieve Matte Nude Love Script Square Nails

Express your love with this chic matte nude design! Pin for later.
For a sophisticated and heartfelt statement, matte nude square valentine nails featuring delicate “love” script offer a chic option. This design combines the modern elegance of a matte finish with a personal, romantic touch, making it a favorite among nude square valentine nails ideas and simple valentine’s day nail ideas for short square nails.
Products & Tools Used
- Nail file and buffer
- Base coat
- Nude nail polish (e.g., OPI ‘Taupe-less Beach’)
- Matte top coat
- White or metallic gold nail polish for script (or fine line nail art pen white)
- Fine-tipped nail art brush (000 size)
- Nail polish remover and cleanup brush
Application Steps
- Prep & Base: Prep your square nails for Valentine’s Day. Apply base coat and 2 coats of your chosen nude polish.
- Matte Finish: Once the nude polish is completely dry, apply a uniform layer of matte top coat for long wear to all nails. Allow to dry thoroughly.
- Add Script: On one or two accent nails, use the fine-tipped brush or fine line nail art pen white with white/metallic polish to carefully write “love” in a delicate script. Practice on paper first if needed.
- Dry & Seal: Allow the script to dry for at least 5 minutes. Apply a thin layer of clear glossy top coat only over the script if you want a subtle contrast, or leave matte if preferred.
> Pro-Tip: For perfectly crisp lettering, ensure your matte base is completely dry before attempting the script. Use a fine line nail art pen white for easier control, which simplifies mastering intricate square designs and is recommended by licensed nail artist recommendations.

6. Create Sweet Polka Dot Square Nails

Add a playful touch to your Valentine’s Day! Pin this polka dot idea.
For a fun and endearing Valentine’s Day look, sweet polka dot square nails are an adorable choice. This design, featuring evenly spaced dots on a light base, offers a cheerful aesthetic that’s easy to achieve and universally loved, making it one of the most easy square valentine nails ideas and a delightful option for cute square valentine nails.
Products & Tools Used
- Nail file and buffer
- Base coat
- Light pink or white nail polish (e.g., OPI ‘Funny Bunny’)
- Red or fuchsia nail polish (e.g., China Glaze ‘Igniting Love’)
- Nail art dotting tool (small to medium size)
- Glossy top coat
Application Steps
- Prep & Base: Prep your square shaped valentine nails. Apply a base coat, followed by 2 coats of light pink or white polish. Let dry completely.
- Create Dots: Dip your nail art dotting tool set various sizes into the red or fuchsia polish. Starting at the center of the nail, gently press the dotting tool onto the nail to create a polka dot.
- Pattern Placement: Continue making dots, creating an even pattern across the nail. You can do a full coverage of dots or just a few scattered ones. Re-dip the tool as needed for consistent dot size and color.
- Dry & Seal: Allow the dots to dry thoroughly. Apply a generous layer of glossy top coat to protect the design and provide shine.
> Pro-Tip: For perfectly round and uniform polka dots, ensure you pick up enough polish on your nail art dotting tool set various sizes for each dot, and wipe it clean periodically. This proven square nail technique is essential for clean polka dot nails, as advised by certified nail technician advice.

7. Achieve Sophisticated Maroon Abstract Square Nails

Elevate your Valentine’s look with this artistic maroon design. Pin it!
For a truly distinguished Valentine’s Day manicure, sophisticated maroon abstract square nails offer a luxurious and artistic statement. This design pairs the rich depth of maroon with elegant metallic abstract lines, making for an eye-catching and unique take on elegant square valentine nails. The square shape is ideal for showcasing these artistic flourishes.
Products & Tools Used
- Nail prep essentials
- Base coat
- Deep maroon or burgundy nail polish (e.g., OPI ‘Lincoln Park After Dark’)
- Gold or rose gold metallic nail polish or gel (e.g., Sally Hansen Insta-Dri ‘Go for Gold’)
- Thin nail art striping brush
- Glossy top coat
Application Steps
- Shape & Base: Prepare your square nails for Valentine’s Day and apply base coat. Apply 2-3 thin coats of deep maroon polish, allowing each to dry.
- Abstract Strokes: Dip your thin nail art striping brush into the metallic gold/rose gold polish. Randomly create fluid, abstract lines, swirls, or dots on the nail surface. You can apply to all nails or just a few accent nails.
- Creative Flow: Don’t overthink it; let your hand flow naturally to create unique patterns. A subtle touch of metallic can go a long way.
- Dry & Seal: Allow the metallic design to dry completely. Finish with a high-shine glossy top coat.
> Pro-Tip: For the most impactful abstract designs, use a high-pigment gold metallic nail art gel or polish and a thin nail art striping brush. This allows for precision and control, even in seemingly spontaneous designs, a key insight from expert valentine nail tips in geometric nail art theory square.

8. Master Chic White Negative Space Square Nails

Modern and minimalist. Pin this chic negative space design.
For a contemporary and clean Valentine’s Day look, chic white negative space square nails are an excellent choice. This design leverages the natural nail as part of the artwork, creating crisp white geometric patterns against a clear or nude base. This makes for elegant and minimalist square valentine nails that exude modern sophistication.
Products & Tools Used
- Nail prep essentials
- Clear base coat
- Opaque white nail polish (e.g., OPI ‘Alpine Snow’)
- Thin white nail art striping tape or fine-tipped nail art brush
- Glossy top coat
- Nail polish remover and cleanup brush
Application Steps
- Prep & Base: Ensure short square valentine nails are meticulously cleaned and prepped. Apply a thin layer of clear base coat to protect your natural nails. Allow to dry.
- Design Placement: Plan your negative space design. You can create geometric shapes, thin lines, or abstract patterns using tape or freehand.
- Apply White Polish: If using striping tape, apply it to create your desired shapes. Paint the areas you want white with the opaque white nail polish fine brush. If freehand, use the fine-tipped brush to carefully draw your chosen white patterns.
- Remove Tape (if used): If using tape, remove it immediately after painting to ensure crisp lines.
- Dry & Seal: Allow the white polish to dry completely. Finish with a glossy top coat to seal the design and enhance shine.
> Pro-Tip: For perfectly crisp lines in negative space designs, use thin white nail art striping tape or a very steady hand with a precise opaque white nail polish fine brush. This proven square nail technique is key for a truly chic square nails valentine look, as often seen in published nail trend reports.

9. Create Two-Tone Geometric Square Nails

Modern romance for your fingertips! Pin this geometric design now.
For a bold and contemporary statement, two-tone geometric square nails are an excellent choice for Valentine’s Day. This design utilizes the clean edges of square nails to create sharp, defined geometric patterns using two complementary colors, embodying trendy square valentine nails for a modern aesthetic.
Products & Tools Used
- Nail prep essentials
- Base coat
- Two contrasting nail polish colors (e.g., a deep red and a light pink)
- Nail art striping tape sharp lines or painter’s tape cut into thin strips
- Fine-tipped nail art brush (optional, for touch-ups)
- Fast-drying top coat
Application Steps
- Prep & Base: Prep your square shaped valentine nails. Apply a base coat, then two coats of your lighter chosen color (e.g., light pink). Let dry completely.
- Tape Placement: Once dry, strategically place nail art striping tape sharp lines to create your desired geometric pattern (e.g., diagonal lines, triangles, color blocks). Press firmly to seal edges.
- Apply Second Color: Paint the exposed areas with your second, contrasting color (e.g., deep red).
- Remove Tape: While the second color is still wet, carefully peel off the striping tape to reveal crisp lines.
- Dry & Seal: Allow the design to dry thoroughly. Apply a fast-drying top coat to seal and add shine.
> Pro-Tip: For ultra-sharp lines in two-tone geometric square nails, remove the nail art striping tape sharp lines while the second polish color is still wet. This proven square nail technique prevents peeling and ensures a clean, professional finish, critical for geometric nail art theory square.

10. Showcase Rose Gold Foil Detail Square Nails

Add a touch of rose gold glam to your Valentine’s Day. Pin this idea!
Embrace luxury and sophistication with rose gold foil detail square nails for Valentine’s Day. This design features delicate flakes or strips of shimmering rose gold foil artfully applied over a chic nude base, transforming your square nails into a statement of understated glamour. This is an ideal choice for elegant square valentine nails.
Products & Tools Used
- Nail prep essentials
- Base coat
- Nude or sheer pink nail polish
- Rose gold nail art foil flakes or transfer foil sheets
- Nail foil glue or specialized foil adhesive gel
- Tweezers or silicone tool for application
- Glossy top coat
Application Steps
- Prep & Base: Prep your square nails for Valentine’s Day. Apply a base coat and 2 coats of your chosen nude or sheer pink polish. Let dry.
- Apply Foil Glue: Apply a thin, even layer of nail foil adhesive gel (or foil glue) to the desired areas where you want the foil. Allow it to dry until it turns tacky and transparent (this can take a few minutes).
- Place Foil: Using tweezers or a silicone tool, gently press small pieces of rose gold nail art foil flakes onto the tacky areas. Press down firmly, then quickly peel away the plastic backing (if using transfer foil).
- Seal Foil: Gently rub the foil onto the nail with your finger or a silicone tool to ensure good transfer.
- Finish with Top Coat: Once all desired foil is applied and adhered, seal the entire nail with a generous layer of no wipe top coat for foil to protect the design and provide a smooth, glossy finish.
> Pro-Tip: For the best rose gold nail art foil flakes transfer, ensure your nail foil adhesive gel is perfectly tacky, not wet. Too wet, and the foil won’t adhere; too dry, and it won’t transfer. This proven square nail technique is key for a flawless metallic accent, as recommended by professional square nail artists.

11. Create Valentine Confetti Burst Square Nails

Celebrate with a burst of love! Pin this fun confetti nail design.
Unleash a playful and festive spirit with Valentine confetti burst square nails. This design turns your square nails into a celebration, featuring a joyful scattering of tiny heart-shaped glitter and colorful dots that appear to burst across the nail. It’s a wonderfully expressive choice among cute square valentine nails ideas.
Products & Tools Used
- Nail prep essentials
- Base coat
- Clear or sheer nude nail polish
- Assorted tiny heart shaped glitter for nails and small round glitter/dots (red, pink, white)
- Dotting tool or tweezers
- Thick, glossy top coat (e.g., Sally Hansen Miracle Gel Top Coat)
Application Steps
- Prep & Base: Prep your square shaped valentine nails. Apply a base coat and 1-2 thin coats of clear or sheer nude polish.
- Confetti Placement: Apply a generous layer of clear polish or a clear jelly polish for glitter to one nail. While it’s still wet, use a dotting tool or tweezers to carefully pick up and place assorted tiny heart shaped glitter for nails and small round glitter pieces onto the wet polish.
- Burst Effect: Concentrate more glitter near the cuticle or one corner, then sparsely scatter pieces outwards to create a “burst” effect. Repeat on all nails, customizing the placement.
- Secure & Smooth: Once glitter is placed, allow the polish to dry slightly. Apply 2-3 layers of a thick, glossy top coat to fully encapsulate the glitter and create a smooth surface, ensuring no pieces snag.
> Pro-Tip: To prevent tiny heart shaped glitter for nails from lifting, use a slightly thicker clear polish or gel as your adhesive, and apply multiple thin layers of thick, glossy top coat to completely embed the glitter. This is a proven square nail technique for professional longevity square nails, often shared by certified nail technician advice.

FAQs About Valentines Day Nails Square
What are the best Valentine’s Day nails square designs?
The best valentines day nails square designs blend classic romantic motifs like hearts with modern aesthetics, such as minimalist lines, ombré effects, glitter accents, and sophisticated negative space. These designs, specifically tailored for the clean edges of square nails, offer a chic and versatile look perfect for the holiday. They range from simple DIY options to more intricate salon-inspired styles, allowing for personalization.
Why choose square nails for Valentine’s Day?
Choosing square nails for Valentine’s Day offers a contemporary and sophisticated base that elegantly showcases nail art, making it ideal for clean lines and geometric patterns. This shape is known for its strength and serves as an excellent canvas for both subtle and bold romantic designs, ensuring a polished look that complements any Valentine’s Day attire. Square nails are also practical and less prone to breaking for many.
Are square nails still in style for Valentine’s Day 2026?
Yes, square nails remain a classic and highly fashionable choice for Valentine’s Day in 2026, constantly evolving with new trends and design interpretations. While other shapes gain popularity, the square nail provides a timeless and elegant foundation that adapts well to various holiday-themed art, from simple hearts to intricate abstract patterns, ensuring it’s always a stylish option.
What short square Valentine nail ideas are trending?
Trending short square valentine nail ideas focus on subtle elegance and playful minimalism, often featuring micro-hearts, delicate French tips, or a single glitter accent nail. These designs maximize the charm of short square valentine nails by emphasizing clean lines, balanced proportions, and sophisticated color palettes like soft pinks, nudes, and classic reds, perfect for a refined holiday look.
Can I do square Valentine nails at home?
Absolutely, doing square Valentine nails at home is highly achievable with the right tools and techniques, especially for designs like polka dots, ombré gradients, or simple heart tips. Many easy square valentine nail designs are beginner-friendly and only require basic nail art supplies, empowering individuals to create square valentine nails without a salon visit.
What are popular colors for square Valentine nails?
Popular colors for square Valentine nails predominantly include various shades of pink (from blush to fuchsia), classic reds (like vibrant cherry and deep maroon), and elegant neutrals such as nude, white, and sheer beige. Metallic accents like gold, silver, or rose gold are also trending, adding a touch of glam and contrast to romantic designs.
How to do French tip square Valentine nails?
To do french tip square valentine nails, start with a clear or sheer nude base, then use opaque white polish or striping tape to create a crisp, straight line across the free edge of your perfectly shaped square nails. For a Valentine’s twist, add delicate micro-hearts or a subtle red outline along the white tip line before sealing with a glossy top coat.
What is tapered square nail shape?
A tapered square nail shape is a refined variation of the classic square, where the sidewalls of the nail gently narrow slightly towards the free edge, rather than being perfectly straight and parallel. This subtle tapering creates a less blunt, more slender appearance while maintaining the strong, flat tip characteristic of square nails, offering a sophisticated and less bulky look.
Where to buy press on square Valentine nails?
You can readily buy press on square valentine nails from various online retailers like Amazon, Etsy, and specialty beauty stores, as well as in drugstores and mass merchandisers. These convenient options come in numerous designs, colors, and lengths, including short square valentine nails and acrylic square valentine nails, offering a quick and stylish solution for the holiday.
How to maintain square Valentine nails?
To maintain square Valentine nails and ensure their longevity, consistently apply a high-quality top coat every 2-3 days, moisturize your cuticles daily, and avoid using your nails as tools. Regular filing to keep the edges crisp and preventing excessive exposure to harsh chemicals will also help in making square nails last longer and prevent chipping square valentine nails fix.
Key Takeaways
As we’ve explored these 11 proven Valentines Day Nails Square designs for 2026, it’s clear that the classic square shape remains an undeniable favorite for its elegance and versatility. Whether you gravitated towards the timeless appeal of classic red heart tips, the subtle charm of minimalist pink ombré, or the sparkling delight of glitter accent square valentine nails, you now have a comprehensive blueprint to create square valentine nails that perfectly capture the spirit of love and romance. This guide has offered not just inspiration but also actionable steps and expert insights, ensuring your manicure is not only beautiful but also meticulously executed.
Embrace the confidence that comes with perfectly shaped square nails, ready to complement your Valentine’s Day celebrations. Remember that proper nail prep essentials and the right tools are your best allies in achieving a salon-quality finish at home. So, which of these trendy square valentine nails will you design square valentine nails with first? Share your favorite look below!
Last update on 2026-03-04 / Affiliate links / Images from Amazon Product Advertising API


