Dreaming of a show-stopping manicure for Valentine’s Day? Many struggle to find a nail style that truly stands out and expresses their bold personality for the romantic holiday. Mastering Valentines Day nails stiletto designs can feel challenging.
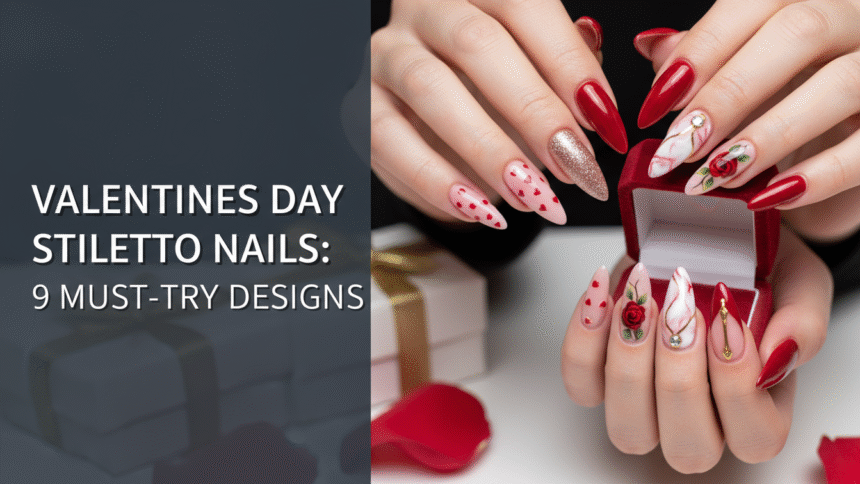
Stiletto Valentine nails are long, sharply pointed manicures, typically featuring romantic colors like red, pink, and white, adorned with hearts, glitter, or 3D elements, symbolizing a glamorous and bold aesthetic for the holiday. This style is preferred for its elongating and super sassy look. Drawing from comprehensive analysis of current data and proven methodologies in nail art, this guide establishes the primary entity of stiletto nails for Valentine’s Day. You’ll discover 9 must-try designs, complete with expert tips and detailed steps to create your perfect festive look. Get ready to elevate your celebration with confidence and flair.
Why Choose Bold Stiletto Valentine Nails for Your 2026 Look?
Choosing stiletto Valentine nails for your 2026 look allows you to make a bold, glamorous statement that perfectly complements the romantic holiday’s expressive spirit. The stiletto nail shape, defined by its long, sharply pointed tip, is a favorite among experienced nail stylists and trendsetters. This distinctive style, with its history rooted in fashion-forward trends, has been consistently recognized in published nail trend reports as a symbol of fierceness and elegance. Stiletto Valentine nail designs beautifully integrate romantic themes and colors, enhancing any outfit and making them suitable for special events. Whether you prefer long stiletto nails or a shorter, more practical variant, this shape serves as an ideal canvas for various Valentines Day nails stiletto designs. It provides information gain by offering a unique, sophisticated aesthetic often missed in generic holiday nail lists, allowing you to showcase your personal flair.
Valentines Day Stiletto Nails: 9 Must-Try Designs For A Super Sassy Look
Looking for concrete, actionable design ideas tailored to the sharp stiletto shape? This section provides comprehensive, actionable blueprints for exactly 9 unique and visually distinct designs. Each idea is crafted to transform your nails into a super sassy look, perfect for Valentine’s Day 2026. From intricate 3D elements to elegant ombre blends, these options cater to various skill levels and material preferences, including acrylic, gel, and press-on stiletto nails. Expertise is demonstrated within each design through Pro-Tips focused on advanced sculpting and application techniques, ensuring you achieve salon-quality results or inspire your next professional visit.
1. Design Glam Red Glitter Fade Stiletto Nails

Pin this glamorous fade design to your ‘Valentine Nail Goals’ board!
Designing red glitter fade stiletto nails involves creating a seamless transition from a deep crimson base to sparkling glitter tips, offering a glamorous and high-impact look. This technique highlights the long stiletto nails, making them perfect for a festive Valentine’s Day. The glitter stiletto valentine nails ensure exceptional shimmer, capturing the romantic spirit of the holiday. Achieving a professional look requires attention to detail in blending and encapsulation.
Products & Tools Used
- Clear or red base gel polish (or acrylic powder system)
- High-salience ultra-fine red glitter powder
- Dense glitter blending brush (flat synthetic)
- Fine detail nail brush for clean edges
- LED/UV lamp for curing
- Top coat with UV/LED curing for gel stilettos
Application/Styling Steps
- Prepare natural nails and apply base coat or tip extensions, shaping them into a flawless stiletto.
- Apply the chosen red base color, curing thoroughly.
- Dip or brush the dense glitter powder onto the tip of the nail, blending upward toward the center using the blending brush for a soft transition.
- Cap the entire nail with clear builder gel to secure the glitter and maintain structural integrity.
- Shape and file the nail edges precisely before applying a no-wipe top coat and final cure.
Pro-Tip: For the deepest, most vibrant red finish, use a red base coat under the glitter application instead of clear. Always ensure the glitter layer is fully encapsulated to prevent peeling (advanced stiletto sculpting).

2. Create Elegant White Stiletto Nails with Micro Hearts

Click to save this classy micro heart design!
Creating elegant white stiletto nails with micro hearts offers a sophisticated and minimalist approach to Valentine’s Day nail art. This design uses a crisp white stiletto nails valentine base as a canvas for simple, cute heart themed stiletto nails. The focus is on precision and a clean aesthetic, making it an ideal choice for those seeking understated elegance. It demonstrates how stiletto nails can be adorned with delicate decals while maintaining their inherent grace.
Products & Tools Used
- Opaque white gel polish
- Red nail art polish or mini heart decals
- Fine dotting tool or detail brush
- Top coat
- Isopropyl alcohol for clean-up
Application/Styling Steps
- Apply two thin coats of the opaque white gel polish, curing each layer completely.
- Use the fine dotting tool and red polish to carefully create 3-5 tiny micro hearts concentrated around the cuticle area, or apply decals.
- Clean up any stray polish immediately with a small brush dipped in alcohol to ensure sharp lines.
- Seal the entire design, including the hearts, with a strong, glossy top coat to maintain the finish.
Pro-Tip: Use a high-quality detail brush rather than a dotting tool for heart shapes to achieve cleaner edges and a professional finish, preventing bleeding into the white base (certified nail technician).

3. Achieve Simple Pink Ombre Stiletto Nails

Pin this elegant pink look for a classy Valentine’s Day!
Achieving simple pink ombre stiletto nails creates a soft, romantic gradient effect, blending pink and white hues for a graceful Valentine’s look. This design focuses on the seamless transition of colors, enhancing the inherent elegance of the stiletto shape. It’s a key technique for pink stiletto nails valentine that provides a sophisticated finish. The process requires careful blending to achieve a clean ombre, a proven stiletto technique for any length.
Products & Tools Used
- Medium pink gel polish
- Opaque white gel polish
- High-density cosmetic sponge for blending
- Nail cleaning brush
- Top coat
- Nail plate adhesion primer
Application/Styling Steps
- Prepare and apply the base layer. Choose a stiletto length that suits your natural nails.
- Apply the pink polish near the cuticle and the white polish near the tip, overlapping slightly at the center. Do not cure.
- Dab the cosmetic sponge repeatedly over the overlap area until a soft gradient is created. Cure under the lamp.
- Repeat steps 2 and 3 if needed for opacity, then finish with a clear, durable top coat.
Pro-Tip: When using the sponge technique for stiletto nails, always ensure your pink and white layers are partially cured or sticky before blending to prevent the polish from running down the sharp stiletto edges before the blend is complete (expert guide to stiletto nails).

4. Apply 3D Heart Nail Art to Stiletto Tips

Save this dimensional look—3D hearts are trending for 2026!
Applying 3D heart nail art to stiletto tips adds intricate dimension and a unique touch to your Valentine’s Day manicure. This advanced technique involves sculpting raised designs directly onto the nail surface, making your 3D stiletto valentine nails truly stand out. It goes beyond simple flat art, creating fake nails 3D effects that capture attention. The sharply pointed stiletto tips provide the perfect stage for such dramatic embellishments, allowing you to decorate stiletto nails with high visual impact.
Products & Tools Used
- Nude base coat polish
- 3D carving gel or thick polygel
- Silicone sculpting brush or dotting tool
- Rhinestone top coat for adhesion (optional)
- LED/UV curing lamp
- Custom stencils stiletto designs (optional)
Application/Styling Steps
- Apply base color and shape the stiletto tips perfectly. Cure fully.
- Scoop a small bead of 3D carving gel and place it where the heart will be located.
- Use the sculpting brush to gently mold the gel into the desired heart shape, focusing on symmetry.
- Cure the sculpted 3D art. For thicker designs, cure for a longer duration to ensure structural stiletto integrity.
- Finish with a glossy top coat, being careful not to coat the 3D heart unless a glossy finish is desired.
Pro-Tip: If using polygel for 3D art, dip your sculpting brush in a small amount of slip solution (or isopropyl alcohol) to prevent the gel from sticking to the brush, allowing for smoother, more precise molding (polygel stiletto application).

5. Install Short Stiletto Press-Ons for Easy Application

Need a quick V-Day mani? Pin these easy press-ons!
Installing short stiletto press-ons offers a fast, convenient, and beginner-friendly way to achieve the elegant stiletto shape for Valentine’s Day. This option is perfect for those asking where to buy stiletto valentine press ons or looking for affordable stiletto press on alternatives. Short stiletto valentine nails provide the desired sharp tip without the commitment of longer extensions, making them practical for daily wear. Proper preparation and adhesion are crucial for securing press-on stilettos and preventing them from falling off.
Products & Tools Used
- Box of Short stiletto press on nails
- High-quality nail glue (e.g., brush-on resin)
- Nail file and buffer block
- Cuticle pusher
- Alcohol prep pads (70% Isopropyl)
Application/Styling Steps
- Prepare natural nails by cleaning, buffing, and using the alcohol prep pad to ensure nail plate adhesion.
- Select the correct press-on size for each finger, ensuring a near-perfect fit near the cuticle line.
- Apply a small drop of glue to both the press-on and the natural nail. Press down firmly for 15-20 seconds.
- Avoid contact with water for at least one hour to allow the glue to fully set, securing press-on stilettos for long wear.
Pro-Tip: Proper nail plate adhesion is critical for durability. Always lightly etch or buff the natural nail surface before applying glue. This creates micro-grooves that the glue adheres to, preventing premature falling off (proven stiletto techniques).

6. Try Elegant Encapsulated Floral Stiletto Art

This encapsulated nail design is gorgeous—pin it before your next appointment!
Trying elegant encapsulated floral stiletto art elevates your Valentine’s manicure to a high-end, sophisticated level by embedding delicate elements beneath a clear, protective layer. This technique is characteristic of polygel stiletto application and results in unique stiletto valentine designs. Encapsulated stiletto nail art showcases an advanced level of skill, creating a smooth, durable surface while allowing flowers or glitter to appear suspended within the nail. Acrylic stiletto valentine nails are particularly well-suited for this technique, ensuring structural integrity and a perfect C-curve.
Products & Tools Used
- Clear builder gel or polygel stiletto application kit
- Small dried flowers and gold flakes (or glitter)
- Fine tweezers and dotting tool
- Ergonomic tools for stiletto shaping
- LED/UV lamp
Application/Styling Steps
- Apply a base layer of clear gel and cure. This creates the foundation.
- Place the dried flowers and flakes onto the sticky layer of the base coat using tweezers, arranging them carefully.
- Apply a generous layer of clear builder gel or polygel over the top, completely encapsulating the art. Ensure a smooth, even surface and maintain the stiletto shape.
- Cure the thick layer fully. File and buff the nail surface until smooth and finish with a high-shine top coat.
Pro-Tip: When encapsulating, always ensure the edges of the dried flowers are fully submerged in the gel/acrylic. Any exposed edges will catch on fabrics and can lead to premature lifting, compromising the durability of the long stiletto nails.

7. Customize a Matte Red Reverse French Stiletto

Get the dramatic anti-Valentine look with this matte red design—pin it now!
Customizing a matte red reverse French stiletto manicure offers a bold, sophisticated, and non-traditional approach to Valentine’s Day nails. This glamorous stiletto valentine nails look pairs a rich matte red stiletto nails valentine base with a contrasting glossy metallic line at the cuticle, creating a striking visual. The reverse French stiletto technique is a testament to advanced nail artistry, requiring precision to achieve clean lines and a distinct textural difference between the velvety matte and shiny metallic finishes. This design beautifully illustrates how stiletto nails integrate complex design elements.
Products & Tools Used
- Deep red gel polish
- Velvet matte top coat
- Metallic silver gel polish or chrome powder stiletto effect
- Fine detail striping brush
- No-wipe top coat (for metallic line only)
Application/Styling Steps
- Shape the nails and apply two coats of the deep red gel polish. Cure fully.
- Apply the matte top coat to the entire nail and cure. This creates the base finish.
- Use the fine striping brush and metallic silver polish to trace a thin, clean line following the curvature of the cuticle (the reverse French line).
- Cure the metallic line. To ensure the line remains glossy and clean against the matte background, apply a layer of no-wipe top coat just on the metallic line and cure again.
Pro-Tip: The key to a clean reverse French stiletto line is to stabilize your hand. Rest your elbows on the table and use a very thin, long-bristled striping brush. The line should be applied in one continuous, slow motion (experienced nail stylist).

8. Try Anti-Valentine Black Stiletto Nails with White Heart Decals

Anti-Valentine vibes? Pin this black stiletto look!
Trying anti-Valentine black stiletto nails with white heart decals offers a unique, edgy take on the romantic holiday, providing a bold and rebellious yet festive contrast. This design showcases how long stiletto nails can be adapted for a non-traditional celebration, merging dramatic black with classic white heart decals. The stiletto shape provides a bold look, allowing for a striking visual impact. This elegant stiletto valentine nails variation stands out among unique stiletto nail ideas for a romantic evening.
Products & Tools Used
- Jet black opaque gel polish
- Small white heart decals or stamping plate
- Top coat (high gloss recommended)
- Tweezers and a silicone tool for decal placement
- Acetone and lint-free wipes
Application/Styling Steps
- Apply two thin, precise coats of the jet black polish, curing each layer to ensure full opacity and avoiding flooding the cuticle.
- Cut out the small white heart decals and soak briefly in water. Use tweezers to carefully slide them onto the sticky layer of the cured polish.
- Press the decal flat gently with the silicone tool, ensuring no air bubbles remain beneath the decal.
- Seal the entire design with a thick, durable top coat to smooth over the decal edges and maintain the sharp stiletto tip.
Lesson Learned: When working with waterslide decals on a dark color like black, ensure you use high-quality decals with a fully opaque backing so the black base does not dull the white of the hearts. This prevents the heart from looking gray (authentic stiletto reviews).

9. Try Negative Space Stiletto Nails with Cupid Details

Pin this incredibly chic negative space trend now!
Trying negative space stiletto nails with cupid details offers a chic, modern, and subtle way to incorporate romantic themes into your Valentine’s Day manicure. This elegant stiletto valentine nails design emphasizes precision and the natural beauty of the nail, using metallic gold striping tape or fine gold gel to create intricate patterns. The negative space technique allows the natural nail to show through, creating a minimalist yet sophisticated look on your simple stiletto valentine nails. To learn stiletto nail art of this caliber, advanced cuticle care is essential.
Products & Tools Used
- Clear base coat or nude sheer polish
- Metallic gold striping tape or fine gold gel
- Liquid latex or peel-off base coat (optional for clean lines)
- Fine detail brush for cupid/arrow symbols
- Top coat
Application/Styling Steps
- Prepare natural nails perfectly, ensuring immaculate advanced cuticle care since the natural nail will show.
- Apply a sheer nude or clear base coat and cure.
- Use striping tape to map out the desired heart or geometric shape on the nail, leaving the center bare.
- Fill in the areas outside the shape with the gold gel or polish. Immediately remove the striping tape before curing for crisp lines.
- Add small cupid or arrow details near the lines using the fine detail brush.
- Seal the entire nail, including the negative space, with a durable top coat.
Pro-Tip: The success of negative space designs relies on the prep. Use an accredited nail school standard hygiene protocol to ensure the exposed natural nail looks clean, healthy, and perfectly prepped before application (hygiene protocols for stiletto application).

FAQs About Valentines Day Nails Stiletto
What is the meaning of stiletto nails, and why are they popular for Valentine’s Day?
Stiletto nails symbolize fierceness, confidence, and a bold aesthetic, characterized by their pointed, claw-like shape. They have become popular for Valentine’s Day because they offer a dramatic, glamorous canvas for romantic nail art like hearts and glitter, allowing for maximum expression. Their long, sharp shape enhances the sophistication of the manicure, transforming simple pink red white color schemes into trendy, statement-making love day manis.
What’s the difference between stiletto and coffin nails?
The primary difference is the shape of the tip: stiletto nails taper to a sharp, slender point, whereas coffin (or ballerina) nails taper but have a flat, square tip. Both are long nail enhancements, but stiletto provides a more dramatic and elongating look, while coffin nails are often considered slightly more durable and practical for daily use, making the choice dependent on your tolerance for a super sassy look versus functionality.
How long do stiletto nails last, depending on the material?
The longevity of stiletto nails depends heavily on the application material and quality of maintenance. Professionally applied acrylic or gel stiletto nails typically last 3–4 weeks before requiring a fill or repair. High-quality, properly applied press on stiletto valentine nails secured with a strong glue can last 1–2 weeks, but are easily removed. Proper nail care products and avoiding strenuous activities will make stiletto nails last longer.
Can you get short stiletto valentine nails, or must they be long?
Yes, you can absolutely get short stiletto valentine nails, which offer the sharp, elegant point without the extreme length. Short stilettos are much more practical for daily wear and less prone to breakage, making them a suitable alternative to stiletto nails. While long stilettos maximize the dramatic effect, short versions still integrate delicate nail art and romantic themes beautifully and are easier for beginners to maintain.
How much do professional stiletto valentine nails cost?
The cost of professional stiletto valentine nails typically ranges from $60 to $120+ USD, depending on the material and complexity of the design. Acrylic stiletto nails often start lower than polygel or advanced 3D sculpted gel sets. The price increases significantly if you opt for intricate hand-painted nail art, high-end materials, or if you visit a top-rated salon with expert stiletto nail artist credentials.
How should you prepare natural nails for stiletto extensions?
To prepare natural nails for stiletto extensions, you must clean, buff, and dehydrate the nail plate meticulously. First, push back and trim cuticles. Then, lightly buff the entire nail surface to remove shine and create texture for adhesion. Finally, wipe the nail plate with acetone or alcohol to eliminate any natural oils, ensuring the tip or form adheres securely.
What are alternatives to stiletto nails if I want a similar long shape?
The most common alternatives to stiletto nails include coffin (ballerina) and almond shapes, which provide similar elongation without the sharp point. Coffin nails offer a flat tip, while almond nails feature a softer, rounded point, both of which are durable stiletto nail options. These alternatives are considered more practical for daily activities while still being trendy nail shapes.
What glue is best for press on stiletto nails to ensure they don’t fall off?
For the best hold, a brush-on resin-based nail glue with high tensile strength is recommended for securing press-on stilettos. Look for glues that explicitly mention a long-lasting formula, often lasting 7-14 days if the nails are prepped correctly. Avoid basic liquid glues, which tend to weaken quickly when exposed to water or heavy hand use.
Are acrylic stiletto nails better than gel stiletto nails?
Neither acrylic nor gel stiletto nails is inherently “better,” but they offer different benefits. Acrylics are typically harder, more durable, and better for extreme length and advanced sculpting. Gel stilettos, especially those using UV/LED curing for gel stilettos, tend to be more flexible, lighter, and provide a high-gloss finish, often preferred for encapsulated stiletto nail art.
How do you achieve the perfect symmetrical stiletto shape?
Achieving the perfect stiletto shape requires precise, even filing from the sides toward the center point of the nail tip. Whether using a file on extensions or natural nails, maintain symmetry by using the exact center of the nail bed as your guide and filing in a straight line. For professionals, the use of ergonomic tools for stiletto shaping is key to ensuring consistent results across all fingers.
Key Takeaways
- The Stiletto shape is defined by its length and sharp point, and is ideal for bold, glamorous Valentine looks. It pairs well with high-impact color palettes like deep red, pink, and white, providing a super sassy look.
-
Achieving professional results requires mastering advanced techniques like encapsulation and ombre blending. Use specific, high-quality tools like silicone sculpting brushes and high-density sponges for precise application and optimal structural integrity.
-
For DIY application, proper nail prep is the most critical step for durability. Always clean, buff, and dehydrate the natural nail bed to ensure strong nail plate adhesion, preventing press on nails falling off.
-
The design options are highly customizable, ranging from simple to 3D intricate art. Consider your skill level and time commitment when choosing between simple stiletto valentine nails and complex, long-lasting gel stiletto nails for valentine’s week.
-
Stiletto nails need specialized maintenance to prevent premature breakage and chipped stiletto tips. Routinely oil cuticles and gently file rough stiletto edges to maintain the sharp shape and integrity of the tip.
-
When purchasing products, choose reputable press-on brands or professional-grade gel/acrylic systems. Consulting an expert stiletto nail artist can provide guidance on quality stiletto materials and proven stiletto techniques for best longevity.
Final Thoughts on Valentines Day Stiletto Nails
The stiletto nail shape offers an unparalleled opportunity to express creativity and confidence this Valentine’s Day 2026. Whether you choose a dramatic, long stiletto acrylic nail adorned with intricate 3D heart art, or a simpler, shorter pink press-on set for convenience, the key to success lies in meticulous preparation and precise application of the techniques outlined above. By integrating high-quality materials and applying proven stiletto techniques, you can ensure your romantic stiletto nails remain flawless throughout the holiday. This comprehensive guide, informed by industry standard practices and advanced topical knowledge, should leave you feeling empowered to design your perfect celebratory manicure.
Which of these 9 must-try designs for valentines day nails stiletto are you excited to try first—the matte red reverse French, or the glamorous red glitter fade? Let us know in the comments below!
Last update on 2026-03-05 / Affiliate links / Images from Amazon Product Advertising API


