Want to give a gift that truly speaks volumes this Valentine’s Day? Generic presents often fall flat, leaving a desire for something deeply personal and memorable for your loved one, something like a valentines day scrapbook.
A Valentine’s Day scrapbook is a personalized, handcrafted album designed to preserve cherished memories, photos, and sentiments, creating a heartfelt gift for a loved one. It serves as a tangible expression of affection, celebrating shared moments and a couple’s unique love story. Leveraging tested frameworks and data-driven insights from seasoned crafters, this guide will unlock the secrets to crafting an unforgettable DIY valentine album. You’ll discover easy-to-follow ideas and expert tips to transform your memories into a cherished keepsake.
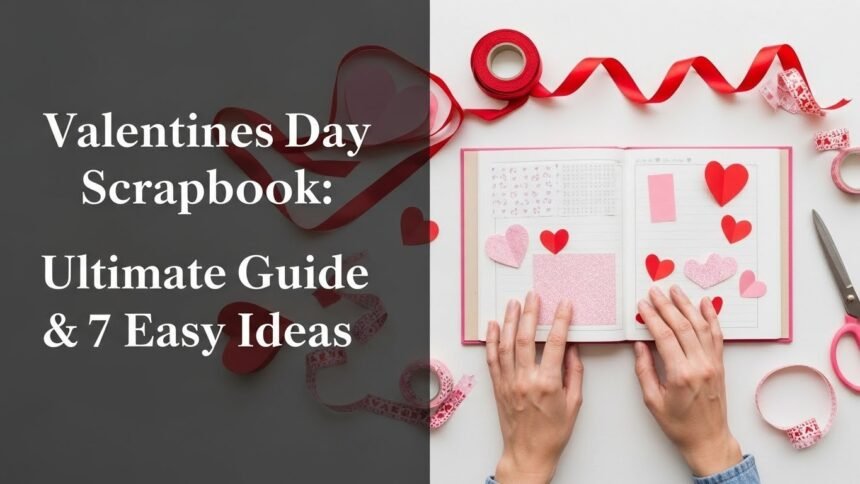
Unleash Your Creativity: Crafting the Perfect Valentine’s Day Scrapbook for 2026
Creating a valentines day scrapbook is more than just a craft; it’s an intimate journey through shared memories, culminating in a deeply personal and heartfelt gift. For 2026, ditch the impersonal and embrace the power of a handmade sentiment. This comprehensive guide caters to anyone looking to craft a unique DIY valentine album, whether you’re a seasoned scrapbooking enthusiast or a beginner seeking an easy entry into the world of creative gift-giving. We’ll explore various romantic memory book concepts, providing you with inspiration and practical steps to ensure your project is a success, resulting in a cherished keepsake that truly documents your love story.
7 Easy Valentine’s Day Scrapbook Ideas for 2026
Embarking on a valentine’s day scrapbooking project doesn’t have to be daunting. This section offers a curated collection of easy valentine scrapbook ideas, each designed to inspire and guide you in creating a unique, personalized gift. From interactive designs to narrative-driven albums, these concepts will help you express your affection in a tangible way. We’ll walk you through distinct approaches, focusing on both the aesthetic and emotional impact, ensuring you find the perfect project to celebrate your relationship this 2026. Get ready to transform your cherished photos and memories into a beautiful love scrapbook.
1. Create an Interactive Mini Explosion Box Scrapbook
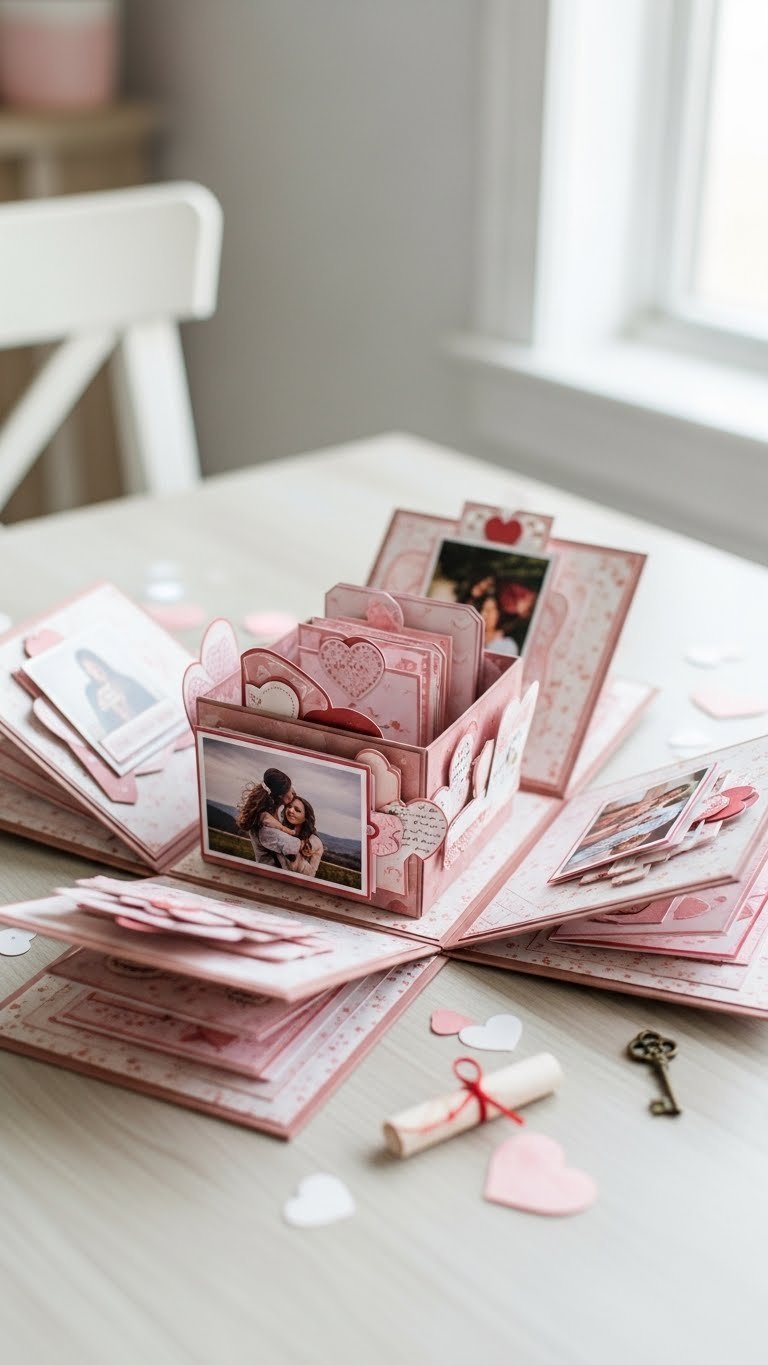
Pin this genius interactive idea to your “DIY Valentine’s Day Gifts” board!
For a truly surprising and engaging gift, consider crafting an interactive valentine’s day album in the form of a mini explosion box. This creative valentine craft opens up to reveal multiple layers of photos, hidden notes, and tiny embellishments, making it a delightful way to present cherished memories. It’s a small but mighty scrapbook that offers a high “wow” factor, allowing you to arrange photos and include embellishments in an unexpected and charming format.
Supplies Needed
- Heavy-duty cardstock (12×12 inches, 65lb or 176gsm) in romantic colors like ruby red, blush pink, or cream
- Decorative pattern paper (acid-free, lignin-free) with small Valentine’s Day motifs
- Assorted miniature embellishments: tiny faux flowers, small heart stickers, glitter tape
- Small photos (1.5×1.5 inches to 2×2 inches)
- Double-sided adhesive tape (acid-free, extra strong)
- Craft glue suitable for paper (quick-drying)
- Ruler and scoring board for precise folds
- Craft knife or paper trimmer
- Bone folder for crisp creases
- Ribbon (1/4 inch wide, satin or grosgrain) for tying the box
Step-by-Step Directions
- Prepare the Base: Cut an 11.5×11.5 inch square from your heavy-duty cardstock. Score at 3 3/4 inches and 7 3/4 inches on all four sides. Trim the corner squares to create tabs, forming the base of your explosion box.
- Add Inner Layers: Cut two more squares, 9.5×9.5 inches and 7.5×7.5 inches. Score and fold them similarly, trimming corners, ensuring each layer is slightly smaller than the last.
- Decorate Panels: Before assembling, adhere decorative paper to each panel of your base and inner layers. Cut small squares of pattern paper (e.g., 3.5×3.5 inches) for the larger panels.
- Attach Photos & Embellishments: Arrange and glue your small photos onto the decorated panels. Add miniature embellishments like heart stickers, tiny pull-out tags, and faux flowers for visual interest.
- Assemble the Box: Glue the tabs of each layer together to form the nested boxes. Stack them, securing the smallest box inside the next larger one, and so on.
- Create a Lid: Cut a 6×6 inch square from cardstock for the lid. Score at 1.5 inches on all four sides. Trim and glue the tabs to form the lid.
- Final Touches: Add a ribbon around the assembled box base, tying it into a bow to keep the box closed. Write small “love notes” on hidden tags.
Pro-Tip: For the cleanest folds on your explosion box, always use a scoring board and a bone folder. This prevents cracking in the cardstock and ensures your box opens and closes smoothly, showcasing “top-tier craftsmanship valentine’s.”

2. Design a “Reasons Why I Love You” Journal Scrapbook
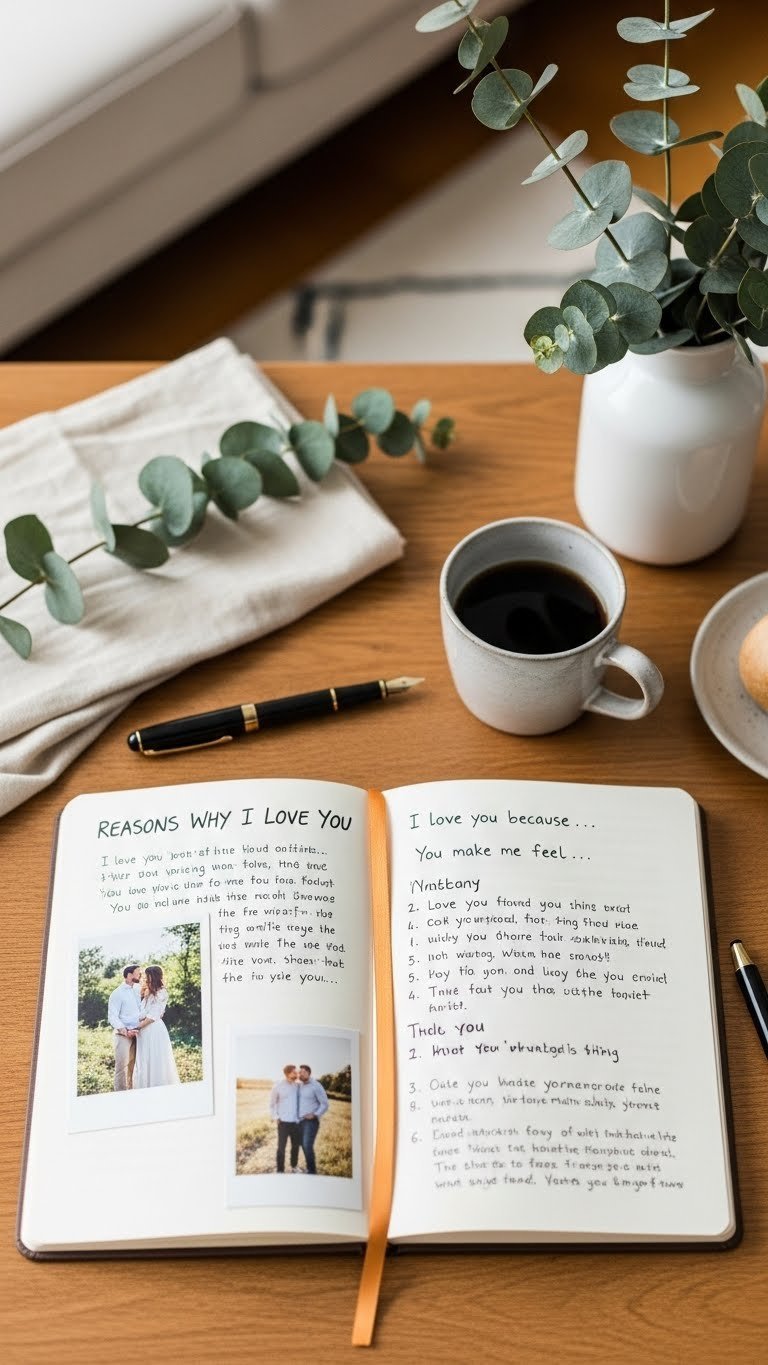
Save this heartfelt journal idea for a truly personal Valentine’s gift!
For a deeply sentimental and personalized love journal, create a “Reasons Why I Love You” scrapbook. This romantic journal focuses on articulating your feelings, combining thoughtful journaling with cherished photos. It’s an opportunity to connect memories with specific sentiments and allows for profound personalization, expressing affection through your own words. This approach is perfect for those who want to delve into the narrative and emotional aspects of their relationship.
Supplies Needed
- Blank, unlined journal or a small binder with quality paper inserts (kraft paper or thick cream stock, at least 100gsm)
- Acid-free fine-tip pens (various colors: black, red, gold)
- Small photos (instax prints, wallet-sized, or printed digital photos)
- Washi tape in romantic patterns (hearts, stripes, subtle florals)
- Small stickers and die-cuts (hearts, arrows, “love” script)
- Stencils for decorative borders or lettering
- Craft glue stick or photo corners for adhering photos
- Optional: Small envelopes or pockets for hidden notes
Step-by-Step Directions
- Choose Your Format: Select a journal that suits your style – a rustic kraft journal, an elegant linen-bound book, or a customizable binder.
- Brainstorm Reasons: Dedicate time to listing all the reasons you love your partner. Think about shared memories, unique qualities, inside jokes, and daily affirmations.
- Section Your Journal: Decide if you want a reason per page, per spread, or grouped by theme (e.g., “His Smile,” “Our Adventures”). Use a pencil to lightly mark sections.
- Write Your Sentiments: On each dedicated section or page, write down your “reasons why.” Vary your handwriting style, use different colored pens, or incorporate small doodles.
- Integrate Photos: Select photos that visually complement your written reasons. Adhere them with photo corners or washi tape next to the corresponding text.
- Add Embellishments: Use washi tape to create borders, add small heart stickers around text, or tuck tiny love notes into pockets. Stencils can add decorative flair.
- Create a Title Page: Design a cover or first page that clearly states “Reasons Why I Love You, [Partner’s Name]” with elegant lettering and a favorite couple photo.
Pro-Tip: Don’t feel pressured for every page to be perfect. The authenticity and raw emotion of your handwritten thoughts are what truly make this “sentimental album” special, more so than perfect adherence to design rules. “Experiential design in memory albums” focuses on the feeling it evokes.

3. Assemble a Vintage Romance Keepsake Album
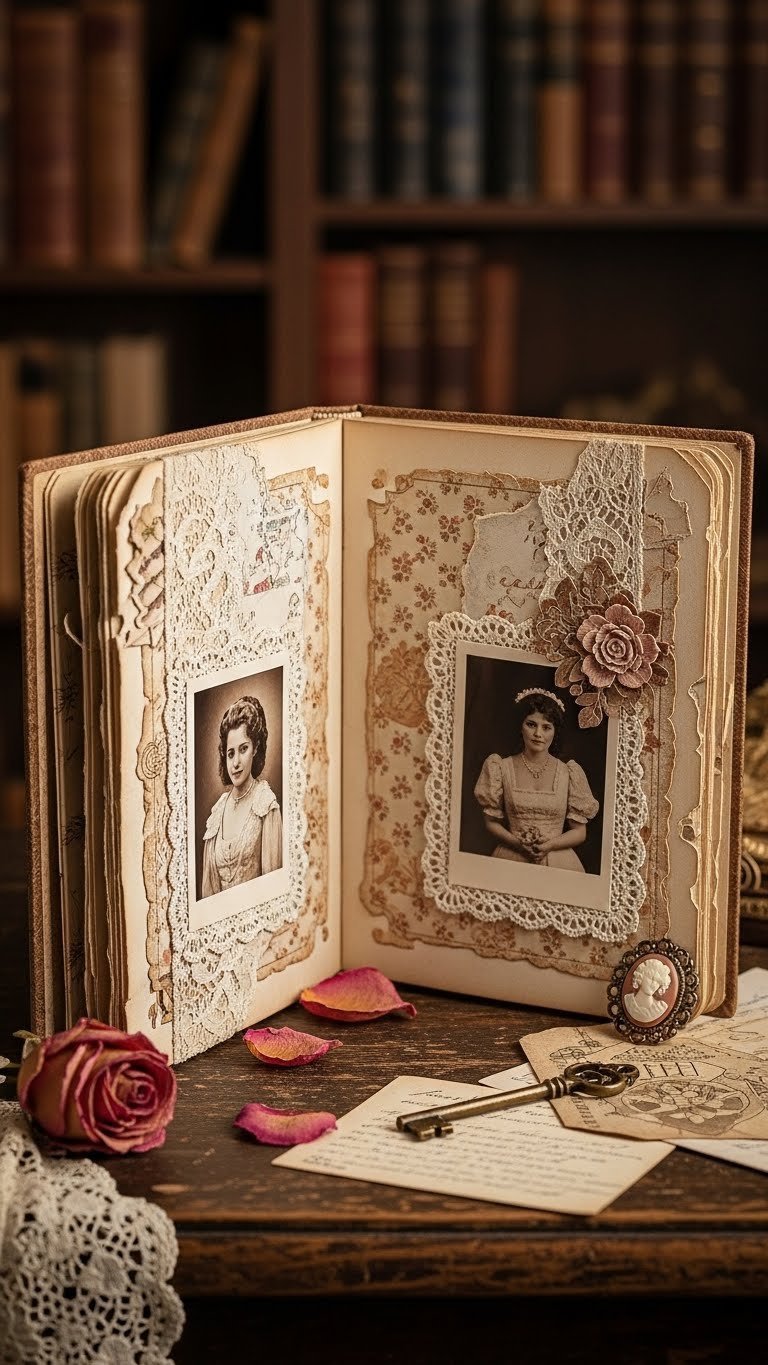
Pin this elegant vintage album idea to your “Timeless Valentine’s Crafts” collection!
For a gift that feels like a cherished heirloom, create a vintage romance keepsake album. This elegant valentine scrapbook design allows you to preserve moments with a distinct, antique-inspired aesthetic. By utilizing aged paper effects, ephemera, and distressed elements, you can document your love story with a touch of historical charm. The focus here is on material selection and techniques that evoke a sophisticated, timeless feel, showcasing professional scrapbook design for love.
Supplies Needed
- Scrapbook album with a neutral cover (e.g., linen, brown kraft, or dark faux leather)
- Vintage-style scrapbook paper (sepia tones, subtle florals, damask patterns, script text)
- Acid-free white cardstock for photo mats (80lb or 216gsm)
- Photos (black and white or sepia-toned prints work best for effect)
- Lace trim (delicate, antique-style)
- Ephemera: old buttons, small antique keys, dried pressed flowers, postage stamps, old ticket stubs
- Distress ink pads (vintage photo, walnut stain, frayed burlap colors)
- Sponges or daubers for applying distress ink
- Craft glue (PVA or strong tacky glue)
- Double-sided tape
- Scissors with decorative edges (optional)
Step-by-Step Directions
- Prepare Your Papers: Lightly distress the edges of your vintage scrapbook paper and white cardstock photo mats using distress ink and a dauber. This creates an aged, worn look.
- Select & Tone Photos: Choose photos that resonate with a romantic, timeless feel. Convert color photos to sepia or black & white before printing for a cohesive vintage aesthetic.
- Layout Design: Arrange photos onto the distressed cardstock mats. Play with overlapping elements and slightly askew placement to enhance the vintage, lived-in feel.
- Adhere Backgrounds: Glue your prepared vintage papers onto the scrapbook pages, using a mix of patterns and textures.
- Layer Embellishments: Attach photos to their mats, then layer with lace trim, ephemera, and other small antique elements. Secure with craft glue, ensuring a variety of textures.
- Add Journaling: Handwrite short, poetic captions or quotes in a vintage-style script. You can use a dark brown or sepia-toned ink pen.
- Final Touches: Add a subtle final distressing to the entire page composition to unify all elements.
Pro-Tip: Collect genuine “ephemera in valentine scrapbooking” from flea markets or antique shops. A small, aged postcard or an old handwritten recipe card can add incredible authenticity and “semantic connections love scrapbooking” that manufactured items can’t replicate.

4. Craft a Long-Distance Love Map Scrapbook
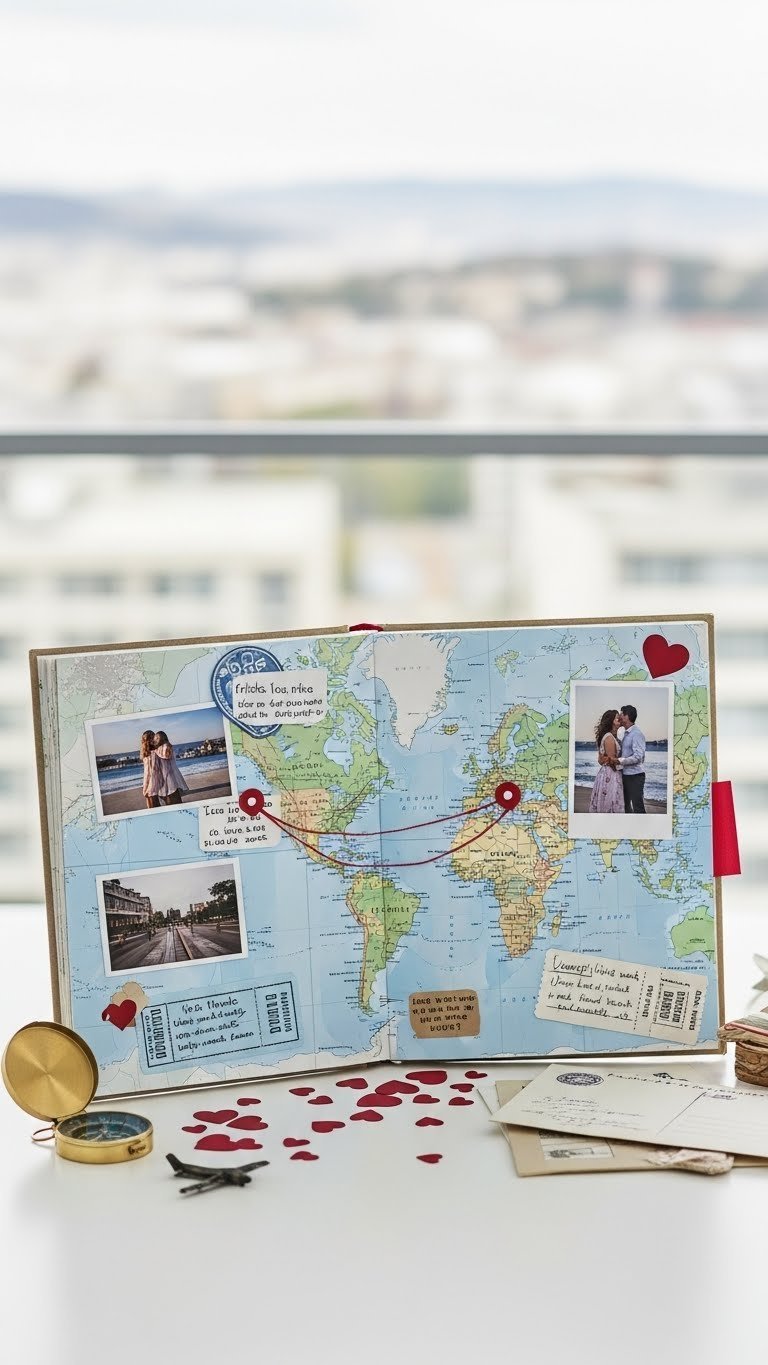
Inspire wanderlust and love! Pin this long-distance scrapbook idea!
For couples navigating distance, a long-distance love map scrapbook is one of the most meaningful Valentine’s Day scrapbook ideas. This relationship scrapbook uses maps, photos, and ticket stubs to document your love story across geographical locations. It’s a powerful way to celebrate your connection despite the miles, showcasing your shared journeys and future aspirations. This creative project makes for a deeply touching personalized gift.
Supplies Needed
- Scrapbook album with sturdy pages
- World map or country map scrapbook paper (acid-free)
- Photos of places visited together, or photos from each person’s location
- Red embroidery floss or thin red ribbon
- Small push pins or brads with heart-shaped tops
- Ticket stubs, postcards, airplane charms, or other travel memorabilia
- Fine-tip black pen for journaling and drawing lines
- Alphabet stickers or stamps for titles and location names
- Craft glue and double-sided tape
Step-by-Step Directions
- Choose Your Maps: Select a world map or maps of specific countries/states relevant to your relationship (where you live, where you’ve met, places you plan to visit).
- Base Pages: Adhere the chosen map paper to your scrapbook pages, making it the central feature. You can cut out specific continents or whole countries.
- Mark Your Locations: Use push pins or brads to mark your respective current locations on the map, and any significant places you’ve visited together.
- Connect the Dots: Use red embroidery floss or ribbon to create lines connecting the marked locations on the map, symbolizing your connection. Secure with glue or tiny tape dots.
- Integrate Photos: Around the map, place photos from each location or from your visits. Label them with alphabet stickers or neat handwriting.
- Add Memorabilia: Incorporate ticket stubs, postcards, or small charms that represent your journeys or future travel plans.
- Journal Your Hopes: Write captions about past visits, future dreams, and the strength of your long-distance bond. Use phrases like “miles apart, but always in my heart.”
Pro-Tip: Consider printing “digital valentine scrapbook ideas” as small images of flight paths or city skylines to layer onto your map pages, enhancing the “visual hierarchy in scrapbook design” and the long-distance theme.

5. Create a Photo Booth Strip Memory Album
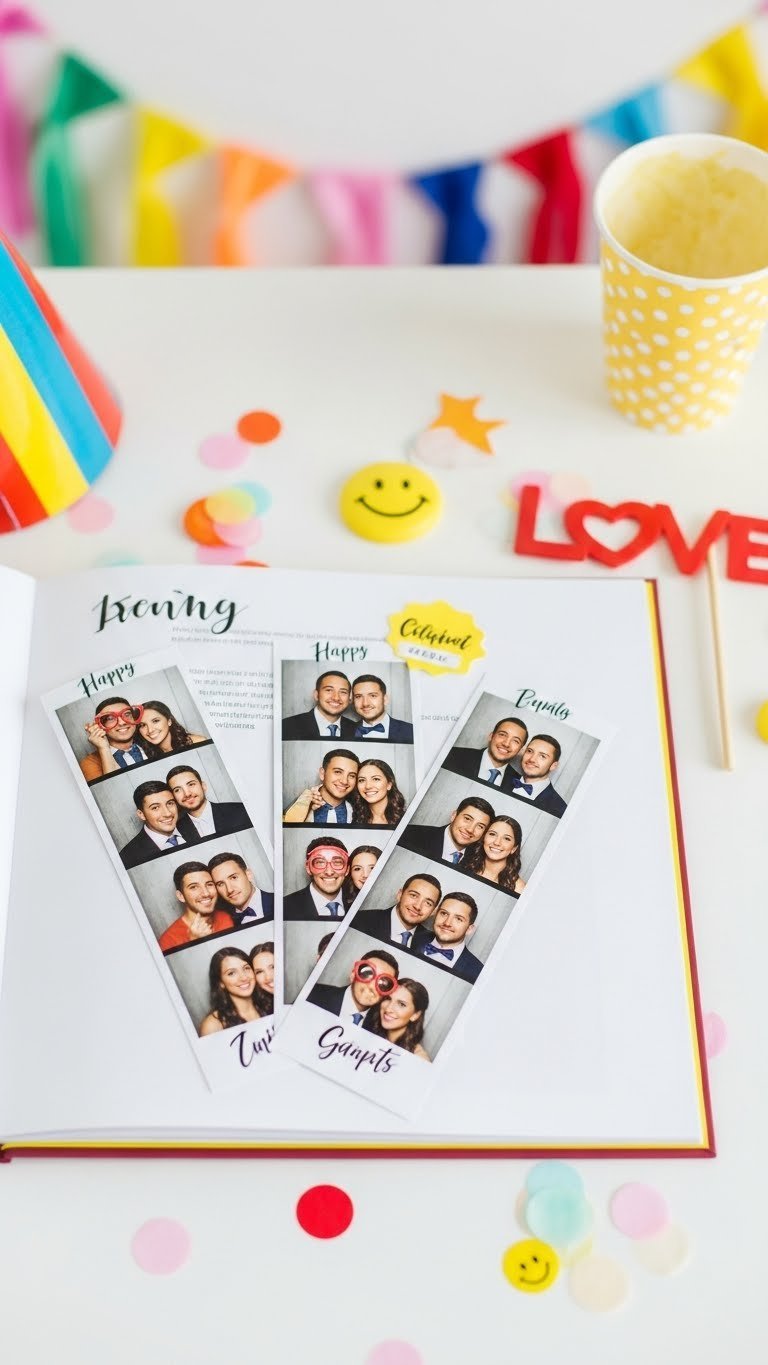
Click to save this fun and quirky photo booth album idea!
Capture the spontaneous joy of your relationship with a photo booth strip memory album. This unique photo album scrapbook showcases your journey and captures milestones through a collection of fun, candid images. It’s one of the cutest Valentine scrapbook ideas, focusing on shared memories and joy in a dynamic visual format. This album is a fantastic way to display your pictures and memories with a playful, lighthearted design.
Supplies Needed
- Scrapbook album with black or white pages (to make photos pop)
- Assorted photo booth strips (real ones or printed digital photos formatted as strips)
- White gel pen or fine-tip silver/gold marker for journaling
- Small, playful stickers (speech bubbles, little hearts, stars)
- Washi tape in bright, cheerful patterns
- Photo-safe adhesive (glue dots or acid-free glue stick)
- Optional: Small die-cut cameras or film reel shapes
Step-by-Step Directions
- Gather Your Strips: Collect all your physical photo booth strips. If you don’t have many, format and print digital photos (4-5 per strip) to mimic the look.
- Choose a Background: Opt for black or white scrapbook pages to create a stark contrast that makes your photo strips truly stand out.
- Arrange & Overlap: Experiment with arranging the strips on your pages. Try overlapping them slightly, creating a fan effect, or arranging them diagonally.
- Adhere Securely: Use glue dots or a glue stick to firmly attach the photo booth strips to the pages.
- Add Playful Captions: Use a white gel pen or metallic marker to add short, witty captions next to or on the strips themselves. Think about the moment each photo captures.
- Embellish Lightly: Add small, playful stickers like speech bubbles or tiny hearts. Use thin strips of washi tape as borders or accents.
- Create a Title: Use alphabet stickers to spell out a fun title for your album, such as “Our Silly Moments” or “Love in Frames.”
Pro-Tip: If you don’t have actual photo booth strips, use a free online photo editor to combine 3-4 candid photos into a vertical strip format. Print these on glossy photo paper for a realistic effect, enhancing the “creative valentine’s day album” feel.

6. Curate a “Story of Us” Timeline Scrapbook
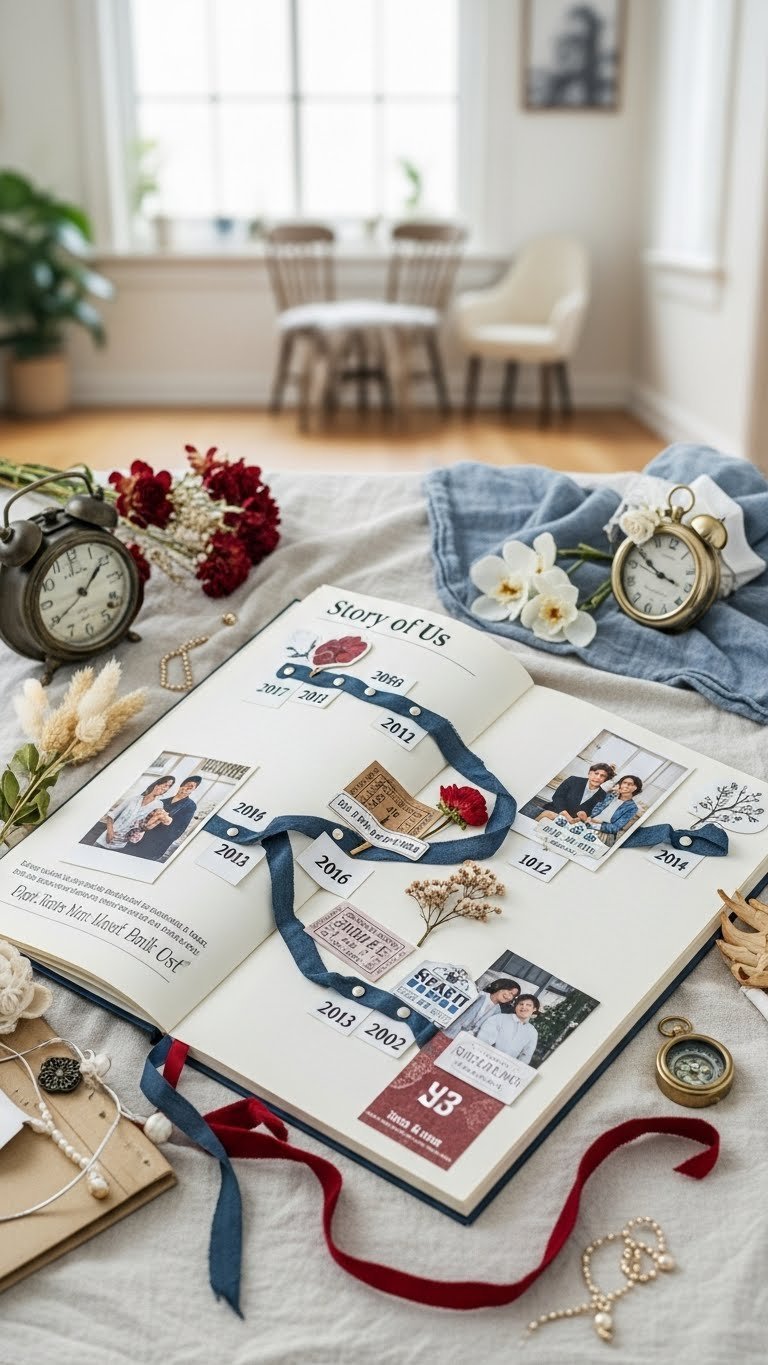
Capture your journey! Pin this romantic timeline scrapbook to your “Relationship Goals” board!
To narrate the beautiful progression of your bond, a “Story of Us” timeline scrapbook is an ideal choice. This love story album documents your relationship’s journey by capturing milestones in a chronological narrative. It’s a profound way to preserve moments, highlighting key events from your first meeting to your most recent adventures. This approach provides a structured yet deeply personal way to celebrate relationship growth, emphasizing storytelling in Valentine’s Day scrapbooks.
Supplies Needed
- Large scrapbook album (12×12 inches recommended for space)
- Assorted scrapbook papers in complementary colors (e.g., neutral tones with pops of red/pink)
- Photos from different stages of your relationship
- Ruler and pencil for drawing timeline
- Fine-tip black pen for dates and journaling
- Thin ribbon, twine, or decorative border stickers to create the timeline line
- Date stamps or small number stickers
- Small memorabilia: concert tickets, movie stubs, dried flowers, small handwritten notes
- Photo-safe adhesive (glue runner, acid-free glue stick)
- Optional: Small charms representing milestones (e.g., key, heart)
Step-by-Step Directions
- Gather Your Memories: Collect photos and mementos from key relationship milestones (first date, anniversary, vacations, moving in together, engagements, etc.). Organize them chronologically.
- Plan Your Layout: For each double-page spread, envision a timeline running across the pages. You can have a straight line, a wavy line, or a ribbon that meanders.
- Draw the Timeline: Lightly sketch your timeline with a pencil. Use ribbon or decorative stickers to create the actual line.
- Mark Milestones: Place your date stamps or write the dates of significant events along the timeline.
- Add Photos & Mementos: Arrange photos and small memorabilia around their corresponding dates on the timeline. Overlap some elements to create depth.
- Journal Your Story: Write short, heartfelt captions describing each milestone, how you felt, or what made that moment special.
- Create Section Titles: Use alphabet stickers or decorative handwritten titles for different chapters of your story (e.g., “The Beginning,” “Our Adventures,” “Forever & Always”).
Pro-Tip: Don’t just focus on big events. Include small, everyday moments that show the growth of your “relationship scrapbook.” A photo of a cozy night in or a silly screenshot can be just as impactful in “capturing milestones” as a major vacation photo.

7. Build a Beginner-Friendly DIY Scrapbook Kit
Start your scrapbooking journey! Pin this beginner-friendly kit idea!
For those new to crafting or seeking a straightforward project, building a beginner-friendly DIY scrapbook kit is an excellent approach. This method focuses on providing all the craft supplies needed to start a scrapbooking project, making it an easy valentine scrapbook for novice crafters. It takes the guesswork out of selecting scrapbook supplies, ensuring a cohesive theme and a smooth crafting experience for anyone asking how to start a Valentine’s Day scrapbook.
Supplies Needed
- Blank mini scrapbook album (8×8 or 6×6 inches, with at least 20 acid-free pages)
- Coordinated pack of Valentine’s Day themed scrapbook paper (6×6 or 8×8 inches, various patterns)
- Assorted sticker sheets (heart shapes, romantic phrases, alphabet letters)
- Die-cut shapes (e.g., small hearts, flowers, banners)
- Photo-safe adhesive (glue runner or glue dots for easy application)
- Fine-tip black journaling pen (acid-free)
- Small pair of craft scissors (optional, for custom cutting)
- Optional: A few pieces of thin ribbon or twine
Step-by-Step Directions
- Choose a Base Album: Select a small, pre-bound album. This eliminates the need for binding and provides a structured starting point. Look for albums labeled “acid-free” and “archival safe.”
- Select Coordinated Paper: Find a pack of scrapbook paper that has a consistent Valentine’s Day theme and color palette. This ensures all your pages will look cohesive without much effort.
- Gather Embellishments: Pick out sticker sheets and die-cuts that match your paper theme. For beginners, simple peel-and-stick options are best.
- Essential Tools: Include a reliable photo-safe adhesive (like a glue runner for clean application) and a fine-tip journaling pen. Small craft scissors are handy but not essential if using pre-cut elements.
- Plan Simple Layouts: Encourage using one to two photos per page, surrounded by patterned paper and a few stickers. The goal is easy, visually appealing pages.
- Assemble the Kit: Place all items neatly into a decorative box or clear bag. Include a small instruction card with basic tips like “Use the glue runner for photos” or “Don’t be afraid to layer!”
- Present as a Gift: This pre-assembled kit is a thoughtful gift for another crafter, or a great way to start your own easy project.
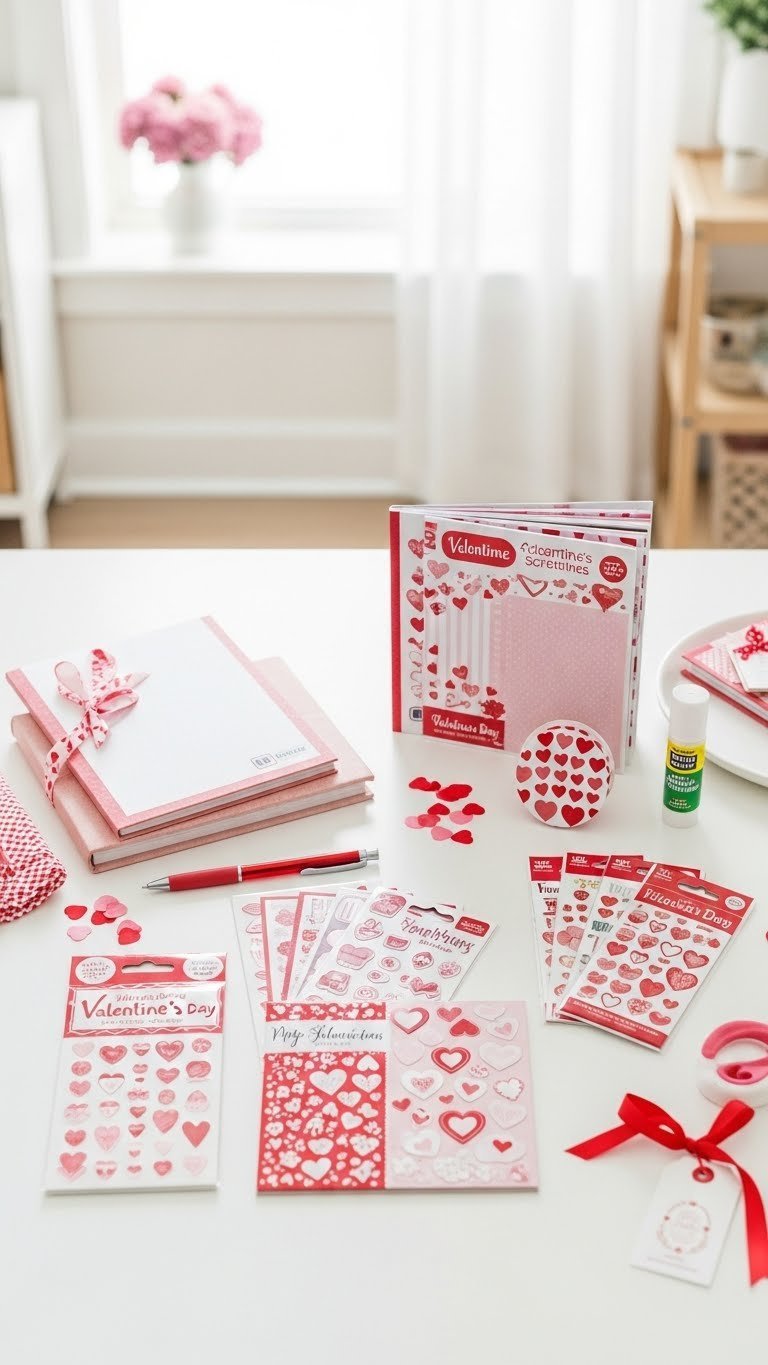
Pro-Tip: When choosing a beginner “scrapbook kit,” prioritize acid-free and lignin-free materials. This ensures that your precious “pictures + memories” won’t degrade or yellow over time, demonstrating “archival quality valentine albums” and “crafting precision for valentines.”

FAQs About Valentines Day Scrapbook
What to put in a Valentine’s Day scrapbook?
A Valentine’s Day scrapbook typically includes photos of cherished moments, handwritten love notes, significant dates, small mementos like ticket stubs, and decorative elements such as stickers and die-cuts. Personalize it with reasons you love your partner, inside jokes, and future dreams to create a truly unique keepsake. Focus on items that evoke shared memories and emotional connection.
How to make a Valentine’s Day scrapbook for beginners?
Beginners should start with a pre-made mini album or a simple binder, gather a coordinated Valentine’s Day scrapbook kit with themed papers and stickers, and focus on one to two photos per page. Use easy adhesives like glue runners, keep journaling concise, and embrace simple layouts without overthinking perfection. The key is to start small and enjoy the creative process.
What are good Valentine’s Day scrapbook ideas?
Good Valentine’s Day scrapbook ideas range from interactive explosion boxes and “Reasons Why I Love You” journals to vintage romance albums, long-distance love maps, and photo booth strip collections. Consider themes that highlight your unique relationship story, such as a timeline of your journey or a simple album showcasing candid, joyful moments together.
Is a Valentine’s Day scrapbook a good gift?
Yes, a Valentine’s Day scrapbook is an exceptionally good and thoughtful gift, offering a highly personalized and sentimental way to celebrate your relationship. Unlike store-bought items, a handmade “memory book” demonstrates significant effort and love, preserving shared experiences and emotions in a tangible, lasting format that becomes a cherished heirloom.
How to decorate a Valentine’s Day scrapbook?
Decorate a Valentine’s Day scrapbook using themed paper, heart-shaped stickers, romantic die-cuts, delicate lace, glitter tape, and personal mementos like dried flowers or ticket stubs. Vary textures and layers, incorporate handwritten journaling, and use acid-free materials to ensure longevity. Keep embellishments proportionate to your page size for a balanced look.
What paper is best for Valentine’s Day scrapbooking?
The best paper for Valentine’s Day scrapbooking is acid-free and lignin-free cardstock or patterned paper, typically ranging from 65lb (176gsm) to 80lb (216gsm). These qualities prevent yellowing and degradation of photos and other elements over time, ensuring your “love album” remains vibrant. Choose romantic colors like reds, pinks, creams, and whites.
How much does a Valentine’s Day scrapbook cost?
The cost of a Valentine’s Day scrapbook can vary widely, from $20-$50 for a basic DIY kit up to $100+ for projects using premium supplies, a high-quality album, and extensive embellishments. Factors include the album type, paper quality, number of embellishments, and whether you print photos at home or professionally. Budget-friendly options are easily achievable.
What kind of pictures to use for a Valentine’s Day scrapbook?
Use a variety of pictures for a Valentine’s Day scrapbook, including candid shots, posed portraits, photos from significant dates or trips, and even silly selfies. Include images that evoke strong positive memories, reflect your partner’s personality, and capture the essence of your shared journey. Consider printing photos in black and white or sepia for a vintage feel.
How to personalize a Valentine’s Day scrapbook?
Personalize a Valentine’s Day scrapbook by incorporating handwritten letters, private jokes, inside references in captions, and memorabilia unique to your relationship. Include specific dates and locations of significant events, use colors and themes relevant to your partner’s preferences, and add small, meaningful tokens like a dried flower from a special occasion.
What tools do I need for Valentine’s Day scrapbooking?
Basic tools for Valentine’s Day scrapbooking include a good pair of craft scissors, photo-safe adhesive (glue runner, glue dots, or acid-free glue stick), a paper trimmer or craft knife, and a ruler. A bone folder is useful for crisp creases, while specialized items like a scoring board or die-cutting machine can enhance more complex projects.
Key Takeaways
Creating a valentines day scrapbook is more than just a craft project; it’s an act of love, a tangible expression of affection that preserves precious memories. This “ultimate guide” has offered “7 easy ideas” to inspire you, from intricate explosion boxes to heartfelt “Reasons Why I Love You” journals, each designed to capture the unique essence of your relationship. By focusing on personalization, thoughtful material selection, and embracing the joy of the creative process, you’re not just assembling pages—you’re curating a “romantic memory book” that tells your unique “love story album” for 2026 and beyond.
Remember that the most valuable part of any DIY valentine album isn’t perfection, but the effort and emotion poured into its creation. Whether you’re a seasoned crafter or a beginner looking for a sentimental gift, the process to design scrapbook pages is an opportunity to reflect on cherished moments and strengthen your bond. We’ve equipped you with “expert scrapbooking techniques valentine’s” and solutions to common challenges, ensuring your project is both enjoyable and rewarding.
So, gather your photos, choose your favorite idea, and start crafting a “heartfelt memory album” that will be treasured for years to come. Which of these “easy valentine scrapbook” ideas will you create first for your loved one this Valentine’s Day?
Last update on 2026-01-18 / Affiliate links / Images from Amazon Product Advertising API