Do you ever feel a pang of longing for a truly unique, handmade gift that expresses your affection more than anything bought from a store? Crafting a personalized valentines day watercolor creation can seem daunting if you’re not a seasoned artist, leaving you searching for fresh ideas.
Creating stunning, easy, and personalized Valentine’s Day watercolor art involves choosing simple designs, utilizing beginner-friendly techniques like washes and resist, and gathering basic supplies like watercolor paper and paint. This approach helps even novices craft beautiful cards and gifts for loved ones. Leveraging tested frameworks and data-driven insights from current artistic trends, this guide offers 11 proven ways to infuse your Valentine’s Day with heartfelt, artistic charm. You’ll discover accessible techniques and practical tips to create memorable watercolor gifts this 2026.
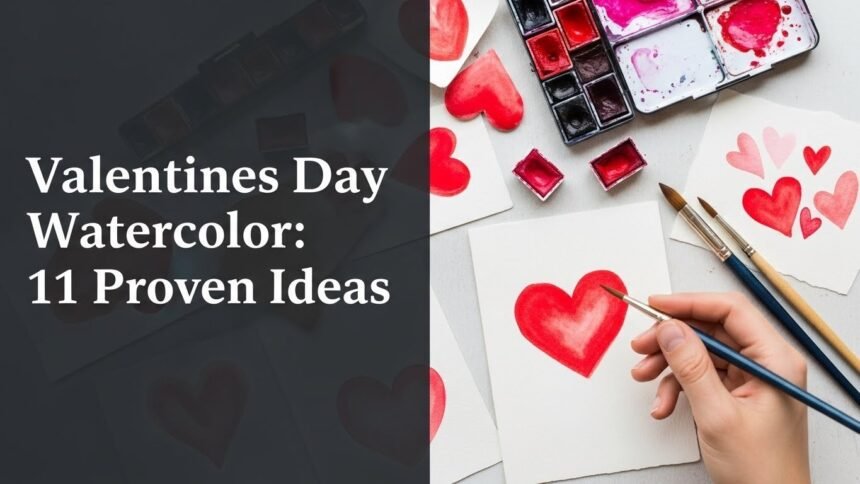
Valentines Day Watercolor: 11 Proven Ideas to Design & Create in 2026
Ready to create watercolor valentine cards and other artistic treasures this Valentine’s Day? This comprehensive guide provides easy watercolor valentine ideas, breaking down each project into simple, actionable steps. You’ll learn to paint valentine art that’s both beautiful and personal, perfect for celebrating love. These creative watercolor valentines focus on accessible techniques for every skill level.
1. Paint Simple Watercolor Hearts

Pin this classic heart design to your “Valentines Day DIY” board for easy inspiration!
Simple heart designs are an ideal starting point for anyone exploring watercolor for valentines. These watercolor heart designs are perfect for beginners, offering a straightforward way to create charming, personalized elements for cards or small art pieces. With just a few basic supplies and an understanding of simple watercolor techniques, you can craft beautiful symbols of affection. This approach is ideal for beginners, ensuring you can create cards with ease using basic watercolor paper.
Supplies Needed
- Student-grade watercolor paint set (non-toxic, vibrant reds, pinks, and purples)
- Cold press watercolor paper (140 lb / 300 gsm, specifically designed to prevent warping)
- Round watercolor brushes (sizes 6 and 8, for fine lines and washes)
- Clean water in two containers (one for rinsing, one for clean water)
- Paper towels or a sponge for blotting brushes
- Pencil and eraser for light sketching
Step-by-Step Directions
- Prepare your paper: Lightly sketch various heart outlines on your watercolor paper using a pencil. Keep them simple, focusing on different sizes and orientations.
- Mix your colors: Squeeze small amounts of red, pink, and purple watercolor onto your palette. Add a drop of water to each to create a creamy consistency.
- Paint basic hearts: Dip your size 8 brush into a color and fill in a heart shape using even strokes. For solid hearts, ensure the paint is wet enough to flow smoothly.
- Create gradient hearts: For another heart, apply a darker shade to one side and quickly blend it with a lighter shade or clean, damp brush towards the other side before the paint dries.
- Develop layered hearts: Once the first layer of a heart is completely dry, use a slightly darker, more concentrated wash of the same color to add a second layer, creating depth.
- Add detailing: With your size 6 brush, add small dots, dashes, or outlines around some hearts for extra visual interest, using a contrasting or darker shade.
- Let dry: Allow all your painted hearts to dry completely. Avoid rushing the drying process to prevent smudging or muddy colors.
* > Pro-Tip: To achieve smooth, blended hearts, ensure your brush is adequately loaded with paint and water. Work quickly when blending, especially with a “wet-on-wet watercolor technique” to prevent harsh lines as the paint dries.

2. Create Watercolor Floral Cards

Capture the beauty! Pin this floral card idea to your “Handmade Valentines” board!
Adding delicate floral elements to your Valentine’s Day cards elevates them with a touch of elegance and romance. These watercolor floral cards are perfect for conveying heartfelt messages. You can illustrate flowers using simple brushstrokes to create beautiful watercolor effects, even if you’re new to painting. This method complements card making perfectly, using readily available cardstock and watercolor paint to achieve stunning results.
Supplies Needed
- Watercolor paper folded into cards (pre-cut or folded 140 lb / 300 gsm paper)
- Watercolor paint set (various pinks, reds, and green hues)
- Small round brush (size 4 or 6 for petals)
- Fine liner brush (size 1 or 2 for stems and details)
- Clean water and paper towels
- Pencil for light guide lines (optional)
Step-by-Step Directions
- Fold your card: If using plain watercolor paper, fold it in half to create your card base.
- Paint a basic rose: On your card, use a pink or red watercolor to paint a loose C-shape for the center of the rose. Add more C-shapes around it, rotating your brush slightly to build layers of petals.
- Add abstract blossoms: For simple flowers, create irregular blobs of color in pinks and reds. While wet, drop a darker shade into the center and let it bleed for a natural look.
- Create leafy sprigs: With green paint, use the tip of your fine liner brush to make small, elongated leaf shapes coming off a thin stem. Vary the pressure for different leaf sizes.
- Blend and layer: Allow initial layers to dry slightly, then add a second, more concentrated layer of color for depth, especially in the centers of flowers.
- Detailing: Once dry, use a fine liner brush with a darker color to add tiny dots or veins to the leaves and flower centers, if desired.
- Final Touches: Let your floral card dry completely before writing your message inside.
* > Pro-Tip: For effortless flower shapes, practice with just your brush and water on scrap paper. Focus on varied pressure to create natural-looking petals, embracing the spontaneity that “mastering watercolor spontaneity” offers.

3. Design Watercolor Love Lettering

Add a personal touch! Pin this watercolor lettering idea to your “Creative Card Making” board!
Custom watercolor messages add a deeply personal touch to any Valentine’s Day creation. Designing watercolor love lettering allows you to combine artistic expression with heartfelt words. This technique uses watercolor and calligraphy pens (or even fine-tip pens) to create artistic valentine creations that truly stand out. You can create custom watercolor cards with elegant lettering even without advanced calligraphy experience.
Supplies Needed
- Watercolor paper or cardstock
- Watercolor paint set (pick a few complementary colors like pink, red, and a touch of gold/yellow)
- Small round brush (size 2 or 4)
- Pencil and eraser
- Fine-tip waterproof pen (e.g., Micron pen, 0.3mm or 0.5mm)
- Clean water and paper towels
Step-by-Step Directions
- Sketch your word: Lightly sketch your chosen word (e.g., “Love,” “XOXO,” “Valentine”) onto your paper using a pencil. You can use a simple block letter style or a faux calligraphy approach (thickening downstrokes).
- Outline with pen (optional): For crisp edges, carefully trace your pencil sketch with a waterproof fine-tip pen. Let the ink dry completely before proceeding. (You can also skip this step for a softer, more blended look).
- Apply watercolor wash: Dip your small round brush into clean water, then load it with a light wash of your chosen watercolor color. Carefully fill in the sketched or inked letters.
- Create a gradient (optional): While the first wash is still wet, drop a slightly darker shade of the same color (or a complementary color) into parts of the letter (e.g., the bottom of each stroke) and let the colors blend naturally.
- Layer for depth: Once the first layer is dry, you can add another, more concentrated layer of color to create darker areas or shadows within your letters.
- Remove pencil lines: Once completely dry, gently erase any visible pencil lines if you didn’t use a pen outline.
- Finalize: Your watercolor lettering is now complete and ready to be part of a card or stand-alone art.
* > Pro-Tip: If you’re new to lettering, start with a simple block font and use a pencil to map out where you want to add wider strokes for a faux calligraphy effect. This “beginner watercolor tutorial” method simplifies “advanced composition rules.”

4. Try Watercolor Resist Technique

Uncover the magic! Pin this resist technique to your “Watercolor Experiment” board!
The watercolor resist technique is a fun and simple method to create unique watercolor designs for Valentine’s Day. By applying masking fluid or even a white wax crayon, you can preserve areas of your paper, creating crisp patterns when you paint over them. This approach results in unique watercolor designs that feature heart motifs or heartfelt messages. It’s an easy watercolor valentine method that yields striking results.
Supplies Needed
- Watercolor paper (140 lb / 300 gsm)
- Watercolor paint set (bright reds, pinks, purples)
- Wide flat brush or a large round brush for washes
- White wax crayon or a masking fluid pen
- Clean water and paper towels
Step-by-Step Directions
- Draw your design: Using a white wax crayon or masking fluid pen, draw your Valentine’s Day design (hearts, “LOVE” letters, XOXO) onto the watercolor paper. Press firmly if using a crayon to ensure good wax transfer. If using masking fluid, allow it to dry completely.
- Prepare your wash: Mix a generous amount of watercolor paint with water to create a light to medium wash in your chosen Valentine’s colors.
- Apply the wash: Using your wide brush, paint a broad, even wash over your entire paper, covering your wax or masking fluid design. The watercolor paint will repel the wax/fluid, leaving your design in white or the paper’s original color.
- Layer colors (optional): While the first wash is still wet, you can drop in a second, darker color in some areas for a blended, gradient effect.
- Dry completely: Allow the watercolor to dry fully. If you used masking fluid, gently rub it off with your finger or a rubber eraser to reveal the crisp white design underneath.
* > Pro-Tip: When using a wax crayon, ensure your paper is completely dry beforehand. For masking fluid, apply it with a tool you don’t mind getting stained, like an old brush, and remove it within 24 hours to prevent damage to your paper, addressing “difficult watercolor techniques.”

5. Make Watercolor Galaxy Cards

Reach for the stars! Pin this cosmic card idea to your “Unique Valentine Art” board!
Creating watercolor galaxy cards is a captivating way to express boundless affection. This romantic watercolor painting technique creates unique designs with swirling colors and twinkling stars, perfect for a heartfelt Valentine’s message. You can create unique designs by applying gradient washes with watercolor paint, inspired by romance and cosmic beauty. This method showcases beautiful watercolor effects and offers fantastic watercolor design tips.
Supplies Needed
- Watercolor paper (140 lb / 300 gsm), folded into a card or as a standalone piece
- Watercolor paint set (deep blues, purples, black, and a touch of pink/magenta)
- Round watercolor brushes (medium and small)
- White acrylic paint or opaque white ink (for stars)
- Old toothbrush or stiff brush (for splattering stars)
- Clean water and paper towels
- Masking tape (optional, to tape down paper edges)
Step-by-Step Directions
- Prepare your workspace: Tape down the edges of your watercolor paper to a board if you want to prevent warping.
- Wet the paper: Using a clean, large brush, apply a generous, even layer of clean water over the entire area you want to be your galaxy. The paper should be glistening wet.
- Apply main colors: While the paper is still wet (wet-on-wet technique), drop in small amounts of your dark blues and purples. Let the colors bleed and blend naturally. Add touches of black for depth and pink/magenta for nebulae effects.
- Encourage blending: Gently tilt your paper to help the colors merge and create organic shapes. Avoid overworking it.
- Let dry (mostly): Allow the watercolor background to dry almost completely, but still slightly damp for best results.
- Add stars: Dip your old toothbrush into white acrylic paint or ink (thinned slightly with water). Point the bristles towards your galaxy and run your thumb across them to splatter fine white dots, creating stars. You can also use a small brush to dot in larger stars.
- Final dry: Let your galaxy card dry completely.
* > Pro-Tip: For truly vibrant and deep galaxy colors, don’t be afraid to use concentrated paint. The “understanding pigment properties” helps you choose colors that blend beautifully, avoiding the common issue of “colors getting muddy.”

6. Paint Cute Watercolor Animals

So adorable! Pin these cute animal ideas to your “Kids Valentine Crafts” board!
Cute watercolor animals make incredibly charming and playful watercolor themes for Valentine’s Day. These designs are suitable for gifts and are particularly popular for children’s watercolor valentine card making activity. By focusing on simple shapes and gentle colors, you can paint valentine art that is both appealing and easy to achieve. These quick watercolor projects are delightful and bring a smile to anyone’s face.
Supplies Needed
- Watercolor paper (140 lb / 300 gsm)
- Watercolor paint set (soft browns, grays, pinks, blues)
- Round brushes (small and medium)
- Fine-tip waterproof pen (optional, for outlines)
- Pencil and eraser
- Clean water and paper towels
Step-by-Step Directions
- Sketch your animal: Lightly sketch a simple, cute animal (e.g., a fox, a rabbit, a teddy bear) on your watercolor paper. Focus on basic shapes like circles and ovals. You can add a small heart for them to hold.
- Outline (optional): For a cleaner look, you can outline your sketch with a waterproof pen. Let it dry completely.
- Apply base colors: Using a light wash of watercolor, fill in the main areas of your animal (e.g., light brown for a fox, gray for a rabbit). Let this first layer dry.
- Add details and shadows: Mix a slightly darker shade of your base color and add subtle shadows or fur texture. Use pink for rosy cheeks or a heart.
- Paint the heart: Fill in any hearts with a vibrant red or pink watercolor.
- Facial features: With a very fine brush or your waterproof pen, carefully add small eyes, a nose, and a mouth.
- Background (optional): Add a very light, soft watercolor wash of a complementary color (like light blue or pink) in the background, carefully avoiding the animal.
* > Pro-Tip: Start with very dilute washes of color for the base of your animals. Watercolor is translucent, allowing you to build up color in layers and correct mistakes more easily. This “learning watercolor foundation” helps overcome “no artistic talent help.”

7. Create Watercolor Landscape Silhouettes

Set the scene! Pin this romantic landscape idea to your “Valentine’s Day Art” board!
For a truly romantic watercolor painting, consider creating watercolor landscape silhouettes. This technique uses dramatic contrast between a vibrant, blended sky and sharp, dark silhouettes to evoke a sense of intimacy and atmosphere. It’s a thoughtful watercolor gift idea that emphasizes atmospheric perspective in watercolor. Using watercolor paint, you can easily set a romantic scene.
Supplies Needed
- Watercolor paper (140 lb / 300 gsm or heavier)
- Watercolor paint set (reds, oranges, yellows, purples for sky; black or very dark blue for silhouette)
- Large flat brush or wash brush for sky
- Small round brush (size 2 or 4) for details and silhouettes
- Pencil for light sketching
- Clean water and paper towels
Step-by-Step Directions
- Sketch your silhouette: Lightly draw your desired silhouette (e.g., a couple, a tree, a simple skyline) on the lower portion of your watercolor paper.
- Prepare for the sky: Wet the upper two-thirds of your paper evenly with clean water.
- Paint the sunset sky: While the paper is wet, apply yellow, then orange, then pink/red watercolors, letting them blend into each other horizontally across the wet surface. Use purple at the very top for depth. Keep the colors vibrant.
- Let the sky dry: Allow the sky portion to dry completely. This is crucial for crisp silhouettes.
- Paint the silhouette: Once the sky is bone dry, load your small round brush with concentrated black or dark blue watercolor paint. Carefully fill in your sketched silhouette, ensuring a solid, opaque color.
- Refine edges: Use a steady hand to create clean edges for your silhouette. You can use a fine-tip brush for intricate areas.
- Final dry: Let the silhouette dry completely before handling.
* > Pro-Tip: For the best gradient sky, work quickly while the paper is wet, allowing the colors to flow seamlessly. Using masking tape to create a crisp horizon line can help “getting clean lines” and simplify the process for beginners.

8. Design Watercolor Abstract Blends

Flow with color! Pin these abstract blends to your “Modern Watercolor Ideas” board!
For those who love expressive painting without rigid forms, designing watercolor abstract blends is a perfect choice. This process allows for beautiful watercolor effects and achieving smooth blends with romantic colors. It emphasizes abstract watercolor art as a creative pursuit, focusing on the natural flow and transparency of the medium. Even for beginners, this method allows for stunning, artistic results.
Supplies Needed
- Watercolor paper (140 lb / 300 gsm or heavier, taped down if prone to warping)
- Watercolor paint set (romantic colors like pink, rose, violet, a touch of peach)
- Large, soft brush (flat or round, for applying water and washes)
- Clean water in a large container
- Paper towels
Step-by-Step Directions
- Prepare your paper: Lay your watercolor paper flat and, using your large, soft brush, thoroughly wet the entire surface with clean water. Ensure it’s evenly saturated and glistening, but without puddles.
- Drop in colors: While the paper is still wet, load your brush with a diluted amount of your first chosen color (e.g., pink) and gently touch it to the wet paper. The color will spread and bloom.
- Add more colors: Immediately introduce your second color (e.g., violet) by touching your loaded brush to another area, allowing it to blend naturally with the first color. Repeat with your third color.
- Encourage blending: You can gently tilt your paper to guide the flow of the colors, or use the tip of a clean, damp brush to subtly swirl them together for seamless transitions.
- Control saturation: If an area is too wet, gently blot your brush on a paper towel and then touch it to the wet pigment on the paper to absorb excess moisture.
- Let it bloom: Avoid overworking the painting. The beauty of abstract blends often comes from the natural interaction of colors as they dry.
- Dry flat: Allow your abstract watercolor to dry completely flat to minimize warping.
* > Pro-Tip: The key to successful abstract blends is patience and letting the water do its work. Don’t try to force the colors too much. Experiment with “creating luminous effects” by using transparent pigments and layering very light washes.
9. Craft Watercolor Bookmark Gifts

Bookmark this idea! Pin these sweet gifts to your “DIY Valentine Gifts” board!
For thoughtful and unique presents, craft watercolor bookmark gifts. These personalized gifts transform simple watercolor art into functional and beautiful tokens of affection. Using cardstock and watercolor paint, you can create various designs, from small hearts to abstract blends. These are quick watercolor projects that make perfect handmade valentine cards or standalone presents.
Supplies Needed
- Heavy watercolor paper or thick cardstock (at least 140 lb / 300 gsm)
- Watercolor paint set (various colors)
- Small round brushes (for details and washes)
- Pencil and ruler
- Scissors or paper cutter
- Hole punch (small size)
- Ribbon, twine, or small tassels
- Clean water and paper towels
Step-by-Step Directions
- Cut your bookmarks: Use a ruler and scissors or a paper cutter to cut your watercolor paper into bookmark shapes (e.g., 2×6 inches or 2×7 inches).
- Design your art: On each bookmark, create a small watercolor design. You can paint a simple heart, an abstract blend, a small floral sprig, or a short word like “Love.” Refer to previous ideas for specific techniques.
- Let dry: Allow your watercolor designs to dry completely.
- Add a hole: Use a hole punch to create a small hole at the top center of each bookmark.
- Attach tassel/ribbon: Thread a piece of ribbon, twine, or a small tassel through the hole and tie it off securely.
- Optional sealing: For added durability, you can apply a thin layer of clear acrylic sealant (matte or gloss) once the watercolor is fully dry.
* > Pro-Tip: Make a batch of bookmarks with varying designs, experimenting with different “watercolor techniques to make beautiful valentine art.” This allows you to “share creations” with multiple loved ones while refining your skills.

10. Illustrate Watercolor Sweets & Candy

Sweet inspiration! Pin these candy illustrations to your “Watercolor Food Art” board!
Illustrating watercolor sweets and candy is a delightful way to create festive watercolor art. This artistic venture uses watercolor paint to create detailed watercolor illustrations of charming treats, perfect for personalized messages on cards. Whether it’s heart-shaped cookies or conversation hearts, these vibrant watercolor colors add a delicious touch to your Valentine’s Day creations. These designs offer plenty of watercolor painting inspiration for valentine’s day cards.
Supplies Needed
- Watercolor paper (140 lb / 300 gsm)
- Watercolor paint set (bright reds, pinks, whites, browns, purples)
- Small round brushes (sizes 0, 2, and 4)
- Pencil and eraser
- White gel pen or opaque white paint (for highlights)
- Clean water and paper towels
Step-by-Step Directions
- Sketch your sweets: Lightly sketch various Valentine’s Day treats like conversation hearts, small chocolates, or a cupcake. Focus on simple, recognizable shapes.
- Apply base colors: Using a light wash of your chosen watercolor colors (e.g., pink for frosting, light brown for chocolate), fill in the main areas of each sweet. Let these layers dry.
- Build shadows and depth: Mix slightly darker versions of your base colors and add subtle shadows to the undersides or crevices of your sweets to give them dimension. For chocolates, this might mean adding darker browns.
- Add highlights: With a very light, almost dry brush, pick up a tiny bit of white paint or use a white gel pen to add small, bright highlights to the shiny parts of chocolates or the moist parts of cupcakes.
- Detailing: For conversation hearts, use a fine brush and a darker color to paint small words like “LOVE” or “BEE MINE.” For sprinkles on a cupcake, use tiny dots of various colors.
- Final dry: Allow all your illustrations to dry completely.
* > Pro-Tip: To make your sweets look truly appetizing, pay attention to the value changes (light to dark). Adding clear, crisp highlights with a white gel pen can dramatically enhance the realism and appeal, overcoming “getting clean lines” on small details.

11. Develop Watercolor Pattern Backgrounds

Pattern perfection! Pin these background ideas to your “DIY Paper Crafts” board!
Developing watercolor pattern backgrounds is an excellent way to add a unique, handmade touch to cards, gift tags, or other paper crafts. These easy watercolor background techniques for cards allow you to create charming watercolor designs using simple, repeating motifs. They are perfect for crafting and complement card making by providing a distinctive backdrop. This method is a quick watercolor project that can help solve the problem of struggling with card design.
Supplies Needed
- Watercolor paper or cardstock
- Watercolor paint set (light, complementary colors like pink, red, light blue, or peach)
- Small round brush (size 0 or 2)
- Pencil and eraser (optional)
- Stencils (small heart shapes, dots, stars – optional)
- Clean water and paper towels
Step-by-Step Directions
- Prepare your surface: Decide if you want a solid background color first or directly apply patterns to white paper. If painting a background, apply a very light wash of a single color over your paper and let it dry completely.
- Choose your pattern: Decide on a simple repeating pattern – tiny hearts, dots, small ‘x’s, or abstract swirls.
- Paint the pattern: Load your small round brush with a dilute watercolor color. Carefully paint your chosen pattern across the paper. Try to maintain consistent spacing and size for a cohesive look.
- For hearts: Paint tiny heart shapes, varying angles slightly.
- For dots: Use the tip of your brush to tap small dots across the paper.
- For swirls: Create small, delicate swirls or ‘s’ shapes.
- Vary colors (optional): For added interest, switch to a different, complementary color after painting a section of the pattern. Let the first color dry slightly to avoid bleeding, or let them blend for a softer effect.
- Use stencils (optional): If using stencils, hold them firmly in place and dab your brush with a small amount of paint inside the stencil cutouts for crisp shapes.
- Dry completely: Allow your patterned background to dry fully before using it for cards or other crafts.
* > Pro-Tip: The charm of handmade patterns often lies in their slight imperfections. Embrace the organic nature of watercolor. To prevent “paint bleeding issues” when layering different colors for your pattern, ensure the previous color is mostly dry.

FAQs About Valentines Day Watercolor
How to make watercolor valentine cards?
To make watercolor Valentine cards, start with good quality watercolor paper, sketch your design, then apply watercolor paint using simple techniques like washes and layering. Let each layer dry before adding more detail, and use a light touch with water for controlled blending. This process allows for “easy watercolor valentine” designs, from simple hearts to more intricate florals, ensuring a “handmade valentine card” is both beautiful and personal. Gathering “basic watercolor supplies” will set you up for success.
What are easy watercolor valentine ideas for beginners?
Easy watercolor Valentine ideas for beginners include simple heart patterns, abstract color blends, loose floral designs, or even watercolor resist techniques using a white crayon. These methods require minimal drawing skills and focus on the natural beauty of watercolor washes. Focus on “simple watercolor cards” and “quick watercolor projects” that allow for experimentation without pressure. Embrace the imperfections, as they add to the charm of your “DIY watercolor valentine.”
What supplies do I need for watercolor valentines?
For watercolor Valentines, you’ll need watercolor paper (140 lb/300 gsm), a set of watercolor paints (pans or tubes), a few round watercolor brushes (small to medium), clean water, and paper towels. Optional supplies include a pencil, eraser, and masking tape to secure your paper. These “basic watercolor supplies” are essential for good results and will help prevent common issues like “watercolor paper warping.” Look for “student grade watercolor” if you’re just starting out.
How do you paint a watercolor heart with smooth edges?
To paint a watercolor heart with smooth edges, first lightly sketch the heart, then use enough paint and water on your brush to fill the shape in one continuous, even stroke. Avoid going over areas multiple times once the paint starts to dry to prevent harsh lines or muddy colors. For crisp lines, ensure your brush has a good point and maintain consistent pressure. The “wet-on-wet watercolor technique” can also help achieve softer, blended edges if preferred.
Can kids make watercolor valentine cards easily?
Yes, kids can easily make watercolor Valentine cards, especially with simple designs like large hearts, abstract splatters, or basic animal shapes. Encourage them to experiment with colors and water, focusing on the fun of the creative process rather than perfection. “Children’s watercolor valentine card making activity” is a great way to “teach watercolor art” and “enjoy art” together. Provide “non-toxic watercolor paint” and thick paper for best results.
What kind of paper is best for watercolor valentines?
The best paper for watercolor Valentines is cold press watercolor paper, at least 140 lb (300 gsm), as it’s designed to absorb water evenly, prevent warping, and hold pigment beautifully. This specific paper type allows for cleaner washes and better color vibrancy. Using “watercolor paper vs cardstock” is crucial for preventing “paint bleeding issues” and ensuring a professional finish. Avoid regular printer paper, as it will buckle and tear.
How do I prevent watercolor paper from warping?
To prevent watercolor paper from warping, use heavy-weight paper (140 lb/300 gsm or more) and tape all four edges down to a rigid surface (like a board or desk) with artist’s tape before painting. This secures the paper while it dries, minimizing buckling. Another solution is to thoroughly wet both sides of your paper and allow it to dry completely flat before you begin painting, which preshrinks the fibers.
What colors are best for romantic watercolor art?
For romantic watercolor art, classic colors like various shades of pink, red, and purple are ideal, often complemented by soft creams, subtle yellows, or hints of gold. These colors evoke feelings of love, passion, and tenderness. Consider “blend watercolor colors” for soft gradients, and don’t be afraid to add a touch of deep blue or violet for contrast and depth, especially in “watercolor galaxy cards” themes.
How long does it take to paint a simple watercolor card?
A simple watercolor card, such as a basic heart or abstract wash, can take anywhere from 15 to 30 minutes to paint, not including drying time. The quickness depends on the complexity of the design and your familiarity with the techniques. The drying time can vary based on humidity and how much water you used, so plan for at least another 30-60 minutes, or use a hairdryer on a cool setting to speed up the process for “quick watercolor projects.”
How can I add text to my watercolor valentines without smudging?
To add text to your watercolor Valentines without smudging, ensure your watercolor painting is completely dry before writing on it. Use a fine-tip waterproof pen or a calligraphy pen with waterproof ink for your lettering. Alternatively, you can sketch your text in pencil first, then fill it in with watercolor, ensuring the painted letters dry completely before handling, creating “custom watercolor messages.”
Final Thoughts on Valentines Day Watercolor
Creating something by hand, especially for a loved one, carries a unique emotional weight that store-bought items simply cannot match. “Valentines Day Watercolor” offers an accessible and incredibly rewarding avenue to express that affection. As we’ve explored through these 11 proven ideas, mastering beautiful watercolor art doesn’t require years of training; it simply asks for a willingness to experiment with colors, water, and a few basic techniques. From “easy watercolor cards” adorned with playful hearts to sophisticated “watercolor floral cards” and cosmic “watercolor galaxy cards,” the possibilities for personalized, heartfelt gifts are endless.
Remember, the beauty of watercolor lies in its fluidity and transparency, making every piece genuinely unique. Embrace the process, don’t be afraid to try new techniques, and let your creativity flow. Whether you’re a seasoned artist or picking up a brush for the first time, these “quick watercolor projects” are designed to build your confidence and help you create stunning, “creative watercolor valentines” that will be cherished. By following the “proven painting techniques” and leveraging the “reliable supply recommendations” shared, you’re well-equipped to create something truly special this Valentine’s Day.
Which of these “valentines day watercolor” ideas are you most excited to try first? Share your creative plans in the comments below!
Last update on 2026-03-15 / Affiliate links / Images from Amazon Product Advertising API