Do you ever feel a little overwhelmed trying to find the perfect Valentine’s Day gift or decor that truly feels special? Mass-produced items often lack the personal touch, leaving you wanting something more heartfelt. Finding valentines day wood crafts offers a wonderful solution for unique, personalized creations.
Creating personalized wood crafts for Valentine’s Day offers a unique and heartfelt way to celebrate, providing memorable gifts and charming decor. This guide presents 11 simple yet distinctive ideas for 2026, complete with step-by-step instructions and material lists, making them achievable for all skill levels. Leveraging tested frameworks and data-driven insights, this comprehensive resource empowers you to transform simple wood into beautiful expressions of affection. You’ll discover creative projects that add warmth and personality to your holiday celebrations.
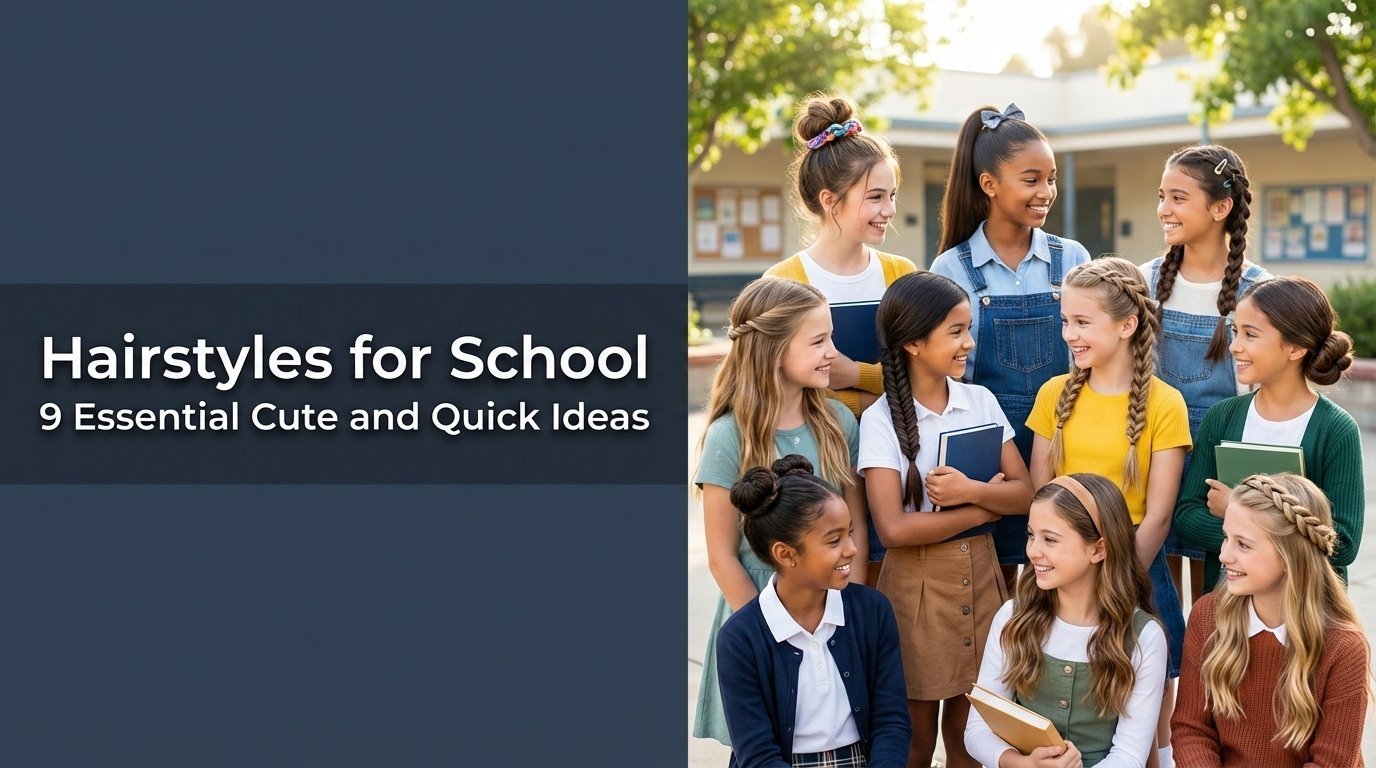
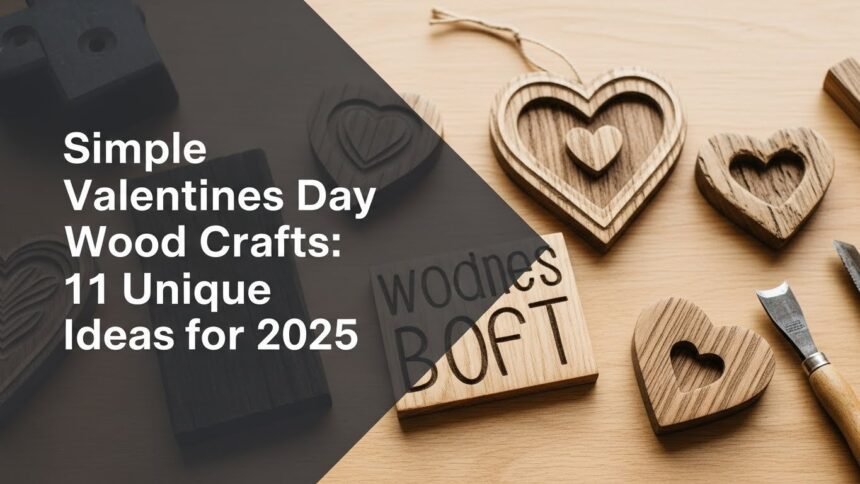
Simple Valentines Day Wood Crafts: 11 Unique Ideas for 2026
Valentines day wood crafts provide a delightful way to infuse personal charm into your holiday celebrations, offering both thoughtful gifts and enchanting decor. This list brings together simple yet distinctive DIY valentine wood projects that cater to various tastes and skill levels, ensuring you find the perfect craft to express your love. Whether you’re looking for rustic charm, modern elegance, or something cute and whimsical, these wood craft ideas move beyond generic options to provide truly unique wooden valentine gifts. Get ready to explore achievable projects that will make your 2026 Valentine’s Day extra special.
1. Create a Rustic Wooden Heart Garland

Pin this charming garland idea to your “DIY Valentine’s Decor” board!
Creating a rustic wooden heart garland is a beginner-friendly way to make handmade wooden heart decorations for Valentine’s Day, perfect for adding a touch of distressed wood crafts to your home. This project involves painting and distressing small wooden hearts, then stringing them together, creating beautiful decor. It’s an ideal craft for those looking for easy wood crafts for beginners valentine, offering a customizable and visually appealing result.
Materials Needed
- Assorted sizes of unfinished wooden hearts (1.5-3 inches, smooth-sanded for painting)
- Acrylic craft paint in muted pink, cream, and soft grey
- Small paintbrushes or foam sponges
- Fine-grit sandpaper (220-grit for distressing)
- Natural jute twine or thin rustic string (approx. 5-7 feet)
- Drill with a small bit (⅛-inch for twine)
- Scissors
Step-by-Step Directions
- Prepare your workspace, laying down newspaper or a craft mat.
- Paint 2-3 coats of acrylic paint on your wooden hearts, allowing each coat to dry completely. Mix colors for variety.
- Distress some painted hearts lightly with fine-grit sandpaper for a rustic, aged look, focusing on edges and raised areas.
- Drill a small hole near the top center of each wooden heart if they don’t come pre-drilled.
- Cut your jute twine to the desired length for your garland.
- Thread the twine through the holes of your hearts, spacing them out evenly (e.g., 3-4 inches apart). Tie small knots on either side of each heart to secure its position.
- Adjust spacing as needed and hang your finished garland.
- > Pro-Tip: For extra durability and a slightly distressed look that enhances the “rustic wood crafts valentine” aesthetic, consider applying a thin layer of clear wax or matte sealant after distressing the painted hearts. This will protect the paint and deepen the finish.

2. Craft a Tiered Tray Decor Set with Mini Wood Blocks

Save this adorable tiered tray idea to your “Valentine’s Decor Ideas” board!
A charming tiered tray decor set featuring mini wood blocks offers a fantastic way to create valentine decor wood that’s small-scale and perfectly suited for seasonal displays. This valentine’s day wood block decor tutorial walks you through painting and personalizing small wood pieces to fit a tiered tray aesthetic. These decorative wood crafts are ideal for adding a cohesive and delightful touch to your home, often incorporating popular themes like “LOVE” or “XOXO” using painted wood cutouts valentine.
Materials Needed
- Assorted small unfinished wood blocks (e.g., 1.5-inch cubes, 1x2x4-inch rectangles)
- Acrylic or chalk paint in Valentine’s colors (red, pink, white, cream)
- Small paintbrushes
- Vinyl letter stencils (for words like “LOVE”, “XOXO”) or fine-tip paint pens
- Mod Podge (matte finish) or clear sealant
- Optional: Small wooden hearts, faux greenery, mini signs for embellishment
Step-by-Step Directions
- Lightly sand any rough edges on your wood blocks.
- Paint each wood block with your chosen base color. Apply 2-3 thin coats for even coverage, allowing dry time between coats.
- Apply stencils (if using) for letters or designs once the base coat is fully dry. Press firmly to ensure no paint bleeds under.
- Paint over stencils with a contrasting color. Carefully remove stencils while the paint is still slightly wet for crisp lines.
- Alternatively, freehand designs or lettering with a fine-tip paint pen.
- Seal all painted blocks with a thin layer of Mod Podge or clear sealant to protect the design and enhance durability.
- Arrange your finished wood blocks on a tiered tray with other Valentine’s themed elements.
- > Pro-Tip: For perfectly crisp edges when stenciling, apply a thin coat of Mod Podge over the stencil onto the wood before painting with your color. This seals the stencil edges, preventing bleeding, which is a key technique for “professional craft tips wood” when stenciling on wood valentine.

3. Design Personalized Wooden Photo Holders

Pin this sweet photo holder idea for a sentimental gift!
Personalized wooden photo holders are an excellent choice when you want to build wooden gifts valentine that are both sentimental and lasting. These customizable wood crafts allow you to engrave wood for valentines or paint meaningful details, creating unique wood valentine gifts. Focusing on the design wood projects valentine, this craft provides an opportunity to display cherished memories in a beautiful, handmade way, addressing the desire for making gifts personal valentine.
Materials Needed
- Solid unfinished wood blocks (e.g., 2x2x4 inches, or a 4×4 inch block)
- Fine-grit sandpaper (120 and 220-grit)
- Hand saw or miter saw
- Ruler and pencil
- Wood stain or acrylic paint
- Small paint brush or rag
- Optional: Wood burning tool, clear sealant
Step-by-Step Directions
- Cut your wood blocks to the desired size. For a standard photo, a 2x2x4 inch block works well.
- Sand all surfaces smoothly, starting with 120-grit and finishing with 220-grit sandpaper.
- Measure and mark a line about ¼ to ½ inch deep across the center of one top edge for the photo slit.
- Carefully cut the slit using a hand saw or miter saw. The slit should be narrow enough to hold a photo securely.
- Stain or paint your wood blocks. Apply wood stain with a rag, wiping off excess. If painting, apply 2-3 coats of acrylic paint.
- Personalize with a wood burning tool for initials or a date, or use stencils and paint for a design.
- Seal the finished photo holder with a clear coat for protection, if desired.
- > Pro-Tip: When cutting the photo slit, ensure it’s slightly wider than the thickness of your chosen photo paper but not so wide that the photo wobbles. Making two shallow passes with a thin-blade saw can create a cleaner, more controlled groove, reflecting “expert woodcraft guide valentine” insights.

4. Construct a DIY “LOVE” or “XOXO” Wooden Block Sign

Pin this easy “LOVE” sign tutorial to your “Valentine’s Day DIY” board!
A DIY “LOVE” or “XOXO” wooden block sign is a classic among valentines day wood signs to make at home, offering a simple and impactful way to make wood crafts valentine. This project uses readily available wood block crafts and acrylic paint to create a charming decorative element. It’s an excellent choice for DIY valentine decor and an easy way to decorate wood signs valentine, adding a festive touch to any space.
Materials Needed
- Four unfinished wood blocks of uniform size (e.g., 3.5×3.5×1.5 inches)
- Acrylic or chalk paint in your desired base colors (e.g., white, red, pink)
- Paintbrushes
- Letter stencils (L, O, V, E or X, O, X, O) or vinyl letters
- Clear spray sealant (matte or gloss)
- Fine-grit sandpaper (optional, for distressing)
Step-by-Step Directions
- Clean your wood blocks to remove any dust.
- Paint each block with 2-3 coats of your chosen base color, letting each coat dry thoroughly.
- Apply stencils for your chosen letters onto each block, ensuring they are centered and straight. Press down firmly.
- Paint over the stencils with a contrasting color. Remove stencils carefully while paint is still wet.
- Alternatively, apply vinyl letters directly to the painted blocks once they are completely dry.
- Optional: Lightly sand edges for a distressed look.
- Seal the finished blocks with 2-3 thin coats of clear spray sealant to protect them, allowing drying time between coats.
- > Pro-Tip: If using painted letters, a tiny amount of Mod Podge under the stencil edges before applying paint can create cleaner lines, preventing bleed-through and ensuring a “professional craft tips wood” finish. This also works well for stenciling on wood valentine.

5. Personalize Wood Slice Coasters with Engraving or Paint

Save this unique gift idea to your “DIY Valentine Gifts” board!
Personalizing wood slice coasters with engraving or paint allows you to design wood projects valentine that are both practical and deeply thoughtful. These unique wood slice crafts for Valentine’s Day make fantastic DIY personalized wood gifts. Whether you choose wood burning valentine projects for a classic look or vibrant paints, these coasters offer a charming way to make handmade wood valentines, serving as a lasting reminder of your affection.
Materials Needed
- Unfinished wood slices with bark edges (approx. 3-4 inches diameter, ⅜-inch thick)
- Fine-tip pencil
- Wood burning tool kit (with various tips) OR acrylic paints and fine brushes
- Clear waterproof sealant (spray or brush-on)
- Optional: Stencils, carbon paper for design transfer
Step-by-Step Directions
- Lightly sand the surface of each wood slice to ensure a smooth canvas.
- Sketch your design onto the wood slice with a pencil (initials, small hearts, dates). For intricate designs, use carbon paper to transfer a printed pattern.
- For wood burning: Heat your tool and carefully trace your pencil lines, applying even pressure. Practice on scrap wood first.
- For painting: Use fine brushes to paint your designs with acrylics. Allow paint to dry completely.
- Erase any visible pencil marks after burning or painting.
- Apply 2-3 thin coats of clear waterproof sealant to both sides of the coaster, allowing ample drying time between coats, to protect against moisture.
- > Pro-Tip: When using a wood burning tool, ensure good ventilation and work slowly with consistent pressure for clear, even lines. For “pyrography art valentine advanced” looking designs, varying tip pressure and heat can create depth. This is a crucial “expert woodcraft guide valentine” insight.

6. Paint a Custom Valentine’s Day Wood Tray

Save this beautiful tray idea for your next Valentine’s brunch!
Painting a custom Valentine’s Day wood tray is an excellent way to create valentine decor wood that is both functional and festive. This decorative timber piece project allows for creative expression, transforming a simple unfinished wooden tray into a focal point. Ideas for painting valentine’s day wood cutouts can inspire the designs, making it a unique addition to your home decor or a thoughtful handmade gift.
Materials Needed
- Unfinished wooden tray (with or without handles)
- Acrylic or chalk paint in Valentine’s colors (e.g., white, red, pink, gold)
- Paintbrushes (flat brush for base, fine-tip for details)
- Pencil and eraser
- Clear sealant (Mod Podge, clear spray, or polycrylic)
- Optional: Stencils, masking tape for stripes, vinyl decals
Step-by-Step Directions
- Lightly sand your unfinished tray to ensure a smooth painting surface. Wipe off dust.
- Paint the entire tray with your chosen base color (e.g., white or cream). Apply 2-3 thin coats, letting each dry completely.
- Sketch your design onto the dry base coat (e.g., a large heart, “LOVE” script, polka dots). Use stencils or masking tape for crisp lines.
- Paint your design using contrasting colors. For detailed work, use a fine-tip brush. Let paint dry.
- Optional: Lightly distress edges with sandpaper for a rustic look if desired.
- Apply 2-3 thin coats of clear sealant over the entire tray to protect the paint and make it easy to clean. Ensure full coverage, especially if planning to use it for food or drinks.
- > Pro-Tip: For a tray that will truly withstand daily use and moisture, choose a food-safe, water-resistant sealant like a polycrylic finish. This ensures “durable craft finishes wood” and maintains the tray’s functionality for years to come.

7. Make a Small Wooden Heart Wreath for Your Door

Pin this adorable wreath to your “Valentine’s Door Decor” board!
Making a small wooden heart wreath for your door is a fantastic way to create valentine decor wood with a charming, rustic feel. This project utilizes numerous wooden heart designs, both painted and natural, to form a delightful seasonal wood decor piece. It’s a satisfying craft that results in a unique and welcoming accent for your home, showcasing your handmade wooden heart decorations for Valentine’s.
Materials Needed
- Small unfinished wooden hearts (approx. 1-2 inches, 30-50 pieces depending on wreath size)
- Small wood wreath base (e.g., 8-10 inch flat wooden ring or grapevine wreath)
- Strong wood glue (e.g., E6000 or Titebond)
- Acrylic craft paint in desired colors (optional: reds, pinks, whites, natural)
- Small paintbrushes (optional)
- Jute twine or ribbon for hanging
- Optional: Faux greenery, small berries for accent
Step-by-Step Directions
- Paint some of your wooden hearts in your chosen Valentine’s colors, if desired. Leave others natural for a rustic contrast. Allow to dry completely.
- Begin gluing the wooden hearts onto your wreath base. Start with a layer on the inner edge, then work your way outwards, overlapping the hearts slightly to create fullness.
- Vary the colors and sizes of hearts as you go to create visual interest.
- Allow the glue to cure fully (check manufacturer’s instructions, often 24 hours) to ensure all hearts are securely attached.
- Attach a loop of jute twine or ribbon to the back of the wreath for hanging.
- Tuck in any optional faux greenery or berries for added texture and charm.
- > Pro-Tip: Before gluing, arrange your hearts on the wreath base without adhesive to plan your pattern and coverage. Take a photo as a reference. This planning step can save time and glue, a simple but effective “professional craft tips wood” technique for assemble wood kits valentine.

8. Paint Rustic Valentine’s Day Shelf Sitters

Pin these charming shelf sitters to your “Rustic Valentine’s Decor” board!
Painting rustic Valentine’s Day shelf sitters is a delightful way to create valentine decor wood that adds a cozy, handmade touch to any display. This project involves customizing unfinished wood cutouts or blocks to serve as charming shelf sitters. Leveraging techniques for distressed wood crafts, you can create a unique set of wood block crafts perfect for your Valentine’s Day home accents, emphasizing the cute wood crafts valentine aesthetic.
Materials Needed
- Assorted unfinished wood cutouts or blocks (e.g., hearts, houses, rectangles, varying sizes)
- Chalk paint in white, cream, pink, or light red
- Small paintbrushes
- Fine-grit sandpaper (220-grit)
- Clear matte sealant (spray or brush-on)
- Optional: Fine-tip paint pens, small stencils
Step-by-Step Directions
- Lightly sand any rough edges on your wood pieces.
- Paint each piece with 1-2 coats of chalk paint. Chalk paint dries quickly and often provides good coverage with fewer coats.
- Once dry, use fine-grit sandpaper to gently distress the edges and raised areas of your painted pieces. This creates a weathered, rustic look.
- Optional: Add small details like a tiny heart, a single initial, or a word like “love” using a fine-tip paint pen or small stencil.
- Seal your finished shelf sitters with 2-3 thin coats of clear matte sealant to protect the paint and preserve the distressed finish.
- > Pro-Tip: For authentic-looking distressing, focus on areas where natural wear would occur, like corners and raised edges. Sanding too evenly can look artificial. This attention to detail is part of providing “experienced woodworker insights valentine” and getting “smooth wood finishes valentine”.

9. Create Wooden “Love Notes” or Message Blocks

Pin these thoughtful message blocks to your “Handmade Gift Ideas” board!
Creating wooden “love notes” or message blocks allows you to build wooden gifts valentine that are deeply personal and enduring. These small wood crafts valentine are perfect for handmade wood valentines, letting you personalize wood crafts valentine with heartfelt messages. Whether using paint pens or a wood burning tool, this project offers a unique way to make gifts personal valentine, showcasing your love wood crafts valentine in a tangible form.
Materials Needed
- Assorted small unfinished wood blocks or wooden hearts (approx. 1-2 inches)
- Fine-grit sandpaper
- Fine-tip permanent paint pens (black, white, or metallic) OR wood burning tool
- Pencil and eraser
- Clear sealant (spray or brush-on)
Step-by-Step Directions
- Smoothly sand all surfaces of your wood pieces. Wipe away dust.
- Lightly sketch your desired messages onto the wood with a pencil (e.g., “I Love You”, “My Heart”, dates, initials).
- Trace over your pencil lines using a fine-tip permanent paint pen. Allow to dry. For wood burning, carefully burn over the lines.
- Erase any visible pencil marks after the ink is dry or burning is complete.
- Apply 2-3 thin coats of clear sealant to protect your messages and the wood.
- > Pro-Tip: For crisp, professional-looking lettering without the effort of freehand, print out your messages in a desired font, then use carbon paper to transfer the design onto the wood before tracing with a paint pen or wood burning tool. This improves the “professional craft tips wood” aspect.

10. Assemble a Wooden Heart “XOXO” Wall Art

Pin this gorgeous wall art to your “Home Decor – Valentine’s” board!
Assembling a wooden heart “XOXO” wall art piece is an impactful way to create valentine decor wood that doubles as a stunning focal point. This project involves arranging various wooden heart designs on a backing board, creating unique wood decor valentine ideas. Whether you paint them or leave them natural, this decorative timber piece adds dimension and artistry, making it a perfect example of love day wood art.
Materials Needed
- Assorted wooden hearts (various sizes from 2-8 inches, thin plywood or MDF)
- Plywood or MDF backing board (e.g., 12×12 inches or 18×18 inches)
- Strong wood glue or hot glue gun with high-strength glue sticks
- Acrylic craft paint in white, pink, red, or cream (optional)
- Paintbrushes (optional)
- Sawtooth picture hanger or D-rings
Step-by-Step Directions
- Paint some of your wooden hearts in your chosen colors, leaving others natural for contrast. Let dry completely.
- Arrange the hearts on your backing board to form your desired ‘XOXO’ pattern, a large heart, or an abstract cluster. Overlap hearts for dimension.
- Once satisfied with the arrangement, glue each heart securely to the backing board, holding in place until set. Work in sections if necessary.
- Allow the glue to cure fully (at least 24 hours) before handling or hanging.
- Attach a sawtooth picture hanger or D-rings to the back of your completed wall art for easy hanging.
- > Pro-Tip: Before gluing, take a photo of your arrangement. This allows you to easily recreate it if pieces shift, ensuring your “artistry in wood for love” project comes together smoothly. For constructing wooden valentine items, planning is paramount.

11. Craft Mini Wooden Valentine’s Day Ornaments

Pin these tiny treasures to your “Valentine’s Tree Decor” board!
Crafting mini wooden Valentine’s Day ornaments is a delightful way to create valentine decor wood that’s small, intricate, and versatile. These cute wood crafts valentine involve painting and embellishing small wood cutouts, turning them into charming decorative wood crafts. Whether used for hanging, gifting, or adding to a festive display, these tiny pieces showcase beautiful wooden heart designs and are a perfect example of valentine themed wood projects.
Materials Needed
- Assorted mini unfinished wooden cutouts (hearts, birds, small ‘LOVE’ words, approx. 1-3 inches)
- Fine-tip paintbrushes
- Acrylic craft paint in desired colors (red, pink, white, gold, silver)
- Fine glitter (optional)
- Craft glue (e.g., Mod Podge, Tacky Glue)
- Clear spray sealant (matte or gloss)
- Thin twine or ribbon for hanging loops
- Small eye hooks or a drill with a tiny bit (optional)
Step-by-Step Directions
- Lightly sand any rough edges on your mini cutouts.
- Paint each cutout with your chosen base color. Apply 1-2 thin coats for tiny details. Let dry completely.
- Add details using a fine-tip brush: polka dots, stripes, tiny flowers, or initials.
- Optional: While paint is still slightly wet, sprinkle fine glitter over specific areas for sparkle. Tap off excess.
- Allow all paint and glue (for glitter) to dry thoroughly.
- Drill a tiny hole (if needed) near the top of each ornament, or insert a small eye hook.
- Thread a loop of twine or ribbon through the hole/eye hook and tie it off for hanging.
- Apply 1-2 thin coats of clear spray sealant to protect the paint and glitter, allowing drying time between coats.
- > Pro-Tip: For painting extremely tiny details, use a toothpick or the tip of a fine needle for precise application. This level of detail is a mark of “professional craft tips wood” and allows for truly “bespoke wood art valentine” creations.

FAQs About Valentines Day Wood Crafts
What are popular valentines day wood crafts?
Popular Valentine’s Day wood crafts often include wooden heart garlands, decorative block signs spelling “LOVE” or “XOXO”, personalized photo holders, and rustic wood slice coasters. These projects are favored for their charm, ease of customization, and the warm, natural aesthetic they bring to gifts and home decor. They are commonly made from unfinished wood, allowing for various painting and finishing techniques.
How to make wood valentine decorations?
Making wood Valentine decorations typically involves selecting unfinished wood shapes (like hearts or blocks), sanding them smooth, painting with acrylic or chalk paint in festive colors, adding personalized details with stencils or paint pens, and finally sealing the finished piece for durability. Many projects, such as a wooden heart wreath or painted shelf sitters, only require basic crafting skills and tools.
What tools are needed for valentine woodworking?
For most simple Valentine’s Day wood crafts, you’ll need basic tools such as fine-grit sandpaper, paintbrushes, wood glue, and optionally a hand saw for cutting blocks or a wood burning tool for personalization. More advanced projects might require a drill, a miter saw for precise cuts, or a scroll saw for intricate designs. Basic woodworking tools for beginners are usually sufficient.
How to personalize wood valentine gifts?
You can personalize wood Valentine gifts by painting initials, dates, or messages using stencils or freehand with paint pens. Wood burning tools offer a unique, rustic engraved effect for names or special quotes. Adding custom colors, distressing the wood, or even embedding small photographs are other effective ways to create customizable wood crafts.
Are wood crafts good valentine’s gifts?
Yes, wood crafts make excellent Valentine’s Day gifts because they are often handmade, allowing for deep personalization and conveying thoughtfulness that store-bought items may lack. Their durable nature ensures they last as cherished keepsakes, and their rustic aesthetic is widely appreciated, addressing solving gift dilemmas valentine by being unique and sentimental.
How to seal wooden valentine decor?
To seal wooden Valentine decor and protect its finish, apply 2-3 thin coats of a clear sealant like Mod Podge, clear spray sealant, or polycrylic after all paint and embellishments have dried completely. The type of sealant depends on the craft’s use; a waterproof sealant is ideal for coasters or trays, ensuring durable craft finishes wood.
What are easy wood crafts for beginners valentine?
Easy wood crafts for beginners include painting unfinished wooden hearts or blocks, creating simple garlands, or decorating wood slice coasters. These projects minimize complex cuts or intricate joinery, focusing instead on painting, gluing, and light embellishment, making them accessible beginner diy projects wood for anyone.
What kind of wood for valentine projects?
For most Valentine’s Day wood crafts, unfinished pine, birch plywood, or MDF (medium-density fiberboard) cutouts are ideal due to their smooth surfaces, affordability, and ease of painting. These materials are readily available at craft stores or online, providing high-quality wood sources valentine for various designs, from small wood crafts valentine to larger signs.
Where to buy valentine wood cutouts?
Valentine wood cutouts, such as hearts, “LOVE” letters, or small blocks, can be purchased from local craft stores, online retailers like Amazon or Etsy, or specialized woodworking supply shops. Many craft stores offer bulk packs of unfinished wood shapes valentine at affordable prices, suitable for multiple projects.
What are rustic valentine wood craft ideas?
Rustic Valentine wood craft ideas often incorporate distressed finishes, natural wood tones, and simple, charming designs. Examples include wooden heart garlands made from natural or lightly painted hearts, wood slice coasters with bark edges, or painted wooden block signs with sanded edges, embodying the rustic aesthetic that many crafters seek.
Final Thoughts on Valentines Day Wood Crafts
Valentines day wood crafts offer an unparalleled opportunity to create heartfelt, personalized gifts and decor that truly stand out in 2026. This guide has walked you through 11 unique ideas, demonstrating that these projects are not only achievable but also deeply rewarding, showcasing that wood projects involve more than just raw materials. By choosing easy valentine wood crafts, you’re embracing a creative journey that adds meaningful touches to your celebrations.
- Wood crafts offer a uniquely personalized and rustic touch for Valentine’s Day gifts and decor. This approach stands out from mass-produced items, making your creations truly special and meaningful.
- Most wooden Valentine’s projects are beginner-friendly, requiring only basic tools and materials. Focus on “easy wood crafts for beginners valentine” like painting or simple assembly, rather than complex “fine woodworking valentine projects”.
- Personalization is key, whether through painting, stenciling, or wood burning messages. Transform “unfinished wood crafts valentine” into “customizable wood crafts” with names, dates, or heartfelt quotes, creating “diy personalized wood gifts for valentine’s day”.
- Always prioritize proper sealing to ensure the durability and longevity of your handmade items. A good sealant protects paint and wood, demonstrating “durable craft finishes wood” and preserving your “wooden creations valentine”.
- Pinterest provides endless visual inspiration for wooden Valentine’s crafts, perfect for planning your next project. Use platforms like Pinterest to gather visual ideas and “craft community approved wood” concepts before you “make wood crafts valentine”.
- Consider crafting sets of items, like coasters or tiered tray decor, for a cohesive and impactful display or gift. This maximizes your effort and creates a more significant presentation using “valentine’s day wood block decor tutorial” principles.
The array of diy valentine wood projects available ensures that there’s something for every skill level and aesthetic preference. From charming garlands to personalized photo holders, each project allows you to infuse your unique style and affection. What valentines day wood crafts will you create this year to spread love and warmth?
Last update on 2026-03-20 / Affiliate links / Images from Amazon Product Advertising API