Are you tired of paying premium salon prices only to have your manicure chip before your romantic dinner even begins? Many beginners struggle to find easy valentines gel nail art that looks professional but doesn’t require years of training to master. You want a durable, stunning look for the holiday without the frustration of complex techniques or the high cost of a professional service.
Valentines gel nails: A long-lasting, chip-resistant manicure style utilizing UV or LED cured polish to create romantic designs ranging from classic red hearts to elegant glitter fades. Ideal for home application, these diy valentines gel nails offer a durable, high-gloss finish that withstands daily wear far better than traditional lacquer, ensuring your festive look stays flawless for weeks.
Drawing from professional gel nail standards and extensive testing of home kits, this guide simplifies the process into manageable steps anyone can follow. You will discover how to achieve salon-quality results with accessible tools and techniques. Get ready to transform your home manicure routine with these beginner-friendly designs that guarantee a stunning, long-lasting finish.
How to Create Stunning Valentines Gel Nails: 11 Easy Designs for Beginners 2026
Creating beautiful valentines nails gel at home is more accessible than ever, bridging the gap between expensive salon visits and the desire for a creative, personal touch. Gel nails—known for their incredibly durable, high-gloss finish—are the perfect canvas for Valentine’s Day, a holiday synonymous with romance and attention to detail. Unlike regular polish, gel polish requires a UV lamp or LED light to cure gel, a process that hardens the polymer almost instantly. This means no smudging while you reach for your keys and a manicure that can last two weeks or more without chipping.
For beginners, the prospect of diy valentines gel nails might seem intimidating, but the secret lies in preparation and simple, scalable designs. By focusing on easy designs and fundamental techniques, you can achieve salon quality gel nails right at your kitchen table. This guide prioritizes accessible artistry—using tools you likely have or can easily acquire—to help you master gel nail designs valentines that look sophisticated but are surprisingly simple to execute. Whether you prefer a classic red or a subtle pink, mastering the basics of nail preparation essentials and following safety guidelines for gel nails will ensure your manicure is not only beautiful but also safe and long-lasting.
Create Valentines Gel Nails: 11 Easy Designs for Beginners 2026
Ready to dive into the fun part? To create valentines gel nails that turn heads, you need a solid foundation of tools and a dash of creativity. Before you unscrew that first bottle of polish, ensure you have your station set up with a quality UV lamp, a reliable gel nail kit, and specific nail art brushes which are essential to design gel nail art with precision. The designs below are curated specifically to be easy for beginners while delivering a professional gel nail finish. We will explore everything from minimalist dots to sparkly accents, focusing on gel polish application techniques that minimize mistakes. Each design includes a list of exactly what you need and a pro-tip to help you master the look.
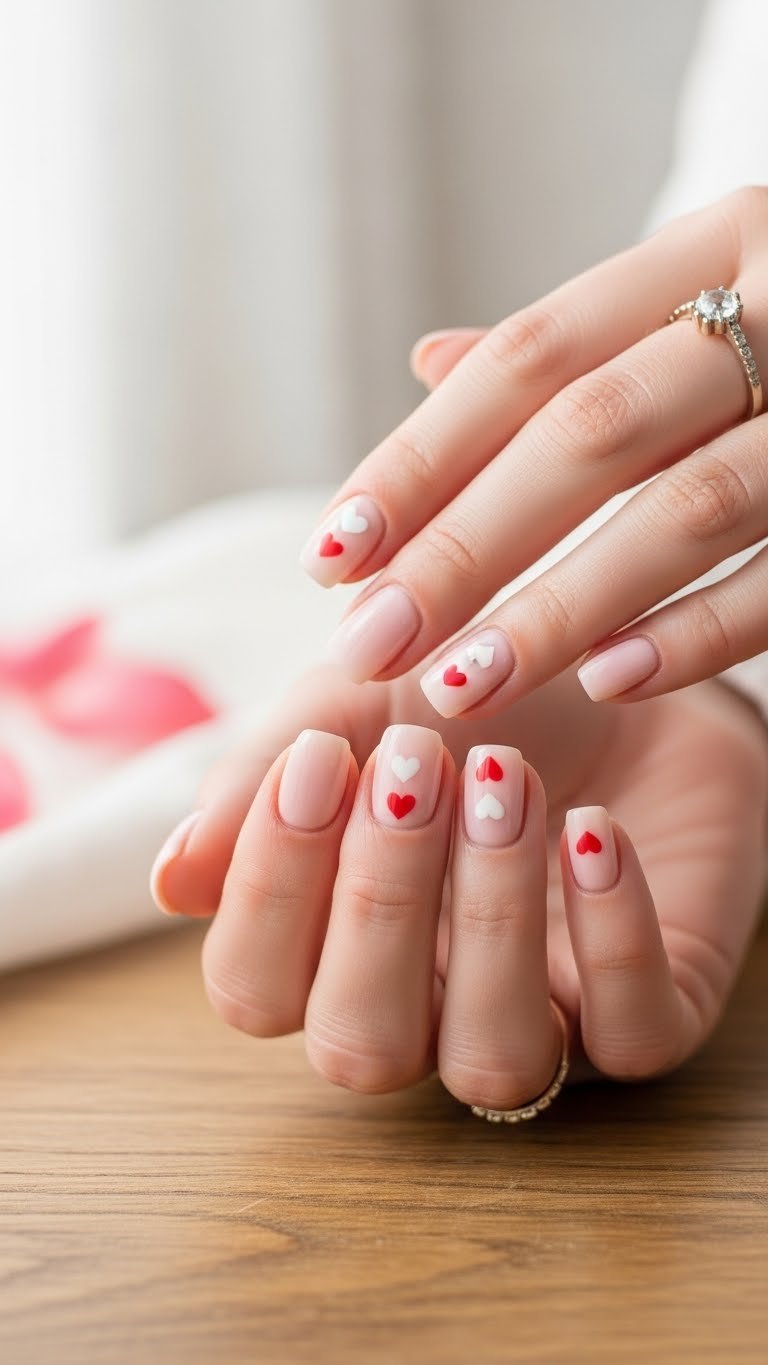
1. Apply Gel Polish with Subtle Heart Accents
Pin this elegant gel nail design to your Valentine’s board!
This design proves that less is often more. Subtle valentines gel nails rely on a clean, neutral base and a tiny, deliberate pop of affection. It is one of the best easy heart designs on gel nails for novices because it requires very little steady hand work compared to complex patterns.
Products & Tools Used:
- Gel Base Coat (essential for long-lasting gel nails valentines)
- Soft Pink Gel Polish (a vibrant gel polish color)
- Opaque White Gel Polish (for crisp details)
- Fine-Tip Nail Art Brush (a nail art essential tool)
- Gel Top Coat (for a professional gel nail finish)
- UV/LED Nail Lamp (to cure gel nails)
- Nail Prep Solution
- Lint-Free Wipes
Application Steps:
- Prep nails for gel by cleaning, shaping, and applying nail prep solution to dehydrate the nail plate.
- Apply gel base coat thinly and cure for 30 seconds under your UV/LED nail lamp.
- Apply soft pink gel polish in two thin coats, curing each coat for 60 seconds to ensure opacity.
- Dip the fine-tip nail art brush into opaque white gel polish.
- On your accent nail (typically the ring finger), paint two small dots side-by-side. Then, gently drag the brush diagonally downwards from each dot to meet at a point, forming a heart.
- Cure gel nails for 60 seconds immediately to freeze the design.
- Seal with top coat, floating it over the design to avoid smearing, then cure for 60 seconds.
- Wipe off the tacky layer with a lint-free wipe.
Pro-Tip: For perfectly symmetrical hearts, practice nail art on a silicone mat or piece of foil first. Using a small dotting tool for the initial two dots can make the process easier for beginners before dragging with the brush. This technique ensures a professional gel nail finish without the frustration of trial and error on your actual nail.

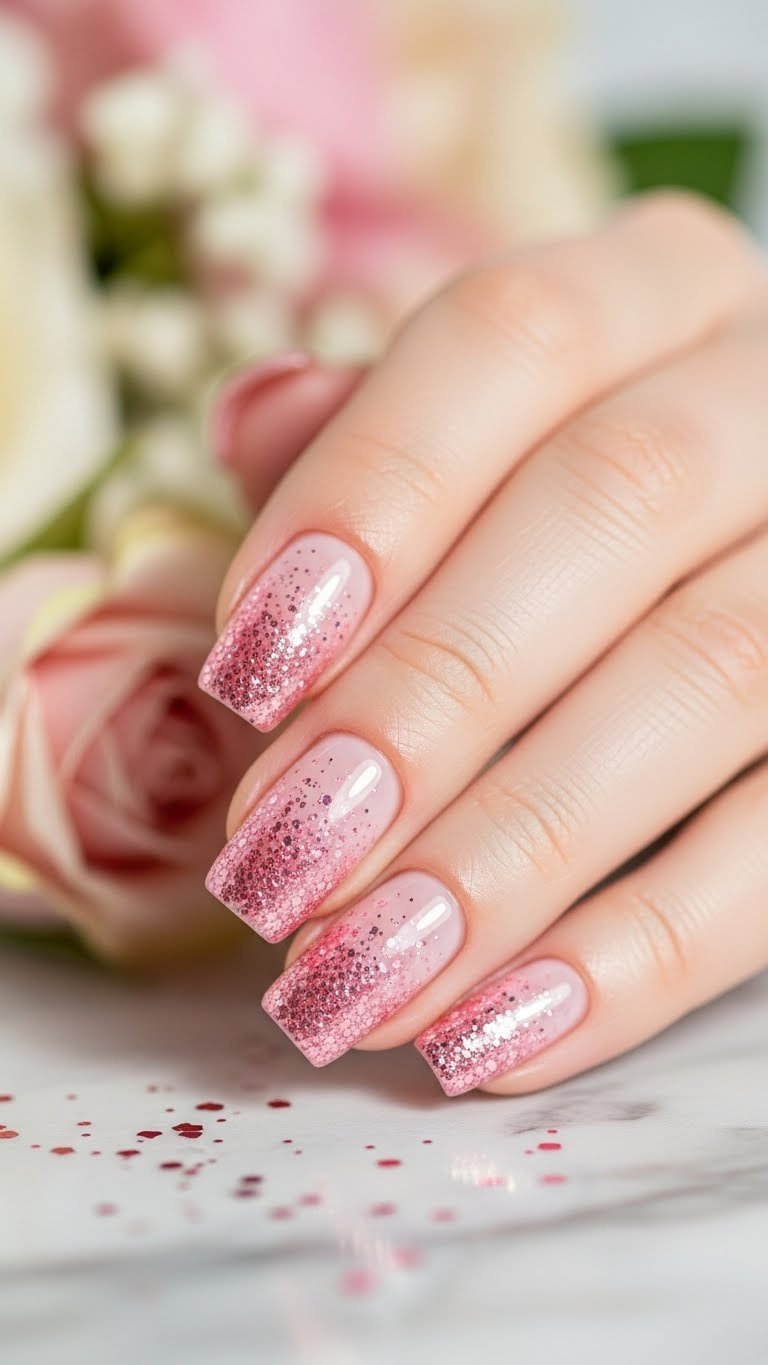
2. Design Gel Nail Art with Glitter Ombré
Save this sparkly valentines gel nail idea for your next manicure!
For a look that screams celebration, sparkly valentines gel nails using an ombré technique offer glamour without being overpowering. This gradient effect, often called a “glitter fade,” uses glitter gel nails techniques to blend sheer pink gel polish into a dense sparkle, creating one of the most popular ombré gel art gradients.
Products & Tools Used:
- Gel Base Coat
- Sheer Pink Gel Polish (a romantic gel nail style)
- Fine Pink or Holographic Glitter Powder (for glitter accents)
- Gel Top Coat
- UV/LED Nail Lamp
- Small Fan Brush or Eyeshadow Applicator
- Dusting Brush
Application Steps:
- Prep nails for gel as usual. Apply gel base coat and cure for 30 seconds.
- Apply sheer pink gel polish as the base color and cure for 60 seconds. Repeat for a second coat if you prefer more color.
- Apply a thin layer of gel top coat but do NOT cure yet.
- Using the fan brush or applicator, gently pat fine glitter powder onto the free edge (tip) of the nail. Gradually decrease the amount of glitter as you move up toward the middle of the nail to create the fade.
- Once satisfied with the gradient, cure gel nails for 60 seconds.
- Use a dusting brush to gently remove any excess loose glitter from the skin.
- Seal with top coat to encapsulate the glitter. You may need two coats to ensure a smooth surface. Cure for 60 seconds.
- Wipe off the tacky layer.
Pro-Tip: For maximum sparkle and a glass-like finish, use a “no-wipe” gel top coat in step 3 before applying glitter. The cured no-wipe top coat provides a slick surface for the glitter to slide on, or if using raw glitter, the uncured layer grabs it. To achieve advanced encapsulation art, apply a final layer of builder gel or thick top coat to fully bury the glitter texture.

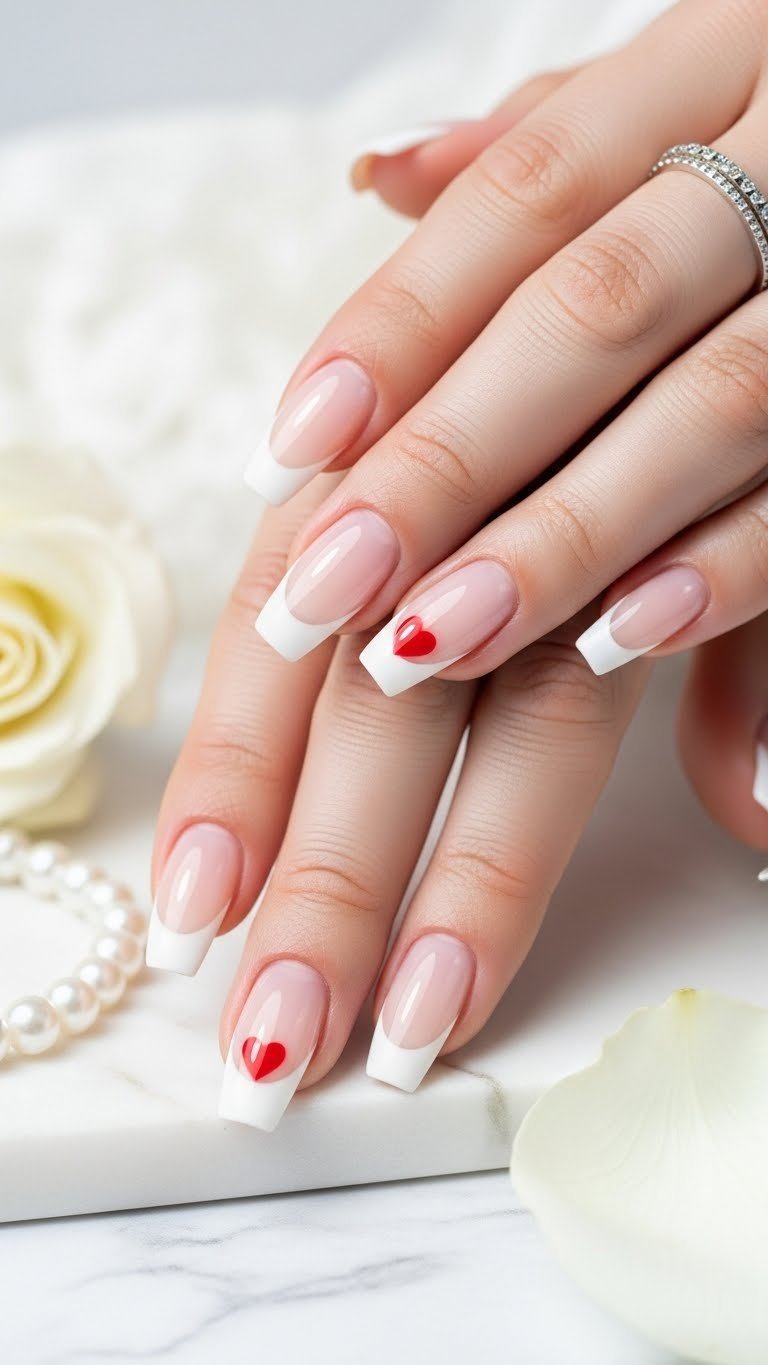
3. Create Valentines Gel Nails with Classic French Tips & Red Heart
Perfect your french tip valentines gel nails with this classic look!
Nothing says classic valentines gel nails like a crisp French manicure updated with a festive twist. By adding a small heart to french tip valentines gel nails, you combine elegance with romance. Red valentines gel nails can be bold, but this design uses red as an accent, making it perfect for elegant valentines gel nails.
Products & Tools Used:
- Gel Base Coat
- Sheer Nude or Pink Gel Polish (for the base)
- Opaque White Gel Polish (for the tips)
- Vibrant Red Gel Polish (for the heart, a vibrant gel polish color)
- French Tip Guides (optional, for easier application)
- Fine-Tip Nail Art Brush or Dotting Tool
- Gel Top Coat
- UV/LED Nail Lamp
Application Steps:
- Prep nails for gel thoroughly. Apply gel base coat and cure for 30 seconds.
- Apply sheer nude or pink gel polish in two thin coats, curing each for 60 seconds.
- For the tips: Use French tip guides for guidance or freehand with a steady hand. Paint nail designs with opaque white gel polish along the free edge. Clean up the smile line with a brush dipped in alcohol if needed. Cure for 60 seconds.
- Using the fine-tip nail art brush or dotting tool dipped in vibrant red gel polish, paint two small dots near the cuticle of your ring finger and drag them together to form a tiny heart. Cure for 60 seconds.
- Seal with top coat, capping the free edge to prevent chipping, then cure for 60 seconds.
- Wipe off the tacky layer.
Pro-Tip: If freehanding the French tip feels impossible, try the “stamp” method or use a specific “smile line” brush. Dip the brush in white gel, anchor your arm on the table, and rotate your finger (not the brush) to create the curve. This expert gel nail advice helps beginners achieve that crisp, professional gel nail finish line.

4. Design Gel Nail Art with Abstract Pink Swirls
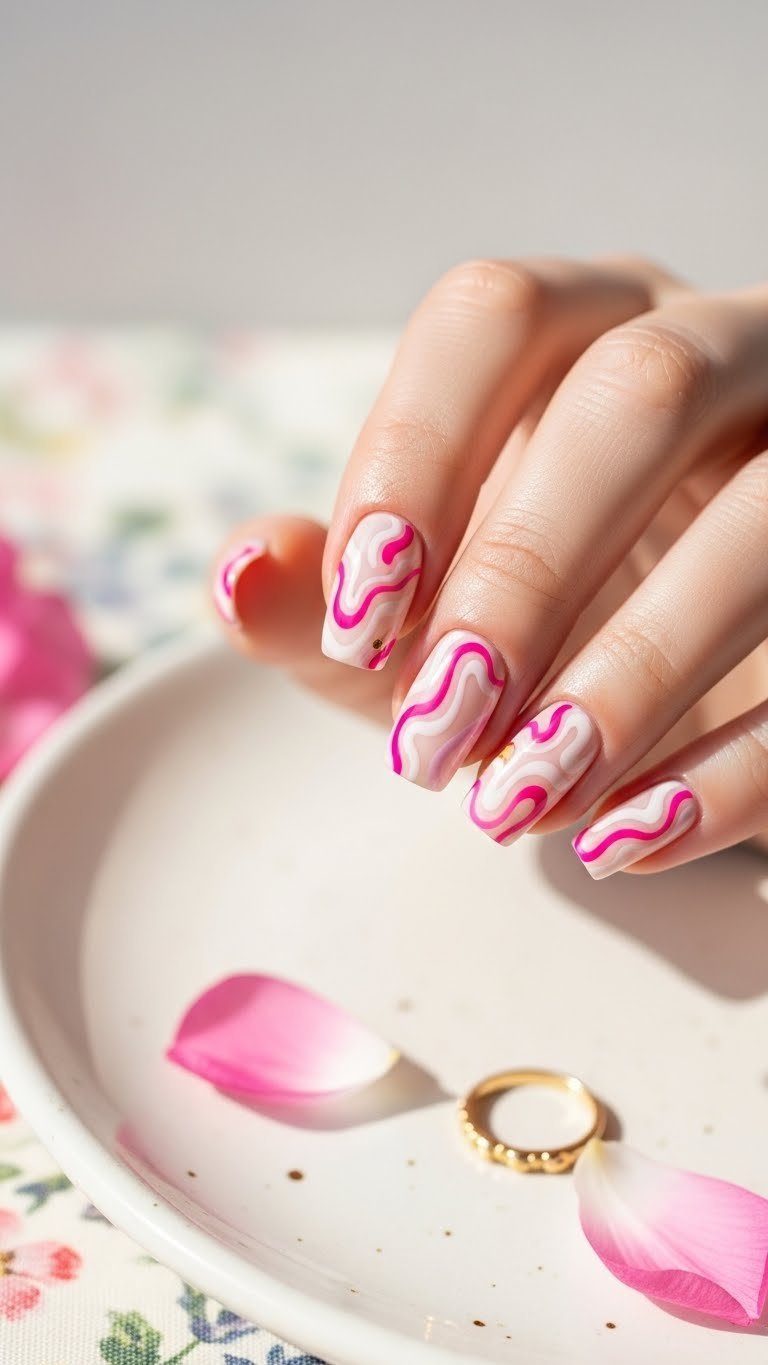
Add a playful valentines gel design to your look with these abstract swirls!
If you want cute valentines gel nails that feel artistic and trendy, abstract swirls are the way to go. Modern valentines gel nails often move away from literal hearts to embrace abstract gel nail art. By mixing pink valentines gel nails shades, you create depth and movement.
Products & Tools Used:
- Gel Base Coat
- Light Pink or Creamy White Gel Polish (for base)
- Various Shades of Pink Gel Polish (e.g., pastel pink, fuchsia)
- Fine-Tip Nail Art Detailing Brush
- Gel Top Coat
- UV/LED Nail Lamp
Application Steps:
- Prep nails for gel. Apply gel base coat and cure for 30 seconds.
- Apply light pink or creamy white gel polish in two thin coats, curing each for 60 seconds.
- Do NOT apply top coat yet. On the cured base color (or a wiped base), use the fine-tip detailing brush to randomly paint nail designs consisting of thin, curving lines. Use different shades of pink for each line. Don’t overthink it—natural, fluid movement looks best.
- Once satisfied with the design, cure gel nails for 60 seconds.
- Seal with top coat and cure for 60 seconds.
- Wipe off the tacky layer.
Pro-Tip: To make your swirls pop, incorporate a tiny amount of a darker contrasting gel polish (like deep magenta or red) for one of the lines. This contrast creates a more expressive gel nail design. Keep the gel layers thin; blooming gel creates patterns that spread, but for this look, you want crisp lines, so flash cure (cure for 10 seconds) between colors if you’re worried about them running together.
5. Do a Gel Manicure with Polka Dot Playfulness
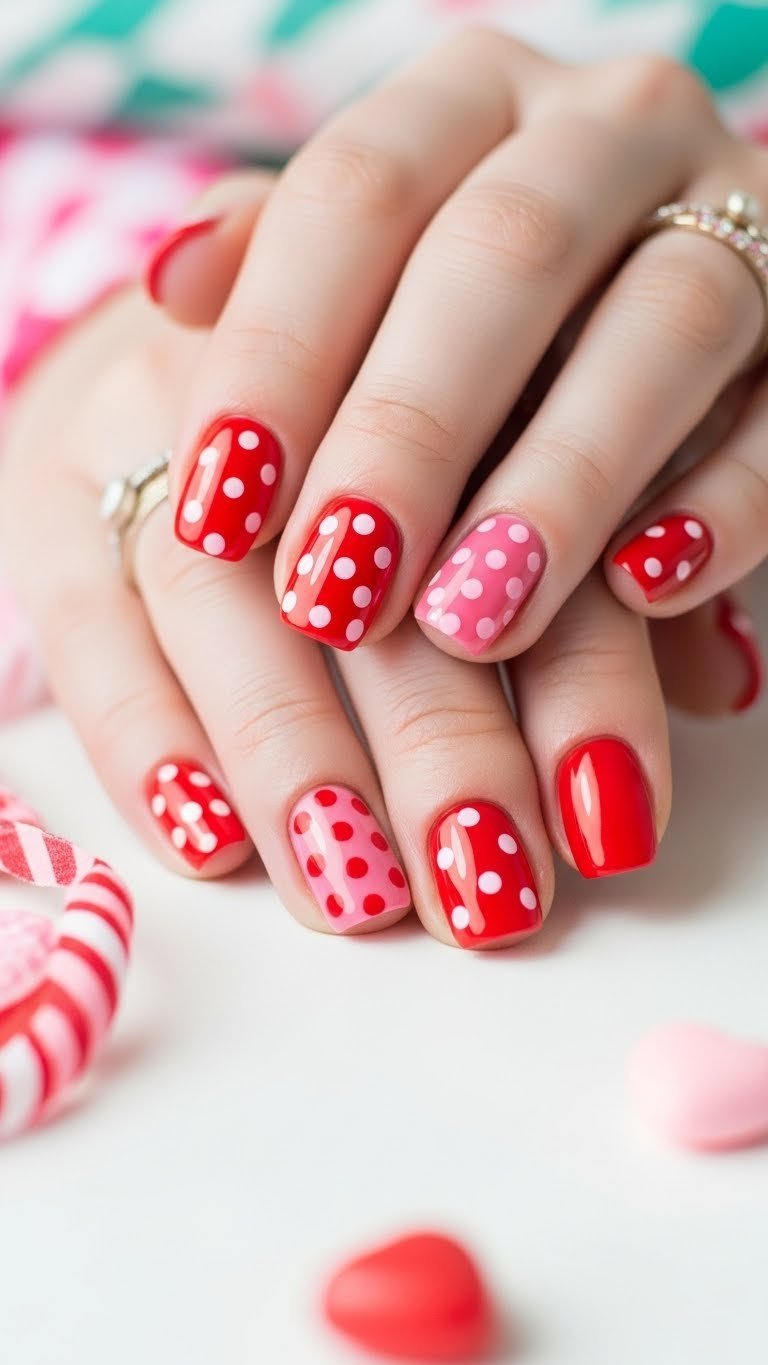
Try this cute valentines gel nail look for a fun, festive manicure!
Cute valentines gel nails don’t get much simpler or effective than polka dots. Playful valentines gel designs utilizing red gel nails with contrasting white dots evoke a retro, candy-sweet vibe. Pink valentines day gel looks are equally stunning with red dots.
Products & Tools Used:
- Gel Base Coat
- Vibrant Red or Pink Gel Polish (for base, a vibrant gel polish color)
- Opaque White or Contrasting Pink Gel Polish (for dots)
- Dotting Tool Set (with various sizes)
- Gel Top Coat
- UV/LED Nail Lamp
Application Steps:
- Prep nails for gel. Apply gel base coat and cure for 30 seconds.
- Apply vibrant red or pink gel polish in two thin coats, curing each for 60 seconds.
- Dip the smallest dotting tool into your opaque white or contrasting pink gel polish.
- Carefully paint nail designs by placing evenly spaced dots across the nail surface. You can do a full pattern or just a vertical line of dots.
- Cure gel nails for 60 seconds.
- Seal with top coat, cure for 60 seconds.
- Wipe off the tacky layer.
Pro-Tip: For perfectly round dots, don’t drag the tool. Simply press gently and lift straight up. To create a “fading” dot effect, dip the tool once and press it onto the nail multiple times in a row without re-dipping; the dots will get progressively smaller. This simple trick is a great way to make a gel nail design look professional with minimal effort.

6. Create Valentines Gel Nails with Glitter Placement & Stripes
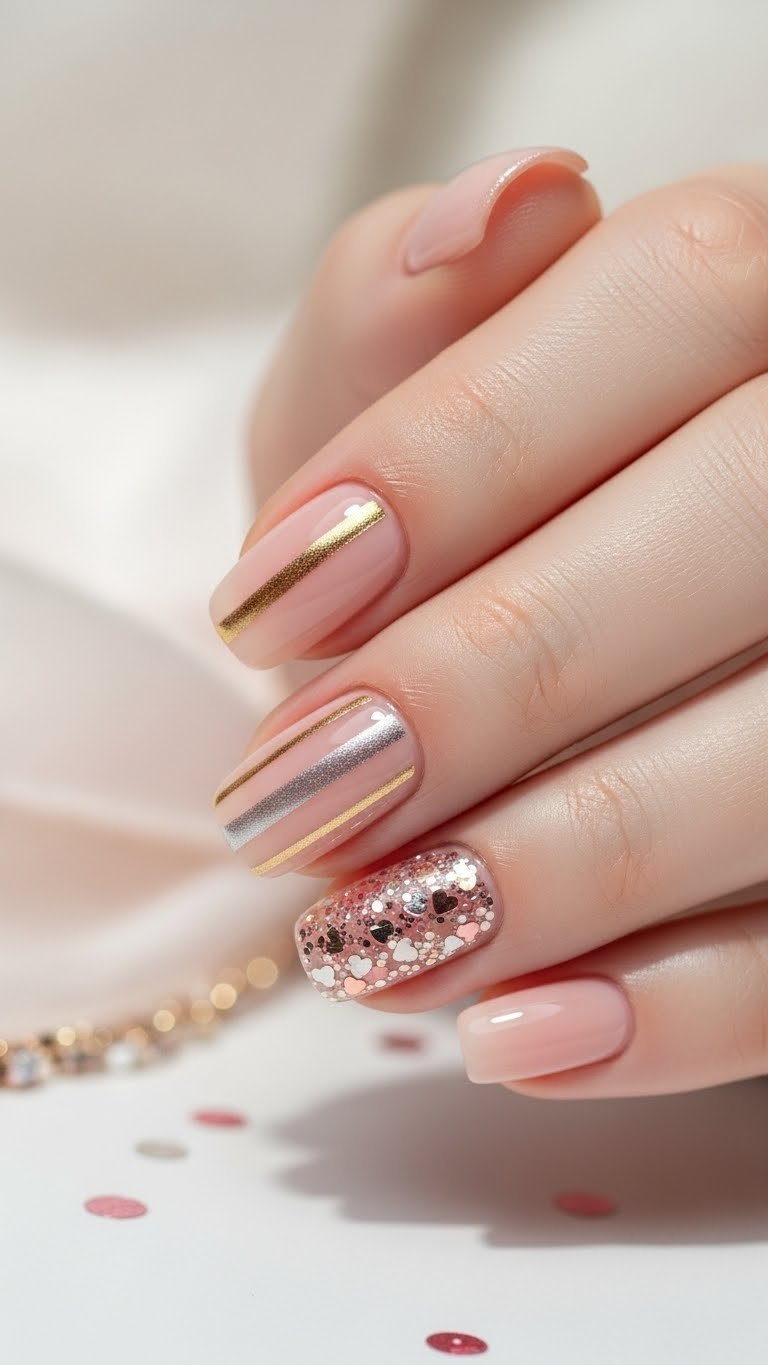
For an elegant valentines gel nail design, try this glitter and stripe combo!
If you prefer elegant valentines gel nails, combining precise lines with glitter accents offers a sophisticated aesthetic. This look uses long-lasting gel nails valentines products to hold heavier glitter pieces that regular polish often drops. Sparkly valentines gel nails can be refined by using glitter strategically rather than all over.
Products & Tools Used:
- Gel Base Coat
- Nude or Sheer Pink Gel Polish (for base)
- Gold or Silver Gel Polish (for stripes)
- Fine Glitter Pieces (e.g., heart-shaped or chunky mix)
- Gel Liner Brush
- Nail Stripping Tape (optional, for crisp lines)
- Gel Top Coat
- UV/LED Nail Lamp
- Tweezers
Application Steps:
- Prep nails for gel. Apply gel base coat and cure for 30 seconds.
- Apply nude or sheer pink gel polish in two thin coats, curing each for 60 seconds.
- For stripes: Place nail stripping tape to mask off the area for your line, or use a gel liner brush to freehand a vertical stripe with gold or silver gel polish. Cure for 60 seconds.
- For glitter: Apply a thin layer of wet gel top coat (do NOT cure yet). Using tweezers, pick up individual fine glitter pieces and place them exactly where you want them. Cure for 60 seconds.
- Seal with top coat, cure for 60 seconds.
- Wipe off the tacky layer.
Pro-Tip: When using nail stripping tape, ensure your base color is fully cured and has no sticky layer (wipe it with alcohol first) before applying the tape. Remove the tape immediately after painting your stripe, before curing the stripe color. For glitter, use two thin layers of top coat to ensure the surface is smooth and the glitter doesn’t snag, ensuring long-lasting gel nail designs.

7. Design Gel Nail Art with Sweet & Simple Kisses
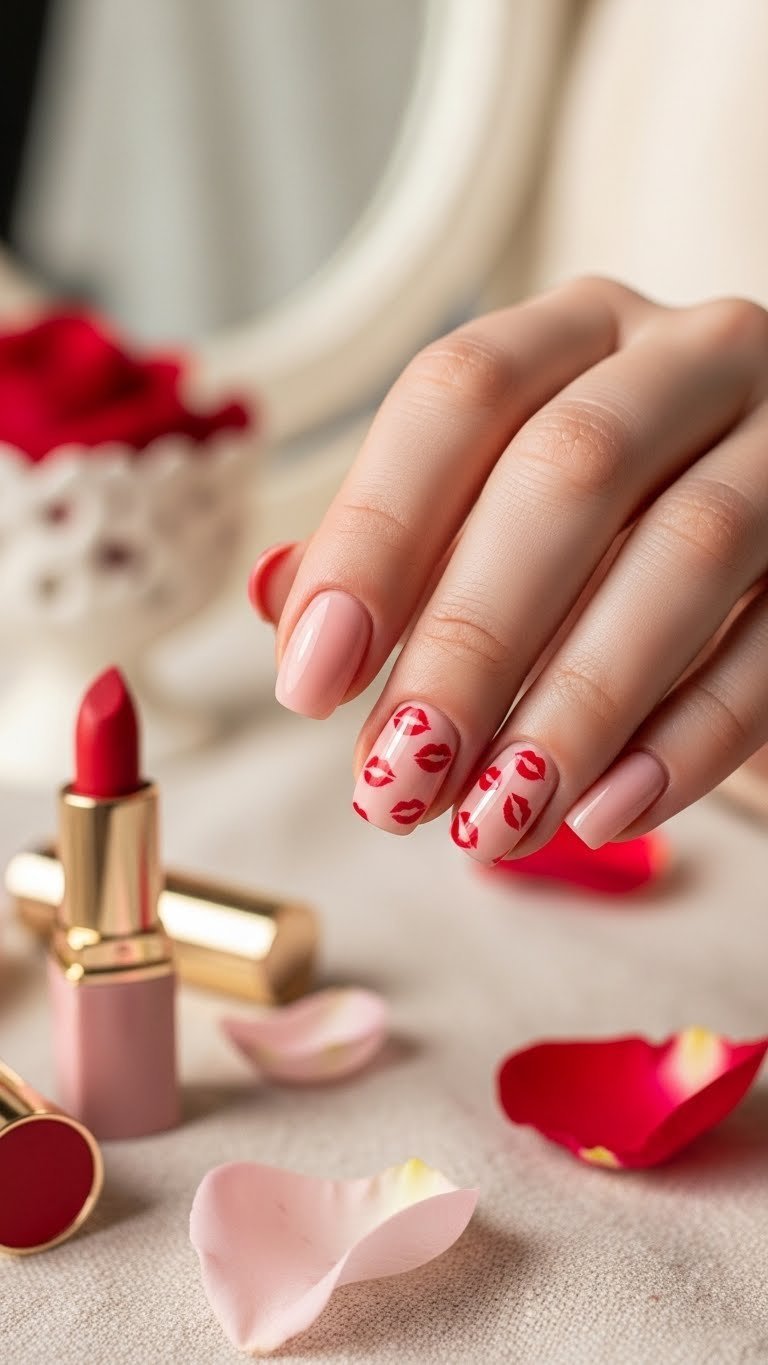
Kiss boredom goodbye with these cute valentines gel nails!
Cute valentines gel nails often feature playful motifs. Playful valentines gel designs like “kiss marks” or lip prints are easier than they look and create a distinct themed gel manicure. Using red valentines gel nails colors for the art against a nude background makes the design pop.
Products & Tools Used:
- Gel Base Coat
- Light Pink or Nude Gel Polish (for base)
- Vibrant Red or Dark Pink Gel Polish (for kisses, a vibrant gel polish color)
- Fine Detail Nail Art Brush
- Gel Top Coat
- UV/LED Nail Lamp
Application Steps:
- Prep nails for gel. Apply gel base coat and cure for 30 seconds.
- Apply light pink or nude gel polish in two thin coats, curing each for 60 seconds.
- On the accent nail, dip your fine detail nail art brush into vibrant red or dark pink gel polish.
- Paint two small, elongated oval shapes side-by-side to form the general shape of lips. Add a tiny “V” divot at the top center and bottom center to define the Cupid’s bow. It doesn’t have to be perfect—abstract looks great!
- Cure gel nails for 60 seconds.
- Seal with top coat and cure for 60 seconds.
- Wipe off the tacky layer.
Pro-Tip: Don’t stress about photographic realism. An abstract “kiss” mark is often easier for beginners and reads clearly as festive valentine gel art. If painting feels too hard, you can use a stamping plate or stickers for this nail art for beginners technique.

8. Create Valentines Gel Nails with Minimalist Pink & White Color Block
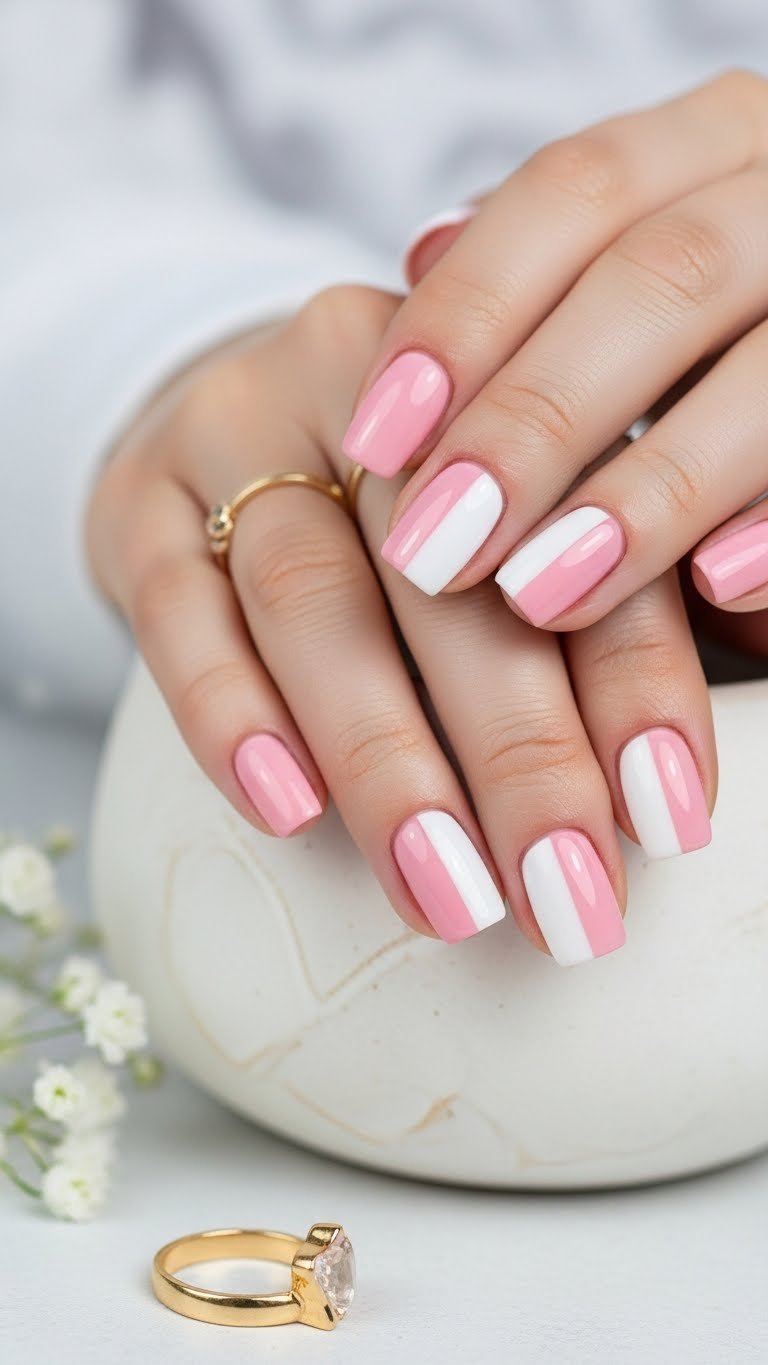
Achieve a chic minimalist valentines gel nail look with this simple color block idea!
Minimalist valentines gel nails rely on geometric precision. Simple valentines gel nails using blocks of pink valentines gel nails color against white gel nails create a modern, high-fashion look. This technique is fantastic for short valentines nails gel where complex art might look cluttered.
Products & Tools Used:
- Gel Base Coat
- Pastel Pink Gel Polish
- Opaque White Gel Polish
- Nail Art Tape (or a striping brush for freehand)
- Gel Top Coat
- UV/LED Nail Lamp
Application Steps:
- Prep nails for gel. Apply gel base coat and cure for 30 seconds.
- Apply pastel pink gel polish to just one half of the nail (diagonal or vertical) and cure for 60 seconds. Don’t worry if the line isn’t perfect yet.
- Place nail art tape along the edge of the pink to create a sharp barrier. Apply opaque white gel polish to the empty side.
- Remove the tape immediately before curing.
- Alternatively, use a striping brush to draw the dividing line first, then fill in the sections. Cure for 60 seconds.
- Seal with top coat, cure for 60 seconds.
- Wipe off the tacky layer.
Pro-Tip: For the sharpest lines, ensure the first color block is fully cured. If you use nail art tape, press it down firmly to prevent bleeding. Removing the tape while the second color is still wet is the secret to preventing gel nail damage (like peeling edges) and achieving a professional gel nail finish.

9. Apply Gel Polish for Rose Quartz Marbling
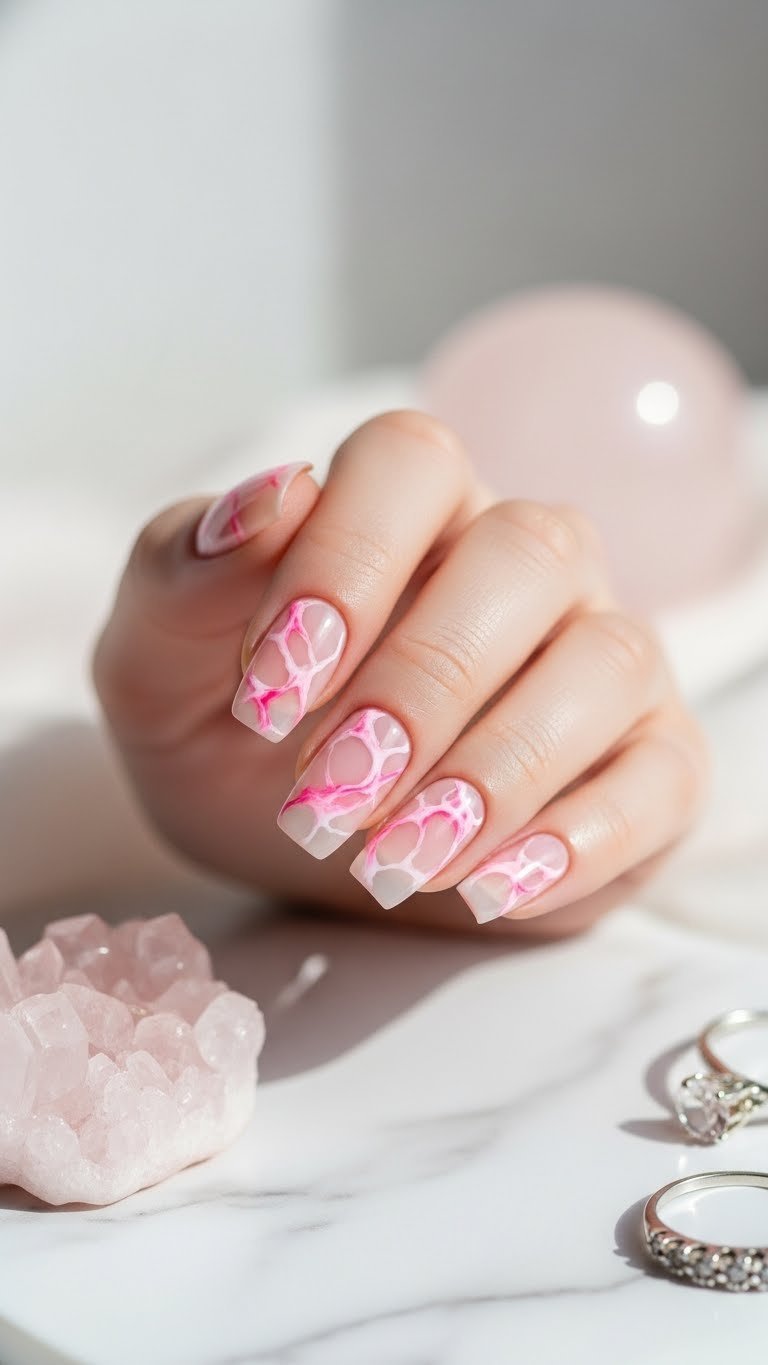
Achieve a stunning and unique valentines gel nail look with this easy rose quartz marble!
Elegant valentines gel nails inspired by crystals are incredibly trendy. This design creates unique valentines gel nails using a gel nail marbling technique that mimics the soft veins of rose quartz. It fits perfectly into romantic gel nail styles.
Products & Tools Used:
- Gel Base Coat
- Milky Pink Translucent Gel Polish (for base)
- Opaque White or Light Pink Gel Polish (for veins)
- Fine Detail Nail Art Brush
- Blooming Gel (optional, for easier marbling)
- Gel Top Coat
- UV/LED Nail Lamp
Application Steps:
- Prep nails for gel. Apply gel base coat and cure for 30 seconds.
- Apply milky pink translucent gel polish in two thin coats, curing each for 60 seconds.
- Apply a thin layer of blooming gel (do NOT cure).
- While the blooming gel is wet, use the fine detail nail art brush to lightly draw thin, shaky lines with opaque white or light pink gel polish. The blooming gel will cause the lines to spread and soften naturally.
- Once you like the stone effect, cure gel nails for 60 seconds.
- Seal with top coat and cure for 60 seconds.
- Wipe off the tacky layer.
Pro-Tip: If you don’t own blooming gel, you can hack this technique using a clear top coat. Apply the uncured clear coat, then drag your white lines through it. Let gravity do the work for a few seconds before curing. This expert gel nail advice allows you to mimic the blooming gel creates patterns effect with standard products.

10. Do a Gel Manicure with Valentine’s Themed Decals
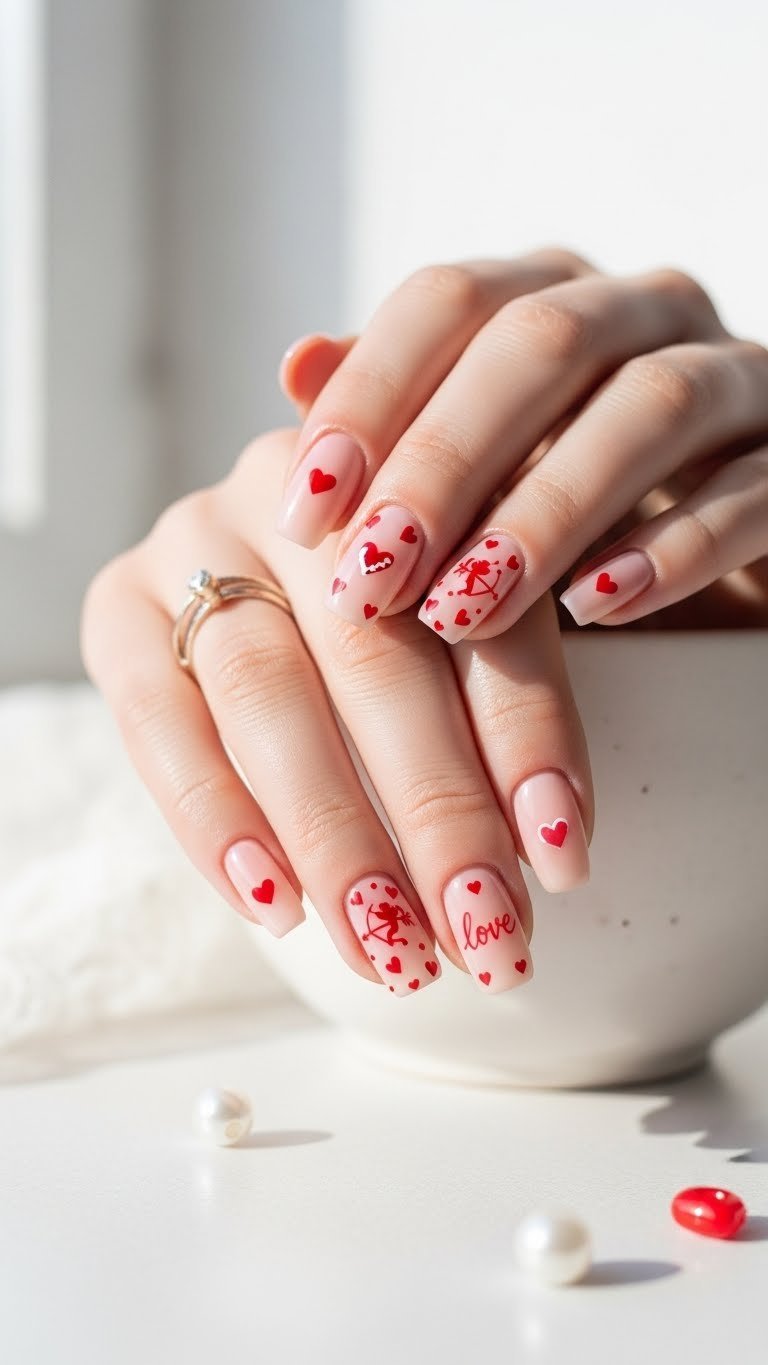
For an ultra-easy valentines gel nail look, try these fun decals!
Sometimes the best easy valentines gel nails involve a little help. Nail decals valentines and nail stickers valentine’s allow you to have intricate art like script or tiny cupids without drawing them. This creates a themed gel manicure in seconds.
Products & Tools Used:
- Gel Base Coat
- Nude or Soft Pink Gel Polish (for base)
- Valentine’s Themed Nail Decals or Nail Stickers
- Fine Tweezers (for placement)
- Gel Top Coat
- UV/LED Nail Lamp
- Small Dish of Water (if using water-slide decals)
Application Steps:
- Prep nails for gel. Apply gel base coat and cure for 30 seconds.
- Apply nude or soft pink gel polish in two thin coats, curing each for 60 seconds.
- Apply a thin layer of gel top coat and cure for just 10-30 seconds (sticky cure). This helps the decal grab onto the nail.
- Remove your valentine’s themed nail decals from the backing. If using water slides, soak them first.
- Using fine tweezers, place the decal onto the nail. Press it down gently from the center outwards to remove air bubbles.
- Cure gel nails for 60 seconds to lock it in place.
- Seal with top coat, ensuring you have enough gel over the sticker so it doesn’t poke through. Cure for 60 seconds.
- Wipe off the tacky layer.
Pro-Tip: If using water-slide nail decals, dry them thoroughly on a lint-free wipe before placing them on the gel. Water and gel don’t mix; trapped moisture causes gel polish lifting prevention issues. Ensuring the decal is dry and flat is the key to long-lasting gel results.

11. Create Valentines Gel Nails with Simple Glitter Tips
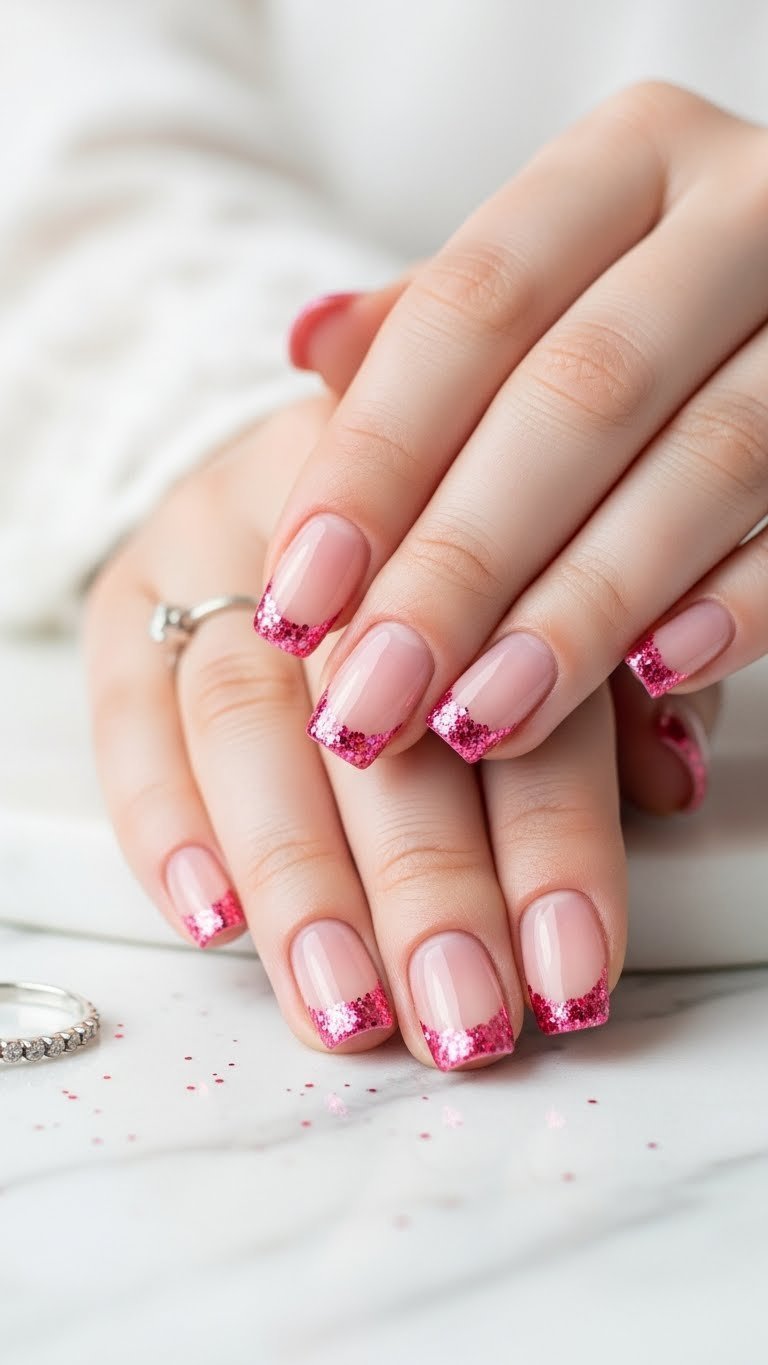
Add a touch of sparkle with these sparkly valentines gel nails and easy glitter tips!
This variation of the French manicure uses glitter valentines gel nails concepts for a festive finish. By swapping white tips for fine glitter powder, you get easy valentines gel nails that catch the light. It’s a forgiving french tip with glitter style because the glitter line doesn’t have to be as razor-sharp as a solid color.
Products & Tools Used:
- Gel Base Coat
- Sheer Pink or Nude Gel Polish (for base)
- Fine Pink, Red, or Holographic Glitter Powder
- Small Gel Applicator Brush or Eyeshadow Applicator
- Gel Top Coat
- UV/LED Nail Lamp
- Dusting Brush
Application Steps:
- Prep nails for gel. Apply gel base coat and cure for 30 seconds.
- Apply sheer pink or nude gel polish in two thin coats, curing each for 60 seconds.
- Apply a thin layer of gel top coat (do NOT cure).
- Using the small gel applicator brush or a sponge applicator, gently tap fine glitter powder onto just the very tips of the nails. You can clean up the line with a dry brush if needed.
- Cure gel nails for 60 seconds.
- Use a dusting brush to sweep away loose glitter.
- Seal with top coat. You might want two layers to make the tips smooth and not gritty. Cure for 60 seconds.
- Wipe off the tacky layer.
Pro-Tip: “Sandwiching” is the secret here. Apply a layer of base coat or gel top coat over the glitter and cure before your final top coat layer. This extra step in maintaining gel nails ensures the glitter texture is completely smoothed out, preventing it from snagging on clothes and ensuring a long-lasting gel manicure.

Key Takeaways: Your Quick Guide to Valentines Gel Nails
To summarize, creating easy valentines gel nails is all about preparation and patience. Whether you choose diy valentines gel nails with complex swirls or simple decals, these principles ensure success:
- DIY is Achievable: With the right tools, beginners can create valentines gel nails like glitter ombrés or heart accents without professional training.
- Prep is Paramount: Proper nail preparation essentials—like dehydrating the nail plate—are vital for gel polish lifting prevention and a long-lasting gel nails valentines result.
- Tools Matter: A quality gel nail kit valentines with a powerful uv lamp for gel nails and fine brushes simplifies the gel polish application process significantly.
- Decals are Your Friend: For the ultimate easy valentines gel nail hack, nail decals valentines provide intricate designs instantly without the need for drawing skills.
- Encapsulate Everything: To ensure long-lasting gel results, always seal glitter and nail stickers valentine’s under at least two layers of gel top coat.
- Practice First: Use a silicone mat to practice nail art before applying to your own hands; it builds muscle memory for better gel polish application.
- Troubleshoot Wisely: Learn chipped gel nails solution techniques to maintain gel nails and keep your manicure flawless throughout the holiday.
People Also Ask About Valentines Gel Nails
Here are answers to the most common questions about achieving the perfect valentines nails gel manicure at home.
What are the best valentines gel nail designs for beginners?
The best valentines gel nail designs for beginners prioritize simplicity, such as subtle heart accents, glitter ombrés, and classic French tips with a single heart decal. These styles rely on basic gel polish application rather than complex freehand drawing. Designs using dotting tools (like polka dots) or nail decals valentines are also excellent entry points for those learning how to do valentines gel nails at home.
How to do valentines gel nails at home?
To do valentines gel nails at home, start by thoroughly prepping your nails (filing, buffing, dehydrating), then apply a base coat and cure it under a UV/LED lamp. Follow with two thin coats of colored gel polish, curing between each layer. Add your chosen easy valentines gel nail design, cure again, and finish with a top coat, wiping away the tacky layer for a long-lasting gel manicure.
What gel nail colors are popular for Valentine’s Day?
Popular gel nail colors for Valentine’s Day include various shades of pink (from pastel to fuchsia), classic vibrant reds, and crisp whites. These vibrant gel polish colors form the foundation of most romantic gel nail styles. Nude and sheer pinks are also essential for minimalist valentines gel nails and negative space designs.
What tools are needed for gel nail art?
Essential tools for gel nail art include a UV/LED nail lamp, gel base and top coats, colored polishes, and specific art tools like fine-tip brushes and dotting tools. A comprehensive gel nail kit valentines usually provides the basics. For advanced designs, you might need nail stripping tape, blooming gel, or a gel liner brush.
How to make gel nails last longer?
To make gel nails last longer, ensure you dehydrate the nail plate with alcohol or primer before applying the base coat to improve adhesion. Apply thin, even layers to prevent wrinkling and always “cap” the free edge of the nail with polish. Proper curing times under a powerful UV/LED nail lamp are critical for long-lasting gel nails valentines.
Are semi cured gel nails good for Valentine’s Day?
Yes, semi-cured gel nails are a fantastic option for Valentine’s Day if you want the durability of gel without the painting process. These strips are 60% cured gel that you stick on and fully harden under a lamp. They are excellent valentines gel nails alternatives for beginners looking for complex designs without the effort.
How to remove gel polish safely?
To remove gel polish safely, gently file off the shiny top coat, then soak cotton balls in 100% acetone and wrap them onto your nails with foil for 10-15 minutes. Once the gel bubbles and lifts, gently push it off with an orange stick. Never peel the gel, as this causes damage; this method ensures damage free gel removal.
What nail shapes are best for valentines gel art?
The best nail shapes for valentines gel art depend on the design; almond and oval shapes are great for elegant, romantic looks, while square or coffin shapes provide a larger canvas for detailed art. Short valentines nails gel look fantastic with minimalist designs or full-color red, while longer shapes suit French tips and ombrés.
How to prevent air bubbles in gel polish?
To prevent air bubbles in gel polish, roll the bottle gently between your hands instead of shaking it, and apply thin, deliberate coats. Avoid pumping the brush in and out of the bottle. If bubbles appear, pop them with a fine brush before curing to ensure a smooth gel polish application.
What is the difference between gel polish and hard gel?
Gel polish is a soft gel that can be soaked off with acetone, making it ideal for standard manicures and color. Hard gel is a non-porous, durable substance used for building extensions and structure; it cannot be soaked off and must be filed down. Beginners usually start with soft gel polish for easy valentines gel nails.
Final Thoughts on Valentines Gel Nails
Mastering valentines gel nails is a rewarding journey that combines creativity with self-care. By choosing one of these easy valentines gel nail designs, you can enjoy a salon-quality manicure that withstands the rigors of daily life while celebrating the season of love. The durability of gel nails valentine’s styles means your hard work will pay off with weeks of flawless wear, far outlasting traditional polish.
Don’t be afraid to experiment with vibrant gel polish colors or mix and match techniques like glitter and decals. The beauty of diy gel nails is that you have the freedom to customize your look exactly to your taste. Whether you opt for a minimalist valentines gel nail or a bold red design, the key is to have fun with the process. Which of these designs will you try first for your romantic gel nail styles? Grab your uv lamp for gel nails and get creative
Last update on 2026-01-17 / Affiliate links / Images from Amazon Product Advertising API