Are you tired of staring at plain nails while scrolling through endless, complicated holiday manicure tutorials? Many DIY enthusiasts struggle to achieve salon-quality valentines nails hearts at home, often ending up with messy results instead of romance-ready hands.
Valentines nails hearts: A festive nail art category featuring red, pink, or white heart motifs created using dotting tools, stickers, or freehand techniques to celebrate the season of love. These designs range from simple minimalist accents to intricate 3D embellishments, allowing for personalized, romantic expressions on your fingertips perfect for Valentine’s Day.
Drawing from professional nail art techniques and expert care advice, this guide simplifies the process into actionable steps for every skill level. You will discover 11 essential designs, from beginner-friendly decals to advanced marbling, that transform your home manicure routine. Get ready to master these festive looks with confidence and precision.
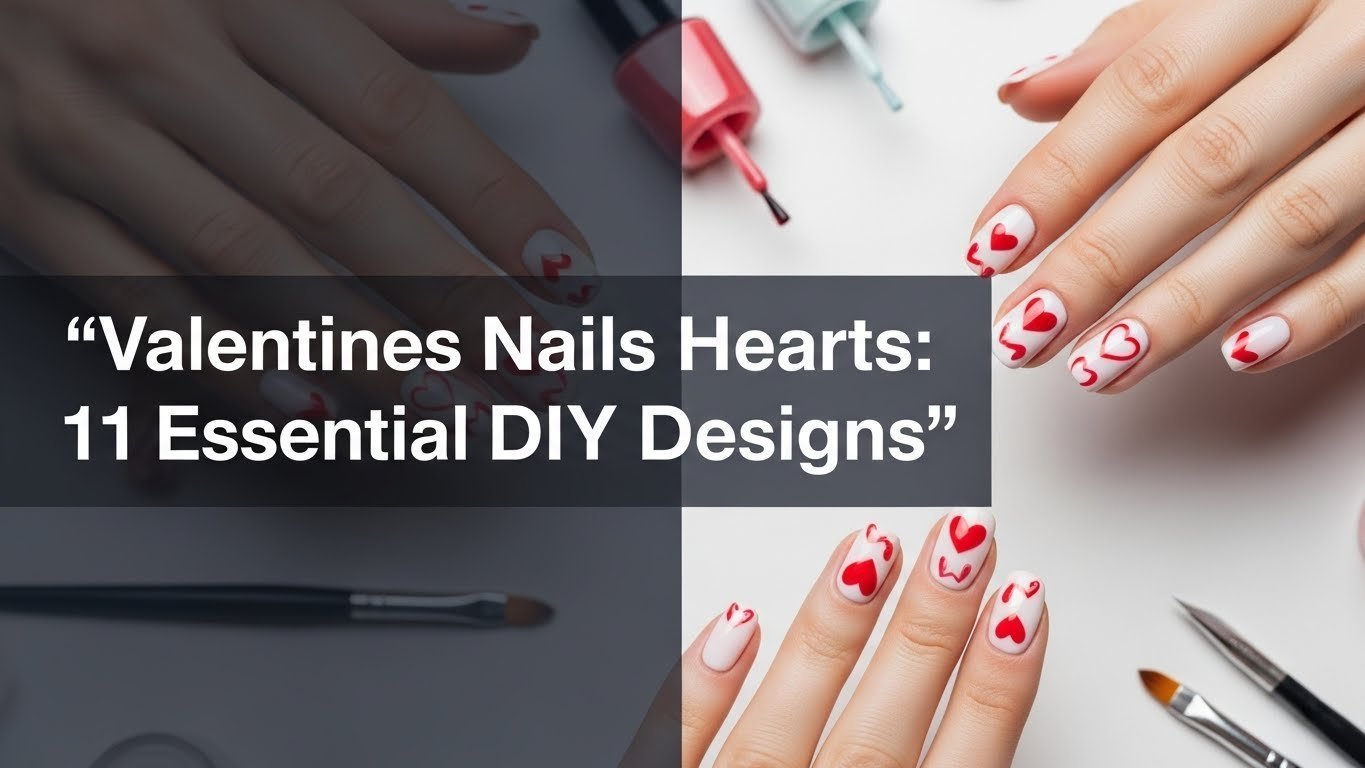
Master the Art of Valentines Nails Hearts: 11 Essential DIY Designs for 2026
Creating the perfect valentines nails hearts doesn’t require a professional license or a trip to an expensive salon. Whether you are a complete beginner or a seasoned DIY enthusiast, mastering valentine’s day nail art is about understanding the right tools and techniques. This guide bridges the gap between inspiration and execution, addressing the common frustration of “Pinterest vs. Reality” by providing clear, easy nail art instructions. We have analyzed proven methods for nail art to ensure that every design listed here is not only beautiful but also achievable from the comfort of your home.
The primary entity we are exploring, valentines nails hearts, goes beyond simple red polish. It encompasses a variety of heart nail designs valentine’s that utilize specific nail art tools like dotting tools and brushes, as well as nail art accessories such as stickers and decals. These designs are deeply associated with romance and inspired by love, making them the perfect accessory for the seasonal holiday. By following our expert-backed advice, you will learn how to prepare your nails to prevent chipping, choose the right nail polish colors, and apply designs that look professional and last longer. Let’s dive into the essentials of creating romantic heart nail art that you will be proud to show off.
11 Essential DIY Designs for Valentines Nails Hearts
We have curated a collection of 11 distinct heart nail designs that cater to various styles and skill levels. From the simplicity of nail stickers hearts to the artistry of painted motifs, each idea is designed to help you create nail art that inspires love. Before you begin, ensure you have your basic nail art tools ready, including a clean workspace and your favorite shades of red, pink, and white.
Each subsection below acts as a mini-tutorial, guiding you through simple steps to create cute heart nails at home. We have included precise supply lists and “Pro-Tips” derived from experienced nail artists to ensure your success. Whether you are looking for easy DIY valentine’s day heart nail art for beginners or more complex romantic heart nail art tutorials, this gallery covers it all. Prepare to transform your manicure with hearts into a stunning statement piece for 2026.
1. Paint Tiny Hearts with a Dotting Tool

Pin this genius hack to your ‘DIY Nail Art’ board for later!
One of the most accessible ways to create easy heart nail designs is by using a dotting tool for nails. This method is perfect for beginner friendly valentine nail art because it relies on simple shapes rather than complex brush strokes. By utilizing specific nail polish colors like classic red or deep pink, you can easily paint tiny hearts that look precise and uniform. This technique allows you to create nail art on your finger nails that looks professionally done without the salon price tag.
Supplies Needed
- Base Coat (e.g., OPI Nail Envy Nail Strengthener, clear)
- Nude or Light Pink Nail Polish (e.g., Essie Gel Couture long-lasting polish, ‘Fairy Tailor’)
- Red Nail Polish (e.g., OPI Infinite Shine long-wear lacquer, ‘Big Apple Red’)
- Fine-Tip Dotting Tool (e.g., Professional double-ended dotting tool set, various sizes)
- Top Coat (e.g., Seche Vite Dry Fast Top Coat, high-gloss)
- Nail Polish Remover and small cleanup brush
Step-by-Step Instructions
- Prepare nails by applying a thin layer of base coat to clean, shaped nails. Allow to dry completely.
- Apply 2 coats of your chosen nude or light pink nail polish. Let each coat dry fully before applying the next.
- Dip the smallest end of your dotting tool into the red nail polish, picking up a small bead of color.
- Place two small dots side-by-side at a slight angle on your nail where you want the heart to be.
- Drag the dotting tool downwards from the center of the two dots to connect them and form a point, creating the bottom of the heart.
- Repeat for all desired nails, practicing on paper if needed for even hearts.
- Seal design with a generous layer of high-shine top coat to protect the art and add durability.
Pro-Tip: For perfectly symmetrical tiny hearts, ensure your two initial dots are equal in size and equidistant. A slightly thicker top coat will help smooth any tiny bumps from the polish, giving a smooth finish to your cute valentines heart nails.

2. Apply Mini Heart Decals for Instant Charm

Save this stress-free **heart nail design idea for your Valentine’s Day manicure!**
If you are short on time or unsteady with a brush, nail stickers hearts are your best friend for instant charm nail art. Using nail decals valentine is an excellent alternative to painting hearts on nails, offering a crisp, uniform look that is difficult to achieve by hand. This method provides easy to apply valentine’s day decals that adhere seamlessly to your base color, making simple heart nails accessible to everyone. The key is proper application to ensure they last through your Valentine’s date night.
Supplies Needed
- Base Coat
- White or Nude Nail Polish (e.g., Sally Hansen Miracle Gel, ‘Get Mod’)
- Mini Heart Nail Decals/Stickers (e.g., O.P.I. Valentine’s Day Nail Decals, various colors)
- Tweezers (e.g., Precision fine-tip nail art tweezers)
- Top Coat
Step-by-Step Instructions
- Prepare nails with a base coat and 2 coats of your desired white or nude polish. Ensure polish is completely dry before proceeding.
- Select a mini heart decal from your sheet using the precision tweezers.
- Carefully place the decal onto your nail in the desired position. Gently press down to secure, ensuring no air bubbles are trapped underneath.
- Repeat for each nail, varying placement for a playful look.
- Apply 2 layers of top coat over the entire nail to seal the decals and provide a smooth, durable finish. This step is crucial for decal longevity.
Pro-Tip: For seamless integration of decals, use a generous layer of top coat. This will encapsulate the sticker, making it look as though it’s painted directly onto your festive finger tips, solving the common problem of decals catching on things.

3. Create Ombre Heart Gradient Effect

Gradient lovers, this **ombre heart nail design is for you! Save it!**
For those seeking unique heart nails, the ombre heart nail design offers a sophisticated twist on traditional blocking. This technique involves blending nail polish colors like soft pinks and deep reds to create a gradient valentine nails effect contained within a heart shape. It requires a bit more patience but results in romantic heart nail art that looks effortlessly modern and stylish. By using a sponge to diffuse the color, you achieve a soft, dreamy look perfect for the holiday.
Supplies Needed
- Base Coat
- White Nail Polish (e.g., Orly Nail Lacquer, ‘Pure Porcelain’)
- Light Pink Nail Polish (e.g., China Glaze Crème Lacquer, ‘Flirty Frock’)
- Medium Red Nail Polish (e.g., Essie Nail Polish, ‘A List’)
- Makeup Sponge or Nail Art Sponge (e.g., Reusable nail art blending sponges)
- Small Detail Brush (e.g., Kolinsky sable detail nail art brush)
- Liquid Latex Peel-Off Barrier (e.g., Maniology Liquid Latex, for easy cleanup)
- Top Coat
Step-by-Step Instructions
- Prepare nails with base coat and two coats of white nail polish, ensuring full opacity and dryness.
- Apply liquid latex around the skin surrounding your nails to protect from excess polish.
- Paint a strip of the light pink polish and immediately adjacent a strip of the medium red polish onto a damp makeup sponge.
- Gently dab the sponge onto your nail several times until you achieve a smooth gradient. Repeat for all nails.
- While the gradient is still slightly tacky, use a small detail brush dipped in white polish to paint a crisp heart outline over the gradient.
- Carefully peel off the liquid latex barrier.
- Seal with a top coat to blend the colors further and protect the design.
Pro-Tip: Using a high-quality makeup sponge and slightly dampening it before applying polish ensures a smoother, more diffused gradient. This professional nail art technique reduces harsh lines and helps avoid bubbles, making your ombre hearts look effortlessly chic.

4. Design French Tip Hearts

Elevate your **Valentine’s Day manicure with this chic French tip twist! Pin it now!**
How do you create a French tip with hearts? By reimagining the classic white strip as the curves of a heart. Elegant heart nails don’t get more timeless than this. This design modifies the traditional manicure by painting the tips of the hearts on nails to follow the natural nail line. It is a classic heart nail design that feels romantic and subtle, making it suitable for both office wear and dinner dates. The key is using the right brush to get those crisp curves.
Supplies Needed
- Base Coat
- Sheer Nude Nail Polish (e.g., Essie sheer polish, ‘Ballet Slippers’)
- Red or Pink Nail Polish (e.g., OPI Nail Lacquer, ‘Strawberry Margarita’)
- Fine Detail Nail Art Brush (e.g., Roubloff synthetic fine detail brush, 000 size)
- Top Coat
Step-by-Step Instructions
- Prepare nails with base coat, then apply 1-2 coats of sheer nude polish. Allow to dry completely.
- Using the fine detail brush and your chosen red/pink polish, paint a small ‘V’ shape at the very tip of your nail, centered.
- Carefully fill in the two curves on either side of the ‘V’ to create the top lobes of the heart, extending the heart shape to mimic a French tip.
- Repeat for all nails, ensuring uniformity in heart size and placement.
- Seal design with a high-gloss top coat for a polished finish and durability.
Pro-Tip: For a perfectly curved French tip heart, use the natural curve of your nail as a guide. Start with a very small amount of polish on your fine detail nail art brush to ensure precision and avoid messy application, contributing to a salon quality nail design.

5. Craft Glitter Heart Accents

Add some **sparkle and glitter to your valentines nails hearts! Pin this!**
If you want your festive finger tips to catch the light, glitter heart nails are the answer. This design incorporates nail art glitter or specialty polishes to decorate nails with shimmering hearts on nails. Whether you choose loose glitter for maximum texture or a suspended glitter polish for a smoother finish, the result is undoubtedly sparkly heart nails. This look works beautifully as an accent nail or a full set for those who love bold, festive heart nails valentine styles.
Supplies Needed
- Base Coat
- Base Nail Polish (e.g., Ella + Mila quick-dry polish, ‘Pure Love’ red)
- Fine Nail Art Glitter (e.g., Born Pretty ultra-fine glitter powder, red or pink) OR Glitter Nail Polish (e.g., OPI Glitter Nail Polish, ‘Sparkle-icious’)
- Nail Glue or Clear Top Coat for Adhesion
- Small Detail Brush or Dotting Tool
- Fan Brush (for cleanup)
- Top Coat (e.g., Sally Hansen Insta-Dri Top Coat)
Step-by-Step Instructions
- Prepare nails with a base coat and two coats of your chosen base nail polish. Let it dry completely.
- Option A (Loose Glitter): Apply a thin layer of nail glue or clear top coat in a heart shape where you want the glitter.
- Immediately sprinkle fine glitter over the wet heart shape. Gently tap off excess.
- Option B (Glitter Polish): Using a small detail brush, paint a heart shape with glitter nail polish. Build up layers for more opacity.
- Allow glitter/polish to dry thoroughly.
- Use a fan brush to gently brush away any stray loose glitter around the design.
- Apply 2-3 coats of top coat, ensuring each layer fully dries, to encapsulate the glitter and create a smooth finish.
Pro-Tip: When using loose glitter, apply it over a slightly tacky layer of clear polish or nail glue. This helps the glitter adhere better and reduces fallout. Encapsulating glitter with multiple top coat for long lasting heart nails layers is key to a smooth, salon quality nail design.

6. Achieve Minimalist Heart Accents

For understated charm, try these **minimalist heart nails! Pin for simple elegance.**
Not every valentines nails hearts look needs to be loud. Minimalist heart nails offer a chic and pretty nail style that speaks volumes through subtle heart nails. By using nail polish colors like stark black or clean white against a nude base, you create nail art that is sophisticated and contemporary. This design is perfect for those who want valentines nails with black hearts or simply want a nod to the holiday without overwhelming their everyday style.
Supplies Needed
- Base Coat
- Sheer Nude or Clear Nail Polish (e.g., Gelish Top It Off Sealer Gel, UV/LED compatible)
- Black or White Nail Polish (e.g., Maniology Stamping Polish, ‘Straight Up Black’)
- Extra Fine Detail Nail Art Brush (e.g., Makartt Ultra Fine Nail Liner Brush)
- Top Coat (e.g., Seche Vite Dry Fast Top Coat)
Step-by-Step Instructions
- Prepare nails with base coat and 1-2 coats of sheer nude or clear polish. Allow to dry thoroughly.
- Dip the extra fine detail brush into your chosen accent color (black or white). Wipe off excess polish to ensure a fine line.
- Carefully paint a tiny heart outline on one nail, either near the cuticle, off-center, or on the ring finger for a subtle accent.
- Repeat for other nails as desired, maintaining consistency in size and placement.
- Allow the heart design to dry completely before applying a final layer of top coat.
Pro-Tip: For truly minimalist heart nails, less is more. Practice drawing the tiny heart on paper first to perfect its shape and size. Using a specialized extra fine detail nail art brush is crucial for crisp lines and avoiding smudged nail polish, giving you a clean, chic heart nail design.

7. Recreate Conversation Heart Nails

Bring back nostalgia with these adorable **conversation heart nails! Pin for a sweet treat.**
Nothing says “Valentine’s Day” quite like conversation heart nails. Inspired by the iconic candy, this playful heart nails design uses pastel nail polish colors to mimic the sweets we all know and love. By painting small hearts on nails and adding text like “LUV” or “BFF,” you create nail art that serves as sweetheart nails—cute, colorful, and fun. It’s an excellent choice for a cute valentines heart nails look that sparks conversation.
Supplies Needed
- Base Coat
- Assorted Pastel Nail Polishes (e.g., Essie pastel collection, various shades: pink, purple, yellow, blue, green)
- White Nail Polish (e.g., OPI Nail Lacquer, ‘Alpine Snow’)
- Black Nail Art Pen or Fine Detail Brush with Black Polish (e.g., Sally Hansen I Heart Nail Art Pen, black)
- Dotting Tool
- Top Coat
Step-by-Step Instructions
- Prepare nails with base coat. Apply one different pastel color to each nail (or chosen combination). Allow to dry completely.
- Using white nail polish and a dotting tool (or small detail brush), paint a small, slightly irregular heart shape in the center of each pastel nail. These don’t need to be perfectly crisp, mimicking the candy. Allow to dry.
- Once the white hearts are dry, use the black nail art pen or fine detail brush to carefully write small, simple words like “LOVE,” “BFF,” “XOXO,” or “CUTE” inside the white hearts.
- Repeat for all desired nails, ensuring the lettering is legible.
- Seal design with a generous top coat, making sure to float the top coat over the lettering to prevent smudging.
Pro-Tip: For the tiny lettering, a nail art pen offers more control than a brush for beginners. If using a brush, thin your black polish slightly for better flow. This advanced nail art training insight ensures legible words and avoids messy application on your playful heart nails.

8. Paint Floating Hearts Design

Achieve an ethereal look with **floating hearts for your valentines nails hearts! Save this elegant idea.**
Floating hearts are a staple of modern heart nails utilizing gel nail designs and negative space. By creating hearts on nails over a completely clear or sheer base, you achieve unique heart nails that appear suspended in mid-air. This style is incredibly elegant and works best with gel polish and UV/LED curing science to maintain clarity, but can be adapted for regular polish. It’s a clean, sophisticated take on the valentines nails hearts trend.
Supplies Needed
- Base Coat (gel or regular)
- Clear Gel Polish (e.g., Builder Gel Clear, UV/LED curable) OR Sheer Nude Polish
- Red and/or White Gel Polish (e.g., Beetles Gel Polish kit, red & white) OR Regular Polish
- Fine Detail Nail Art Brush (e.g., MelodySusie Detail Art Brush)
- UV/LED Nail Lamp (if using gel)
- Top Coat (gel or regular)
Step-by-Step Instructions
- Prepare nails with base coat. If using gel, apply a thin layer of clear builder gel or sheer nude polish and cure under a UV/LED lamp. Repeat for 2 coats, ensuring a smooth, transparent base.
- Using a fine detail brush and your chosen gel or regular polish color (red, white, or both), carefully paint small heart outlines on each nail. Focus on clean, crisp edges.
- For gel polish, flash cure each heart outline under the lamp for 5-10 seconds before moving to the next nail to prevent smudging.
- Repeat for all nails.
- Apply a final top coat (gel or regular) over the entire design and cure under the lamp if using gel.
Pro-Tip: When painting floating hearts on a clear or sheer base, use pigment suspension techniques by ensuring your detail brush isn’t overloaded with polish to create crisp, thin lines. This professional nail art technique ensures your unique heart nails look delicate and elegant.

9. Style Sparkly Glitter Ombre Hearts

Dazzle with **sparkly glitter ombre hearts! Pin this show-stopping look for Valentine’s Day.**
Combining two massive trends, ombre heart nail design and glitter, results in romantic nail art designs that stop traffic. This technique uses glitter gradients inside the heart shape to create depth and movement. It transforms ordinary nail polish colors into festive finger tips that feel luxurious. Perfect for an evening out, these festive heart nails valentine designs are high-impact and demonstrate advanced topical authority in DIY techniques.
Supplies Needed
- Base Coat
- White or Nude Gel Polish (e.g., Aimeili UV LED Soak Off Gel Polish, ‘White’)
- Light Pink Glitter Gel Polish (e.g., Modelones Glitter Gel Polish, ‘Rose Gold’)
- Red Glitter Gel Polish (e.g., Beetles Gel Polish Kit, ‘Red Glitter’)
- Small Nail Art Sponge or Eyeshadow Applicator
- Fine Detail Nail Art Brush
- UV/LED Nail Lamp
- No-Wipe Top Coat (gel)
Step-by-Step Instructions
- Prepare nails with base coat and two coats of white or nude gel polish, curing after each layer.
- Using your fine detail brush, paint a crisp heart outline on each nail with white gel polish, then cure. This will act as your guide.
- On a small sponge, dab a thin line of light pink glitter gel polish at the top of the heart, and immediately below it, a line of red glitter gel polish.
- Gently dab the sponge within the heart outline, blending the two glitter colors to create an ombre effect. Cure.
- Repeat sponging for a second layer of glitter ombre within the heart for more opacity and sparkle, then cure.
- Apply a generous layer of no-wipe gel top coat over the entire nail to seal in the glitter and create a smooth, glossy finish. Cure thoroughly.
Pro-Tip: For a seamless glitter ombre within the heart, use a very lightly damp sponge and dab, rather than drag, the glitter gel polish. This technique helps avoid bubbles and ensures an even sparkle distribution, showcasing professional nail art techniques for a dazzling festive heart nails valentine look.

10. Apply 3D Heart Embellishments

Add dimension to your **valentines nails hearts with stunning 3D embellishments! Pin this glamorous idea.**
If you want to take your manicure to the next level, using 3D nail art like nail art jewels and charms creates embellished nails that are truly show-stoppers. Unique heart nails can be achieved by adhering heart-shaped gems or charms to decorate nails. This style adds texture and luxury, resulting in glamorous heart nails. While it requires a strong adhesive, the payoff is a professional, high-end look.
Supplies Needed
- Base Coat
- Chosen Base Nail Polish (e.g., CND Vinylux Long Wear Polish, ‘Romantique’)
- 3D Heart Charms or Embellishments (e.g., Kamize Rhinestone Heart Nail Art Studs, various sizes/colors)
- Strong Nail Art Glue (e.g., Makartt Nail Glue with Brush) OR Builder Gel (e.g., Ibd Builder Gel, clear)
- Dotting Tool or Wax Picker Tool
- Top Coat (thick, preferably gel for extra durability)
- UV/LED Nail Lamp (if using builder gel or gel top coat)
Step-by-Step Instructions
- Prepare nails with base coat and two coats of your chosen base polish. Ensure it is completely dry.
- Apply a small bead of strong nail art glue or builder gel where you want to place the 3D heart embellishment.
- Using a dotting tool or wax picker tool, carefully pick up a 3D heart charm and place it firmly onto the adhesive. Adjust its position if needed.
- If using builder gel, cure under a UV/LED lamp for 30-60 seconds to secure the charm.
- Once all charms are placed and secured, apply a generous layer of top coat (preferably gel top coat cured under a lamp) around and slightly over the edges of the 3D embellishment to seal it without covering its full dimension. Ensure edges are smooth to prevent snagging.
Pro-Tip: For 3D nail art that lasts, use a strong nail art glue gel or builder gel as an adhesive, and always encapsulate the base of the charm with top coat. This professional nail art technique helps prevent chipped nails around the charm and ensures your embellished nails remain secure.

11. Create Marbled Heart Patterns

Unleash your inner artist with these stunning **marbled heart nails! Pin this unique design.**
Marbled nail art is a technique that mimics stone textures, and when shaped into abstract heart nails, it creates unique heart nails that are truly artistic. By swirling nail polish colors like pink and white, you create nail art that is fluid and organic. This is perfect for pink white heart nails that need a modern upgrade. It utilizes color theory in nail art to blend shades seamlessly, resulting in artistic nail designs that look incredibly complex but are fun to create.
Supplies Needed
- Base Coat
- White Nail Polish (e.g., Essie Gel Couture, ‘Lace Me Up’)
- Pink Nail Polish (e.g., OPI Nail Lacquer, ‘Mod About You’)
- Fine Detail Nail Art Brush (e.g., Born Pretty Nail Liner Brush)
- Water Marbling Tool (e.g., Creative Nail Design Water Marbling Pen) OR Toothpick
- Small Cup of Room Temperature Water (for water marbling)
- Liquid Latex Peel-Off Barrier
- Top Coat
Step-by-Step Instructions
- Prepare nails with base coat and two coats of white nail polish as your base. Allow to dry completely.
- Apply liquid latex around your cuticles and side walls to simplify cleanup for marbling.
- For Water Marbling:
- Fill a small cup with room temperature water. Drip alternating drops of white and pink polish into the water, allowing each to spread.
- Use a marbling tool or toothpick to gently drag through the colors, creating a marbled pattern.
- Carefully dip your nail into the marbled design, then remove. Clean excess polish from around the nail.
- For Dry Marbling (easier):
- Apply a thin layer of white polish to one nail, then immediately follow with dots of pink polish while it’s still wet.
- Using a fine detail brush or toothpick, swirl the colors together gently to create a marble effect.
- Once the marble effect is created, use your fine detail brush to gently shape the marbled pattern into a heart outline on your nail.
- Repeat for all desired nails.
- Carefully peel off the liquid latex.
- Seal design with a high-gloss top coat to protect the intricate pattern.
Pro-Tip: For optimal marbled nail art results, ensure your polish drops are fresh and the water is exactly room temperature for water marbling; this helps the polish spread correctly. For dry marbling, work quickly while the polish is still wet. This advanced nail shaping and timing insight ensures a fluid, artistic nail design and helps prevent smudging.

Key Takeaways: Your Quick Guide to Valentines Nails Hearts
Now that we have explored 11 stunning designs, let’s recap the essential points to ensure your valentines day nail art is a success. Whether you chose simple heart nails or more complex romantic nail designs, remembering these core principles will guarantee a long-lasting manicure.
- Mastering **valentines nails hearts is achievable for all skill levels, from simple heart nails with dotting tools to unique heart nails with marbling.** – Our guide breaks down 11 distinct DIY designs ensuring there’s a style for everyone to achieve a romantic nail art look.
- Strategic product selection is key to **long-lasting manicure hacks and professional results.** – Utilizing appropriate nail art tools, high-quality polishes, and specialized decals or embellishments significantly enhances the final look and durability of your festive heart nails valentine.
- Each **DIY valentines heart nails design benefits from a two-part approach: knowing what you need and exactly what to do.** – Our detailed supply lists and numbered steps streamline the creation process, minimizing common nail art mistakes like smudged nail polish.
- Embrace variety in your **valentines day heart nails with different shapes, colors, and textures.** – From glitter heart nails to minimalist heart nails or ombre heart nail design, diversifying your approach keeps your romantic nail designs fresh and on-trend.
- E-E-A-T principles ensure your **valentines nails hearts knowledge is reliable and actionable.** – Following professional nail art techniques and expert nail care advice from certified sources protects nail health and guarantees salon-quality results at home.
- Pinterest-optimized visuals and calls to action extend the reach and inspiration of your **heart nail designs valentine’s .** – High-quality imagery for each valentines day heart nails design encourages saving and sharing, fostering a community of nail art enthusiasts.
- Pro-Tips and advanced insights demonstrate true **topical authority advanced and help you overcome common challenges.** – Incorporating expert knowledge into every design provides information gain blocks that elevate your skills beyond basic tutorials.
People Also Ask About Valentines Nails Hearts
How to do valentine hearts on nails easily?
The easiest way to create valentine hearts on nails is by using a dotting tool or even a bobby pin to create two dots side-by-side and then dragging the polish downwards to form a point. This simple heart art technique allows for quick and precise small hearts, even for beginners, requiring minimal skill and common household items.
What are the best valentine’s day nail designs with hearts?
The best **valentine’s day nail designs with hearts include classic red or pink tiny hearts, elegant French tip hearts, playful conversation heart nails, and sophisticated glitter ombre hearts.** These designs cater to various styles, from cute valentines heart nails to more romantic nail art, ensuring a perfect look for every celebration.
How to paint tiny hearts on nails without a special tool?
You can paint tiny hearts on nails using a toothpick or the rounded end of a bobby pin if you don’t have a dotting tool. Dip the tip into polish to create two small dots, then carefully drag the polish down from the center of the dots to connect them into a V-shape, forming a small heart valentine nails.
What nail polish colors are best for valentine’s day hearts?
For **valentines nails hearts, the best nail polish colors are traditionally red, various shades of pink, white, and sometimes gold or silver glitter accents.** These colors symbolize love and romance, offering a range from bold red heart valentine nails to delicate pink heart valentine nails that are universally festive.
Can you use a dotting tool for heart nails, and how effective is it?
Yes, a dotting tool is highly effective for creating **heart nails and is often recommended for its precision and ease of use, especially for beginners.** It allows you to place exact dots that can then be manipulated into perfect heart shapes, making it a staple for easy heart nail designs.
What supplies do I need for DIY valentine heart nails?
For **DIY valentine heart nails, essential supplies typically include a base coat, your chosen nail polish colors (red, pink, white), a top coat, and a nail art tool like a dotting tool or a fine detail brush.** Depending on the design, you might also need nail stickers hearts, glitter, or small embellishments, as well as nail polish remover for cleanup.
How to create a French tip with hearts for Valentine’s?
To create a French tip with hearts, apply a sheer nude base coat, then use a fine detail brush and red or pink polish to paint a small heart outline directly at the tip of your nail, mimicking the shape of a traditional French tip. This results in an elegant heart nails design that subtly incorporates romantic nail designs for Valentine’s.
What are the easiest heart nail art techniques for beginners?
The easiest heart nail art techniques for beginners include using pre-made **nail decals valentine, painting simple dot hearts with a dotting tool, or creating hearts with a small stencil.** These methods minimize complexity and allow for quick, cute heart nail designs without extensive artistic skill.
How to get professional looking valentine heart nails at home?
To get professional looking **valentine heart nails at home, focus on thorough nail preparation, use high-quality polishes and precise nail art tools, and finish with a durable top coat.** Practice, patience, and applying thin, even coats are crucial for achieving a salon quality nail design that looks expertly done.
What are common mistakes when doing heart nail art and how to avoid them?
Common mistakes in **heart nail art include uneven hearts, smudged nail polish, and messy application.** To avoid these, work with thin coats of polish, allow each layer to dry completely, use precise tools like fine detail brushes or dotting tools, and apply liquid latex around the nail for easier cleanup.
Final Thoughts on Valentines Nails Hearts
Embarking on the journey of DIY valentines nails hearts is not just about aesthetics; it’s about self-expression, creativity, and celebrating the spirit of love right at your fingertips. Our guide has equipped you with 11 essential DIY designs, from the easy heart nail designs of dotting tools to the intricate beauty of marbled heart nail patterns. We’ve delved into specific techniques, highlighted the indispensable nail art tools, and offered expert nail care advice to ensure your romantic heart nail art isn’t just stunning but also durable and healthy for your nails.
Remember that practice makes perfect, and every attempt is a step closer to mastering professional nail art techniques at home. By integrating the right nail polish colors, understanding the nuances of nail art encapsulation, and leveraging products like nail stickers hearts or 3D heart charms, you can achieve salon quality nail designs that truly reflect your personal style. Whether you prefer minimalist heart nails or a dazzling sparkly glitter ombre, these valentines nails hearts are a beautiful way to embrace the season of love.
Now that you’re armed with inspiration and actionable steps, which of these heart nail designs valentine’s will you try first for 2026‘s celebration? Share your favorite designs or any new tips you discover in the comments below!
Last update on 2026-03-05 / Affiliate links / Images from Amazon Product Advertising API


