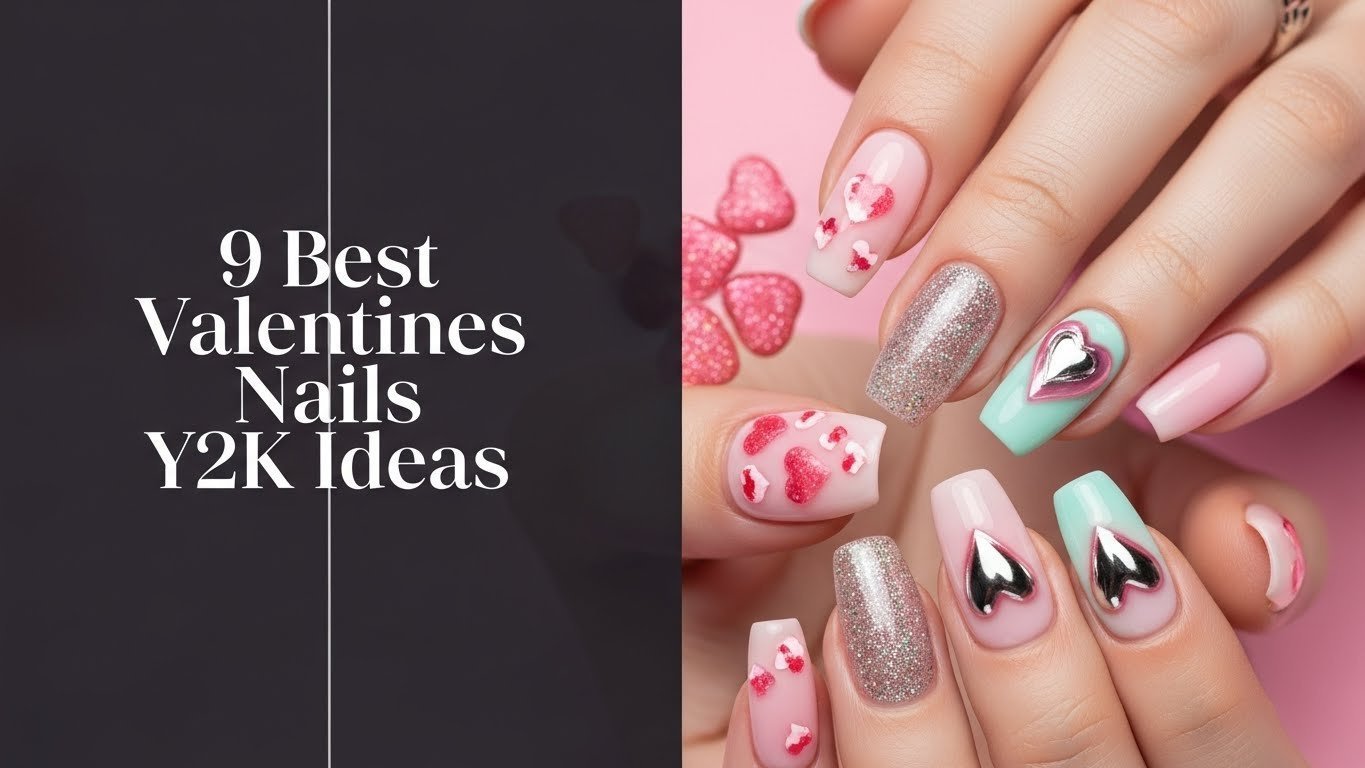
Are you tired of the same predictable red manicures and looking to inject some nostalgic flair into your holiday look this year? You aren’t alone; navigating the resurgence of early 2000s fashion can be overwhelming, especially when trying to balance romantic vibes with bold, retro aesthetics. If you are struggling to find valentines nails y2k inspiration that feels fresh rather than costume-like, you have found the right guide to elevate your nail game.
Valentines nails y2k are a playful fusion of classic romantic motifs like hearts and bows with the distinct, maximalist aesthetic of the early 2000s, characterized by 3D charms, chrome finishes, and bold shapes. This style moves beyond traditional minimalism, incorporating elements such as y2k valentine nails staples like silver balls, airbrushed designs, and exaggerated duck tips to create a look that is both nostalgic and trendy. By blending vibrant pinks and dark reds with futuristic textures, these designs offer a unique way to celebrate the holiday.
Drawing from comprehensive analysis of current social media trends and proven professional nail art techniques, this guide curates the most achievable and stylish looks. In this post, you will discover nine distinct design categories ranging from beginner-friendly press-ons to advanced polygel sculpting. Get ready to master the y2k aesthetic with actionable steps that guarantee salon-quality results right at home.
Master the Y2K Valentine’s Nail Aesthetic: Your Guide to Trendy Designs for March 2026
The Y2K aesthetic is defined by its fearless combination of futuristic technology optimism and playful, kitschy femininity. When applied to valentines nails y2k, this translates into a departure from subtle nudes and simple reds. Instead, we see a heavy emphasis on texture and dimensionality. The core of this trend relies on integrating y2k valentine’s day nail ideas that utilize distinct nail art tools and materials not commonly found in standard manicures.
To truly nail this look, you must understand the interplay between the base and the nail charms. Unlike modern minimalism, 2000s valentine nails thrive on “more is more.” This means layering chrome y2k nails with rhinestones, or combining y2k nail inspo like tribal patterns with soft, romantic hearts. Whether you are using press-on nails for a quick fix or sculpting with polygel, the goal is to create a visual impact that feels like a time capsule opened in 2026.
9 Best Valentines Nails Y2K Ideas to Master the Aesthetic for March 2026
Creating the perfect Y2K manicure requires a mix of creativity and specific application techniques. Below, we have curated the top designs dominating the scene, complete with the specific supplies and steps you need to recreate them.
1. Glamorous 3D Bow & Heart Lock Accents

Pin this elegant 3D bow nail look to your Valentine’s board!
3D bow nails involve adhering bulky, resin-based charms to the nail surface to create a tactile, coquette-inspired Y2K look. This style heavily utilizes heart lock nails accessories and sheer bases to make the 3D elements pop. It is one of the most iconic representations of glamorous y2k valentine nails, requiring precise placement to ensure the nail art charms stay secure.
Supplies Needed
- Soft pink gel polish (or builder gel for acrylic y2k nails)
- Mini 3D nail bows (white, pink, or sheer options)
- Tiny silver heart lock nail charms
- Strong nail art glue with a precision applicator
- Clear top coat (gel or regular)
- UV/LED lamp (if using gel polish)
- Tweezers or wax pencil for precise placement
Step-by-Step Directions
- Prepare nails: Ensure nails are clean, filed, and prepped with a base coat. Apply 1-2 coats of soft pink gel polish, curing between layers.
- Plan placement: Use tweezers to gently arrange the 3D nail bows and heart lock charms on a dry nail to visualize your design before applying glue.
- Adhere charms: Apply a small dot of strong nail art glue to the back of each bow and charm, pressing it firmly onto the desired spot on the nail for 10-15 seconds.
- Seal and cure: Once all charms are secure, apply a thin layer of clear top coat around the base of the charms (avoiding directly over intricate details if possible, or using a non-wipe top coat). Cure under the UV/LED lamp.
- Final check: Ensure all edges are sealed and charms are firmly attached.
Pro-Tip: For the most secure 3D bow nails attachment, lightly etch the back of resin charms with a file before gluing. This creates a better surface for adhesion, leading to a long-lasting formula for your y2k valentine nails.

2. Edgy Chrome Heart Outlines

Save this chrome nails inspiration for your next y2k valentine manicure!
Chrome heart outlines utilize fine metallic powder rubbed over partially cured gel to create a liquid metal effect. This technique is central to chrome y2k nails, often paired with dark red nails y2k or deep black bases to maximize contrast. Understanding chrome powder application nuances is critical here; the timing of your cure determines whether the powder adheres to the heart y2k valentine nails design or slides right off.
Supplies Needed
- Dark red gel polish or glossy black gel polish
- Silver chrome nail powder or iridescent chrome powder
- No-wipe gel top coat (essential for chrome application)
- Fine-tipped nail art brush
- Sponge applicator (eyeshadow applicator works well)
- UV/LED lamp
- Lint-free wipes
Application Steps
- Base application: After basic nail prep, apply your chosen dark red gel polish or black gel polish. Cure completely under the UV/LED lamp.
- First top coat: Apply a thin layer of no-wipe gel top coat over the color. Cure for the recommended time (usually 30-60 seconds).
- Draw hearts: Using the fine-tipped nail art brush and the no-wipe top coat, carefully draw the outline of small hearts on your nails. Cure for a very short time (10-15 seconds) to make it tacky but not fully hardened.
- Chrome application: Dip the sponge applicator into the silver chrome nail powder. Gently rub the powder onto the tacky heart outlines until a mirror-like chrome finish appears.
- Dust off: Use a soft brush or lint-free wipe to gently dust off any excess chrome powder from the surrounding nail.
- Seal the design: Apply another layer of no-wipe gel top coat over the entire nail to seal in the chrome hearts. Cure for a full cycle under the UV/LED lamp for a durable, glossy finish nails.
Pro-Tip: For perfectly crisp chrome heart outlines, ensure your no-wipe top coat is cured just enough to be tacky, not fully hard. Over-curing will prevent the chrome from adhering, demonstrating polygel application mastery for perfect chrome y2k nails.

3. Iconic Silver Ball Accents

Add a touch of Y2K bling! Pin this silver balls y2k nails idea!
Silver balls, or caviar beads, act as industrial-chic punctuation marks in Y2K nail art. These tiny metallic spheres are distinct from rhinestones because they offer texture without the facets. Silver balls y2k nails often feature these beads arranged in clusters, lines, or framing other jewel y2k nails. Knowing how to incorporate silver balls in y2k nail art properly ensures they don’t snag or fall off immediately.
Supplies Needed
- Clear or nude base coat
- Silver nail art caviar beads (various sizes: 0.8mm-1.5mm)
- Nail art glue gel or top coat (non-wipe gel recommended)
- Wax picker tool or tweezers
- Fan brush (for dusting excess)
- UV/LED lamp (if using gel)
Application Steps
- Prepare your base: Apply a base coat and desired base color (e.g., translucent pink or clear). Cure if using gel.
- Apply adhesive: Apply a thin layer of nail art glue gel or a regular gel top coat to the area where you want the silver balls. Do not cure yet if using gel.
- Place silver balls: Using a wax picker tool or tweezers, gently pick up and place the silver caviar beads onto the wet adhesive. You can create lines, clusters, or fill entire areas.
- Press gently: Once placed, gently press the beads down to ensure they are fully embedded in the adhesive.
- Cure (if gel): If using gel adhesive, cure under the UV/LED lamp to set the beads.
- Seal the design: Carefully apply a thin layer of top coat around the edges of the design, ensuring not to flood the beads too much, which can dull their shine. Cure if using gel top coat.
Pro-Tip: For the most durable silver balls y2k nails, use a nail art glue gel specifically designed for charms. This provides a stronger bond than regular top coat and helps to encapsulate the tiny beads effectively, demonstrating advanced 3D nail sculpting for a professional grade finish.

4. Playful Pink French Tips with a Y2K Twist

Get your retro glam on! Pin these pink french tip y2k nails now!
Pink French tips modernize the classic manicure by swapping white for vibrant bubblegum shades and adding retro motifs like flames or stars. This design is quintessential French tip y2k nails, often seen on short square y2k nails for an authentic early 2000s silhouette. The key to making this look “Y2K” rather than just “colorful” is to paint y2k designs like tribal lines or sparkles over the pink y2k valentine nails base.
Supplies Needed
- Clear or milky nude base coat
- Vibrant bubblegum pink nail polish (gel or regular)
- Fine-tipped nail art brush
- White nail polish (for optional stars) or y2k flame nail decals
- Top coat (glossy or matte)
- French tip guides (optional, for beginners)
- UV/LED lamp (if using gel)
Step-by-Step Directions
- Base prep: Apply a base coat and 1-2 coats of clear or milky nude gel base, curing if using gel.
- Pink French tip: Using the vibrant bubblegum pink nail polish and a fine-tipped brush (or French tip guides), carefully paint the tips of your nails. Aim for a clean, slightly rounded or straight line. Cure if using gel.
- Add Y2K accents (optional): With the fine-tipped nail art brush and white polish, paint tiny stars or flame designs on one or two accent nails. Alternatively, apply y2k flame nail decals and press them firmly.
- Seal the design: Apply a generous layer of top coat (glossy for shine, matte for an edgier look) over the entire nail to seal and protect the design. Cure if using gel.
Pro-Tip: For the cleanest French tip y2k nails line, use a thin brush dipped in acetone to clean up any wobbles before applying the top coat. This demonstrates precision gel extension techniques for a salon quality finish.

5. Bold XOXO V-Tip Designs

Show some love with this XOXO V-tip style! Pin it!
XOXO V-tip nails use geometric negative space to form letters directly on the nail tip, creating a bold, typographic statement. This design is a staple of y2k valentine’s day nail art ideas because it combines the angular sharpness of the era with festive messaging. Learning how to achieve an XOXO v-tip y2k valentine’s look involves mastering the chevron or “V” shape, which serves as the foundation for both the ‘X’ and the ‘O’.
Supplies Needed
- Nude or clear base coat
- Contrasting nail polishes (e.g., black and white, or red and pink)
- Fine-tipped nail art brush
- V-tip French nail guides (optional)
- Top coat (glossy recommended)
- UV/LED lamp (if using gel polishes)
Creation Steps
- Base application: Apply a base coat and 1-2 coats of your chosen base color (e.g., nude). Cure if using gel.
- First V-tip: Use one contrasting polish (e.g., black) and your fine-tipped brush (or V-tip guide) to paint the first half of a “V” shape at the tip of the nail. Cure if using gel.
- Second V-tip: Using the same color, paint the second half of the “V” to complete one side of the XOXO pattern (e.g., the left leg of an “X”). Cure.
- Repeat for other color/letter: Switch to your second contrasting polish (e.g., white or pink) and repeat steps 2 and 3 to create the other half of the XOXO design on alternating nails, or to overlap for a single X.
- Refine & fill: Use the fine brush to sharpen the lines and fill in any gaps for a crisp look. Cure.
- Seal: Apply a generous layer of glossy top coat over the entire nail to seal and protect the intricate design. Cure.
Pro-Tip: Achieving perfectly symmetrical XOXO v-tip nails requires a steady hand. Practice drawing “V” shapes on paper first, and consider using striping tape as a guide for extra precision, showcasing advanced E-file techniques for professional y2k valentine nails.

6. Grunge-Inspired Red Goth Nails

Unleash your inner Y2K rebel! Pin these red goth nails!
Red goth nails channel the darker, grunge side of the 2000s, often blending matte textures with metallic hardware. This style is perfect for those who want valentines nails y2k but prefer an anti-heroine aesthetic. Key components include dark red nails y2k bases, flame y2k nails patterns, and silver studs. This look is frequently paired with short square y2k nails for a sporty, aggressive edge.
Supplies Needed
- Deep, dark red nail polish (preferably matte finish, or a matte top coat)
- Black nail polish or black flame nail decals
- Silver nail art studs (small, flat-backed)
- Nail art glue
- Fine-tipped nail art brush (if hand-painting flames)
- Tweezers or wax pencil
- Top coat (matte or glossy)
Application Steps
- Base color: Apply 2-3 thin coats of deep, dark red nail polish to achieve full opacity. Allow each coat to dry completely.
- Add flame design: On 1-2 accent nails, use the fine-tipped nail art brush and black polish to carefully paint stylized flame designs near the cuticle or tip. Alternatively, apply black flame nail decals and press firmly.
- Place studs: While the polish is still slightly tacky (or using a dot of nail glue), use tweezers or a wax pencil to place silver nail art studs strategically—perhaps a single stud at the base of each nail, or a small cluster on an accent nail.
- Seal the design: Apply a matte top coat over all nails for a true red goth nails look, or a glossy top coat for a subtle shine. Ensure the top coat seals around the studs without covering them excessively.
Pro-Tip: For consistent dark red nails y2k opacity with dark polishes, apply several thin layers rather than one thick one. This prevents streaking and ensures a smoother, long-lasting formula for your y2k valentine nails.

7. Dazzling Rhinestone Embellishments

Sparkle up your Valentine’s Day! Pin these rhinestone y2k nails!
Rhinestones are the ultimate Y2K accessory, transforming simple manicures into blindingly reflective statements. A proper rhinestone y2k nails look isn’t just about glueing a gem on; it’s about the density and pattern of the stones. From “blinged-out” cuticles to fully encrusted accent nails, adhere rhinestones carefully to avoid them popping off. Users often ask what kind of rhinestones are best for y2k nails, and the answer is usually flat-back glass or crystal for maximum refraction.
Supplies Needed
- Base color nail polish (clear, glittery, or pastel pink recommended)
- Flat-back nail rhinestones (various sizes and shapes, clear or iridescent)
- Rhinestone picker tool (wax pencil or tweezers)
- Nail art glue gel or strong nail glue
- Top coat (gel or regular)
- UV/LED lamp (if using gel)
Application Steps
- Base prep: Apply base coat and 1-2 coats of your chosen base color. Cure if using gel, ensuring the surface is smooth and dry.
- Apply adhesive: Apply a small dot or thin line of nail art glue gel or nail glue to the areas where you want to place the rhinestones.
- Place rhinestones: Using the rhinestone picker tool, carefully pick up and place the flat-back nail rhinestones onto the wet adhesive. Arrange them in clusters, lines, or specific patterns.
- Gently press: Once all rhinestones are placed, gently press them down with the picker tool to ensure they are firmly embedded.
- Cure (if gel): If using gel glue, cure under the UV/LED lamp to set the rhinestones.
- Seal and protect: Apply a layer of top coat around the base and edges of the rhinestones, sealing them in without completely covering the facets (which can dull their sparkle). Cure if using gel top coat.
Pro-Tip: For the most secure rhinestone y2k nails application, use a builder gel or nail art glue gel under and around your rhinestones. This creates a stronger bond and prevents snagging, a testament to advanced 3D nail sculpting for salon quality results.

8. Exaggerated Duck Polygel Nails

Dare to be bold! Pin these unique duck polygel nails for your Y2K look!
Duck polygel nails feature a controversial yet quintessentially Y2K wide flare at the tip, resembling a duck’s webbed foot. This shape is impossible to achieve with standard tips; you must sculpt polygel nails to create the exaggerated width. Duck polygel nails provide a massive canvas for checkerboard y2k nails or complex glitter y2k nails patterns. If you are wondering what products are used for y2k duck nails, the secret lies in specialized dual forms or expert hand-sculpting.
Supplies Needed
- Polygel kit (clear, pink, or red polygel recommended)
- Dual forms for flared/duck nails or wide nail forms
- Slip solution (or rubbing alcohol)
- Polygel brush or spatula
- Nail file (100/180 grit) and buffer
- Base coat and top coat (gel)
- UV/LED lamp
- Optional: Glitter, small charms, or nail art stickers for Y2K decoration
Creation Steps
- Nail preparation: Prep your natural nails by cleaning, filing, and pushing back cuticles. Apply a thin layer of gel base coat and cure.
- Select dual form: Choose a dual form for flared/duck nails that fits your natural nail width.
- Apply polygel: Scoop a small amount of polygel onto the dual form. Dip your polygel brush in slip solution and gently spread the polygel into the desired flared “duck” shape within the form, making sure it’s thicker at the stress points.
- Attach to nail: Press the polygel-filled dual form onto your natural nail, gently squeezing out any air bubbles. Wipe away excess polygel from around the edges with your brush.
- Cure: Cure under the UV/LED lamp according to product instructions (usually 60-120 seconds).
- Remove form: Once cured, gently twist and peel off the dual form.
- Shape and refine: Use a nail file to shape the free edge and sidewalls, creating the exaggerated flared shape. Smooth with a buffer.
- Decorate (optional): Apply glitter, small painted hearts, or checkerboard y2k nail patterns using gel polish, curing after each layer.
- Top coat: Apply a final layer of gel top coat and cure for a high-gloss, durable finish.
Pro-Tip: Mastering duck polygel nails takes practice. Ensure your polygel consistency isn’t too wet or too dry for smooth sculpting, preventing issues like nail chipping solution and ensuring structural integrity nail design.

9. Retro Encapsulated Glitter & Charms

Capture the Y2K magic! Pin these encapsulated designs for Valentine’s!
Encapsulated designs create a mesmerizing aquarium effect by trapping glitter and charms inside clear acrylic or gel. This technique gives y2k valentine nails immense depth. Unlike surface rhinestones, encapsulated designs are smooth to the touch. This method often involves polygel y2k nails or clear acrylic y2k nails to build the structure that houses the glitter y2k nails elements.
Supplies Needed
- Clear builder gel or clear acrylic powder and monomer
- Iridescent chunky glitter
- Mini dried flowers (heart shapes or small petals)
- Tiny metallic charms (stars, hearts, letters)
- Base coat and top coat (gel)
- Polygel brush or acrylic brush
- Dotting tool or tweezers
- UV/LED lamp (if using gel)
- Nail file and buffer
Application Steps
- Nail prep and base: Prep natural nails. Apply a base coat and cure.
- First clear layer: Apply a thin layer of clear builder gel (or clear acrylic). Do not cure (or let acrylic set only partially).
- Place elements: Using a dotting tool or tweezers, carefully place your iridescent chunky glitter, mini dried flowers, and tiny metallic charms onto the wet clear layer. Arrange them as desired.
- Encapsulate: Apply a second, slightly thicker layer of clear builder gel (or acrylic) over the elements, ensuring they are fully covered and creating an even surface. Cure completely.
- Shape and smooth: If necessary, use a nail file to gently shape and smooth the nail surface, removing any bulk from the encapsulated elements. Buff smooth.
- Final top coat: Apply a final layer of gel top coat and cure for a high-shine, protective finish, fully sealing in your encapsulated designs.
Pro-Tip: For the best encapsulated glitter effect in acrylic y2k nails, ensure your glitter and charms are completely dry before encapsulating to prevent discoloration or lifting. This showcases encapsulation techniques nail art for optimal long-lasting formula.

Key Takeaways: Your Quick Guide to Valentines Nails Y2K
Now that we have covered the best designs, here are the essential points to remember as you create your own trendy y2k valentine nails.
- The Y2K Valentine’s nail aesthetic is a bold blend of romantic motifs and early 2000s trends, featuring iconic elements like 3D bows, chrome, and expressive patterns. This fusion creates original y2k valentine nails that stand out.
- Achieving the Y2K look often involves intricate 3D elements and specific embellishments like silver balls and rhinestones, which require precise application methods. These nail art charms are key to the aesthetic.
- Popular Y2K nail shapes for Valentine’s include short square and exaggerated duck nails, which provide a nostalgic yet trendy base for designs. These shapes are distinct to the 2000s nail designs.
- Materials such as polygel and high-quality gel polishes are crucial for sculpting complex shapes and ensuring the durability of your Y2K Valentine’s nails. Utilizing high-quality nail supplies is a proven nail technique.
- Creative use of color, including vibrant pinks, dark reds, and metallic chromes, is essential to capture the authentic Y2K vibe for your Valentine’s manicure. The vibrant polishes represent the y2k aesthetic fashion.
- Encapsulation techniques allow for suspending glitter and charms within clear nail layers, adding unique depth and longevity to your Y2K designs. This encapsulation techniques nail art creates advanced 3D nail sculpting.
- Whether you choose press-ons or DIY techniques, understanding proper prep and sealing is vital for a long-lasting, salon-quality finish that celebrates your personal style. Maintaining nail health is important for long-lasting formula.
People Also Ask About Valentines Nails Y2K
If you still have questions about mastering this aesthetic, we’ve compiled the most common inquiries to ensure your y2k valentine nails turn out perfectly.
What are y2k valentines nails?
Y2K Valentine’s nails are a playful fusion of classic Valentine’s Day themes—like hearts, bows, and romantic colors—with the distinct, often bold and maximalist aesthetic of the early 2000s. This popular style incorporates elements such as 3D charms, chrome finishes, vibrant glitter, unique French tips, and specific nail shapes like short square or duck nails, creating a nostalgic yet trendy look perfect for valentine y2k nail art.
How to do y2k valentines nails at home?
To create Y2K Valentine’s nails at home, start with a well-prepped base and gather key elements like vibrant polishes, 3D nail charms, rhinestones, or chrome powder. Choose a specific design from popular y2k valentine’s day nail ideas, follow detailed step-by-step instructions for application, and seal your design with a durable top coat. Many designs can be achieved using affordable DIY nail kits and tools.
What are the best y2k valentines nail designs?
The best Y2K Valentine’s nail designs typically feature iconic elements like 3D bows, metallic chrome hearts, silver ball accents, playful pink French tips, and bold XOXO V-tips. Edgy red goth designs or intricate encapsulated glitter and charms also rank high, offering a range from romantic to rebellious for aesthetic y2k valentine nails.
Where can I buy y2k valentines press-on nails?
Y2K Valentine’s press-on nails are widely available from various online retailers specializing in trendy nail art, including platforms like SHEIN, Amazon, and Etsy. Many indie nail brands also offer unique, handcrafted sets. Look for specific keywords like “SHEIN press-on nails,” “y2k love letter press on nails,” or “acrylic fake nails y2k” for a wide selection.
What colors are popular for y2k valentines nails?
Popular colors for Y2K Valentine’s nails often include vibrant bubblegum pinks, deep dark reds, classic whites, and striking blacks, frequently accented with metallic silvers or iridescent chromes. Pastel hues and clear, transparent bases are also common, allowing 3D elements and glitter to stand out, embodying the vibrant polishes aspect of the aesthetic.
Are y2k valentines nails hard to do?
The difficulty of Y2K Valentine’s nails varies greatly depending on the complexity of the design. Simple designs with basic color application and pre-made decals are relatively easy for beginners. More intricate designs involving 3D sculpting, chrome powder, or encapsulated elements require practice and specialized tools, demonstrating the need for polygel application mastery or advanced 3D nail sculpting.
What nail shapes are y2k for valentine’s?
Common Y2K nail shapes for Valentine’s include classic short square, trendy coffin, and the more adventurous duck (flared) shape. Almond and oval shapes can also be adapted with Y2K designs, but the boxier and more exaggerated shapes truly capture the early 2000s nails aesthetic.
How do I get a 3D bow on my y2k nails?
To apply a 3D bow on your Y2K nails, you typically use a small, pre-made resin nail bow, often in white or sheer colors. These bows are secured onto your cured nail surface using a strong nail art glue gel or builder gel for a long-lasting formula. A precision tool like tweezers helps with placement, making your 3D bow heart stand out.
What are some y2k nail charm ideas for valentine’s day?
Popular Y2K nail charm ideas for Valentine’s Day include miniature 3D bows, tiny silver heart lock charms, iridescent butterflies, small silver studs, and delicate flame decals. These nail embellishments add character and dimension, contributing significantly to the y2k nail design valentine aesthetic.
How to apply y2k valentine’s fake nails (press-ons)?
To apply Y2K Valentine’s fake nails (press-ons), start by prepping your natural nails by cleaning, filing, and pushing back cuticles. Select the correct size press-on for each finger, apply nail glue to both your natural nail and the back of the press-on, then press firmly for 15-30 seconds. Ensure no air bubbles for a secure, long-lasting formula for your press on nails.
Final Thoughts on Valentines Nails Y2K
As we wrap up this exploration of valentines nails y2k, it is clear that this aesthetic offers infinite room for creativity. Whether you are drawn to the edgy look of red goth nails or the playful charm of 3D bow nails, the Y2K trend allows you to express your personality boldly. By utilizing specific nail art charms and mastering nail shapes like the flared duck tip or the crisp short square, you can create a look that is authentically retro yet perfectly suited for 2026.
Remember, the key to great y2k nail inspo is experimentation. Do not be afraid to mix different textures, like chrome and matte, or to try new nail art tools like polygel. Armed with these trendy y2k valentine nails ideas and professional application tips, you are ready to create a manicure that isn’t just a holiday accessory, but a true fashion statement. Which y2k valentine’s day nail ideas will you try first?
Last update on 2026-03-03 / Affiliate links / Images from Amazon Product Advertising API


