Feeling overwhelmed by that box of unused ornaments? You open it each year, full of festive spirit, only to find you have far too many for just one tree.
A Christmas ornament is a beautiful holiday decoration, but a surplus collection can quickly turn into frustrating clutter. You’re not alone in feeling this way, wondering if there are better, more creative ways to use them.
The best ways to use Christmas ornaments beyond the tree include creating stunning centerpieces, crafting custom wreaths, enhancing garlands, and designing elegant window displays. This guide will unlock the hidden potential in your collection, turning clutter into creative holiday decor.
Feeling Overwhelmed by a Box of Unused Ornaments?
That moment is familiar to many of us. You pull out a box packed with years of memories—old ornaments from childhood, extra baubles from a color scheme you tried two years ago, and beautiful one-offs that just don’t fit the main Christmas tree. The thought of either packing them away again or throwing them out feels wasteful. I had this exact “aha!” moment a few years back when I realized these beautiful decorations weren’t just for the tree. They were versatile elements of holiday decor waiting to be unleashed throughout my home.
This guide is your treasure map to solving ornament clutter. We’re reframing that box not as a problem, but as a chest of creative potential. You’ll find genius, simple, and beautiful solutions that go far beyond the branches of a traditional tree. These repurposing ideas will give every last festive bauble a chance to shine.
9 Genius Ways to Use Christmas Ornaments Beyond the Tree
Ready to transform your extra ornaments into stunning home accents? We’ve curated nine distinct and achievable DIY ornament ideas based on core interior design principles like color, texture, and scale to ensure your results are always elegant. These projects range from 5-minute decorating hacks to fun afternoon crafts, offering creative ways for every skill level to decorate with baubles.
1. Fill a Glass Vase for an Instant Centerpiece

Pin this 5-minute decorating hack for later!
This is one of the fastest and most impactful ways to create an elegant Christmas centerpiece. Simply gathering color-coordinated ornaments in a clear glass vase creates a look of effortless sophistication. It’s a perfect solution for a dining table, coffee table, or entryway console.
Materials Needed:
- 1 Large, clear glass vessel (a hurricane vase, cylinder vase, or even a large trifle bowl works well)
- 20-40 Christmas ball ornaments in a cohesive color palette (e.g., shades of blue and silver)
- Optional: A string of battery-powered fairy lights with a thin wire
- Optional: Pinecones or sprigs of faux greenery for filler
Step-by-Step Directions:
- Clean and dry your glass vessel thoroughly to ensure it sparkles.
- If using fairy lights, place the battery pack at the bottom of the vase and loosely coil the string upwards.
- Begin by placing your largest ornaments in the vase first to create a stable base.
- Continue filling the vase with medium and then smaller ornaments, ensuring the fairy light string is woven throughout.
- Gently tuck in any pinecones or greenery into small gaps to add texture and interest.
- Place on your dining table, coffee table, or mantel and switch on the lights for a magical glow.
Pro-Tip: To use fewer ornaments in a large vase, place an empty paper towel tube in the center and fill the space around it. No one will ever know!

2. Craft a Sparkling Wreath from Old Baubles

Save this DIY wreath tutorial for a festive craft day!
Turn a collection of old or unused ornaments into a stunning, high-end-looking wreath. This DIY ornament wreath is a fantastic Christmas craft project that looks much more complicated to make than it actually is. All you need is a sturdy base, a lot of baubles, and a glue gun.
Materials Needed:
- 1 Sturdy wire wreath form (14-inch or 18-inch is a good size to start)
- 60-80 Shatterproof ball ornaments in various sizes (a mix of large, medium, and small)
- A low-temperature hot glue gun and plenty of glue sticks
- A piece of wide ribbon for hanging
Step-by-Step Directions:
- Lay your wire wreath form on a protected flat surface. Plug in your low-temp glue gun to heat up.
- Start with your largest ornaments. Apply a generous amount of hot glue to the ornament cap area and press it firmly onto the wire form, holding for a few seconds. This creates your base layer.
- Continue gluing the large and medium ornaments to cover the front and sides of the form, packing them closely together.
- Once the base is covered, use your smallest ornaments to fill in any gaps. This is what makes the wreath look full and professional.
- Turn the wreath over and glue a few ornaments to the back to ensure it looks good from all angles if it’s visible.
- Loop your ribbon through the wire form, tie a knot, and hang your beautiful new wreath.
Lesson Learned: From my experience, using a low-temp glue gun is crucial. A high-temp gun can melt plastic ornaments and cause the glue to fail over time.

3. Weave Ornaments into a Mantel Garland

Save this elegant mantel decorating idea!
Elevate a simple evergreen garland by weaving in ornaments for a pop of color and sparkle. This is how professional decorators achieve that lush, full look on fireplace mantels and stair railings. Using floral wire to create small clusters is the secret to success.
Materials Needed:
- 1 Evergreen garland (real or high-quality faux)
- 20-30 Shatterproof ornaments of various sizes
- Green floral wire (22-gauge is ideal)
- Wire cutters
- Garland hooks or clear adhesive hooks
Step-by-Step Directions:
- First, securely hang your plain garland on the mantel or railing. Fluff all the branches to make it look as full as possible.
- Create small ornament clusters. Cut a 6-inch piece of floral wire. Thread it through the caps of 2-3 ornaments of different sizes.
- Twist the wire tightly behind the ornaments to secure them into a small bunch. Leave the two long ends of the wire free.
- Take an ornament cluster and nestle it into the garland. Use the long wire ends to wrap tightly around a sturdy branch of the garland, hiding the wire within the greenery.
- Continue adding clusters every 8-10 inches along the garland, varying their position (some higher, some lower) for a natural look.
- Fill in any sparse areas with single ornaments attached with wire. Step back and adjust until you’re happy with the result.
Pro-Tip: Create the ornament clusters first while watching a holiday movie. Having them all pre-made makes the process of decorating the garland go much faster.

4. Create Reusable Gift Toppers
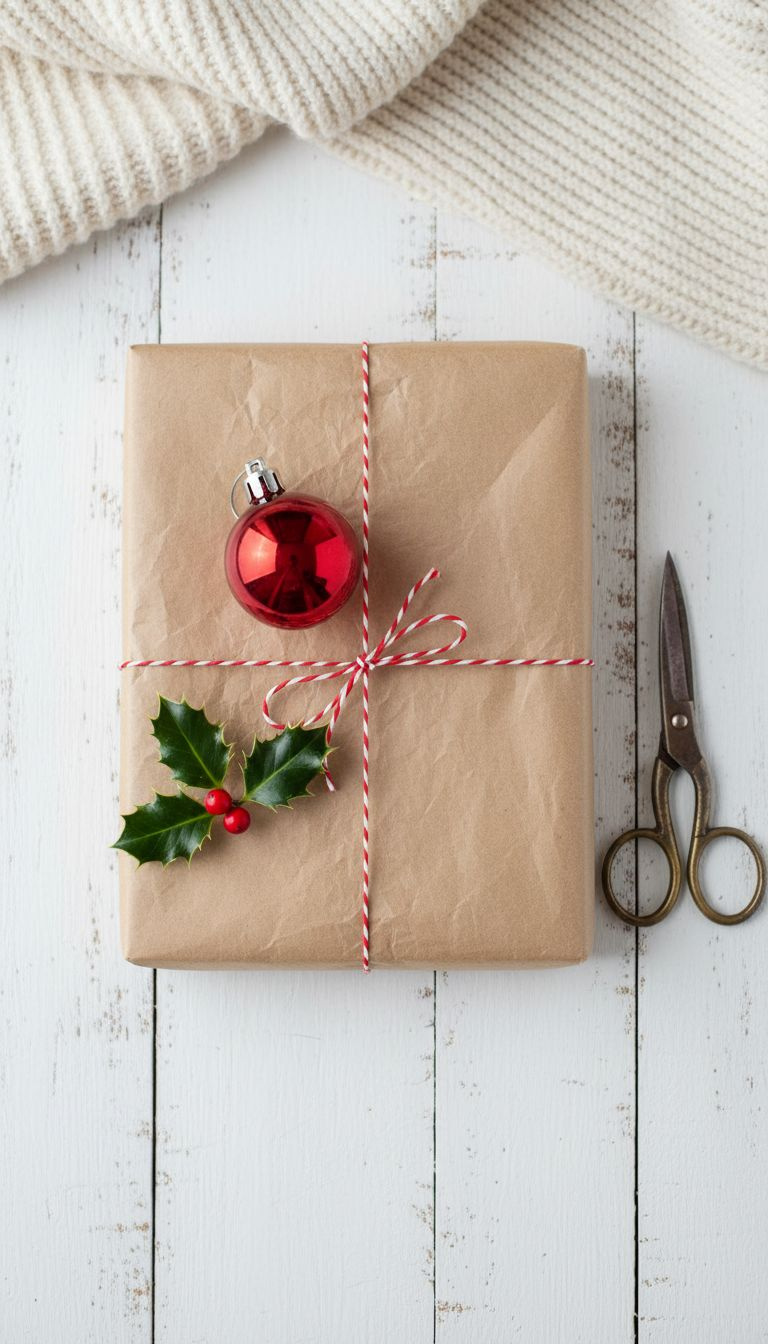
Pin this beautiful and sustainable gift wrapping idea!
Ditch disposable plastic bows and add a thoughtful, reusable touch to your Christmas presents. Using a single, beautiful ornament as a gift topper is a simple, elegant, and sustainable gift wrapping idea. The ornament becomes part of the gift itself, a little keepsake for the recipient to enjoy.
Materials Needed:
- Wrapped gifts
- A selection of small to medium-sized, relatively flat or lightweight ornaments
- Ribbon or baker’s twine
- Scissors
- Optional: small gift tags
Step-by-Step Directions:
- Wrap your present as you normally would.
- Tie a ribbon or twine around the package, leaving the ends long enough to tie a knot but not a full bow.
- If using a gift tag, write on it and thread it onto one end of the ribbon.
- Thread the ribbon through the loop of your chosen ornament.
- Tie a simple, secure knot or a small bow to attach the ornament to the center of the package.
- Trim the ends of the ribbon. The ornament now serves as a beautiful, reusable decoration that’s part of the gift itself.
Pro-Tip: This works especially well for hostess gifts or wine bottles. Simply tie a beautiful ornament around the neck of the bottle with a ribbon.

5. Design Elegant Place Card Holders

Save this idea for your Christmas dinner party!
Add a personal and festive touch to your holiday tablescape with these easy DIY place card holders. This simple Christmas table decor idea doubles as a charming party favor for your guests to take home and hang on their own tree.
Materials Needed:
- One beautiful ornament for each guest (choose a consistent color or style)
- Small cardstock tags
- A pen with metallic or fine-point ink
- Thin, elegant ribbon (velvet or satin looks lovely)
- Hole punch
Step-by-Step Directions:
- Write each guest’s name neatly on a cardstock tag.
- Use the hole punch to make a small hole at one end of each name tag.
- Cut 6-inch lengths of ribbon, one for each place setting.
- Thread a piece of ribbon through the hole in the name tag.
- Tie the ribbon securely onto the loop of an ornament, finishing with a small, simple bow.
- Place one ornament at the top of each plate or on the folded napkin at each setting. Your guests will have a beautiful, personalized party favor to take home.
Pro-Tip: For a different look, use flat, disc-shaped ornaments and a paint pen to write guests’ names directly on the ornament itself.

6. Build a Dazzling Window Display

Save this magical window decorating idea!
Create a magical, floating display by hanging ornaments in a window. This simple idea looks stunning from both inside and outside your home. Using glass, crystal, or icicle-shaped ornaments is especially effective as they catch the daylight beautifully.
Materials Needed:
- A selection of ornaments (glass, crystal, or icicle shapes work beautifully as they catch the light)
- Clear fishing line or thin, translucent ribbon
- Scissors
- An adjustable tension rod that fits your window frame
- Optional: Small, clear adhesive hooks
Step-by-Step Directions:
- Decide on the look you want. For a uniform look, cut all ribbons to the same length. For a staggered, “cascading” effect, cut ribbons to various lengths.
- Tie one end of a piece of ribbon securely to an ornament’s loop.
- Install the tension rod at the very top of your window, snug against the inside of the frame.
- Tie the other end of the ribbon to the tension rod, spacing the ornaments a few inches apart.
- Repeat until you have a full display. The tension rod makes this easy to install and remove without any damage.
- Alternatively, for a simpler look, you can stick clear adhesive hooks to the top of the window frame and hang the ribbons from them.
Pro-Tip: This is a perfect solution for small spaces or apartments where you might not have room for a full Christmas tree but still want a festive focal point.

7. Add Glamour to a Chandelier
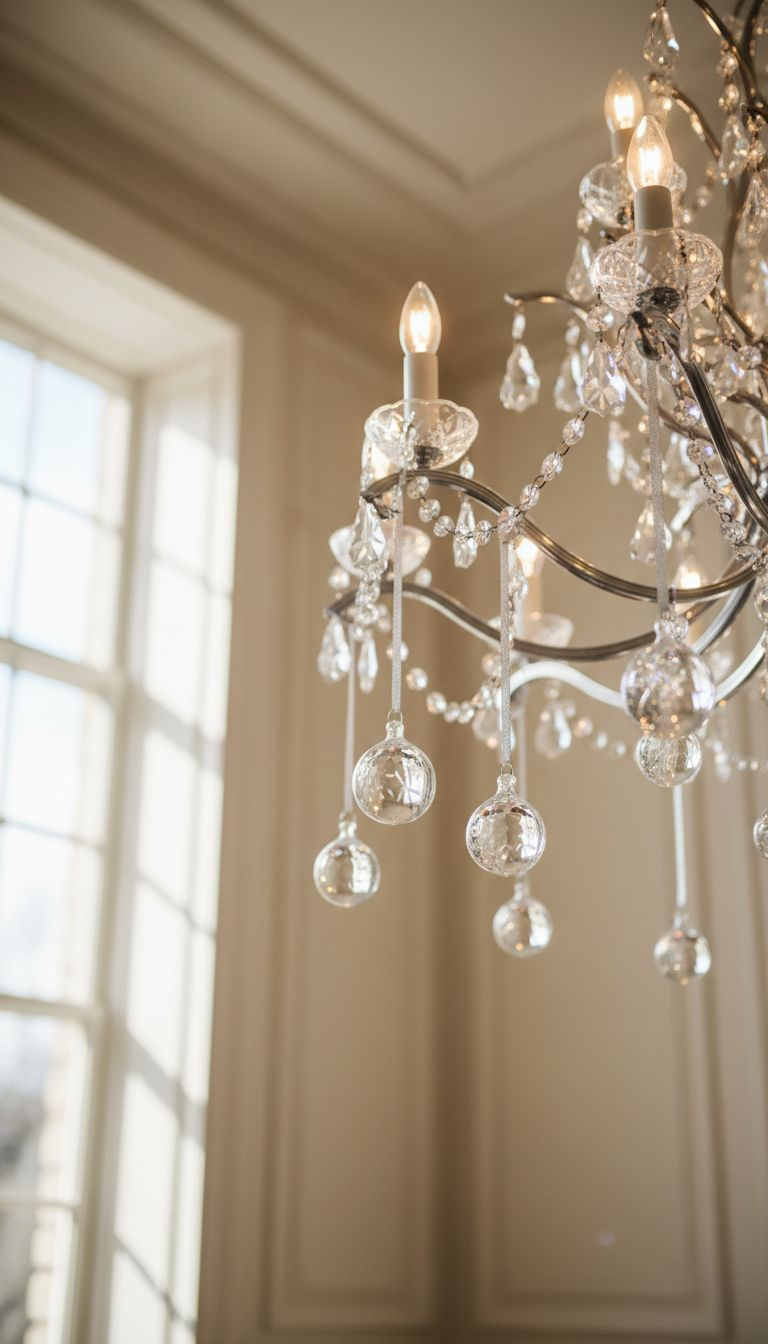
Pin this glamorous holiday decorating tip!
Add an unexpected touch of holiday glamour to your dining room or entryway by decorating a chandelier. Hanging a few lightweight ornaments from your light fixture is a sophisticated trick that makes the whole room feel more festive.
Materials Needed:
- A selection of very lightweight ornaments (miniature balls, small icicles, or crystal drops are perfect)
- Decorative ornament S-hooks or thin, clear fishing line
- A sturdy stepladder
Step-by-Step Directions:
- Safety First! Turn off the power to the light fixture at the breaker box before you begin.
- Set up your stepladder on a stable, level surface.
- Using S-hooks or short lengths of fishing line, begin hanging the ornaments from the arms and scrolls of your chandelier.
- Distribute them evenly around the fixture for a balanced look.
- Step down and view the chandelier from different angles to check for any gaps.
- Once you are satisfied, turn the power back on. The light from the bulbs will beautifully reflect off the added ornaments.
Lesson Learned: Do not skip turning off the power. It’s a simple step that ensures your safety. Also, stick to truly lightweight ornaments to avoid putting any strain on your light fixture.

8. Style a Minimalist Ornament Branch Tree

Save this for a touch of simple, Scandinavian-inspired holiday decor!
For a modern, understated, or Scandinavian-inspired look, create a minimalist Christmas branch tree. This chic alternative to a traditional tree is perfect for small spaces and provides a beautiful way to display a few of your most special ornaments.
Materials Needed:
- A few tall, interesting-looking branches from your yard (or a craft store)
- A sturdy, heavy-bottomed vase or pot
- Sand, pebbles, or floral foam to secure the branches
- A small, curated selection of your most beautiful or meaningful ornaments (5-9 ornaments is plenty)
Step-by-Step Directions:
- Clean your branches of any dirt or loose bark. If desired, you can spray paint them white, silver, or gold for a different look.
- Place floral foam in the bottom of your vase, or fill it with sand/pebbles.
- Arrange the branches in the vase, pushing them firmly into the base material until they stand securely on their own.
- Carefully hang your selected ornaments on the sturdiest parts of the branches.
- The key to this look is negative space. Don’t overcrowd the branches. Let each special ornament have its own moment to shine.
- Place your minimalist tree on an entryway table, a buffet, or in a floor corner.
Pro-Tip: Choose ornaments with a similar theme or material—like all-wood, all-glass, or all-metal—to enhance the intentional, curated feel of this display.

9. Protect Heirlooms in a Cloche Display

Pin this beautiful way to display and protect sentimental ornaments.
Some sentimental ornaments are too fragile or precious to risk hanging on a busy tree. A glass cloche, or bell jar, provides the perfect way to display these heirloom ornaments safely. This method turns your cherished memories into a beautiful, protected focal point.
Materials Needed:
- 1-3 special heirloom ornaments
- A glass cloche (bell jar) with a sturdy base
- Faux snow, velvet fabric, or a bed of evergreen clippings for the base
- Optional: A small, battery-operated string of fairy lights
Step-by-Step Directions:
- Prepare the base of your cloche. Sprinkle a layer of faux snow or arrange a piece of fabric neatly on the wooden or marble base.
- Carefully arrange your most precious ornaments on top of the base material. You can lay them down or, if they are stable, stand them up.
- If using fairy lights, loosely coil them around the ornaments, tucking the tiny battery pack out of sight at the back.
- Gently place the glass dome over the display, making sure it doesn’t touch the ornaments.
- This creates a mini-museum for your memories, keeping them dust-free and safe from accidental bumps, pets, or small children.
Pro-Tip: This is the perfect way to honor ornaments from loved ones who have passed or to showcase your baby’s “first Christmas” ornament for years to come.

Key Takeaways: Your Quick Guide to Using Christmas Ornaments
- Create Instant Decor: Fill any clear glass bowl or vase with color-coordinated ornaments for a 5-minute centerpiece.
- Craft Something New: Use a low-temp hot glue gun and a wire form to turn old baubles into a stunning DIY wreath.
- Elevate Existing Decor: Weave ornaments into garlands, hang them from chandeliers, or add them to window displays for a festive touch.
- Think Beyond Decoration: Use single, beautiful ornaments as reusable gift toppers or elegant place card holders for holiday dinners.
- Protect the Precious: Display fragile heirloom ornaments safely under a glass cloche to keep them cherished and secure.
People Also Ask About Using Christmas Ornaments
What can I do with broken glass ornaments?
Safety is the top priority with broken glass ornaments. After carefully collecting the pieces with gloves, you can either dispose of them safely (in a sealed, labeled box) or get creative. The pieces can be crushed further and used like glitter on craft projects or carefully glued onto a picture frame or plain ornament to create a beautiful mosaic effect.
How can I display sentimental or heirloom ornaments safely?
The best way to display sentimental ornaments is by giving them a protected space. Instead of hanging fragile heirlooms on a busy tree, display them under a glass cloche or in a shadow box. This keeps them safe from dust, pets, and accidental breakage while turning them into a beautiful focal point on a mantel or shelf.
Is it okay to donate old Christmas ornaments?
Yes, absolutely! Most thrift stores and charitable organizations welcome donations of gently used Christmas ornaments. It’s a fantastic, sustainable way to declutter your collection while allowing another family to enjoy them for the holidays. Just be sure they are not broken before donating.
What’s the best way to hang ornaments in a window?
Use a tension rod for a damage-free and professional look. Fit an adjustable tension rod inside the top of your window frame. Tie ornaments to varying lengths of clear fishing line or thin ribbon and then tie them onto the rod. This allows you to create a beautiful cascading effect without putting any holes in your walls or woodwork.
Final Thoughts
That dusty box of old ornaments is not clutter—it’s a treasure chest of creative potential just waiting to be opened. With these ideas for repurposing and displaying your collection, you can spread holiday cheer into every corner of your home, far beyond the Christmas tree. From a simple centerpiece to a sparkling DIY wreath, your extra ornaments hold the key to a uniquely festive home.
Which one of these ornament ideas are you excited to try first this holiday season? Let me know in the comments below
Last update on 2026-01-18 / Affiliate links / Images from Amazon Product Advertising API