Staring at that pile of holiday cards on your counter? You’re not alone.
That stack represents so much love, but it also creates so much clutter. The guilt of throwing away memories from friends and family is real, leaving you stuck. You need a simple, stress-free plan.
What to do with old Christmas cards: You can creatively upcycle them into gift tags, ornaments, and bookmarks, donate the card fronts to charity, or recycle them after removing any non-paper elements like glitter, foil, or batteries. This guide will show you brilliant, easy ideas you can actually use.
Feeling the Post-Holiday Clutter? What to Do With Old Christmas Cards
We’ve all been there. The holidays are over, the decorations are packed away, but a persistent pile of used Christmas cards remains. It feels wrong to just toss them in the trash, yet keeping them all leads to boxes of sentimental clutter that take up precious space. This is the classic conflict between cherishing a memory and wanting an organized home.
The good news is that you don’t have to choose between guilt and clutter. Think of that stack of old holiday cards not as a problem, but as a collection of free, beautiful craft supplies. This guide offers a range of solutions, from creative DIY projects to eco-friendly disposal, designed for every skill level. You’re about to find the perfect, stress-free plan for your old cards.
Your 5-Minute Action Plan: How to Sort Your Cards Without the Guilt
Before you can decide what to do, you have to conquer the pile. The biggest hurdle is often “analysis paralysis”—staring at the cards and not knowing where to begin. The solution is a quick, decisive sorting method that removes the emotional friction.
To sort old Christmas cards, use the 4-Box Method. Get four boxes or create four piles and label them:
1. Keep: For the most sentimental cards with long, personal notes or special photos of loved ones. Be very selective!
2. Craft: For beautiful cards with images or patterns you can repurpose. These are your raw materials.
3. Donate: For card fronts that are in good condition and suitable for charity programs.
4. Recycle/Trash: For everything else, including plain cards or those that are damaged.
Set a timer for 15 minutes and work quickly. Don’t overthink it. This simple framework turns an overwhelming task into a manageable one and prepares you for the creative ideas that follow.
9 Brilliant Ideas For Old Christmas Cards You Can Actually Use
Now that your cards are sorted into the “Craft” pile, it’s time for the fun part. Here are nine clever, creative ways to upcycle those beautiful cards into something new, useful, and festive. We’ll start with the most practical projects first.
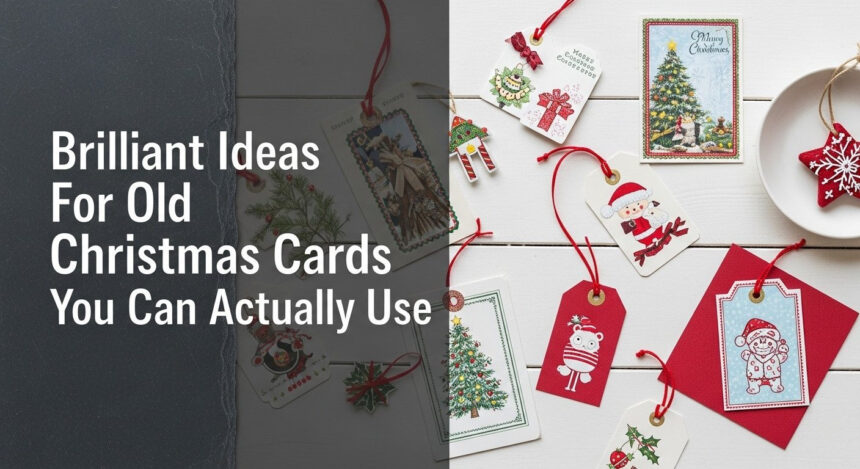
1. Craft the Perfect DIY Gift Tags

Pin this money-saving idea to your ‘Christmas Crafts’ board!
H4: Materials Needed:
- Old Christmas cards from your “Craft” pile
- A good pair of sharp scissors or decorative edging scissors
- A single hole punch (1/4 inch is standard)
- Baker’s twine or thin ribbon
H4: Step-by-Step Directions:
- Select & Cut: Choose cards with small, isolated images like ornaments, holly, or characters. Carefully cut around the image to create your tag shape.
- Punch: Use the hole punch to make a clean hole at the top of your tag.
- String: Cut a 6-inch piece of twine or ribbon. Fold it in half, push the loop through the hole from front to back, then pull the two ends through the loop to secure it.
- Write (Optional): Use the blank back of the tag to write “To:” and “From:”.
Pro-Tip: Use craft punches in shapes like circles or scallops for perfectly uniform tags in seconds. This is a game-changer if you’re making a large batch!

2. Create Festive & Frugal Bookmarks

Save this easy 5-minute craft idea!
H4: Materials Needed:
- Old Christmas cards with vertical patterns or scenes
- A paper trimmer or ruler and craft knife for straight edges
- A single hole punch
- Embroidery floss or thin yarn for a tassel
- Optional: Self-laminating sheets for durability
H4: Step-by-Step Directions:
- Cut Strips: Select cards with long, vertical designs. Use a paper trimmer to cut them into 2-inch wide strips.
- Punch a Hole: Punch a single hole in the center of the top of the strip.
- Make a Tassel (Optional): Wrap embroidery floss around three fingers about 20 times. Slide it off, tie a tight knot at the top with another piece of floss, and cut the bottom loops to create the tassel.
- Attach: Loop the tassel’s tie string through the hole in the bookmark and secure.
- Laminate (Optional): For a bookmark that will last, place it inside a self-laminating sheet and trim the excess.
Lesson Learned: Don’t worry about the writing on the back! It gets hidden inside the book and adds to the recycled charm.

3. Design Charming Christmas Ornaments

Pin this sentimental ornament idea for next Christmas!
H4: Materials Needed:
- Old Christmas cards, especially those with special meaning
- A 2 or 3-inch circle craft punch (or trace a cup and cut by hand)
- Craft glue or a glue stick
- Thin ribbon for hanging
- Optional: Clear plastic or glass fillable ornaments
H4: Step-by-Step Directions:
- Punch Circles: Use the circle punch to cut out several images from your cards.
- Create a 2D Ornament: For the simplest version, take one circle, punch a small hole at the top, and loop a ribbon through for hanging.
- Create a 3D Ornament: Punch out 4 identical circles. Fold each in half with the image facing inward. Glue the back-right half of the first circle to the back-left half of the second circle. Continue with all four until you have a 3D ball shape. Glue a ribbon loop inside before closing the last section.
- Create a “Memory Ball”: Cut cards into thin strips. Curl them around a pencil and place them inside a clear fillable ornament.
Pro-Tip: Use photo cards for this project to create beautiful ornaments featuring loved ones’ faces that you can cherish on your tree each year.

4. Fold Simple & Tiny Gift Boxes

Never buy a tiny gift box again! Save this clever idea.
H4: Materials Needed:
- Sturdy old Christmas cards (cardstock weight is best)
- A ruler
- A paper scoring tool or a bone folder (the back of a butter knife also works)
- Scissors
H4: Step-by-Step Directions:
- Separate: Cut the card along the fold so you have two separate pieces (front and back).
- Trim for the Lid: Take the card front (this will be your lid) and trim 1/8th of an inch off of two adjoining sides.
- Score: On the back of both pieces, use your ruler and scoring tool to score a line 1 inch in from all four sides.
- Cut Tabs: On each piece, make a cut from the edge to the score line on the two short sides, creating four small tabs.
- Fold & Glue: Fold along all your score lines. Apply glue to the outside of the small tabs and tuck them inside to form the box walls. Hold for a moment to secure.
- Assemble: Repeat for the other piece. The slightly larger piece will be the bottom, and the trimmed piece will fit perfectly as the lid.
Pro-Tip: Use paper clips to hold the corners together while the glue dries, ensuring a strong and perfectly square box.

5. String a Cheerful Holiday Bunting

Love this festive decor idea! Pin it now.
H4: Materials Needed:
- A large collection of old Christmas cards
- Jute twine or festive ribbon
- Mini clothespins (or a hole punch)
- Scissors
- A piece of cardboard for a template
H4: Step-by-Step Directions:
- Create a Template: Cut a triangle, diamond, or pennant shape from a piece of cardboard to your desired size. This ensures all your bunting pieces will be uniform.
- Trace & Cut: Use the template to trace the shape onto the most colorful parts of your Christmas cards. Cut out as many pieces as you need to achieve your desired length.
- String It Up (Clothespin Method): Cut a long piece of twine. Use mini clothespins to clip the top of each paper shape to the twine, spacing them evenly. This method is easy and reusable.
- String It Up (Hole Punch Method): Alternatively, punch two small holes in the top corners of each paper shape. Thread the twine through the holes to string them together.
Lesson Learned: Mixing different shapes (like triangles and circles) can add more visual interest to your bunting. Don’t be afraid to experiment!

6. Turn Card Fronts into Postcards

Save this zero-waste idea for sending quick notes!
H4: Materials Needed:
- Old greeting cards (Christmas or any occasion) without writing on the back of the front cover
- Scissors or a paper trimmer
- A pen
- Postcard stamps
H4: Step-by-Step Directions:
- Separate: Carefully cut the card along the fold to separate the front from the back. Discard the back half (or save it for scrap paper).
- Check the Back: Ensure the back of the card front is blank and matte (not glossy) so you can write on it.
- Create the Postcard Layout: Use a pen and a ruler to draw a vertical line down the center of the blank side.
- Address and Write: Use the right side for the mailing address and stamp, and the left side for your message. That’s it!
Pro-Tip: To be mailed as a postcard in the US, the card must be rectangular and at least 3.5″ x 5″, but no more than 4.25″ x 6″. Check your card sizes before you start writing.

7. Assemble a “Best Of” Keepsake Ring

An amazing way to store sentimental cards without the bulky box! Pin this.
H4: Materials Needed:
- Your small pile of “Keep” cards
- A single hole punch
- One large metal binder ring (1.5″ to 2″ works well)
H4: Step-by-Step Directions:
- Gather & Order: Collect your absolute favorite cards from the year. Put them in any order you like—perhaps with your favorite card on top as the “cover.”
- Punch: Holding the cards in a neat stack, punch a single hole in the top-left corner of all the cards at once. Make sure to go through a spot that won’t obscure a photo or message.
- Assemble: Open the binder ring, thread all the punched cards onto it, and click it shut.
- Store: You now have a compact, flippable “book” of your favorite cards that can be easily stored on a shelf or in a drawer.
Lesson Learned: I add the new year’s cards to the front of the ring each January. It creates a reverse-chronological album that’s fun to flip through over time.

8. Harvest Scraps for Junk Journaling

A beautiful way to use every last scrap. Save to your ‘Journaling Ideas’ board.
H4: Materials Needed:
- Scraps and cut-offs from old Christmas cards
- A journal or notebook (a “junk journal” is perfect)
- A high-quality glue stick designed for paper crafts
- Scissors
H4: Step-by-Step Directions:
- Harvest Elements: Go through your card scraps and cut out anything that catches your eye: a single flower, a pretty pattern, a festive word, a bird, or a star. Don’t overthink it.
- Create a “Bits” Tray: Keep all these tiny harvested pieces in a small tray or bowl on your desk.
- Decorate Pages: The next time you are working in your journal, grab from your “bits” tray.
- Compose & Glue: Arrange the pieces on your journal page to create small collages, decorative corners, or focal points. Use a glue stick to adhere them permanently.
Pro-Tip: Don’t just save images. Cut out interesting textures, bold color blocks, and even nice handwritten words (like “Joy” or “Peace”) to use in your journal.

9. Make Simple Puzzles for Kids

Such a clever and free activity for toddlers! Pin this now.
H4: Materials Needed:
- Sturdy card fronts with simple, clear images (like a snowman or Santa)
- A pen or marker
- Sharp scissors or a craft knife (for adult use only)
- Optional: Craft glue and popsicle sticks
H4: Step-by-Step Directions:
- Reinforce (Optional): For a sturdier puzzle, glue popsicle sticks to the back of the card front and let it dry completely.
- Draw Lines: On the back of the card, draw simple puzzle piece lines. For a toddler, 4-6 large, simple pieces are perfect. For an older child, you can make them smaller and more complex.
- Cut: Carefully cut along the lines with sharp scissors. An adult should always perform this step.
- Play! Mix up the pieces and let your child have fun putting the picture back together. Store the pieces in a labeled envelope for future use.
Safety Note: An adult should always do the cutting. Once the pieces are cut, they are safe for little hands to play with.

Key Takeaways: Your Quick Guide to Old Christmas Cards
- First, Sort: Use a 4-box system (Keep, Craft, Donate, Recycle) to manage your pile without stress.
- Get Practical: The easiest and most useful craft is turning card fronts into next year’s gift tags.
- Preserve Memories: Store your most treasured cards on a simple binder ring to save space.
- Recycle Smart: NEVER recycle cards with glitter, foil, or batteries. When in doubt, throw it out to avoid contaminating the batch.
- Be Generous: Charities like St. Jude’s Ranch for Children accept card fronts to make new cards. Check their website for current needs.
FAQs About what to do with old christmas cards
Can you recycle Christmas cards with glitter or foil?
No, you absolutely cannot recycle Christmas cards with glitter or foil. The glitter is made of microplastics that contaminate the paper pulp, while the foil is a plastic/metal film that cannot be separated. These cards must be put in the trash or repurposed for crafts.
Where can I donate old Christmas cards for charity?
The most well-known program is St. Jude’s Ranch for Children. They accept the fronts of used greeting cards to create new cards sold for charity. It is critical to visit their official website for the most up-to-date guidelines and mailing address before sending your donation.
Is it okay to just throw away Christmas cards?
Yes, it is perfectly okay to throw away Christmas cards. While recycling or repurposing is more eco-friendly, you should not feel guilty about discarding them. The sender’s kind thought was received and appreciated, and you are not obligated to keep the physical object forever.
How long should you keep Christmas cards?
There is no set rule, but many people display them for the holiday season and then sort through them in January. A good practice is to keep a very small, select few that are deeply personal or from close family and then responsibly dispose of or repurpose the rest.
Final Thoughts: From Clutter to Creativity
That pile of holiday cards doesn’t have to be a source of stress. Think of it as a collection of free craft supplies, a potential donation to a good cause, or simply a memory you’ve enjoyed and are now free to let go of. By choosing just one of these ideas, you can transform post-holiday clutter into a moment of creativity and accomplishment.
What’s your favorite way to reuse old Christmas cards? Share your ideas in the comments below!
Last update on 2026-03-05 / Affiliate links / Images from Amazon Product Advertising API


