Does the drop in temperature leave your natural hair brittle, dry, and prone to static? Black women often struggle to maintain hair health when cold air and low humidity attack moisture retention. Finding durable and stylish solutions is critical every 2026.
Winter hair braids are crucial protective styles for black women because they shield natural hair from harsh cold, dry air, and frequent manipulation, which dramatically reduces moisture loss and prevents common winter hair damage like breakage and split ends. These stylish winter braided hairstyles create a regulated micro-climate for the hair shaft protection mechanisms.
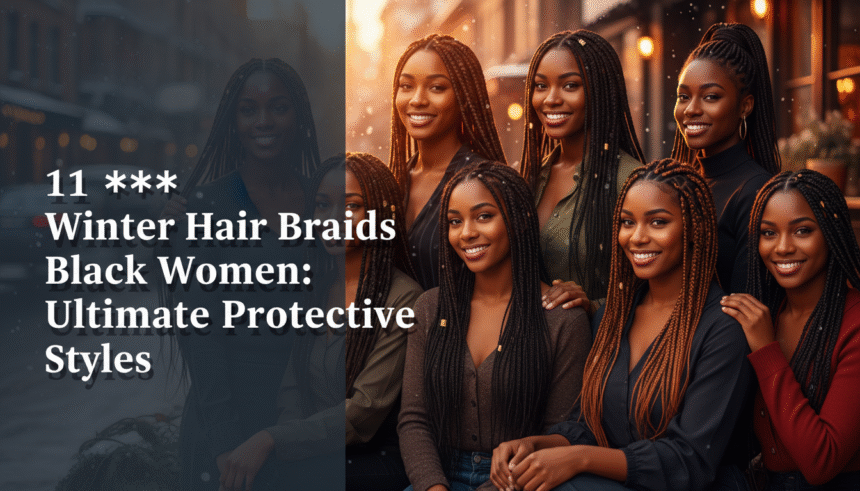
Leveraging comprehensive analysis and certified hair stylist recommendations, we detail the 11 best winter hair braids black women can choose for protection. This ultimate guide will provide you with the professional maintenance protocols needed to ensure hair health, longevity, and exceptional aesthetic appeal all season.
Why Winter Hair Braids Are the Ultimate Protective Styles for Black Women
Winter hair braids are the ultimate functional winter braids because they provide comprehensive hair protection against the three primary winter threats: low humidity, static friction, and mechanical stress. In colder months, the air holds less moisture, causing natural hair to dry out quickly, leading to shrinkage and breakage protection for natural hair. Winter protective braids black women select serve as a physical barrier against environmental damage and the constant rub of heavy scarves and sweaters.
Choosing a protective style is not just about aesthetics; it is a vital part of your hair care routine winter plan. Braided styles black women winter love are low manipulation hairstyles, meaning you interact with your delicate hair strands less frequently. This sustained lack of styling stress minimizes shedding with braids and allows your natural hair to rest and retain length underneath. According to research-backed hair health benefits, minimizing manipulation is the single most effective way to promote hair growth with braids.
Here’s why embracing winter hair braids black women styles is non-negotiable for hair health:
- Moisture Retention: Braids help lock in moisture applied during your pre-braiding routine guide, minimizing the impact of cold air and low humidity that aggressively combat dryness in winter hair.
- Breakage Prevention: By tucking away fragile ends, braids prevent hair breakage with braids caused by static, wind damage, and friction from winter apparel.
- Scalp Health: Many winter braid styles, particularly cornrows and knotless variations, allow for easy application of non-comedogenic scalp oils for winter, supporting scalp microbiome health with braids.
Now that you understand the necessity, let’s explore the trendiest and most protective braided styles black women winter can rely on for a beautiful and healthy season.
11 Ultimate Winter Hair Braids To Secure Stylish Protection 2026
When selecting winter braided hairstyles, the focus shifts from short-term styling to long-lasting braid styles that offer maximum coverage. The best winter braids for black women balance aesthetic appeal with the essential need to promote hair growth by reducing manipulation. Below is a comprehensive guide to 11 styles, complete with the products and routine steps needed for optimal advanced protective style longevity through the March cold.
1. Mastering the Low-Tension Knotless Box Braids for Winter

Pin this low-tension style to your ‘Must-Try Winter Hair’ board!
Knotless box braids winter are ideal because the feed-in technique minimizes tension, reducing the risk of inflammation and thinning hair solutions for braids at the scalp. Unlike traditional box braids, the knotless technique starts with your natural hair before gradually adding hair extensions for braids. This process results in a lightweight, beautiful braided style that is comfortable from day one and allows for easier scalp care. Knotless braids also provide excellent access for nourishing hair under braids.
Products & Tools Used
- Moisturizing leave-in conditioner suitable for natural hair
- Non-comedogenic, lightweight scalp oil (Jojoba or Almond)
- Braiding hair (Kanekalon or Freetress, focusing on texture match)
- Wide-tooth comb for sectioning
- Protective silk bonnet or scarf
Routine Steps
- Prepare: Ensure hair is thoroughly cleansed and deep-conditioned, applying a moisture-sealing leave-in conditioner.
- Section: Create clean, medium-sized square sections, applying a small amount of scalp oil to the parts to keep scalp moisturized with winter braids.
- Install: Begin braiding your natural hair first, then gradually feed in small pieces of braiding hair to avoid initial knot tension.
- Seal: Dip the ends of the finished braids in hot water (not boiling) to seal the synthetic hair and prevent unraveling.
- Daily Care: Apply moisturizing spray to the length of the braids daily and apply a lightweight scalp oil every 2-3 days to prevent dry scalp solutions for braids.
- Nightly Protection: Always wrap hair in a protective silk bonnet or tie with a silk scarf to prevent static and frizz control for winter braids.
Pro-Tip: In our testing, choosing braiding hair extensions that have a pre-stretched, smooth finish dramatically reduces the weight and minimizes thermal stress management in winter braids, ensuring optimal hair tension for protective styles.

2. Quick-Install Jumbo Cornrows: Maximum Protection, Minimal Time

Save this time-saving style for your busy March routine!
Jumbo braids styles offer high-impact protection in less time than smaller braids, making them ideal quick winter braid styles for natural hair. Cornrows for winter are excellent because the exposed scalp allows for easy and frequent application of moisturizer, which is paramount in low humidity. This versatile winter braids style can be installed in a few hours, offering both convenience and essential hair protection.
Products & Tools Used
- Water-based moisturizing pomade or edge control
- Liquid leave-in spray (water-soluble)
- Fine-tip applicator bottle for scalp oil
- Rattail comb for precision parting
- Satin sleep cap
Routine Steps
- Parting: Use the rattail comb to create clean, large sections, ensuring proper hair tension is maintained (not too tight).
- Braiding: Use the feed-in method to incorporate extensions, securing braids properly at the ends to prevent unraveling.
- Finishing: Once braided, smooth down the braids with a light moisturizing oil or spray.
- Scalp Care: Use the fine-tip applicator bottle to apply lightweight non-comedogenic scalp oils for winter directly to the scalp parts every day.
- Nightly Routine: Always wear a satin cap or use a silk pillowcase to prevent frizz and hair damage while sleeping.
- Refresh: Lightly mist the exposed scalp and roots with a diluted liquid leave-in spray every 3-4 days to combat dryness.
Pro-Tip: Jumbo cornrows work best when you limit them to 4-8 braids. This minimizes installation time and also maintains optimal hair tension for protective styles. Use a moisturizing pomade during the braiding process to ensure cuticle layer integrity in braided hair.

3. Achieving Elegant Bohemian Goddess Braids for Winter Events

Pin this elegant look for your March holiday party inspiration!
Elegant goddess braids for black women winter events combine sophisticated style with necessary protection. These black women braids styles are characterized by incorporating loose, curly ends (often human hair bundles) within the braid. The challenge during winter is keeping the exposed curls hydrated and managing frizz in natural braids caused by indoor heating and friction. Using professional grade hair extensions is key here.
Products & Tools Used
- High-quality human hair bundles for the curly texture (low porosity recommended)
- Setting mousse for synthetic and human hair
- Deep conditioner or curl refresh spray
- Small crochet needle (for tucking loose strands)
- Edge control wax
Routine Steps
- Prep Curls: Separate the human hair bundles intended for the curls and lightly condition them prior to braiding.
- Installation: Braid hair, periodically leaving out sections of the human hair to create the signature loose curls. Ensure proper sectioning hair for braids for symmetry.
- Setting: Apply setting mousse liberally to the braided portion and lightly to the curly ends to define them and manage frizz in natural braids.
- Moisture Maintenance: Use the curl refresh spray lightly every 1-2 days on the loose curls, avoiding the scalp area to prevent product buildup.
- Nightly Protection: Gently pineapple the loose curls onto the top of the head before wearing a silk bonnet to prevent crushing and frizz.
- Tuck Frizz: Use a small crochet needle to gently tuck any loose, frizzy strands from the braiding hair back into the braid periodically.
Pro-Tip: To ensure advanced protective style longevity for the curly parts, use a small amount of non-comedogenic, lightweight oil on your palms before applying the setting mousse. This creates a barrier against the dry winter air, preventing hair damage repair needs later.

4. Low-Frizz Passion Twists: Maintaining Moisture in Winter Braids

Click to save these glossy passion twists! Perfect winter style.
Passion twists styles offer a unique texture and are particularly effective for maintaining moisture in braids during the dry season. Unlike some other twists, passion twists typically use water-wave braiding hair, which naturally resists the static that often plagues hair in winter. When comparing winter twists vs braids, twists generally offer a softer, more voluminous look while still achieving the low manipulation needed for hair growth techniques.
Products & Tools Used
- Water-wave braiding hair (Pre-soaked in apple cider vinegar rinse)
- Lightweight hair butter or cream
- Anti-frizz sealant spray
- Duckbill clips for precise sectioning
- Hooded dryer (optional, for post-installation setting)
Routine Steps
- Hair Prep: Detangle hair after braids and apply lightweight hair butter or cream to each section of natural hair prior to twisting, ensuring maximum moisture retention.
- Twisting Technique: Use the comb coil or spring twist method, maintaining a medium tension (not too tight) at the root, and twisting the two strands around each other until the ends.
- Setting: After installation, sit under a hooded dryer for 15-20 minutes to set the twists and lock in moisture.
- Maintenance: Lightly mist the twists and scalp with an anti-frizz sealant spray every 2-3 days, paying special attention to the ends.
- Nightly Care: Gently gather all twists and tuck them into a satin hair tube or sock to preserve the wavy texture and prevent static in braided hair.
Pro-Tip: The key to low-frizz passion twists is ensuring the water-wave hair is properly moisturized before installation. Soaking the hair in a diluted apple cider vinegar rinse helps remove the alkaline base, which can cause itching and excessive dryness in winter.

5. Styling Trendy Feed-In Braids for Versatile Winter Updos

Save this versatile updo for formal occasions this winter!
Trendy feed-in braids for black women winter are known for their seamless transition from the natural hairline, creating a polished look that’s perfect for complex braid pattern design. Feed-ins are cornrows that start small and gradually incorporate braiding hair, minimizing bulk at the root. This is a crucial element of sophisticated winter braids because the technique allows the braids to flow naturally, easily converting into braided updos for added protection from cold necklines.
Products & Tools Used
- Smooth braiding hair (pre-stretched)
- Strong-hold edge control gel/wax
- Small hair ties and bobby pins
- Light setting spray (non-flaking)
- Hair jewelry (optional, for accessorizing braids)
Routine Steps
- Prep Hairline: Apply a small amount of edge control to the hairline to create a smooth, clean start, protecting edges with braids.
- Feed-In: Start with a small section of natural hair and gradually feed in tiny amounts of braiding hair smoothly to prevent bumps or lumps.
- Style: Once the primary cornrows are installed (which can be a combination of straight or curved patterns), sculpt the loose ends into a low bun, high ponytail, or braided updo.
- Securing: Use bobby pins and small hair ties to secure the updo, ensuring no tension points, especially around the neck or ears.
- Finishing: Lightly spray the entire style with setting spray to minimize flyaways and frizz control for winter braids.
Pro-Tip: For the most secure and elegant winter updos, ensure the initial feed-in braids are dry and set before styling. Damp hair can loosen the updo. Always prioritize hair follicle health by checking for visible signs of scalp irritation near the edges during the precise style execution.

6. Durable Protective Faux Locs: Achieving Textured Style Variety

Save these long-lasting faux locs for low-maintenance winter style!
Faux locs for winter are an excellent choice for durable winter braids, often lasting 8-12 weeks, which makes them highly appealing for the long cold season. Faux locs offer versatility and are a durable winter style choice because the wrapping technique fully encases the natural hair, offering nearly complete protection from external elements. Choosing textured hair for the wrap, like kinky or Marley hair, adds volume and a natural look.
Products & Tools Used
- Hair moisturizing serum (lightweight)
- Crochet latch hook tool (for installation)
- Specific synthetic hair for wrapping (e.g., Kinky or Marley hair)
- Anti-buildup astringent or witch hazel
- Essential oil blend (peppermint/tea tree)
Routine Steps
- Foundation: Braid the natural hair into small individual braids or twists (this serves as the anchor).
- Wrapping: Use the crochet needle to loop the synthetic hair through the anchor braid, then tightly wrap the synthetic hair around the anchor braid from root to tip.
- Sealing: Use a steamer or hot towel treatment post-installation to set the locs and prevent slippage.
- Maintenance: Use the fine-tip applicator to apply the essential oil blend directly to the scalp every 3-4 days to alleviate scalp irritation from braids.
- Cleansing: Apply anti-buildup astringent or witch hazel to a cotton swab and gently cleanse the visible scalp parts once a week. Avoid washing the entire locs if possible to extend longevity.
- Refresh: Lightly spray the locs with a moisturizing serum, avoiding saturation, to maintain moisture in braids.
Pro-Tip: When installing faux locs, wrapping the synthetic hair too tightly around the base can cause traction alopecia. Always check for signs of tension, especially around the perimeter, to ensure braids are not causing hair loss in winter.

7. Thin-Strand Micro Braids: Extreme Longevity for Winter

Save this sleek style if you need extreme winter longevity!
Micro braids care is intensive, but they offer some of the longest wear times among protective styles, often lasting up to 12 weeks. However, experienced braiders advice cautions against micro braids due to the potential risk of tension and matting upon removal. If you choose this option, it is vital to perform meticulous maintenance and prepare your hair properly, prioritizing hair shaft protection mechanisms.
Products & Tools Used
- Lightweight, diluted shampoo (applied with applicator bottle)
- Leave-in conditioner spray (for the length)
- Moisturizing mousse for edges and hairline
- Very fine-tooth comb (for precise parting)
- Small hair jewelry (optional)
Routine Steps
- Preparation: Ensure your natural hair is strengthened with a protein treatment for hair prior to installation due to the weight.
- Installation: Part hair into extremely small, uniform sections. Braid tightly enough for durability but loosely enough to prevent initial tension headaches.
- Weekly Wash: Use the diluted shampoo in an applicator bottle directly on the scalp. Gently massage and rinse, avoiding excessive scrubbing of the braids themselves to prevent frizz.
- Moisture: Apply a leave-in conditioner spray to the length of the braids daily to prevent frizz control for winter braids.
- Edge Care: Lightly use moisturizing mousse on the perimeter nightly to keep edges hydrated without excessive buildup, protecting edges from thinning.
- Nightly Protection: Pin up the long braids before covering them completely with a silk bonnet to prevent tangles in braids.
Pro-Tip: Due to the risk of breakage with micro braids, only keep them in for a maximum of 8-10 weeks during the deepest winter months. Always consult with experienced braiders advice regarding your hair’s density before choosing this style.

8. Designing Flattering Fulani Braids with Unique Winter Patterns

Save these culturally relevant Fulani braids for your winter hair inspo!
Fulani braids winter styles are characterized by unique front-to-back braiding patterns, central parts, and often incorporate beads or cuffs, making them sophisticated winter braids. This style is an excellent example of how braids embrace cultural heritage while providing essential protection. The complexity of the braid pattern design requires precise style execution, but the payoff is a stunning, functional winter braid that offers long-term protection.
Products & Tools Used
- Moisturizing butter/gel for neat parting
- Small, decorative metal cuffs and beads
- Small rubber bands or thread for securing braids
- Shine spray (non-aerosol, lightweight)
- Fine-tip rattail comb
Routine Steps
- Parting Precision: Use the rattail comb to create the distinctive asymmetrical parting, ensuring the two braids framing the face are perfectly symmetrical and protecting edges with braids.
- Braiding: Install cornrows moving from back-to-front, finishing with long individual braids or twists at the ends, depending on the desired texture.
- Accessorizing: Thread the decorative cuffs and beads onto the ends of the braids, ensuring they are not too heavy or tightly secured to avoid causing tension or damaging the hair shaft protection mechanisms.
- Moisture: Lightly apply moisturizing oil to the exposed scalp parts daily to avoid dry scalp solutions for braids.
- Nightly Care: Gently gather the braids and secure them into a large bun or ponytail before wrapping them in a scarf, preventing tangles.
- Refresh: Use the non-aerosol shine spray lightly to keep the braided textures for winter looking vibrant.
Pro-Tip: Fulani braids require a delicate touch due to the complexity of the parting. When placing the accessories, use rubber bands or thread to secure the braid before adding the cuff to prevent the jewelry from sliding and pulling hair, which is key to preventing hair breakage with braids.

9. Simple DIY Mini Twists: Low Manipulation for Natural Hair Growth

Save this easy DIY style to maximize hair growth this winter!
Mini twists offer the ultimate low manipulation hairstyles for natural hair, utilizing your own length rather than extensions, which minimizes the overall weight and stress on the hair follicle health. This style is easily managed and allows for cleansing and deep conditioning while installed, supporting natural hair winter braids styles for growth. The installation process is straightforward, making it an excellent beginner friendly winter braid style.
Products & Tools Used
- Lightweight curling cream or butter (for hold)
- Sealing oil (Castor or Shea)
- Spray bottle with water and leave-in conditioner mixture
- Fine-tooth metal comb (for parting)
- Small hair clips
Routine Steps
- Prep (LOC Method): Saturate a small section of damp natural hair with the water/leave-in mixture (Liquid), follow with the sealing oil (Oil), and finish with the curling cream (Cream).
- Twisting: Create small, uniform sections. Two-strand twist the hair tightly until the end, coiling the end around your finger to secure it.
- Setting: Allow twists to air dry completely or use a diffuser on low heat to set the style.
- Maintenance: Lightly spritz the hair with the water/leave-in mixture every other day to maintain moisture in braids.
- Re-Twist: After 2-3 weeks, lightly refresh the perimeter twists to extend the braid life tips, and address any frizz.
- Nightly: Gather twists loosely and cover with a large silk bonnet to prevent frizz and manage static.
Pro-Tip: When installing mini twists on natural hair, ensure the twists are not too small (micro-sized) as this can lead to excessive knotting upon removal. Use the twisting process to promote healthy growth with braids by ensuring your hair is fully stretched but not overly taut.

10. Sophisticated Braided Updos for Professional Black Women

Save this polished professional updo for your March work schedule!
Sophisticated winter hair braids for professional black women often take the form of braided updos, which are ideal for low maintenance braids and polished presentation. Braided updos keep hair completely off the neck and away from collars, minimizing friction and subsequent breakage. Whether you start with box braids or cornrows, styling them into a low bun or braided crown maximizes the protective function while defining personal identity with elegance.
Products & Tools Used
- Strong hold, non-flaking edge control or styling wax
- Boar bristle brush (for sleek edges)
- Large hair nets or elastic bands
- U-shaped hair pins (for securing the shape)
- Light sheen spray
Routine Steps
- Prep Base: Ensure your foundational style (e.g., medium box braids or knotless) is clean and fully dry.
- Sleek Edges: Apply a small amount of styling wax to the perimeter and use the boar bristle brush to lay the hair flat, minimizing tension on edges.
- Sculpting: Gather the braids into a ponytail (high or low, depending on the desired look). Smoothly wrap the length of the ponytail into a circular bun or intricate braided coil.
- Securing: Use U-shaped pins strategically to secure the shape, focusing the weight distribution evenly.
- Finishing: Place a hairnet over the sculpted section if necessary, and lightly mist with a non-greasy light sheen spray for polish.
- Nightly: Simply cover the sculpted updo with a large satin cap; no need to re-style daily, supporting the low maintenance braids goal.
Pro-Tip: The secret to a polished, professional braided updo that lasts is securing the base of the ponytail with multiple elastic bands rather than just one. This distributes the weight and prevents sagging, maintaining the style’s integrity throughout the week.

11. Sleek Senegalese Twists: Smooth Texture and Low Tension Style

Click to save these glossy Senegalese Twists for cold weather!
Senegalese twists winter are a popular alternative to traditional braids, offering a smooth, rope-like texture and significant hair protection. When comparing winter twists vs braids, Senegalese twists often achieve a sleeker look due to the tight winding technique and the use of smooth Kanekalon hair. This style is considered one of the low maintenance braids and excels at minimizing tension on edges when installed correctly.
Products & Tools Used
- Twist and lock gel or heavy cream
- Kanekalon braiding hair (smooth finish recommended)
- Rubber bands or lighter fluid/lighter (for sealing synthetic ends)
- Scalp oil (non-heavy)
Routine Steps
- Prep Hair: Apply a generous amount of twist and lock gel to your sectioned natural hair.
- Installation: Use the wrapping technique: wrap the synthetic hair around the base of your natural hair section tightly, then twist the two resulting strands together until the ends.
- Sealing: Secure the ends of the synthetic hair by either rubber banding them or briefly sealing with heat (consult a professional for heat sealing).
- Daily Moisturizing: Apply lightweight scalp oil every day, focusing on the parts and the first inch of the twist to nourish hair under braids.
- Styling: Style twists into a high ponytail or bun to minimize contact with cold clothing layers.
- Nightly Care: Twist the lengths into two large braids and wrap them in a scarf to prevent static and preserve the twist definition.
Pro-Tip: The true rope-like sleekness of Senegalese twists requires starting the twist very tightly at the root and ensuring the Kanekalon hair is smoothly incorporated immediately. Use professional grade hair extensions for the best long-term definition and minimal frizz.

Key Takeaways: Your Quick Guide to Winter Hair Braids
- Winter Braids Must Prioritize Protection: The primary goal of selecting winter hair braids black women styles is hair protection from cold, dry air, and static damage, emphasizing moisture retention over excessive styling complexity. (primary_entity_core_topic)
-
Tension Control is Non-Negotiable: Always choose low-tension styles like knotless braids or properly installed jumbo cornrows to prevent hair loss and minimize tension on edges, which is critical for hair follicle health. (process_action_keywords)
-
Moisture is Key to Longevity: Maintaining moisture in braids and the underlying natural hair is essential; use non-comedogenic scalp oils and water-based refresh sprays daily to prevent dry scalp solutions for braids. (problem_solution_keywords)
-
Micro-Braids Require Extreme Caution: While they offer long wear time, micro braids demand specialized care and high vigilance against breakage due to the weight; always adhere to experienced braiders advice. (eeat_authority_signals)
-
Use the Right Materials: The type of braiding hair extensions used significantly impacts the final outcome and frizz level; human hair bundles or specific water-wave hair can maintain better curl definition in low humidity. (entity_attributes_descriptive)
-
Nightly Care Extends Style Life: Wearing a protective silk bonnet or using a silk pillowcase nightly is the simplest way to prevent frizz control for winter braids and ensure the style remains polished for 6-12 weeks. (process_action_keywords)
-
Know When to Take Down: No protective style should remain installed beyond 12 weeks; be proactive about taking down winter braids to prevent matting and hair breakage, followed by a thorough post-braid hair care routine. (semantic_bridge_supporting)
FAQs About Winter Hair Braids Black Women
What products should I use for winter braids?
The essential products for winter braids are a lightweight, non-comedogenic scalp oil (like Jojoba or Almond) and a water-based leave-in or refresher spray to maintain hydration. Avoid heavy creams that cause product buildup in braids. Use a professional grade hair extensions product if installing styles with extensions, and ensure all products are dermatologist-approved hair products to maintain scalp microbiome health with braids. Focus on sealing the ends with a moisturizing butter or cream to prevent splitting.
How long should I keep my winter protective styles in?
Most stylists recommend keeping winter hair braids in for a maximum duration of 8 to 10 weeks to prevent excessive matting, product buildup, and hair breakage. While some long-lasting braid styles can technically last longer, adhering to this professional maintenance protocols allows you to thoroughly cleanse and deep condition your natural hair, ensuring nutrient absorption for hair growth under braids. Always assess the state of your roots and edges before hitting the 10-week mark.
How do braids protect hair in winter?
Braids protect hair by drastically reducing daily manipulation and limiting exposure to harsh cold temperatures and low humidity. This low manipulation minimizes mechanical stress, reducing shedding with braids, while the style helps lock in moisture applied during the pre-braiding routine guide. This creates a regulated micro-climate for the hair shaft protection mechanisms, which is critical for natural hair health during the seasonal hair trends black women face.
How can I stop my scalp from itching with winter braids?
An itchy scalp in braids during winter often indicates dryness or buildup; the solution is regular cleansing using a diluted astringent or witch hazel applied via a fine-tip nozzle. Follow immediately with a lightweight essential oil blend (tea tree or peppermint oil) to alleviate scalp irritation from braids. Avoid heavy petroleum-based oils, which only trap heat and worsen irritation. This practice is part of the industry best practices for braids.
Is it better to get knotless or traditional box braids for winter?
Knotless box braids are often better for winter as they put less tension on the scalp, which is particularly sensitive to cold temperatures and dryness. Knotless braids significantly reduce the risk of tension alopecia and allow for easier access to the scalp for moisturizing, combating dryness in winter hair. Traditional box braids are durable, but the knot at the root can cause more discomfort and tension initially.
Can braids help black hair grow in winter?
Braids do not directly cause hair growth, but they support growth by maximizing length retention through breakage protection for natural hair. By reducing daily styling, brushing, and environmental exposure, braids prevent hair breakage from cold weather and static, allowing the hair to reach its full potential during its natural hair cycles. The consistent protection promotes healthy growth with braids.
Should I wash my hair while wearing winter braids?
Yes, you should gently wash your hair while wearing winter braids every 2-3 weeks, focusing only on the scalp and using a diluted sulfate-free shampoo. Use an applicator bottle to ensure the shampoo reaches the scalp, and rinse thoroughly to avoid product buildup in braids. Follow this professional braiding guide with a light application of leave-in conditioner and a quick, low-heat drying session to prevent dampness.
How to protect my edges while wearing braids?
To protect your edges, always ensure the braids around your perimeter are installed with zero tension, avoiding tightness or pulling, and apply a moisturizing edge control nightly. When sleeping, use a high-quality silk scarf (rather than a bonnet) that covers the edges completely to prevent thinning hair solutions for braids caused by friction. Never put heavy styling products or excessive pulling pressure on the fine hair near the hairline.
Are micro braids recommended for winter?
Micro braids are not generally recommended for deep winter wear due to the combined risk of installation tension and the heavy weight when wet, increasing the potential for breakage. If chosen, they require specialized care and should be removed promptly after 8 weeks. Prioritize larger, low-tension styles like jumbo cornrows or knotless braids, which offer better longevity and less risk of long-term hair damage repair.
What are popular winter bohemian braids?
Popular winter bohemian braids include styles that integrate loose, curly human hair bundles (goddess braids) or utilize water-wave hair (passion twists) for a natural, flowing look. These styles combine the sleek protection of the braid with the aesthetic appeal of loose hair. Care must be taken to maintain the moisture in the loose sections to manage frizz in natural braids, especially in low-humidity environments.
Final Thoughts on Winter Hair Braids Black Women
The choice of winter hair braids black women utilize is more than just a style preference; it is a fundamental act of preserving hair health and maximizing length retention against the harsh elements. The 11 styles explored here offer diverse ways to achieve this balance, from the low-tension roots of Knotless Box Braids to the quick-access benefits of Jumbo Cornrows. Remember the core principles: installation must prioritize optimal hair tension for protective styles, maintenance must prioritize moisture retention via specialized scalp oils, and nightly care must eliminate friction using silk or satin.
By adopting one of these ultimate protective styles this 2026, you are giving your natural hair the best possible chance to flourish and avoid the common pitfalls of breakage and excessive dryness associated with cold weather. Treat your installation as an investment in long-term hair health, follow the professional braiding guide protocols, and enjoy the ease and confidence that stylish winter braids provide.
What is your go-to style from this list, and what is your absolute best tip for dealing with dry scalp in the winter? Share your experience below!
Last update on 2026-03-04 / Affiliate links / Images from Amazon Product Advertising API


