Struggling to create that perfect, high-impact holiday manicure? You’ve seen the stunning Christmas bow nails on social media but feel intimidated by the intricate, three-dimensional designs. It’s frustrating when you want a festive, professional look that actually lasts through the season.
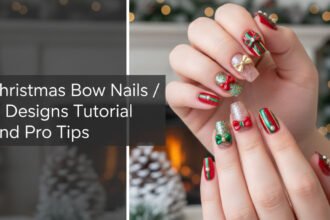
Christmas Bow Nails are a seasonal nail art trend featuring miniature ribbon or bow motifs, often incorporating festive colors like red, pink, or metallic finishes. This high-impact style is executed using advanced 3D sculpting gels or prefabricated charms for maximum dimension. It’s the ultimate statement for the holiday season.
Drawing from professional nail technician tips and current trend analysis, this guide breaks it all down. We’ll explore the easiest ways to achieve the viral Coquette aesthetic and the advanced techniques for sculpting flawless, durable 3D bows. Get ready to master the perfect holiday manicure.
Are 3D Christmas Bow Nails The Ultimate Festive Statement?
Christmas Bow Nails are a seasonal nail art trend featuring miniature ribbon or bow motifs, often incorporating festive colors like red, pink, or metallic finishes, executed using advanced 3D sculpting gels or prefabricated charms for maximum visual impact and dimension during the holiday season. This high-impact, feminine design has become the essential element of the modern holiday manicure, moving beyond simple glitter to embrace detailed, structural art.
The trend’s popularity in 2026 is heavily influenced by the viral Coquette and Balletcore aesthetics, which favor dainty, sheer, and often pink elements. This has shifted the classic red Christmas bow toward softer, more delicate interpretations. While 3D sculpting might seem like an advanced technique reserved for salon professionals, this guide integrates current trend analysis and proven tips to make it achievable. We’ll show you how to create a durable, high-impact manicure that embodies the festive spirit with style and longevity.
Technique Showdown: Choosing Your Path to 3D Bow Mastery
Before diving into the tutorials, it’s crucial to select the right technique for your skill level, time, and desired look. The three primary methods for creating Christmas bow nails—3D sculpted gel, prefabricated charms, and water decals—each offer a different balance of complexity, durability, and volume.
- 3D Sculpted Gel: This method offers the highest complexity but also maximum durability and customizable volume. It’s the choice for a truly professional, integrated look.
- Prefabs/Charms: A great middle ground, these offer high volume with moderate complexity and the fastest application time for a 3D effect.
- Water Decals: With the lowest complexity and cost, decals are perfect for beginners or those wanting a completely flat, snag-free design.
To simplify your choice, here is a direct comparison:
| Technique | Difficulty | Durability & Volume | Time & Cost | Best For |
|---|---|---|---|---|
| 3D Sculpted Gel | High | Highest Durability, Max Volume | Time-Consuming, Moderate Cost | Custom, seamless, professional results |
| Prefabricated Charms | Medium | High Durability, High Volume | Fast Application, Low-to-High Cost | A quick, jewelry-like 3D effect |
| Water Decals | Low | Low Durability, Flat Profile | Very Fast, Lowest Cost | Beginners or a subtle, painted-on look |
According to professional nail technician standards, using a structural product like Builder in a Bottle (BIAB) is often superior to standard nail glue for securing any large 3D elements, as it provides a much stronger, more integrated bond.
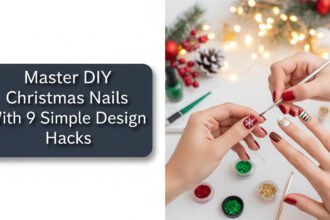
The 9 Essential Tips for Sculpting and Securing Your Festive Bow Nails
Here are nine distinct ideas and techniques, from advanced 3D sculpting to quick beginner hacks, that will help you execute a professional-grade Christmas bow set. Each tip focuses on achieving maximum longevity and aesthetic quality throughout the holiday season.
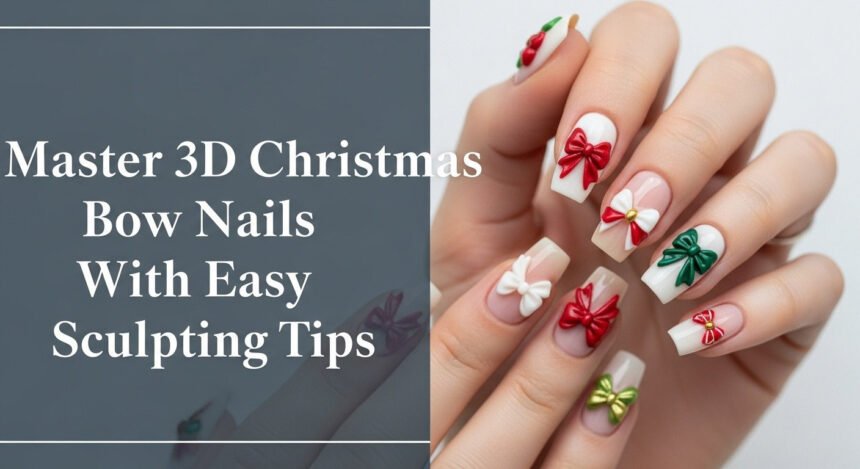
1. Mastering the Voluminous 3D Sculpted Gel Bow

Pin this genius hack to your ‘Advanced Nail Art’ board!
Products & Tools Used:
- High-viscosity 3D Nail Sculpting Gel (opaque white or red, non-sag)
- Dual-ended Silicone Sculpting Tool (flat end and pointed end)
- Fine Detail Brush (for blending edges and shaping ribbon tails)
- UV/LED Curing Lamp (36W or higher, essential for full cure)
- Clean-Up Brush and Isopropyl Alcohol
Application/Styling Steps:
- Prepare the nail and apply base color; cure thoroughly. Finish with a non-wipe top coat and cure again.
- Scoop a small bead of 3D sculpting gel and place it where the bow center will sit.
- Divide the bead into two equal portions. Use the silicone tool to pull and shape the first loop, ensuring sharp folds.
- Flash Cure the first loop for 3-5 seconds to set its structure, preventing slumping.
- Shape the second loop symmetrically to the first, ensuring the size and fold match exactly. Flash cure again.
- Add a tiny, thin strip of gel in the center and shape it into the center knot, wrapping around the loop connections.
- Cure the entire 3D bow structure fully (60-90 seconds, depending on lamp wattage).
- Use a tiny amount of non-wipe top coat and the detail brush to seal the edges where the bow meets the nail for longevity.
- Pro-Tip: Always use a high-viscosity gel. If the gel sags or loses its shape before curing, the layer is too thick, or the gel is too runny for sculpting.

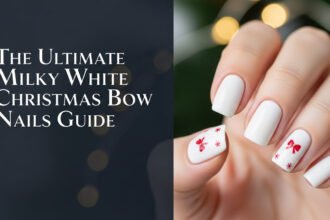
2. Chic Micro-Decal Coquette Bows on a Milky Base

Save this clever organization idea!
Products & Tools Used:
- High-resolution Water Decal Sheets (micro-bow design)
- Milky White or Sheer Blush Gel Polish
- Small Bowl of Warm Water
- Tweezers and Cotton Swab
- Non-Wipe Top Coat
Application/Styling Steps:
- Apply 2-3 coats of sheer milky pink gel polish to the base and cure fully.
- Cut the micro-bow decal close to the design edge and place it in warm water for 15-20 seconds.
- Gently slide the decal off the backing paper using tweezers, holding it carefully by the edges.
- Place the decal onto the sticky inhibition layer of the final cured color coat (if not using a topcoat). For better repositioning, apply it onto the cured color before topcoat.
- Using a cotton swab, gently press and smooth the decal, pushing any air bubbles or wrinkles toward the edges.
- Once perfectly positioned, cure briefly (15 seconds) to set the decal to the tacky layer.
- Apply a generous layer of Non-Wipe Top Coat, ensuring you completely cover the decal’s edges, and cure fully (60-90 seconds).
- Lesson Learned: If the decal still lifts or wrinkles, the topcoat layer was too thin to fully encapsulate the decal edges. Ensure a slightly thicker coat over the decal area.

3. Hand-Painted Classic Ribbon French Tip Accent

Pin this elegant holiday manicure idea!
Products & Tools Used:
- Highly Pigmented Red Gel Polish or Acrylic Paint
- Fine Detail Brush (size 000 or 00, must have a fine tip)
- Dotting Tool (small size)
- Matte or Glossy Top Coat
- Base White Gel Polish (for French tip)
Application/Styling Steps:
- Complete the French tip base (or simple color base) and cure thoroughly. Apply top coat and cure.
- Use the dotting tool to place a tiny dot of red polish/paint where the center of the bow knot will be.
- Dip the detail brush in the red polish. Starting from the central dot, draw the first triangle-shaped loop, angling outwards and back toward the center dot.
- Repeat Step 3 symmetrically on the other side to form the second loop. Ensure the width and height match the first loop.
- Draw the center knot (a tiny square or rectangle over the central dot) and two thin ribbon tails descending from the center point.
- Cure the painted bow design fully (60 seconds).
- Apply a final layer of non-wipe top coat over the entire nail to seal the design and cure thoroughly.
- Pro-Tip: If you struggle with symmetry, practice the design first on a nail art template or a piece of plastic sheet protector. Always use highly pigmented paint or gel to avoid needing multiple bulky layers.

4. The Structural Base: Using BIAB for Unshakeable 3D Art

Get the secret to long-lasting 3D nails!
Products & Tools Used:
- Builder Gel in a Bottle (BIAB, high viscosity recommended)
- Nail Prep Solution (dehydrator/bonder)
- UV/LED Curing Lamp
- Dotting Tool or Small Liner Brush
- File/Buffer (fine grit 220)
Application/Styling Steps:
- Prepare the nail plate by filing, shaping, and lightly buffing the natural nail surface to remove shine. Wipe thoroughly with alcohol cleanser.
- Apply a thin layer of rubber base coat, cure, and then apply 2-3 coats of BIAB for strength, curing each layer. Remove the inhibition layer.
- Using a dotting tool, place a small, high bead of un-cured BIAB (or dedicated jewelry adhesive gel) exactly where the 3D element will rest.
- Gently place the pre-sculpted gel bow or prefabricated charm onto the bead of BIAB. Press lightly so the adhesive squishes slightly around the edges of the charm.
- Cure the nail and the adhesive bead completely (60-90 seconds). This secure base acts as the strongest foundation for your art.
- After curing, use a thin detail brush and topcoat to create a smooth “ramp” where the charm meets the nail, ensuring no sharp edges remain.
- Pro-Tip: For very large, heavy charms, lightly etch the underside of the charm (the part that contacts the nail) with a file. This creates surface area to which the BIAB can bond more securely.

5. Trending Velvet Flocked 3D Bows for a Cozy Look

Save this cozy winter texture idea!
Products & Tools Used:
- High-viscosity Sculpting Gel (matching the flocking powder color, e.g., red)
- Fine Velvet Flocking Powder (red, white, or green)
- Fan Brush (for cleaning excess powder)
- Silicone Sculpting Tool
- Curing Lamp
Application/Styling Steps:
- Sculpt the 3D bow structure using the method in Tip 1, ensuring the loops and knot are perfectly shaped. Do NOT cure the final structure yet.
- While the gel is still wet and uncured, gently sprinkle a generous amount of velvet flocking powder over the entire 3D bow until it is completely coated.
- Cure the nail and the powdered bow structure thoroughly (90-120 seconds). The gel must fully cure through the powder.
- Use a clean, dry fan brush to lightly dust away the excess powder surrounding the bow and on the nail bed.
- CRITICAL: Do NOT apply a topcoat over the flocked velvet bow, as this will destroy the texture. Only seal the rest of the nail if necessary.
- Lesson Learned: Ensure the underlying 3D gel color matches the flocking powder color. If the powder thins or rubs off slightly, the matching base gel will prevent the base color of the nail from showing through the velvet.

6. The Quick Fix: Applying Ready-Made Bow Charms

Pin this for the fastest holiday mani!
Products & Tools Used:
- Prefabricated Resin Bow Charms or Metal Charms (flat back recommended)
- Specialized Nail Jewelry Adhesive Gel (high-viscosity, non-runny)
- Dotting Tool or Tweezers
- Curing Lamp
- Fine-tipped Top Coat Brush
Application/Styling Steps:
- Prepare the nail, apply base color and a final layer of topcoat, and cure. Gently wipe away the inhibition layer with alcohol.
- Lightly roughen the nail surface where the charm will sit using a fine-grit buffer, then cleanse the dust.
- Place a small bead of the specialized nail jewelry adhesive gel onto the roughened area.
- Using tweezers, gently place the charm onto the adhesive, wiggling slightly to embed it into the gel. Do not press too hard or the adhesive will thin out.
- Cure fully (90 seconds). The adhesive must be hard as glass.
- Use the fine-tipped topcoat brush to carefully apply topcoat around the base of the charm, forming a smooth seal against the nail plate, but avoid getting topcoat on the charm itself (unless specifically designed for encapsulation). Cure again.
- Pro-Tip: When placing the charm, ensure the charm’s curvature matches your nail’s C-curve. If the charm is too flat for your curved nail, the edges will lift, making snagging inevitable.

7. High-Glam: Chrome Powder Bows on a Matte Base

Pin this for the perfect high-glam festive look!
Products & Tools Used:
- Deep Burgundy or Black Gel Polish
- Matte Top Coat and Non-Wipe Glossy Top Coat
- Fine Detail Brush
- Chrome Powder (silver or gold)
- Silicone Applicator or Eyeshadow Sponge
Application/Styling Steps:
- Apply base color (e.g., deep burgundy) and cure. Apply a Matte Top Coat to the entire nail and cure fully.
- Use the detail brush and the Non-Wipe Glossy Top Coat to carefully paint the outline and shape of your desired bow design (this will create the sticky surface for the chrome).
- Flash Cure the painted glossy bow design for exactly 15 seconds (this ensures it is tacky, but not too wet).
- Immediately use the silicone applicator to rub the chrome powder onto the glossy, tacky bow outline until the mirror effect is achieved.
- Use a fan brush to gently dust away all excess chrome powder from the matte surface.
- Apply a final layer of Non-Wipe Glossy Top Coat only over the chrome bow to seal it and cure fully (60-90 seconds). Do not touch the matte base.
- Pro-Tip: The timing of the cure on step 3 is critical. If cured too long, the chrome powder won’t adhere; if cured too little, the lines will bleed. Test the tackiness first!

8. The Bow Placement Theory: Optimizing Size for Short Nails

Pin this perfect short nail design strategy!
Design Strategy & Tools:
- Micro Decals or Fine Detail Brush (for micro-painting)
- Dotting Tool (smallest size)
- Nude or Sheer Base Color (to maximize elongation)
- Professional Bow Placement Diagram
Placement Guide:
- Select Size Wisely: Choose bows that are no wider than one-fifth of the total nail width. Avoid large charms or very complex 3D structures.
- Cuticle Base Focus: Position the bow centrally just above the cuticle line. This uses the negative space of the nail bed to draw the eye, optically stretching the length of the nail.
- Free Edge Clearance: Ensure there is ample space between the bow and the free edge of the nail. Crowding the design risks making the short nail look wider.
- Use Minimalist Ribbon Tails: If painting ribbon tails, keep them very short, or omit them entirely, focusing solely on the compact bow knot.
- Use Negative Space: Apply the bow only to a nude or clear base coat for a subtle, elegant look that prevents the design from overwhelming the nail bed.
- Pro-Tip: For maximum visual elongation on short nails, choose an almond or oval shape instead of square. The tapered sides help the micro-bow look daintier.

9. The No-Snag Guarantee: Encapsulation and Edge-Sealing

Save this tip to prevent snagging your new nails!
Products & Tools Used:
- High-Quality, Viscous Non-Wipe Top Coat
- Fine Detail Brush (clean)
- Gel Cleanser and Alcohol Wipe
- Curing Lamp
- Fine Grit Buffer Block
Anti-Snag Steps:
- Cure Before Sealing: Ensure your 3D element (gel or charm) is fully cured and rock-hard before applying the final topcoat layers.
- Check for Residue: Wipe the nail and around the charm with alcohol cleanser to remove any tacky inhibition layer that can attract dust or lint.
- The Ramping Technique: Dip the detail brush into the topcoat. Starting at the side edge of the 3D element, gently feather the topcoat outwards, creating a smooth, gradual “ramp” where the art meets the nail plate.
- Seal All Edges: Pay extra attention to the base of the bow loops and the center knot. If any sharp edges exist, add a tiny bead of topcoat and smooth it out, ensuring no exposed connection points.
- Double Cure: Cure the entire nail for 90 seconds (longer than standard) to ensure this thick sealing layer is completely hardened.
- The Fabric Test: Lightly brush a cotton ball or soft fabric over the finished nail. If any fibers catch, repeat the ramping and sealing technique on that spot.
- Lesson Learned: Snags often start where the art meets the free edge. Always ensure the sealant goes past the art and covers the very tip of the nail (capping the free edge).

Key Takeaways: Your Quick Guide to Flawless Bow Art
- Master the Base: Always use a specialized structural adhesive (like BIAB) for any heavy 3D charm to guarantee longevity.
- Choose Your Curve: Match the size and curvature of the bow design to your specific nail morphology (smaller for short nails).
- Embrace the Coquette: Incorporate sheer pinks, milky whites, and micro-bows for the most fashion-forward look of the 2026 holiday season.
- Prevent Snagging: Meticulously “ramp” and seal all edges of 3D art with a non-wipe topcoat to create a smooth surface transition.
- Flash Cure is Key: Use a quick, 3-5 second flash cure when sculpting 3D gel to prevent the loops from sagging before the final cure.
FAQs About christmas holiday nails with bow
How long should 3D sculpted bows last, and why do they lift prematurely?
If applied correctly using quality products and proper curing, 3D gel bows should last the full 2-3 week duration of your gel manicure. Premature lifting is most often caused by insufficient adhesion (using regular polish instead of dedicated structural gel), failure to thoroughly cleanse the nail plate of oils/residue before application, or incomplete curing of the thick 3D layers.
What is the safest way to remove thick 3D gel art without damaging the nail plate?
Safely removing 3D gel requires reducing the bulk first. Use a nail clipper or a coarse e-file bit to carefully reduce the volume of the bow (but stop short of the natural nail). Then, soak the remaining thin gel layer in 100% acetone. Never attempt to pry or tear off 3D elements, as this can severely damage the nail plate surface.
Can I use regular nail polish to create a 3D bow effect?
No, regular nail lacquer will not maintain the structured, voluminous shape required for a realistic 3D bow. Regular polish will flatten as it dries. You must use high-viscosity sculpting gel, putty, or specialized acrylic to achieve true dimensional volume that cures and holds its shape permanently.
Final Thoughts
The beauty of Christmas bow nails is their versatility—from the ultra-feminine Coquette micro-bows to the bold, voluminous 3D sculptures. By implementing the correct structural techniques, from using BIAB as your adhesive foundation to meticulously sealing the edges to prevent snagging, you can confidently wear your high-impact art through every holiday gathering this July and 2026. Now that you have the knowledge of sculpting and sealing, which bow design will you master first: the classic red velvet or the trending pink Coquette?
Last update on 2026-04-27 / Affiliate links / Images from Amazon Product Advertising API