Tired of wearing the same basic updo every single day? Dealing with hair boredom is a daily struggle for many of us. Finding fresh hairstyle ideas ponytail braid variations can completely transform your morning routine.
A braided ponytail is a versatile hairstyle that combines the simplicity of a traditional ponytail with the intricate structural beauty of a braid. This hybrid style ranges from a sleek, high ponytail with a single braid to complex cornrows, making it perfect for any occasion.
Drawing from comprehensive analysis of current data and professional stylist tips, we have curated the ultimate guide. You will discover 11 elegant looks that will immediately elevate your styling game. Get ready to master these stunning techniques and cure your hair boredom forever.
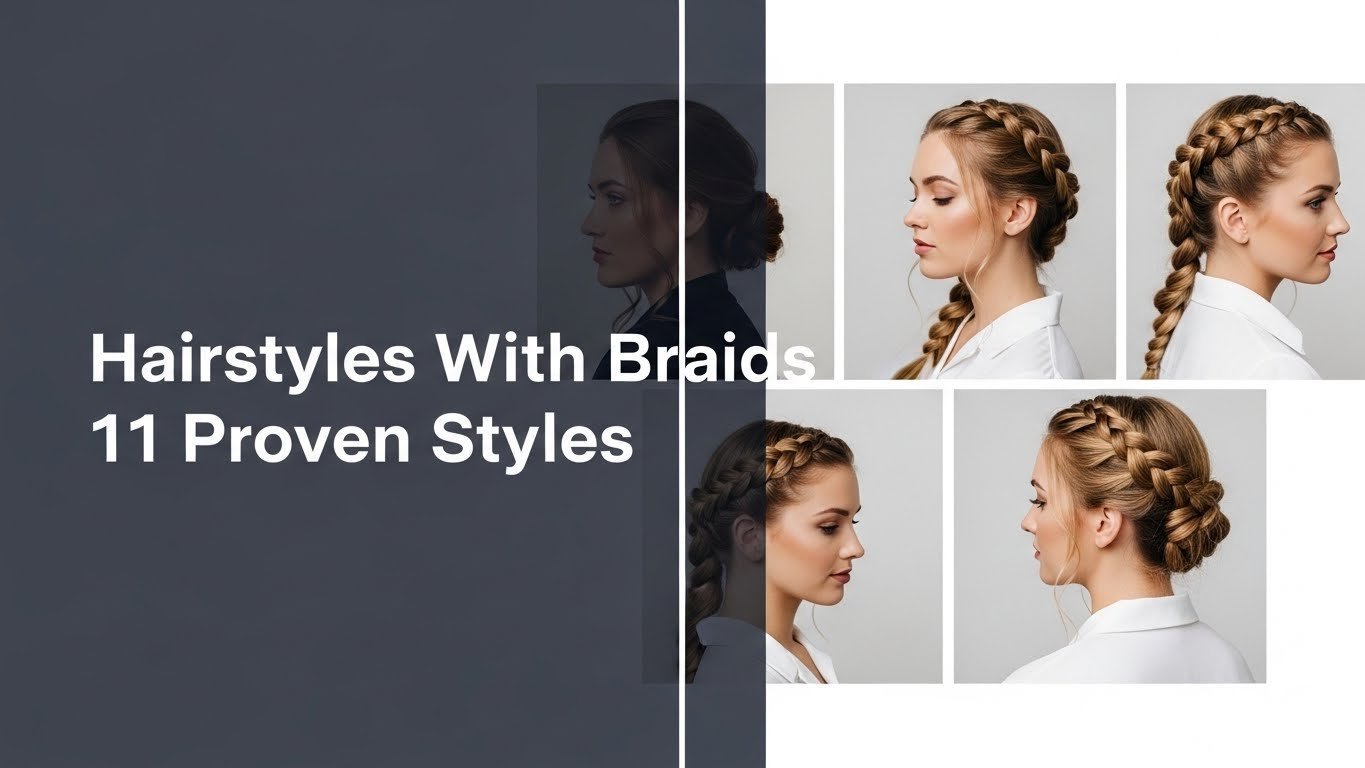
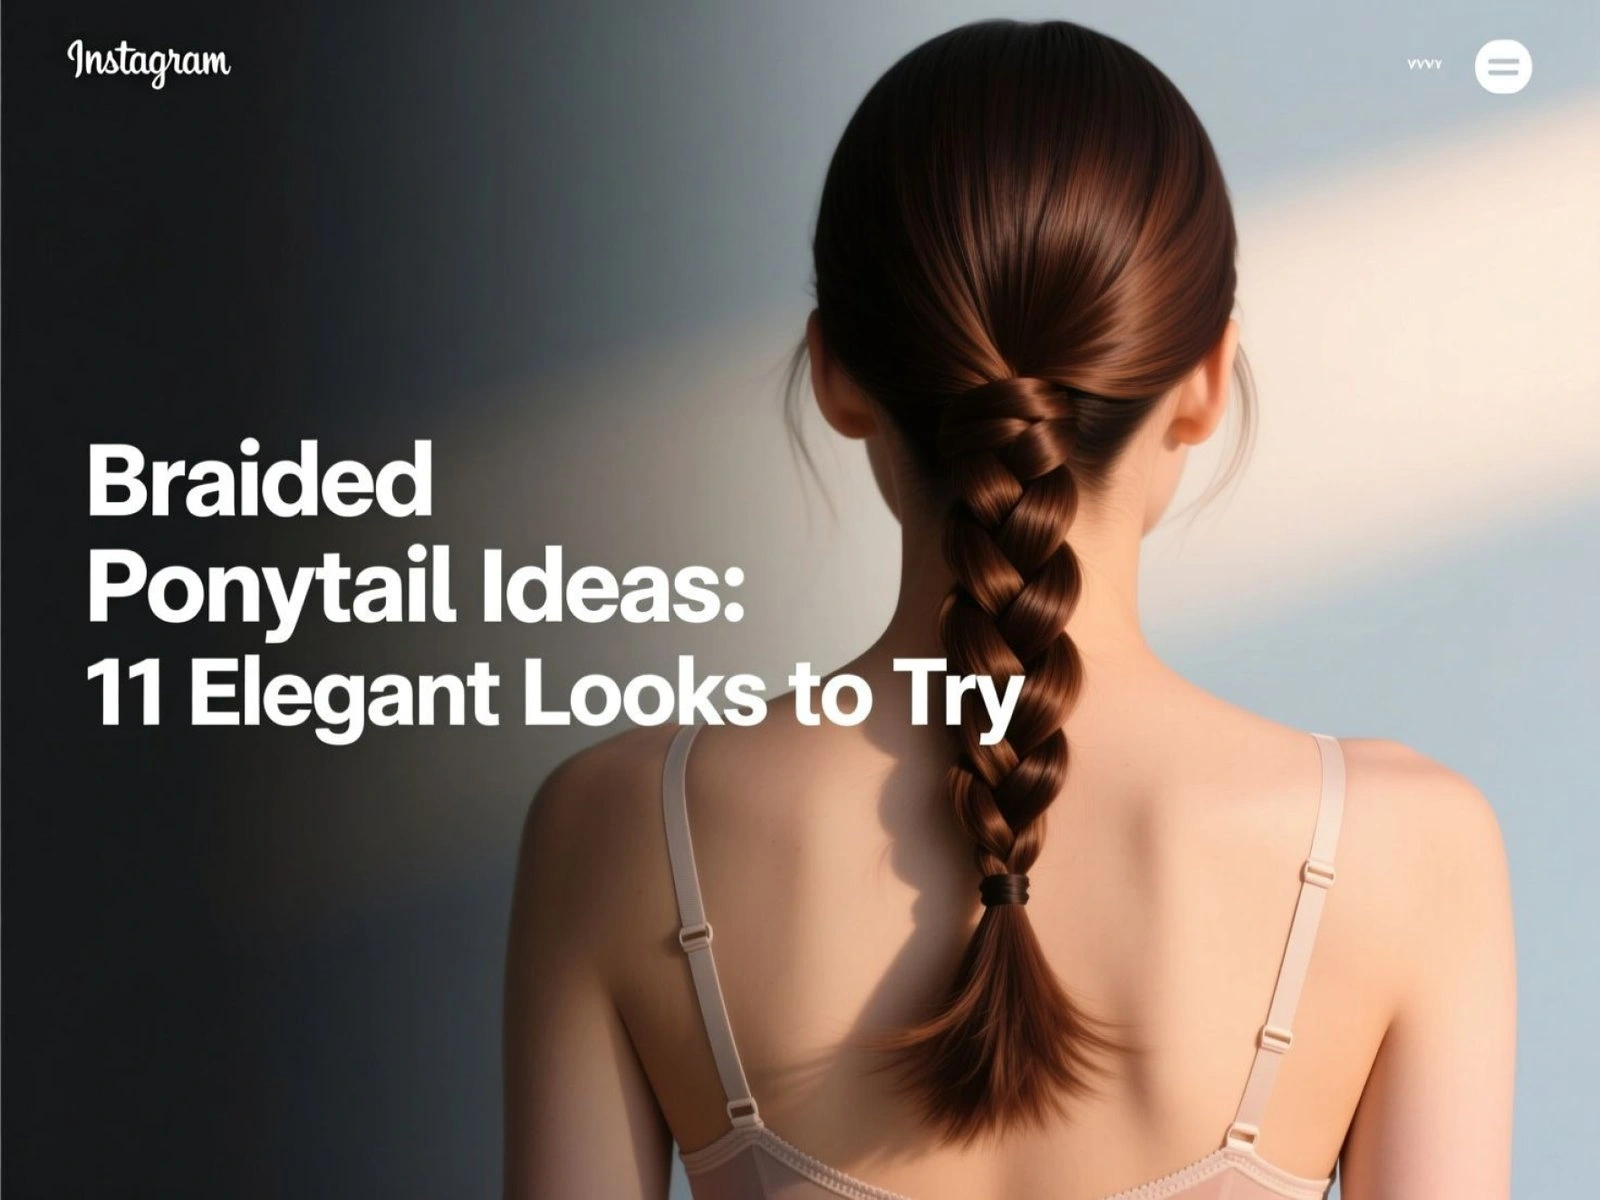
11 Elegant Braided Ponytail Ideas to Try in 2026
If you are looking for braided ponytail hairstyles that go beyond the basics, you need an easy step-by-step guide to bring these concepts to life. Creating an elegant look requires understanding how different braid extensions styles and natural textures work together to form a cohesive, polished finish. We have curated a diverse list of for every occasion styles that range from gym-ready practical to wedding-guest glamorous.
Each of the following tutorials provides detailed instructions, specific tool recommendations, and proven styling methods to guarantee salon-quality results at home. Let’s explore these gorgeous variations and find your new signature look.
1. Create a Sleek High Ponytail with a Braid Wrap

Save this timeless look to your ‘Elegant Hairstyles’ board!
A sleek braided ponytail is the ultimate power move for a polished, sophisticated appearance. By combining a high ponytail with a braid wrap, you create a seamless finish that hides the elastic and elevates the entire look. Whether you are aiming for a neat cornrow ponytail base or a simple smoothed crown, industry leading techniques dictate that a glossy, bump-free finish is essential for this formal braided updo.
Products & Tools Used
- Edge control gel with a strong, long lasting hold
- Boar bristle smoothing brush
- Rat tail comb for precise parting
- Strong elastic hair bands
- A few bobby pins that match your hair color
- Shine serum or hair spray for a glossy braid look
Application/Styling Steps
- Detangling: Start with fully detangled hair. Apply a leave-in conditioner if needed to smooth strands.
- Slicking: Apply edge control gel around your hairline and nape. Use the boar bristle brush to brush all hair upwards towards the crown, smoothing down any flyaways.
- Securing: Gather your hair into a high braided ponytail and secure it tightly with an elastic band.
- Sectioning: Take a small, half-inch section of hair from the underside of the ponytail.
- Braiding: Create a simple three-strand plait with this small section and secure the end with a small, clear elastic.
- Wrapping: Wrap the small braid around the base of your ponytail to completely cover the main hair tie.
- Tucking: Tuck the end of the braid underneath the base and secure it discreetly with one or two bobby pins.
- Finishing: Apply a light mist of hair spray or a drop of shine serum for a polished, frizz control finish.
Pro-Tip: For scalp tension management with tight styles, avoid pulling the hair too aggressively. After securing the ponytail, gently press the base of the pony toward your scalp with your palm for a few seconds to slightly loosen the tension without creating bumps.

2. Style a Messy Boho Ponytail with a Fishtail Braid

Pin this gorgeous boho style for your next casual outing!
While sleek styles require precision, a messy ponytail braid thrives on effortless texture and volume. The boho ponytail braid incorporates a loose fishtail pony that looks intentionally undone and beautifully relaxed. This tousled ponytail is perfect for casual events or summer festivals, relying heavily on texturizing sprays to give the hair grip and dimension without looking stiff.
Products & Tools Used
- Texturizing spray or sea salt spray
- Small, clear elastic hair bands
- Bobby pins
- Dry shampoo (optional, for extra grip and volume)
Application/Styling Steps
- Sectioning: Start with dry hair. If your hair is straight, spray it with texturizing spray to add grip. For extra volume, apply dry shampoo at the roots.
- Detangling: Loosely gather your hair into a low ponytail at the nape of your neck and secure it with a clear elastic. Pull out a few face-framing pieces.
- Braiding: Split the ponytail into two equal sections. Take a small piece of hair from the outside of the left section, cross it over to the right section. Then, take a small piece from the outside of the right section and cross it over to the left. Repeat this fishtail braid ponytail pattern all the way down.
- Securing: Secure the end of the fishtail braid with another clear elastic.
- Adjusting: Now for the “messy” part. Gently pull on the edges of the fishtail braid to loosen and flatten it. This technique, called “pancaking,” creates a thicker, more voluminous ponytail.
- Finishing: If you want to hide the top elastic, take a small strand of hair from the ponytail, wrap it around the base, and secure it underneath with a bobby pin.
Pro-Tip: To get the perfect boho wave without heat, braid your damp hair into two loose plaits the night before. In the morning, undo them and you’ll have a natural, tousled ponytail base that’s perfect for this style. This is a key damage prevention tip for no-heat styling.

3. Master the Elegant Dutch Braid into a Ponytail

Add this chic look to your ‘Braid Inspiration’ board!
Integrating a dutch braid pony offers a stunning 3D effect that immediately draws the eye. Learning how to do a dutch braid into a ponytail is a foundational skill that transforms a standard updo into a stylish ponytail braid. Unlike a traditional French braid that weaves inward, the inverted technique of a Dutch braid makes the plait pop outward, defining the crown and adding architectural interest to your hair.
Products & Tools Used
- Styling cream or mousse for grip
- Detangling brush
- A strong hair elastic
- A clear elastic (optional)
Application/Styling Steps
- Parting: Start with brushed, tangle-free hair. Take a two-to-three-inch section of hair at your front hairline where you want the braid to start.
- Sectioning: Split this section into three equal smaller strands.
- Braiding: Begin a standard braid, but instead of crossing the outer strands over the middle strand, you will cross them under. This is the key to an inverted dutch braiding technique.
- Feeding In: After the first stitch, start adding small sections of hair from the sides. As you pick up a new piece of hair, join it with an outer strand before crossing it under the middle strand.
- Attaching: Continue this pattern down the center of your head until you reach the desired height of your ponytail (e.g., the nape for a low pony, the crown for a high pony).
- Securing: Once you stop adding hair, secure all of your hair, including the braid, into a ponytail with a strong elastic.
- Finishing: You can either let the braid blend into the ponytail or continue the plait a few more inches down the ponytail and secure it with a clear elastic for a defined look.
Pro-Tip: For a fuller, more dramatic Dutch braid, gently pull on the outer loops of the braid after it’s complete but before you create the ponytail. This ‘pancaking’ technique creates the illusion of thicker hair. This is one of the best practices for braids recommended by professional stylists.

4. Achieve the Glamorous Feed-In Braided Ponytail with Extensions

Pin this stunning protective style for your next salon appointment!
For those seeking dramatic length and incredible durability, the braided ponytail with extensions is an absolute must-try. This ponytail with natural hair tutorial focuses on the feed-in method mechanics, seamlessly blending kanekalon hair with your natural strands. Not only does this create a sleek high ponytail with jumbo braid aesthetics, but it also serves as an outstanding protective style that shields your natural ends from daily wear and tear.
Products & Tools Used
- 2-3 packs of pre-stretched braiding hair (Kanekalon)
- Maximum hold edge control gel
- Rat tail comb for stitch braid precision
- Hair clips for sectioning
- Mousse and/or boiling water for sealing ends
Application/Styling Steps
- Parting: Start with clean, stretched, and moisturized natural hair. Use the rat tail comb to create clean, precise parts for your cornrows.
- Sectioning: Apply edge control to the first section you’ll be braiding. This helps create a sleek back ponytail foundation.
- Braiding: Begin braiding your natural hair for the first two or three stitches. This is the foundation of the knotless braiding technique.
- Feeding In: Start adding small pieces of the kanekalon hair into the braid. Fold a small piece of extension hair and feed it under the middle strand as you braid, ensuring it’s blended seamlessly.
- Attaching: Continue this feed-in method, gradually adding more hair to build the braid’s thickness and length as you move down the section.
- Repeating: Repeat this process for all sections, braiding towards the point where the ponytail will be based.
- Securing: Once all cornrows are complete, gather them into a high ponytail. Take one or two of the braids and wrap them around the base to create a neat finish, tucking the ends away.
- Finishing: Apply styling mousse to the entire ponytail to set the braids and tame flyaways. Dip the ends in hot water to seal them (with adult supervision).
Pro-Tip: According to licensed cosmetologist advice, the key to a healthy protective braided ponytail is scalp tension management. The braids should be firm but never painful. If you feel pulling or see bumps, the braids are too tight and could lead to hair loss.

5. Create the Playful and Easy Bubble Braid Ponytail

Try this fun and quick style! Pin it to your ‘Easy Hairstyles’ board.
If you are short on time but still want a striking look, the bubble ponytail braid is your perfect match. Recognized as an incredibly easy braided pony, it falls firmly into the category of quick 5 minute braided ponytail ideas. Since it requires multiple elastics rather than actual weaving, you can easily complete it under 10 minutes, simultaneously enhancing hair volume and adding a playful, segmented silhouette to your style.
Products & Tools Used
- Multiple hair elastics (clear or colored)
- Smoothing brush
- Volumizing powder or texturizing spray (optional)
Application/Styling Steps
- Slicking: Brush your hair into a smooth high or low ponytail and secure it with a hair elastic. For extra root lift, you can use a bit of volumizing powder at the crown.
- Securing: Place a second elastic band about two inches down from the base of the first one.
- Adjusting: Gently pull and tug on the hair between the two elastics to create a rounded, “bubble” shape. Don’t be shy – the more you pull, the bigger the bubble.
- Repeating: Continue placing elastics every two inches down the length of your ponytail, pulling each section out to create a bubble after you secure it.
- Finishing: Ensure all bubbles are roughly the same size for a uniform look. You can hide the very last elastic by wrapping a small piece of hair around it and tucking it in.
Pro-Tip: To create an extra-long, dramatic bubble pony vs traditional braid, you can clip in wefts of hair extensions at the base of your ponytail before you start adding the elastics. Ensure the extensions are well-blended for a seamless look.

6. Design a Romantic Side Braid into a Low Ponytail

Perfect for a wedding guest! Save this romantic hairstyle idea.
Transitioning from casual daytime looks, the low ponytail with side french braid offers exquisite sophistication for formal events. Highly requested as a braided ponytail for wedding guest attire, this sweeping, romantic braid naturally complements your facial structure. The delicate merging of the plait into an elegant ponytail creates a soft, dreamy silhouette that photographs beautifully from every angle.
Products & Tools Used
- Light-hold hairspray
- Bobby pins
- A hair elastic
- Decorative hair accessories like pearl pins (optional)
Application/Styling Steps
- Parting: Create a deep side part on your preferred side.
- Sectioning: On the side with more hair, take a section near the part and begin a French braid (crossing strands over) or a Dutch braid (crossing strands under), depending on your preference.
- Braiding: Angle the braid so it sweeps back along your hairline towards the nape of your neck on the opposite side. Only add new hair from the sections along the hairline to keep the braid neat.
- Attaching: Once the braid reaches the nape of your neck behind the opposite ear, stop adding new hair.
- Securing: Gather the end of the braid and all the remaining hair into a low ponytail with braid and secure with an elastic.
- Finishing: Gently pull on the braid’s edges to add softness and volume. You can wrap a piece of hair around the elastic to hide it, or add decorative hair jewelry for a more formal look. Mist with a flexible-hold hairspray.
Pro-Tip: For an extra touch of elegance, curl the ends of the ponytail with a large-barrel curling iron before you start braiding. This ensures the finished ponytail braid look is soft and romantic from top to bottom, making it a true celebrity hair inspiration.

7. The Sporty and Secure Double Dutch Braid Ponytail

Your new favorite gym hairstyle! Pin this for your next workout.
When functionality is your top priority, the double braided ponytail for workout sessions is virtually unbeatable. Combining the gym + workout demands for a secure hold with tight braiding techniques, these parallel ponytail braiding styles lock your hair firmly in place. It prevents annoying flyaways from distracting you during intense cardio, providing a long lasting hold that looks incredibly athletic and stylish.
Products & Tools Used
- Strong hold gel or pomade
- Rat tail comb for a clean center part
- Two strong, no-slip hair elastics
Application/Styling Steps
- Parting: Use a rat tail comb to create a perfectly straight center part from your forehead all the way to the nape of your neck. Clip one side away.
- Braiding: On the first side, take a section at the hairline and begin a tight Dutch braid, crossing the strands underneath. Keep the sections clean and apply a little gel as you go for a long lasting hold.
- Attaching: Braid all the way down to the nape of your neck. Temporarily secure it with a clip or small elastic.
- Repeating: Repeat the exact same process on the other side, ensuring the braids are symmetrical.
- Securing: Once both braids are complete, unclip the first one. Gather both braids together at the nape of your neck or higher up, depending on your preference, and secure them together into a single ponytail with a strong hair elastic.
Pro-Tip: While tight braiding is great for a workout, be mindful of protecting edges. Avoid pulling the delicate hairs at your hairline too tightly into the braid. Apply a nourishing edge control to style them separately for a look that’s secure without causing traction alopecia.

8. The Pull-Through Braid Ponytail for Maximum Volume

Get instant volume with this braid hack! Pin it to your ‘Thick Hair Styles’ board.
If you struggle with fine or flat hair, the pull through braid is an absolute game-changer. Learning how to do a pull through braid ponytail opens the door to creating a stunning, voluminous ponytail that looks highly intricate. It functions as an exceptional thin hair solution by relying on a series of looped ponytails rather than a traditional weave, instantly multiplying your hair’s perceived thickness and texture.
Products & Tools Used
- Lots of small, clear elastic hair bands
- Texturizing spray or powder
Application/Styling Steps
- Sectioning: Start with a small ponytail at the crown of your head, secured with a clear elastic.
- Attaching: Directly below the first ponytail, create a second ponytail and secure it.
- Looping: Split the top ponytail into two halves. Loop them around the second ponytail and clip the second ponytail up and out of the way.
- Securing: Join the two halves of the first ponytail back together under the second ponytail and add a new section of hair to them. Secure this new, larger section with another clear elastic.
- Repeating: Unclip the ponytail you clipped away (the original second pony). Now, split that ponytail in two, loop it around the new bottom pony, join it with new hair, and secure.
- Finishing: Continue this looping and securing process all the way down to the nape of your neck. Once all hair is incorporated, continue the pattern down the length of the ponytail. Gently pull on the sections to create massive volume.
Pro-Tip: The secret to a seamless pull through braid is making sure the elastics are hidden. As you create each new ponytail, ensure it sits directly on top of the elastic from the previous section, completely camouflaging it from view using this proven styling method.

9. A Crown Braid Finishing in a Curly Ponytail

Feel like royalty! Pin this beautiful curly hairstyle.
Embracing your natural texture reaches new heights with a curly braided pony. As one of the most stunning natural hair styles available, this halo-like crown braid wraps elegantly around your head before cascading into a voluminous back piece. It serves as an excellent foundation for protective braided ponytail styles for curly hair while doubling as a regal, formal braided updo suitable for upscale events.
Products & Tools Used
- Curl defining cream or gel
- Bobby pins and long hair pins
- A hair elastic
- Edge control (optional)
Application/Styling Steps
- Parting: Create a circular part around the crown of your head and clip this section away. The hair outside the part will be used for the crown braid.
- Braiding: Starting near one ear, begin a Dutch or French braid, grabbing hair from the loose perimeter section only. Braid along the hairline, wrapping the braid around your head like a halo.
- Pinning: As you braid, use bobby pins to secure the crown braid against your scalp, helping it stay in place.
- Finishing: Continue until the braid wraps all the way around your head. Tuck the end of the braid under the starting point and pin it securely.
- Securing: Unclip the hair from the center/crown section. Gather it into a ponytail that sits just inside the crown braid.
- Adjusting: Fluff the curly braided pony to maximize volume. Use a little edge control to define your hairline if desired.
Pro-Tip: For maximum curl definition, apply your porosity-based product selection (like styling creams or gels) and create the crown braid while your hair is still damp. This will help your curls clump together beautifully and minimize frizz as it dries. This is a key part of hair shaft protection for curly types.

10. The Edgy Mohawk Braid with a High Ponytail

Unleash your inner rockstar! Pin this edgy braid idea.
For those moments when you want to make a bold statement, the mohawk braid ponytail delivers unparalleled attitude. By pairing an intricate braid pattern down the center of your head with slicked-back sides, you create a fierce faux-hawk illusion. This high braided ponytail redefines the modern braided ponytail aesthetic, demanding strong hold gel to contrast the sleek, tight sides against the raised, textured center braid perfectly.
Products & Tools Used
- A strong-hold styling gel
- A rat tail comb (preferably metal for precision)
- Hair clips for sectioning
- A strong hair elastic
Application/Styling Steps
- Parting: Use the tail of your comb to create two clean, parallel parts running from your temples back to the crown of your head. This center section will be your mohawk.
- Sectioning: Clip the center section out of the way. Apply a generous amount of strong-hold gel to one of the side sections.
- Slicking: Brush the gelled side section back tightly and smoothly towards the base of where the ponytail will sit. Secure temporarily with a clip. Repeat on the other side.
- Braiding: Unclip the center mohawk section. Starting from the front hairline, create a thick Dutch braid, keeping it centered and raised.
- Securing: Once the braid reaches the back of the crown, gather the end of the braid along with the slicked-back sides into one high braided ponytail. Secure tightly with an elastic.
- Finishing: Use a little extra gel and a brush to smooth any remaining flyaways on the sides for a super-sleek finish.
Pro-Tip: The key to a sharp mohawk braid is perfect symmetry. For the most precise advanced sectioning geometry, look in the mirror and use the arches of your eyebrows as a guide for where to start your center panel parts.

11. The Twisted Rope Braid Ponytail

A chic and easy alternative to a classic braid! Pin this look.
Stepping away from traditional three-strand weaving, the rope twist ponytail offers a minimalist, incredibly chic alternative. If you are wondering how to do a rope twist ponytail, the process is surprisingly simple but yields a highly sophisticated result. This simple braid ponytail utilizes a two-strand twisting technique that allows quick styling while consistently delivering a sleek finish, ensuring a perfectly polished ponytail every single time.
Products & Tools Used
- Smoothing cream or anti-frizz serum
- A hair elastic
- A small, clear elastic
Application/Styling Steps
- Slicking: Apply a smoothing cream to your hair and brush it into a low, sleek ponytail. Secure with a hair elastic.
- Sectioning: Divide the ponytail into two equal sections.
- Twisting: Twist both sections tightly in the same direction. For example, twist them both towards the right until they are like tight ropes.
- Wrapping: Now, cross the two twisted sections over each other in the opposite direction. So, if you twisted them to the right, you will cross the right strand over the left.
- Finishing: Continue this crossing pattern all the way to the ends and secure with a small, clear elastic. The opposing tension will keep the rope braid from unraveling.
Pro-Tip: The most common mistake with a rope twist ponytail is not twisting the individual sections tightly enough before you cross them. The tighter the initial twists, the more defined and secure your final rope braid will be. This is a key best practice for braids to prevent unraveling.

Key Takeaways: Your Quick Guide to Braided Ponytails
Mastering a variety of hairstyle ideas ponytail braid techniques is much easier once you understand the foundational rules of styling. Whether you are trying to replicate a complex red-carpet updo or just looking for a quick morning fix, keeping these core principles in mind will guarantee success. Here is your quick ponytail braid ideas overview based on our professional stylist tips:
- Preparation is Key: The best braided ponytail hairstyles start with well-prepped hair. Whether it’s detangling, applying a smoothing cream for a sleek braided ponytail, or adding texturizing spray for a messy ponytail braid, the right foundation makes styling dramatically easier.
- Know Your Braids: The structural difference between a French braid (crossing over) and a Dutch braid (crossing under) creates completely different aesthetic profiles. Master both techniques to unlock a much wider range of ponytail braid ideas.
- Extensions Add Drama: For instant length and significant volume, do not hesitate to use hair extensions. The feed-in method offers a natural-looking, highly protective way to create stunning high ponytails with braiding hair.
- Products are Not Optional: To consistently achieve salon-quality results, you must use the right products. A strong edge control gel is absolutely essential for sleek styles, while a quality texturizing spray is the secret to achieving airy, boho looks.
- Tension Matters: Especially for natural hair styles, you must be extremely mindful of scalp tension. A beautiful hairstyle should never be painful. Always follow damage prevention tips to protect your hairline and prevent traction alopecia.
- “Faux” Braids are a Great Hack: Styles like the Bubble Braid and Pull-Through Braid offer a remarkably quick and easy way to get a voluminous, intricate look with minimal technical effort, making them a perfect thin hair solution.
People Also Ask About Braided Ponytail Hairstyles
Even with detailed tutorials, you might have specific questions about braided ponytails and how to adapt them to your unique hair profile. We have compiled the most common ponytail braid queries to ensure you have all the information needed to execute these styles flawlessly.
How do I add extensions to a ponytail braid?
The easiest way to add extensions is with the feed-in method for cornrow styles or by wrapping a pre-made ponytail extension around your natural hair ponytail. For a simple high pony, first create your natural ponytail, then attach the extension piece and blend it in before braiding. This instantly adds length and volume to any style.
Are braided ponytails a good protective style for natural hair?
Yes, a braided ponytail can be an excellent protective style, provided it’s installed correctly. It keeps your ends tucked away, minimizing daily manipulation and breakage. To ensure it’s truly protective, avoid excessive tension on your scalp and edges, and keep your natural hair properly moisturized underneath the extensions.
How do I make my braided ponytail look thicker and more voluminous?
The best technique for a thicker look is “pancaking” the braid. After creating your braid, gently pull on the outer edges of each loop to loosen and flatten them. You can also use a pull through braid or bubble ponytail, which are explicitly designed to create maximum volume. Using texturizing spray before you start also adds significant grip and fullness.
What is the best way to get a sleek, bump-free ponytail?
To get a super sleek finish, use a strong-hold edge control gel and a boar bristle brush. Apply the gel generously to your hairline and brush your hair firmly into position. For stubborn bumps, use the end of a rat tail comb to smooth them out before securing the elastic. A final mist of hairspray will lock in the smooth finish perfectly.
How long does a braided ponytail with extensions usually last?
A feed-in braided ponytail can last anywhere from one to three weeks, depending on your hair texture and maintenance routine. To extend its life, sleep with a satin scarf or bonnet to reduce friction and frizz overnight. Use a light oil or braid maintenance spray on your scalp to prevent dryness and flaking.
Which ponytail braid is easiest for beginners?
The bubble braid ponytail is by far the easiest for beginners as it requires absolutely no actual braiding. It simply uses a series of elastics to create the beautiful illusion of a braid. For a true woven braid, a simple three-strand plait incorporated into a low ponytail is an excellent starting point for novices.
How can I hide the hair tie on my ponytail?
The most popular method is the braid wrap or hair wrap. Take a small section of hair from the underside of your ponytail, create a small, simple braid (or leave it completely straight), and wrap it tightly around the elastic band at the base of your pony. Tuck the end underneath and secure it securely with a bobby pin.
How do I stop my high ponytail from sagging?
The secret to a non-sagging high ponytail is creating a strong structural anchor. One professional trick is to use two bobby pins: push one pin vertically down through the top of your hair tie into the base, and another horizontally across the bottom. This creates a hidden scaffold that keeps the pony propped up all day.
What products are essential for a polished braided ponytail?
For a polished look, you need three key products: a smoothing agent, a hold product, and a finishing product. This typically means utilizing a smoothing cream or leave-in, a strong-hold edge control gel or mousse for braiding, and a shine serum or hairspray to finish and control flyaways.
Can you do a braided ponytail on short hair?
Yes, you can, but the style will need to be adapted. For short hair, a low ponytail with a small side braid accent or two small Dutch braids leading into a tiny pony at the nape of the neck works exceptionally well. For a longer look, using the feed-in method with extensions is always the best option.
Final Thoughts on Your New Favorite Hairstyle
Exploring these hairstyle ideas ponytail braid variations proves just how incredibly versatile this classic updo truly is. From the gym to the wedding aisle, a braided ponytail seamlessly adapts to your lifestyle, hair texture, and aesthetic preferences. By experimenting with different techniques—whether it is a sophisticated sleek braided ponytail or an edgy mohawk—you can easily cure your hair boredom and elevate your daily look.
Armed with these expert braiding tutorials and industry best practices for braids, you now have the knowledge to achieve salon-quality results right at home. The key is simply to prep your hair properly, utilize the right products, and allow yourself the grace to practice the hand motions. Which of these stunning ponytail braid looks will you attempt for your next outing?
Last update on 2026-04-27 / Affiliate links / Images from Amazon Product Advertising API