That familiar feeling is starting to creep in, isn’t it? The calendar pages are flipping faster, the festive tunes are starting to play, and the pressure to find the perfect, heartfelt Christmas gift for everyone on your list is mounting. You love the idea of giving something handmade, a gift infused with care and personality, but the thought of adding complex, time-consuming projects to your already packed holiday schedule feels completely overwhelming.
You scroll through Pinterest and see beautiful, intricate handmade gifts, and a little voice whispers, “I could never do that,” or “I just don’t have the time.” The desire to create something special is there, but it’s quickly overshadowed by the stress of the holiday crunch. You’re stuck between wanting to give thoughtful, personalized gifts and needing practical, fast solutions. What if you could have both?
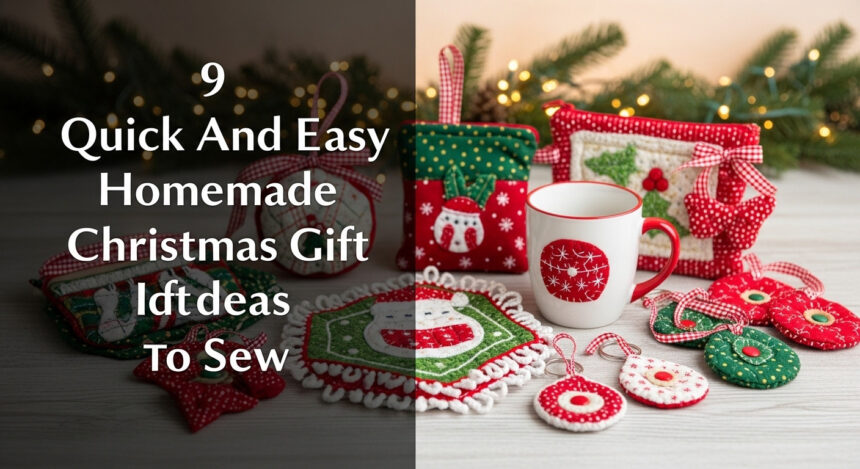
The desire for handmade Christmas gifts often clashes with a busy holiday schedule. This guide focuses on nine simple, quick-to-sew gift ideas, like microwaveable bowl cozies and fabric bookmarks, that you can create in about an hour, even as a beginner. These projects are designed to deliver that wonderful, heartfelt feeling without demanding all of your precious time, allowing you to enjoy the process and the season.
Feeling the Christmas Crunch? What If You Could Sew Heartfelt Gifts in Just an Hour?
The desire for handmade Christmas gifts often clashes with a busy holiday schedule. This guide focuses on nine simple, quick-to-sew gift ideas, like microwaveable bowl cozies and fabric bookmarks, that you can create in about an hour, even as a beginner. I’ve specifically selected these sewing projects for their simplicity and clear instructions, making them perfectly accessible even if you’re new to sewing. They are designed to help you share beautiful, personalized gifts without the stress, turning your holiday crafting into a joy rather than a chore.
9 Quick And Easy Homemade Christmas Gift Ideas to Sew in 2026
You can discover a variety of specific, easy-to-implement sewing gift ideas with clear instructions and inspiration. This curated list features nine distinct, beautiful, and practical homemade gifts perfect for last-minute Christmas crafting for everyone on your list, from family and friends to coworkers and teachers. Each idea comes with actionable, step-by-step instructions so you can start creating immediately. The list is carefully curated from top-rated tutorials and projects popular within the sewing community, ensuring they are tested, loved, and achievable.
- Microwaveable Bowl Cozies
- Fabric Bookmarks
- Self-Binding Cloth Napkins
- Zipper Pouches
- Reusable Fabric Gift Bags
- Stylish Key Fobs
- Holiday Mug Rugs & Coasters
- Travel-Size Pillowcases
- Festive Fabric Christmas Ornaments
1. Cozy Up with Microwaveable Bowl Cozies

Save this idea to your ‘Handmade Christmas’ board!
You can learn to make a practical and safe microwaveable bowl cozy that protects hands from hot bowls. This is an incredibly useful gift for anyone, especially soup lovers and students living in dorms. The key to this project is using 100% cotton materials to ensure it’s completely microwave-safe.
- Materials Needed:
- Two 10-inch squares of 100% cotton fabric
- Two 10-inch squares of microwave-safe cotton batting (it’s crucial to use a product like Pellon Wrap n Zap batting to prevent fires)
- 100% cotton thread
- Sewing machine, pins, scissors, and a fabric marker
- Step-by-Step Directions:
- Place one fabric square on top of one batting square and quilt them together by sewing an ‘X’ from corner to corner. Repeat with the remaining squares.
- Fold one quilted square in half and mark a point 1 inch from the corner along the folded edge and 2 inches down from the corner on the raw edges. Connect the marks to create a dart and sew along the line. Repeat for all four corners.
- Repeat the process for the second quilted square. You now have two bowl shapes.
- Place one bowl shape inside the other, right sides together, aligning the seams.
- Sew around the top edge, leaving a 3-inch gap for turning.
- Turn the cozy right-side out through the gap, press, and topstitch around the entire top edge to close the opening and create a crisp finish.
Pro-Tip: Pre-wash your fabric to prevent shrinking. Always include a small note with the gift reminding the recipient to only use it in the microwave for short intervals (1-2 minutes at a time).

2. Chic Fabric Bookmarks for Book Lovers

Save this scrap-busting idea to your ‘Sewing Gifts’ board!
You can find a quick and easy project to use up small fabric scraps for a simple gift. These fabric bookmarks are perfect for the book lovers in your life, and they are an excellent way to use those beautiful-but-tiny pieces of fabric you couldn’t bear to throw away. They come together in minutes and can be easily customized.
- Materials Needed:
- Fabric scraps (at least 2.5 x 7 inches)
- Lightweight fusible interfacing
- Coordinating thread
- Ribbon or embroidery floss for a tassel
- Step-by-Step Directions:
- Cut two pieces of fabric and one piece of interfacing, each measuring 2.5 x 7 inches.
- Iron the interfacing onto the wrong side of one fabric piece according to the manufacturer’s instructions. This gives the bookmark structure.
- Place the two fabric pieces right sides together.
- Sew around the edges with a 1/4 inch seam allowance, leaving a 2-inch gap on one of the long sides for turning.
- Clip the corners to reduce bulk, then turn the bookmark right-side out through the gap. Use a point turner or a chopstick to get crisp corners.
- Press the bookmark flat, making sure the raw edges of the opening are tucked in.
- Topstitch around the entire bookmark, about 1/8 inch from the edge. This will close the opening and give it a polished look.
- Add a ribbon loop or a handmade tassel to the top.
Lesson Learned: Using pinking shears to trim the seam allowance before turning can help prevent fraying and makes for a smoother edge on the finished bookmark.

3. Elegant Self-Binding Cloth Napkins

Pin this gorgeous gift idea for your next sewing session!
You can learn to create professional-looking cloth napkins as a beautiful and sustainable gift. These self-binding napkins are surprisingly simple to make and result in perfectly mitered corners every time. They are a fantastic present for anyone who enjoys entertaining or wants to reduce waste in their home.
- Materials Needed:
- One fat quarter for the front (approx. 18×22 inches)
- One larger piece of coordinating fabric for the back/binding (approx. 20×24 inches)
- Coordinating thread
- A good quality rotary cutter and cutting mat for precise cuts.
- Step-by-Step Directions:
- Press both pieces of fabric well. Place the larger backing fabric wrong side up.
- Center the smaller front fabric on top of it, right side up. There should be an even border of the backing fabric showing all around.
- Fold the backing fabric’s edge in to meet the raw edge of the front fabric. Press.
- Fold it over one more time, so the folded edge now covers the edge of the front fabric. This creates the “binding.” Press firmly.
- To create the mitered corners, unfold the last fold. Make a 45-degree fold at the corner, then refold the sides. The two sides should meet perfectly at the corner.
- Pin the binding in place all around the napkin.
- Topstitch close to the inner edge of the binding to secure it.
Pro-Tip: A walking foot on your sewing machine can be incredibly helpful for this project to prevent the layers of fabric from shifting while you sew.

4. Versatile Zipper Pouches for Everyone

A perfect gift! Save this zipper pouch tutorial to your sewing board.
You can overcome the fear of sewing zippers and create a useful, professional-looking pouch. Zipper pouches are one of the most versatile handmade gifts you can make. They can be used for makeup, pencils, toiletries, small toys, or keeping a larger bag organized. Once you master this simple technique, you’ll want to make one for everyone you know.
- Materials Needed:
- Two rectangles of outer fabric
- Two rectangles of lining fabric
- Two rectangles of fusible interfacing (slightly smaller than fabric pieces)
- One zipper, slightly longer than the width of your fabric
- A pack of assorted nylon zippers for sewing is great to have on hand for projects like this.
- Step-by-Step Directions:
- Iron the interfacing to the wrong side of your outer fabric pieces.
- Create a “zipper sandwich”: Place a lining piece right side up, place the zipper on top (teeth up), and then place an outer fabric piece on top of that (right side down). Align the top edges.
- Using a zipper foot, sew along the top edge, close to the zipper teeth.
- Fold the fabric back so the wrong sides are together and press. Repeat the process for the other side of the zipper with the remaining fabric pieces.
- Unzip the zipper halfway. Open the fabric so the two outer pieces are right sides together and the two lining pieces are right sides together.
- Sew all the way around, leaving a 3-4 inch gap in the bottom of the lining.
- Turn the pouch right-side out through the hole in the lining.
- Sew the hole in the lining closed and push the lining into the pouch.
Pro-Tip: Use zipper tape or a bit of glue stick to hold the zipper in place before sewing. It’s a simple trick that prevents slipping and makes sewing zippers much less intimidating.

5. Eco-Friendly Fabric Gift Bags

Go green this Christmas! Pin this reusable gift bag idea.
You can find an environmentally friendly and quick alternative to paper gift wrap. These fabric drawstring bags are a “green” gift that keeps on giving. Not only do they make your presents look extra special, but they can be reused year after year, reducing holiday waste. They are incredibly fast to sew, making them perfect for batch-sewing.
- Materials Needed:
- One rectangle of festive cotton fabric
- Coordinating thread
- Ribbon or cotton drawstring cord for the tie
- Safety pin
- Step-by-Step Directions:
- Decide on the size of your bag. A good starting size is a rectangle of 12×26 inches.
- Fold the top raw edge (the short side) down 1/4 inch, press, then fold down another 1 inch to create the casing for the drawstring. Stitch along the bottom edge of this fold. Repeat on the other short side.
- Fold the entire fabric rectangle in half, right sides together, so the two casings you just made are at the top.
- Sew down the two long sides, stopping just below the casing stitching. You need to leave the casing ends open.
- Turn the bag right-side out.
- Cut two pieces of ribbon or cord, each twice the width of your bag plus a few inches.
- Attach a safety pin to the end of one ribbon and thread it through one casing and back through the other. Tie the ends together.
- Repeat with the second ribbon, starting from the opposite side. When you pull both knotted ends, the bag will close.
Lesson Learned: Using a serger or a zigzag stitch to finish the side seams before sewing them will prevent fraying and make your gift bags last for many years to come.

6. Quick and Stylish Key Fobs

The perfect stocking stuffer! Save this key fob tutorial.
You can find a very fast sewing project that uses minimal fabric and makes a practical, stylish gift. Key fobs are the ultimate quick-sew gift. They are perfect for using up long, thin scraps of fabric and make fantastic stocking stuffers, teacher gifts, or add-ons to a larger present. The metal hardware gives them a professional, store-bought look.
- Materials Needed:
- A strip of fabric 4 x 11 inches
- A strip of fusible fleece 2 x 10.5 inches
- A key fob hardware kit that includes the 1-inch metal clamp and key ring.
- Pliers (preferably with nylon jaws to prevent scratching)
- Step-by-Step Directions:
- Center the fusible fleece strip onto the wrong side of the fabric strip and iron to fuse.
- Fold the long raw edges of the fabric in to meet in the middle, covering the fleece. Press well.
- Fold the entire strip in half lengthwise, enclosing the raw edges. The strip should now be 1 inch wide.
- Topstitch along both long edges of the strip.
- Fold the strip in half to form a loop and align the raw ends.
- Slide the raw ends into the metal hardware clamp.
- Use pliers to firmly clamp the hardware shut. It helps to place a scrap of fabric over the metal to avoid scratching it.
Pro-Tip: If you don’t have nylon-jaw pliers, wrapping the jaws of regular pliers with a few layers of masking tape works just as well to protect the metal hardware from scratches.

7. Festive Mug Rugs and Coasters

Such a cute gift set idea! Pin this mug rug tutorial for later.
You can create a small, charming, and useful gift that can be paired with a mug or coffee gift card. A mug rug is a mini quilted mat, bigger than a coaster but smaller than a placemat, perfect for holding a warm drink and a small snack. They are a wonderful scrap-busting project and make an adorable gift for coworkers, neighbors, or teachers.
- Materials Needed:
- Fabric scraps for the top
- A piece of fabric for the backing (approx. 6×10 inches)
- A piece of insulated batting or fusible fleece (same size as backing)
- Optional: A small piece of sewable cork fabric for a modern accent.
- Step-by-Step Directions:
- Piece your fabric scraps together to create a top piece measuring 6×10 inches. This is a great chance to do some simple quilting.
- If using a cork accent, sew it onto the top piece now.
- Make a quilt sandwich: place the backing fabric right side down, then the batting, then the quilted top piece right side up.
- Quilt the layers together as desired (simple straight lines look great).
- Trim the project to your final desired size, squaring up the corners.
- Bind the edges of the mug rug using your preferred method (either with separate binding strips or by folding the backing fabric over to the front).
Pro-Tip: When pairing this with a mug, roll the mug rug up and tie it with a ribbon, then tuck it inside the mug with a packet of hot cocoa for a complete, adorable gift presentation.

8. Sweet Travel-Size Pillowcases

A perfect gift for kids and grandkids! Pin this easy pillowcase tutorial.
You can sew a simple, practical, and personalized gift for a child in your life. A travel-sized pillow with a custom pillowcase is a wonderful and comforting gift for kids, perfect for sleepovers, long car rides, or just snuggling on the couch. Choosing a fabric with their favorite characters or motifs makes it an extra-special present they’ll cherish.
- Materials Needed:
- Main fabric (approx. 2/3 yard of a fun kids cotton print fabric)
- Coordinating cuff fabric (approx. 1/4 yard)
- Coordinating accent strip fabric (2-inch strip)
- Travel-size pillow insert (usually 12×16 inches)
- Step-by-Step Directions:
- Cut your main fabric to 25 x 16.5 inches and cuff fabric to 9 x 16.5 inches.
- Use the “burrito” or “roll-up” pillowcase method for a professional finish. Lay the cuff fabric right side up. Place the main fabric on top, right side up, aligning the top raw edges.
- Roll the main body of the fabric up into a tight tube, stopping just before the top edge.
- Bring the bottom edge of the cuff fabric up and over the roll, aligning all three raw edges at the top. Pin securely.
- Sew along this top edge.
- Pull the main fabric out from inside the cuff tube. Press well.
- Fold the pillowcase in half, wrong sides together, and sew the side and bottom seams. Trim the seam allowance.
- Turn the pillowcase wrong side out and sew the side and bottom seams again, enclosing the raw edges to create a French seam.
Lesson Learned: Using French seams seems like an extra step, but it’s very easy and prevents any fraying inside the pillowcase, making it much more durable for kids and frequent washing.

9. Adorable Fabric Christmas Ornaments

Use up your tiniest scraps! Pin this ornament idea for a festive afternoon.
You can find a festive and fun project to use up the smallest fabric and felt scraps. Sewing your own Christmas ornaments is a delightful way to add a personal touch to your holiday decor or to give as a small, treasured gift. This project is perfect for using up the tiniest, most precious scraps of fabric and can be as simple or as embellished as you like.
- Materials Needed:
- Scraps of fabric, felt, or old quilts
- Cookie cutters or paper templates for shapes (star, tree, gingerbread man)
- Polyester fiberfill stuffing
- Ribbon or twine for hanging loops
- Assorted felt sheets in various colors are perfect for these projects.
- Optional: Buttons, embroidery floss, beads for decoration
- Step-by-Step Directions:
- Trace your shape onto the fabric or felt and cut out two identical pieces.
- Cut a 5-inch piece of ribbon, fold it into a loop, and pin it to the top of one fabric piece (on the right side), with the loop facing inward.
- Place the two fabric pieces right sides together.
- Sew around the shape, leaving a 1.5-inch gap for turning and stuffing.
- Turn the ornament right-side out. Gently push out any points or curves.
- Stuff the ornament with fiberfill to your desired plumpness.
- Hand-sew the opening closed using a ladder stitch for an invisible finish.
- Add decorative touches like buttons for eyes or simple embroidery details.
Pro-Tip: For felt ornaments, you don’t even need to turn them! Just place the two pieces wrong sides together and do a decorative blanket stitch or running stitch around the outside edge by hand.

https://m.youtube.com/watch?v=cdg-fPoT5_0
Key Takeaways: Your Quick Guide to home made christmas gift ideas sewing
To quickly review the most important information, remember these key points for successful holiday sewing. This quick guide will help you get the most out of your crafting time and create gifts that are both beautiful and well-loved.
- Focus on Speed: Most of these projects, like bookmarks and key fobs, can be completed in under 30 minutes.
- Use Your Scraps: Don’t buy new fabric! Projects like ornaments, bookmarks, and mug rugs are perfect for using up your smallest fabric scraps.
- Practicality is Key: Gifts like bowl cozies, cloth napkins, and zipper pouches are things people will actually use and appreciate.
- Personalize It: Choose fabrics that match the recipient’s personality and home decor to make the gift extra special.
- Safety First: When making microwaveable items like bowl cozies, you MUST use 100% cotton fabric, batting (like Pellon Wrap n Zap), and thread to prevent fire hazards.
People Also Ask About home made christmas gift ideas sewing
What to make for Christmas sewing?
Popular items to sew for Christmas include practical gifts like zipper pouches, reusable gift bags, and cloth napkins. Decorative items like fabric ornaments and quilted mug rugs are also great choices. For quick and easy projects, consider fabric bookmarks or key fobs, which are excellent for using up small scraps and can be made in under an hour.
What are some fun sewing projects for gifts?
Fun sewing projects for gifts often involve personalization. Consider making travel-sized pillowcases with a child’s favorite character fabric, or a set of mug rugs to go with a coffee lover’s favorite mug. Zipper pouches are always a hit and can be filled with small treats, makeup, or toys to make the gift even more special and fun to receive.
How can I make a handmade Christmas gift quickly?
To make a handmade gift quickly, choose a simple project with few pattern pieces, like a key fob or a fabric bookmark. Using pre-cut fabrics like fat quarters or charm packs can also save significant time. Batch-sewing is another great strategy: cut all the pieces for multiple gifts at once, then do each sewing step for all the items before moving to the next.
Final Thoughts
Creating beautiful, handmade Christmas gifts doesn’t have to be a stressful or time-consuming endeavor. With these nine quick and easy ideas, you can share a piece of your heart and your craft with loved ones, even at the last minute. The joy of giving something you made yourself is a special gift in itself, a warm and personal touch in a busy season.
Now that you have some inspiration, you can approach your holiday gift list with excitement instead of stress. Embrace the fun of picking out fabrics, the satisfaction of a quick finish, and the happiness of giving a truly thoughtful gift.
What’s the first project on your Christmas sewing list? Let us know in the comments below
Last update on 2026-04-27 / Affiliate links / Images from Amazon Product Advertising API