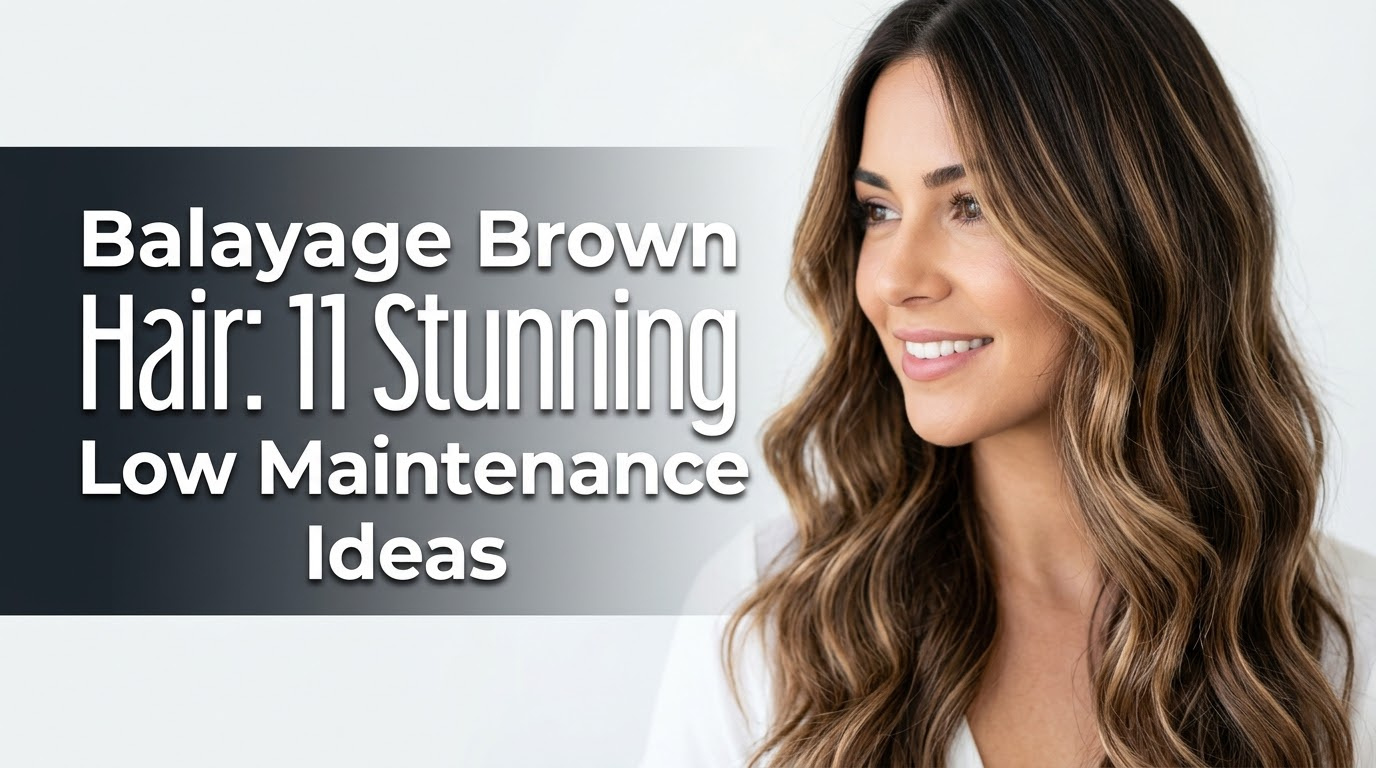
Tired of your beautiful brown hair feeling a bit one-dimensional? Do you crave that gorgeous, sun-kissed look but dread the thought of constant root touch-ups and expensive salon visits? You’re not alone in seeking a stunning change without the high-maintenance commitment.
Balayage on brown hair is a freehand painting technique where a colorist sweeps lightener or color onto the hair’s surface to create soft, natural-looking highlights. This method avoids the harsh root lines of traditional foils, resulting in a beautiful, sun-kissed look that is incredibly low maintenance because it grows out seamlessly. It’s the perfect way to add dimension and brightness.
Drawing from established best practices and an analysis of current 2026 hair trends, this guide provides the ultimate inspiration and expert advice. We will explore 11 breathtaking balayage brown hair ideas, from subtle and rich to bold and bright. You’ll discover exactly what to ask for at the salon and how to maintain your gorgeous new color.
What Is the Best Way to Add Dimension to Brown Hair Without Constant Salon Visits?
For brunettes looking to enhance their color, the ultimate goal is often to achieve a dimensional, vibrant look that appears natural and doesn’t chain them to the salon chair every six weeks. The core problem with many coloring methods is the noticeable line of regrowth, which creates an endless cycle of expensive upkeep. This is precisely the challenge that balayage brown hair was designed to solve. As a hair sweeping technique, color is applied in a feathered, painterly motion that starts away from the root. This seamless blend means there’s no harsh demarcation line as your hair grows, making it the most stylist recommended method for a truly low maintenance hair transformation that looks effortlessly chic for months.
Balayage vs. Ombre vs. Traditional Highlights: What’s the Real Difference?
Understanding the vocabulary of hair color is the first step toward getting the results you truly want. While terms like balayage, ombre, and highlights are often used interchangeably, they represent distinct techniques and create very different outcomes. Knowing the difference helps you and your colorist speak the same language. Balayage is a technique focused on a natural, sun-kissed effect, while ombre is a more dramatic style defined by a gradient from dark to light. Traditional highlights, applied with foils, create a more uniform, patterned look from root to tip. A hybrid technique, foilayage, combines the painting style of balayage with the incubating power of foils to achieve a brighter, more brilliant lift.
| Feature | Balayage | Traditional Highlights | Ombre |
|---|---|---|---|
| Final Look | Soft, natural, sun-kissed | Uniform, patterned streaks | Dramatic, dark-to-light gradient |
| Application | Freehand hair painting | Woven sections in foils | Horizontal color application |
| Grow-Out | Seamless and graceful | Noticeable root line | Soft to stark, depending on blend |
| Maintenance | Very low (3-6 months) | High (6-8 weeks) | Low to Medium |
11 Stunning Low Maintenance Balayage Brown Hair Ideas for 2026
Now for the best part: the inspiration. This is more than just a gallery of pretty pictures; it’s a visual guide to the most popular and beautiful balayage for brown hair ideas for 2026. Each look is broken down by the tools and products a salon professional would use and the steps they would take to achieve it. Whether you’re craving a subtle brown balayage or a bold transformation, use these blueprints to find your perfect match and show your stylist exactly what you’re dreaming of.
1. Achieve a Warm Glow with Classic Caramel Balayage

Pin this gorgeous caramel look to your “Hair Goals” board!
Classic caramel balayage is arguably the most requested look for brunettes, and for good reason. It adds a beautiful, warm dimension to a chocolate brown base without being too drastic. This style is universally flattering, especially on warm or neutral skin undertones, giving the complexion a radiant glow. The key to a high-end look is achieving a true, rich caramel tone, not an unwanted orange, which is all in the professional toning process.
Products & Tools Used
- Clay-Based Hair Lightener: Provides a controlled, gentle lift ideal for open-air hair painting.
- 20 or 30 Volume Developer: The choice depends on the natural hair level and desired brightness.
- Caramel Gloss or Toner: A professional liquid acidic demi-permanent color to achieve that rich, glossy caramel shade.
- Bond Builder Additive (e.g., Olaplex, K18): Crucial for protecting hair health during the lightening process.
- Balayage Brush & Palette: For precise application.
Application Steps
- Section the hair into four quadrants. Begin painting V-shaped sections in the back, starting a few inches from the dark brown roots.
- Saturate the mid-lengths and ends more heavily to create a natural graduation of color.
- Process in open air until the hair has lifted to a pale yellow (the color of the inside of a banana peel), which is the necessary underlying pigment for a true caramel.
- Rinse thoroughly, shampoo, and apply the bond builder treatment as directed.
- Tone the lightened pieces with the caramel gloss at the shampoo bowl, watching carefully until the perfect warm, sun-kissed shade is achieved. Finish with a deep conditioner.
Pro-Tip: The key to a seamless blend is varying the starting point of the highlights. Some should start higher, closer to the root (but never right at it), while others start lower. This “staggering” prevents any visible lines as the hair grows.
2. Neutralize Brassiness with Cool Ash Brown Balayage

Love this modern, cool-toned look? Pin it to your “Chic Hair” inspiration board!
For brunettes who fear pulling warm, red, or orange tones, a cool ash brown balayage is the perfect antidote. This sophisticated style uses a toner with a blue or violet base to neutralize any unwanted brassiness, resulting in a modern, muted look. It’s a trendy choice that complements cool or neutral skin tones beautifully. Achieving a true ashy finish on very dark brown roots is a technical challenge, reinforcing the need for a certified colorist who understands how to lift the hair past the orange stage properly.
Products & Tools Used
- High-Lift Lightener: Needed to lift dark hair past the stubborn orange stages.
- 30 Volume Developer: Often required for the necessary lift on level 3 hair.
- Ash-Based Toner: A toner with a blue/violet base is non-negotiable to neutralize unwanted warmth and achieve a true cool toned result.
- Purple or Blue Shampoo: Essential for at-home maintenance to keep brassy tones at bay.
- Deep Conditioner: Lightening to this level can be stressful on hair, so a good moisturizing treatment is key for breakage prevention.
Application Steps
- Apply the lightener using a foilayage technique (painting in foils). This incubates the hair and provides the extra lift needed for a cool-toned result on dark hair.
- Focus the application away from the root, creating soft ribbons of light.
- Process until hair is lifted to a yellow or pale yellow. Do not rinse when it is still orange, or the toner will not work effectively.
- Rinse, shampoo, and use a bond builder treatment.
- Apply the ashy toner to damp hair, watching the oxidation process closely. Cool tones can grab quickly, so this step requires a professional eye. Rinse as soon as the desired cool shade is reached.
Pro-Tip: The number one mistake is not lifting the hair light enough. To get a true ash brown balayage, the hair’s underlying pigment must be yellow. If you tone over orange, you will get a muddy, neutral brown, not a cool ash. This is why a stylist recommended approach is best for this look.


3. Get a Natural, Beachy Vibe with Honey Blonde Balayage

Save this sunny look for your next summer hair refresh!
If your goal is “vacation hair” in a single salon visit, honey blonde highlights are the answer. This look creates the ultimate natural looking balayage for brown hair, mimicking the way hair lightens after a summer in the sun. The warm, golden-beige tones of honey are brighter than caramel but softer and more universally flattering than a stark blonde. It’s the perfect way to add brightness and enhance the texture of beachy waves, giving your skin a warm, healthy glow.
Products & Tools Used
- Balayage Lightener: A clay or cream-based lightener works well.
- 20 Volume Developer: Perfect for achieving a soft, honey-toned lift on light to medium brown hair.
- Golden-Beige Toner: The key to achieving a sophisticated honey blonde hue, not a flat yellow.
- Sea Salt Spray: For creating that signature beachy texture.
- Heat Protectant: Essential for use before creating waves with a curling wand to prevent hair damage.
Application Steps
- Paint the lightener in fine, sweeping sections, focusing on where the sun would naturally hit: around the face, on the part line, and through the ends.
- Use a lighter touch than for a high-contrast look; the goal is a soft, blended effect.
- Process until lifted to a yellow stage.
- Rinse and shampoo.
- Apply the golden-beige toner to create that warm, shiny honey finish.
- Style by spritzing with sea salt spray and loosely wrapping sections around a 1.25-inch curling wand for effortless waves.
Pro-Tip: For a truly natural looking balayage, ask your stylist for babylights around the hairline in addition to the balayage. These super-fine highlights mimic the soft, sun-bleached hair you had as a child and make the grow-out completely seamless.

4. Indulge in a Rich Chocolate & Mocha Melt Balayage

Pin this decadent chocolate balayage to your “Dream Hair” board!
For the brunette who wants to enhance their color with richness and movement but is afraid of blonde or potential damage, a mocha brown balayage is the perfect entry point. This look is the definition of subtle brown balayage, focusing on tone-on-tone dimension rather than high contrast. The result is an incredibly rich, glossy finish that looks expensive and sophisticated. It’s the ultimate low maintenance balayage for brunette hair because it often requires minimal lift and simply enhances what you already have.
Products & Tools Used
- Low-Volume Lightener OR High-Lift Color: Sometimes this look can be achieved with a permanent color instead of bleach, especially on virgin hair.
- 10 or 20 Volume Developer: A gentle lift is all that’s needed.
- Mocha or Chocolate Brown Toner/Gloss: The star of the show for adding richness and shine.
- Sulfate-Free Shampoo: Crucial for maintenance to prevent the rich tones from fading color.
- Shine Serum: To finish the look and enhance the glossy effect.
Application Steps
- Apply the lifting product very subtly, focusing on the mid-lengths. The goal is not to create blonde pieces, but to lift the natural base just 1-2 shades.
- Paint thicker, more saturated sections than you would for blonde balayage.
- Process for a shorter amount of time, just until a slight softness is created.
- Rinse and shampoo.
- Apply a rich mocha brown balayage gloss all over the hair, from roots to ends. This acts as a root smudge and a toner, melting the subtle highlights into the base for a true color melt.
Pro-Tip: This is a fantastic option if you’re looking for balayage brown hair to cover grey. The multi-tonal nature of the mocha gloss helps blends grey hair into the overall color, making it much less noticeable than a solid, single-process color.

5. Add Delicate Brightness with Subtle Babylights Balayage

Pin this ultra-natural look to your ‘Subtle Hair’ board!
If you’re looking for the most natural looking and delicate enhancement possible, combining babylights with a subtle brown balayage is the answer. Babylights are micro-fine highlights that mimic the soft, multi-dimensional color of a child’s hair. When paired with a few soft balayage pieces through the ends, it creates a “no-color color” look. It’s the kind of lived-in style where people know your hair looks amazing but can’t quite figure out why, making it the epitome of low maintenance hair.
Products & Tools Used
- Cream Lightener: Adheres well to fine sections without swelling.
- 10 or 20 Volume Developer: A gentle lift is all that’s required.
- Fine-Toothed Highlighting Comb: Essential for weaving the micro-fine sections.
- Foils: Used to separate the delicate babylights.
- Neutral, Sheer Toner: To add shine and a soft, polished finish without depositing heavy color.
Application Steps
- Section the hair. Around the hairline and part, take micro-fine weaves of hair—so fine they are almost transparent.
- Apply the lightener to these fine sections and enclose in foils. This is the babylights portion.
- Through the mid-lengths and ends, paint a few soft balayage pieces to connect the babylights.
- Process until a pale yellow is achieved. Babylights process quickly, so watch them carefully.
- Rinse and shampoo, then apply a sheer, neutral gloss all over for just 5-10 minutes to add incredible shine and a blended finish.
Pro-Tip: This is the best technique for someone with fine or thin hair. The micro-highlights create the illusion of density and movement without the potential for stripes that traditional highlights can sometimes cause on less dense hair.

6. Make a Statement with a Bold Face-Framing Money Piece

Want instant brightness? Pin this bold money piece idea!
For a high-impact, trendy look with minimal commitment, the money piece is unmatched. These bold face framing highlights instantly brighten your entire look and make your features pop. It’s a surprisingly low maintenance style because the rest of your hair remains untouched, meaning no major upkeep is required. A money piece can be done on its own for a high contrast statement or paired with a full balayage brown hair with blonde highlights for a more integrated, yet still dramatic, effect.
Products & Tools Used
- Precision Lightener: A cream lightener that doesn’t swell is ideal for this controlled placement.
- 30 Volume Developer: Needed for a bright, high contrast pop against dark hair.
- Foils: Essential to isolate the section and achieve maximum lift.
- Anti-Yellow Toner: A violet-based toner to ensure the blonde is clear and bright, not yellow.
- Hair Clips: To keep the rest of the hair cleanly sectioned away.
Application Steps
- Section out the front hairline. A typical money piece is about a half-inch to a full inch deep, from the part down to the ear.
- Clip the rest of the hair back securely.
- In the front section, take back-to-back fine slices, apply the lightener, and place them in foils. This ensures solid brightness.
- Process until the hair is a pale yellow. This section is delicate, so check it every 5-10 minutes.
- Rinse the front section carefully, shampoo, and apply the toner only to the lightened pieces. Be careful not to let it run onto the brown hair.
Pro-Tip: To make the money piece blend slightly with the rest of your hair, ask your stylist to add just 2-3 fine balayage pieces on the layers right behind the main section. This creates a small semantic bridge of color and makes the look feel more integrated.

7. Go Lighter with a Seamless Bronde (Brown-Blonde) Balayage

Save this perfect bronde balayage for when you’re ready to go lighter!
Bronde balayage is the perfect fusion of brown and blonde, creating the ultimate “best of both worlds” color. It offers the brightness of blonde hair with the low-maintenance ease of brunette roots. This look is ideal for the brunette who wants to make a significant change and go much lighter without the harsh regrowth of traditional all-over blonde. The secret to its seamless grow-out is the root smudge, a technique where a darker toner is applied at the root to create a soft, melted transition from your natural color to the bright light brown ends.
Products & Tools Used
- High-Performance Lightener: To achieve a significant, even lift on dark hair.
- 30 or 40 Volume Developer: For maximum lift.
- Root Smudge Color: A demi-permanent color 1-2 shades lighter than your natural base.
- Beige/Natural Blonde Toner: For the mid-lengths and ends.
- Bond Builder: Non-negotiable for this level of lightening to prevent dry ends and breakage.
Application Steps
- Apply the lightener heavily from the mid-lengths to ends, using a foilayage or teasy-lights technique to get the hair very light.
- Process until the hair is a clean, pale yellow.
- Rinse, shampoo, and apply a bond builder treatment.
- At the bowl, apply the root smudge color to the first 1-2 inches of the root area, using a brush to gently “smudge” or blend it downward.
- Immediately apply the lighter blonde toner to the mid-lengths and ends, overlapping it slightly with the root smudge color to create a seamless color melt.
- Process for 10-15 minutes, then rinse and condition.
Pro-Tip: The key to keeping a bronde balayage looking fresh is a regular gloss or toner service every 6-8 weeks. This service, which doesn’t involve any new lightener, refreshes the blonde tone, adds shine, and re-blends the root area.

8. Add a Pop of Fiery Warmth with Copper Balayage

Spice up your look! Pin this fiery copper balayage idea.
Instead of fighting the natural warmth in brown hair, why not embrace it? A warm copper balayage on brown hair creates a stunning, vivid look that is perfect for autumn or anyone with a warm complexion. Because dark hair naturally lifts to reveal red and orange underlying pigments, achieving a beautiful copper balayage is often less damaging and technically easier than fighting for cool, ashy tones. This style is especially gorgeous on curly hair, as the fiery red tones enhance texture and make curls pop.
Products & Tools Used
- Cream Lightener: To lift the hair to the desired orange/yellow-orange level.
- 20 Volume Developer: Usually sufficient, as you don’t need to lift past orange.
- Vibrant Copper Toner or Direct Dye: To deposit the fiery copper pigment.
- Color-Depositing Conditioner: For at-home maintenance to keep the copper from fading color.
- Curl Cream: To style and define curls after coloring.
Application Steps
- Paint the lightener onto the curls where you want the copper ribbons to pop. For curly hair, it’s often best to paint individual curl clumps.
- Process until the hair is a bright, coppery orange.
- Rinse and shampoo.
- Apply the vibrant copper toner or color, fully saturating the lightened pieces.
- Process for the full time (usually 20 minutes) to ensure maximum vibrancy. Rinse and condition well.
Pro-Tip: Red and copper tones are notorious for fading. To keep your warm copper balayage looking vivid, use a copper-tinted color-depositing conditioner once a week instead of your regular conditioner. This will refresh the color every time you wash.

9. Get Edgy with a Subtle Silver or Mushroom Brown Balayage

Pin this edgy, cool-toned look to your “Modern Hair” board.
For the truly fashion-forward, mushroom brown hair or a silver balayage offers an edgy, high-fashion alternative to traditional tones. This smoky, cool toned look is an advanced version of ash brown balayage and requires lifting the hair to its palest possible state. While the balayage application still allows for a soft grow-out, this is the highest maintenance of the “low-maintenance” styles. Achieving a clean, metallic silver or a complex, earthy mushroom brown hair tone requires professional results from a stylist who is an expert in lightening dark hair.
Products & Tools Used
- High-Lift Lightener with Bond Builder: Essential to lift to the palest blonde without extreme hair damage.
- 30 or 40 Volume Developer: Needed for maximum lift.
- Silver or Ash/Violet-Based Toner: A highly pigmented professional toner is required.
- Silver/Purple Shampoo: A non-negotiable for home care.
- Protein Treatment: To strengthen the hair structure after such an intensive process.
Application Steps
- Apply the lightener using a heavy foilayage technique. Every piece that will be silver must be fully saturated and incubated.
- Process until the hair is the color of the inside of a banana peel (level 10). This can take a long time and may require a second application.
- Rinse, shampoo, and use a bond builder treatment.
- Pre-tone if necessary to neutralize any remaining yellow.
- Apply the final silver or mushroom brown toner to damp hair and watch like a hawk. These tones can turn purple very quickly. Rinse immediately upon reaching the target shade.
Pro-Tip: Don’t attempt this look on hair that is already compromised or heavily colored. Lifting dark hair to a clean level 10 requires the hair to be in excellent condition. A certified colorist will always perform a strand test first.

10. Embrace Your Curls with a Dimensional Curly Balayage

Let your curls shine! Pin this dimensional curly balayage guide.
Coloring curly hair requires a special touch. A curly balayage is a bespoke service designed to add dimensional dark hair color without disrupting the natural curl pattern or causing frizz. Unlike techniques for straight hair, the color is painted onto each curl individually while the hair is dry. This specialized hair painting method, sometimes called the Pintura technique, ensures the highlights fall naturally and enhance texture rather than creating unwanted stripes. The focus is always on maintaining curl integrity and moisture.
Products & Tools Used
- Moisturizing Cream Lightener: A lightener that won’t dry out delicate curls.
- 20 Volume Developer: A gentle lift is best to protect the curl pattern.
- Ammonia-Free Toner/Gloss: To add shine and tone without further stressing the hair.
- Deep Conditioning Mask: The most important product for post-color care to restore hydration.
- Gloves: This technique is often done purely by hand, without brushes.
Application Steps
- The hair should be clean, dry, and styled in its natural curl pattern.
- The colorist will paint the lightener onto individual curl clumps where the light would naturally hit. They will follow the “hills and valleys” of the curls.
- This is a true hair painting technique, often done without foils.
- Process until a soft lift is achieved.
- Rinse very gently, then follow with a long, intensive deep conditioner or moisturizing mask treatment (at least 15-20 minutes). A gloss can be applied at this stage for tone and shine.
Pro-Tip: After a curly balayage, switch to a sulfate-free, moisture-based shampoo and conditioner. Avoid excessive heat styling and incorporate a weekly deep conditioner into your hair care routine to keep your curls bouncy and your color vibrant.

11. Go for a Reverse Balayage to Add Depth Back In

Grown-out color? Pin this reverse balayage idea for a gorgeous refresh!
What happens when your balayage has become too blonde or your old highlights have grown out? The answer is a reverse balayage. This advanced color correction technique adds depth back into the hair by painting on lowlights (darker pieces) and applying a root shadow. It breaks up solid blonde and reintroduces dimension, bringing you back to a more natural-looking, lower-maintenance brunette look while keeping some brightness on the ends. This is the perfect “reset” for hair that feels over-processed or has lost its contrast.
Products & Tools Used
- Demi-Permanent Lowlight Color: A color that matches your natural root color or is one shade lighter.
- 6 or 10 Volume Developer: You only need to deposit color, not lift.
- Protein Filler: (Optional, but stylist recommended) To spray on porous ends to help the dark color grab evenly.
- Foils: To separate the lowlights from the hair you want to keep blonde.
- A clarifying shampoo: To use before the service to remove any product buildup.
Application Steps
- Section the hair. Take weaves of the blonde hair that you want to turn back to brown and place them in foils.
- Apply the lowlight color to these sections, leaving some blonde pieces out of the foils.
- You can also apply the same color to the root area between the foils to create a deep root shadow.
- Process for the full 20 minutes.
- Rinse and condition. Often, a stylist will apply a fresh toner to the remaining blonde pieces to make the whole look pop.
Pro-Tip: When adding dark color back to very light blonde hair, a “filler” is often necessary. This is a protein treatment or a warm-toned color that adds back the red and gold pigments that were stripped out. Without it, the brown lowlights can look hollow or turn a murky green color.

Key Takeaways
- Balayage is the Ultimate Low-Maintenance Option: The primary benefit of balayage brown hair is the seamless blend at the root, which allows for graceful growth without the harsh lines of traditional highlights, saving you time and money.
- Tone is Everything: The success of your balayage depends on the right toner. Caramel and honey tones add warmth, while ash brown and mushroom tones use a cool base to neutralize brassiness.
- Communicate with Your Stylist: Use specific terms like “money piece,” “root smudge,” or “babylights” to tell your colorist the exact look you want. Bringing inspiration photos from this list is always a great idea.
- Protect Your Investment with Home Care: To prevent fading color and brassy tones, use sulfate-free shampoos. For cool tones, use a blue or purple shampoo weekly. For warm tones, a color-depositing conditioner is best.
- Don’t Underestimate Bond Builders: For any look that requires significant lightening, like bronde or silver balayage, ensuring your stylist uses a bond builder is crucial for preventing hair damage and keeping your hair healthy.
People Also Ask About Balayage Brown Hair
Is balayage really low maintenance on brown hair?
Yes, balayage is famously low maintenance, especially on brown hair. Because the highlights are painted away from the root, there is no harsh demarcation line as your hair grows. This means you can go 3-6 months between full balayage appointments, often just needing a quick toner or gloss service in between to refresh the color.
What is the difference between ombre and balayage?
The main difference is that balayage is a technique, while ombre is a specific style. Balayage involves hand-painting highlights for a soft, blended, and natural look. Ombre is a more dramatic gradient style where the hair transitions from a dark color at the roots to a much lighter color at the ends, creating a distinct two-toned effect.
Can you balayage brown hair without using bleach?
It is sometimes possible on lighter brown, virgin (uncolored) hair, but the results will be very subtle. A high-lift permanent color can lift natural hair 2-3 levels, creating a soft caramel or mocha effect. However, to achieve any kind of blonde or a significant lift on dark brown hair, a lightener (bleach) is necessary.
How much does a balayage service typically cost?
The cost of balayage varies widely depending on location, salon, and stylist expertise. Factors influencing the price include your location, the salon’s prestige, the stylist’s experience level, and the length and thickness of your hair. A partial balayage or money piece will be less expensive than a full head application.
Will balayage cause a lot of damage to my hair?
Any process involving lightener can cause some damage, but balayage is often gentler than traditional highlights. Because it’s an open-air technique, the lift is slower and more controlled. The biggest factor in preventing hair damage is ensuring your stylist uses a bond builder in their formula and that you follow up with a good hair care routine.
What color balayage is best for dark brown hair?
For a natural look, caramel, honey, and chocolate tones are beautiful on dark brown hair. They work with the hair’s warm underlying pigments. If you prefer a cooler look, ash brown balayage is possible but requires a more intensive lightening process to lift past the orange stage and avoid brassy tones.
How do I stop my brown balayage from turning orange or brassy?
The key is using a color-correcting shampoo at home. For balayage with blonde or ash tones, use a purple shampoo once a week to neutralize yellow. For caramel or light brown balayage that is pulling orange, a blue shampoo is more effective. Regular gloss treatments at the salon also prevent brassiness.
How often should I get my balayage touched up?
A full balayage touch-up is typically only needed every 3-6 months. Many people extend this even longer. To keep the color fresh between major services, you can book a “toner” or “gloss” appointment every 6-8 weeks. This refreshes the tone, adds shine, and is much quicker and more affordable.
Can you do balayage on hair that is already colored brown?
Yes, but it’s a more complex process that should be handled by a professional. Coloring over previously dyed hair is considered a color correction. The stylist must first lift through the artificial pigment, which can be unpredictable. A strand test is essential to see how the hair will lift and ensure its integrity.
What is a partial balayage?
A partial balayage is when highlights are applied to only a section of your hair. This is typically the top layer and the pieces around the face. It’s a great option if you want to add a pop of brightness and dimension without committing to a full head of highlights, and it’s also more budget-friendly.
Final Thoughts on Achieving Your Dream Balayage Brown Hair
Choosing to get balayage brown hair is about more than just a color; it’s about embracing a style that is both beautiful and practical. It proves that you don’t have to choose between stunning, dimensional hair and a low maintenance lifestyle. From the rich depth of a mocha melt to the bright pop of a honey blonde, there is a perfect balayage for every brunette.
Armed with the inspiration and knowledge from this expert guide, you can now confidently walk into a salon, show your stylist exactly what you want, and understand the process. The key is the combination of a skilled certified colorist who protects your hair health and a great at-home hair care routine to maintain that beautiful tone.
What has been your experience with balayage? Which of these stunning ideas will you be trying first?
Last update on 2026-04-27 / Affiliate links / Images from Amazon Product Advertising API