Tired of boring hair accessories that everyone else has? You see those stunning, sparkly clips online and want to create your own personalized statement piece, but figuring out the right glue, tools, and techniques feels overwhelming. It’s frustrating when you want to make something beautiful but don’t know where to start.
To make a bedazzled claw clip, you will need a plain claw clip, strong craft glue like E6000, flat-back rhinestones, and a wax picker tool for precise placement. First, clean the clip surface. Then, apply small dots of glue and carefully place each rhinestone in your desired pattern, letting the clip cure for at least 24 hours before use.
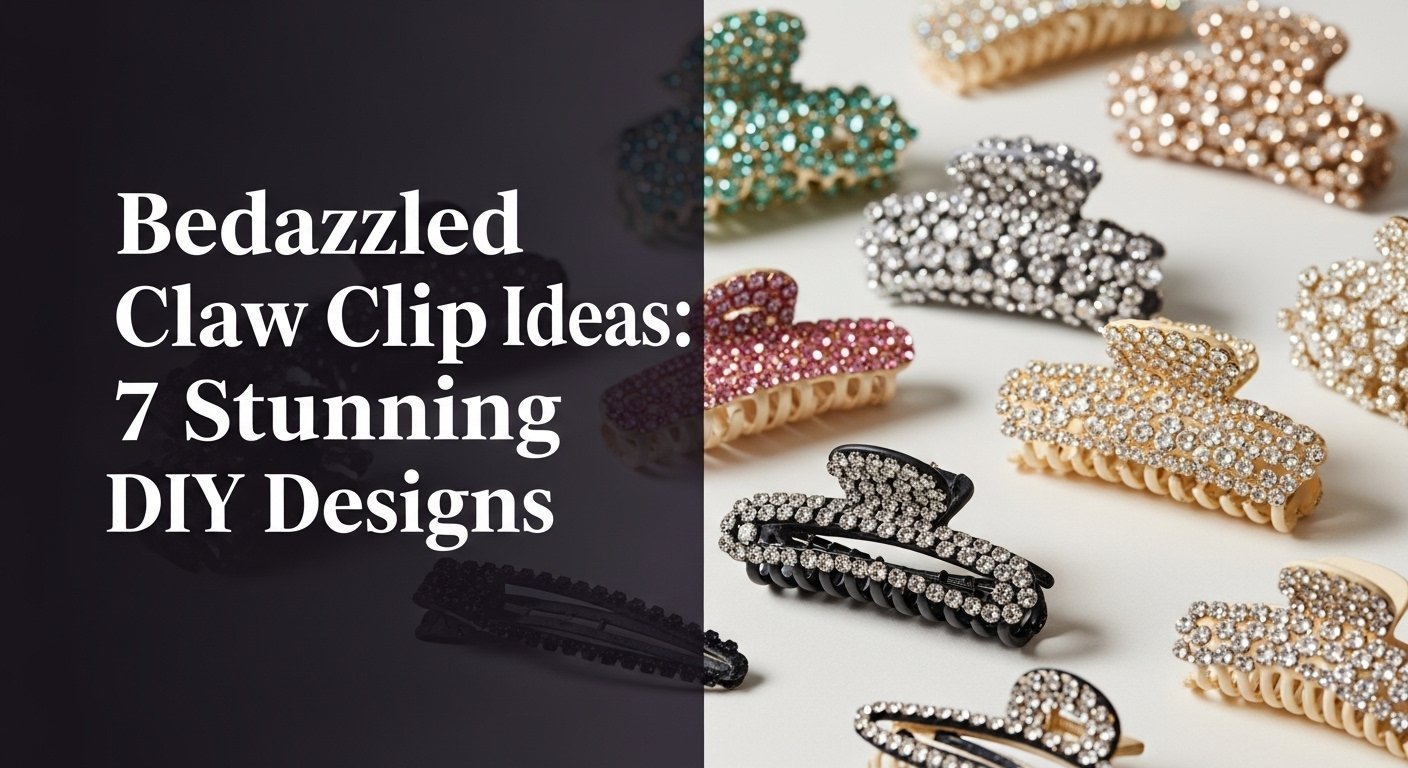
Based on established best practices and tested methods, this guide provides everything you need to know. A bedazzled claw clip is a standard hair accessory that has been transformed into a piece of personalized art using embellishments like rhinestones, pearls, and charms. In this post, you’ll discover seven stunning designs and the exact steps to create durable, professional-quality clips that reflect your unique style.
How Do You Make a Bedazzled Claw Clip?
Before diving into specific designs, it’s crucial to understand the foundational process and gather the right supplies. Turning a plain matte finish or clear resin clip into a work of art is a simple and rewarding project that taps into major trends like Y2K fashion and Barbiecore. Success hinges on using the correct materials. Many DIY projects fail because the wrong adhesive is used, leading to rhinestones falling off after just one wear. All the methods and supplies listed here have been selected to ensure your creations are beautiful and achieve a long lasting bond. The core tools you’ll need are a strong adhesive like E6000 adhesive, a wax picker tool for easy gem placement, and of course, your choice of flat-back crystals and clips. This preparation is the key to transforming a simple clip into a durable, personalized hair clip, making it a perfect girls night activity or handmade gift.
7 Stunning DIY Designs to Bedazzle Your Claw Clip in 2026
Now that you have the basics down, it’s time for the fun part: choosing a design! This section is your creative lookbook, offering seven distinct and achievable bedazzled claw clip ideas, ranging from minimalist bling to a maximalist aesthetic. Each design blueprint includes a specific supply list, step-by-step instructions, and a pro-tip to help you achieve professional results. Whether you’re a beginner or a seasoned crafter, you’ll find inspiration to create a rhinestone claw clip that perfectly matches your style.
1. Create a Dazzling Ombré Rhinestone Effect

Pin this gorgeous ombré look to your ‘DIY Fashion’ board!
This design uses a curated color palette to create a beautiful gradient flow. The key is the careful blending of different shades to achieve a seamless and high-shine ombré rhinestone effect, one of the most popular rhinestone placement patterns.
Supplies Needed
- 1 Large matte finish claw clip (black or a dark color works best)
- Flat-back crystals (e.g., size ss12) in 3 coordinating colors (e.g., dark blue, light blue, clear/crystal AB)
- Industrial strength craft adhesive (e.g., E6000 adhesive or B7000)
- Wax picker tool or tweezers for gem placement
- A small dish or rhinestone tray to hold stones
- Isopropyl alcohol and a cotton pad
Step-by-Step Directions
- Clean the surface of the claw clip with isopropyl alcohol to remove any oils and ensure a long lasting bond.
- Arrange your three colors of rhinestones in separate piles.
- Apply a small section of glue to the bottom of the clip. Using your wax picker tool, place the darkest color rhinestones in a dense pattern.
- Move to the next section, applying more glue. Start mixing in your medium-tone rhinestones with the dark ones.
- In the middle section of the clip, use only the medium-tone stones.
- As you move toward the top, start mixing the lightest stones in with the medium ones.
- Finish the top section with only the lightest color stones.
- Let the clip dry undisturbed for at least 24-48 hours for the glue to fully cure.
Pro-Tip: For the most seamless ombré rhinestone effect, slightly overlap the color transition zones. Instead of a hard stop, feather the colors into each other by a few rows. This precision placement is the key to a professional, non-blocky look.

2. Design a Chic Personalized Name Clip

Save this adorable personalized gift idea to your ‘Handmade Gifts’ board!
A personalized rhinestone name claw clip DIY is one of the most popular projects because it makes a thoughtful and stylish gift. These custom name clips are ideal for bridal party gifts or bachelorette party favors. This design features a name created with alphabet beads, turning a simple accessory into a special keepsake.
Supplies Needed
- 1 Medium size claw clip in a solid color
- Flat-back alphabet beads (pearl or rhinestone style)
- Tiny accent rhinestones (size ss6 or ss8)
- Strong craft adhesive (B7000 glue is great for precision)
- A wax picker or precision tweezers
- A ruler or straight edge (optional, for alignment)
Step-by-Step Directions
- Clean the clip’s surface with alcohol.
- Lay out your alphabet beads to spell the desired name or word.
- Apply a thin line of glue to the back of your first letter and place it carefully on the clip.
- Continue gluing and placing each letter, using a ruler as a guide to keep them straight if desired.
- Once the name is set, apply tiny dots of glue around the letters.
- Decorate the space around the name with the small accent rhinestones to create a “halo” effect.
- Let the custom claw clip cure for a full 24 hours.
Pro-Tip: To ensure your letters are perfectly centered and straight, lightly mark a guideline on the clip with a pencil or a piece of washi tape before you start gluing. You can easily wipe the pencil mark off or peel the tape away after the glue has set.

3. Assemble a Celestial Moon & Stars Design

Pin this dreamy celestial design for your next craft project!
Take your design to the next dimension by adding 3D embellishments. This celestial clip is decorated by combining flat-back crystals with small metallic gold charms for a beautiful, multi-dimensional look. This is a great example of thematic styling using claw clips with charms.
Supplies Needed
- 1 Tortoiseshell claw clip
- Small, flat-back metallic gold moon charms
- Tiny gold star-shaped charms or rhinestones
- Assorted small iridescent rhinestones to act as “stars”
- Gel-based super glue or E6000 adhesive
- Wax picker tool
Step-by-Step Directions
- Clean the clip surface thoroughly.
- Design your celestial layout by placing the larger moon charms first. Arrange them in a pleasing, balanced way.
- Adhere the moon charms one by one with a generous dot of glue.
- Next, place the star charms or star-shaped rhinestones in the gaps between the moons.
- Fill in the remaining empty spaces by creating a “galaxy” effect with the small, scattered iridescent rhinestones.
- Let the clip dry for at least 24 hours. Check that all charms are secure.
Pro-Tip: For 3D elements like charms, apply a small amount of glue to the clip surface AND a small amount to the charm itself. After placing the charm, you can use a toothpick to apply a tiny, invisible “fillet” of glue around the charm’s edge to further secure it and prevent snagging hair.

4. Craft a Minimalist Pearl Accent Clip

Love this elegant look? Pin it to your ‘Minimalist Style’ board!
For a more understated and elegant vibe, a minimalist bling approach is perfect. This design uses negative space design—where the empty space is part of the aesthetic—and is embellished with flatback pearls for a chic, sophisticated look that stands out from more dazzling rhinestones vs pearls styles.
Supplies Needed
- 1 Clear resin or pastel colors claw clip
- Assorted sizes of flatback pearls (e.g., 3mm, 5mm, 7mm)
- Clear-drying jewelry glue (like G-S Hypo Cement)
- Precision tweezers or a wax picker tool
Step-by-Step Directions
- Clean the clip surface so it’s free of dust and oil.
- Design your minimalist pattern. A simple line along the top edge or a small cluster at the hinge are great options.
- Apply a very small dot of glue for your first, largest pearl. Place it at the center of your design.
- Work outwards from the central pearl, adding smaller pearls on either side to create a balanced look.
- Mix the sizes randomly to create texture and visual interest.
- Leave plenty of empty space on the clip—the negative space design is key to the minimalist aesthetic.
- Let the clip cure completely for 24 hours.
Pro-Tip: For an ultra-chic look on a clear resin clip, place some pearls on the inside of the clip as well as the outside. The layered effect creates beautiful depth and looks incredibly professional.

5. Use a Scatter Pattern for a Confetti Crystal Look

Ready for a party? Pin this fun confetti design idea now!
This is the perfect beginner project! The scatter pattern technique is fun, forgiving, and results in vibrant, colorful crystal patterns. This design is created by randomly placing a mix of stones, making it an ideal for anyone who wants to decorate a clip without the pressure of perfect lines.
Supplies Needed
- Any color claw clip (white or a light color works well)
- A “rainbow” mix of flat-back crystals in various colors and sizes (ss6 to ss20)
- Craft glue (E6000 or similar)
- Wax picker tool
Step-by-Step Directions
- Clean the clip surface.
- Pour your rhinestone mix into a tray to see all your colors and sizes.
- Apply glue to a small one-inch section of the clip.
- Begin to place rhinestones randomly in the glued area. Don’t think too hard about it!
- Intentionally vary the sizes, colors, and the spacing between stones. Some should be close, others far apart.
- Continue working in small sections until the entire clip surface is covered in your “confetti.”
- Let the clip cure for 24-48 hours before wearing.
Pro-Tip: The key to a beautiful scatter pattern technique is true randomness. To achieve this, close your eyes, pick up a stone with your wax tool, and place it down. Force yourself to use the color and size you grabbed. This prevents subconscious patterning and gives a true confetti look.

6. Design a Bold Monochromatic Color Block Clip

Make a statement! Pin this bold color block idea to your ‘DIY Accessories’ board.
Embrace the maximalist aesthetic and the Barbiecore trend with a bold, graphic color block design. This clip consists of two distinct sections of color, creating a high-fashion look that is modern and eye-catching. The technique requires precision but yields stunning results.
Supplies Needed
- A claw clip
- Flat-back crystals in two shades of the same color (e.g., hot pink and light pink)
- Strong craft glue (E6000)
- Wax picker tool
- Washi tape or painter’s tape
Step-by-Step Directions
- Clean the claw clip with alcohol.
- Decide where you want your color block line to be (e.g., diagonally, horizontally).
- Apply a piece of washi tape firmly along your desired dividing line.
- Apply glue to the first section.
- Set your first color of rhinestones tightly together in a honeycomb pattern, right up against the edge of the tape.
- Let the first section dry for about 1-2 hours until tacky and firm.
- Carefully peel off the washi tape.
- Apply glue to the second section and fill it with your second color of rhinestones, meeting the clean edge of the first color.
- Let the entire clip cure for 48 hours.
Pro-Tip: For the cleanest possible line, use the “honeycomb” or “offset” rhinestone placement pattern. This staggers the rows and minimizes gaps, creating a solid, encrusted texture that makes the color block divide look sharp and professional.

7. Host a ‘Bling Bar’ Party with DIY Clip Kits

The best party idea! Pin this ‘Bling Bar’ guide for your next event!
Wondering how to host a bling bar party? This is one of the most fun easy DIY birthday party ideas for teen girls or a perfect girls night activity. A “Bling Bar” is an event that requires pre-assembled kits of craft supplies and is perfect for a bachelorette party where everyone gets to create their own custom party favor ideas.
What You Need (Per Person/Kit)
- 1-2 plain claw clips (durable plastic in various colors)
- Small, re-sealable bags or a compartmentalized container
- A curated mix of rhinestones, flatback pearls, and fun charms
- 1 mini tube of B7000 glue (less fumes than E6000 for a group)
- 1 wax picker tool
- A small tray or paper plate to work on
How to Host (The Steps)
- Assemble the Kits: Before the party, create an individual kit for each guest. This prevents chaos and ensures everyone has what they need.
- Set Up the ‘Bling Bar’: Arrange the kits at each seat. You can also have extra “premium” embellishments like large charms or special crystals in communal bowls in the center of the table.
- Prep the Clips: For best results, give all the plastic claw clips a quick, light sanding with fine-grit sandpaper where they will be decorated. This helps the glue adhere much better.
- Give a Quick Demo: Show everyone how to apply a small amount of glue and pick up stones with the tool. Share a few of the design ideas from this post!
- Craft & Socialize: Let everyone unleash their creativity. Play some music and have snacks and drinks available.
- Drying Station: Designate a safe spot where the finished clips can dry undisturbed for at least 24 hours. Provide small labeled boxes or bags for guests to take their creations home safely.
Pro-Tip: The number one rule for a successful craft party is managing the mess. Cover your table with a disposable tablecloth. Give each guest a small, rimmed tray (like a small baking sheet or even a clean styrofoam tray) to contain their stones and prevent spills.

Key Takeaways: Your Quick Guide to Bedazzled Claw Clips
- Glue is Everything: Your choice of glue is the most critical factor. Use a strong, industrial-strength adhesive like E6000 or B7000 for a long lasting bond; hot glue will not be durable enough and stones will fall off.
- Surface Prep is Non-Negotiable: Always clean your claw clip with isopropyl alcohol before starting. For extra grip, lightly sand the plastic surface to help the adhesive adhere properly and prevent falling off.
- The Right Tools Make it Easy: A wax picker tool is a game-changer for picking up and placing tiny stones. It’s far more efficient than tweezers and essential for precision placement.
- Curing Time is Crucial: Be patient! You must let your finished custom claw clip cure for a minimum of 24-48 hours. Using it too soon will cause the rhinestones to shift or fall off.
- Start with a Design Plan: Don’t just start gluing randomly (unless it’s the confetti design!). Plan your rhinestone placement pattern—like an ombré, color block, or pearl accent—before you begin for professional results.
- It’s the Perfect Group Activity: A “Bling Bar” is a fun and creative girls night activity or DIY birthday party idea. Prepare individual kits beforehand to make it a smooth and enjoyable experience for everyone.
FAQs About bedazzled claw clip ideas
What glue is best for bedazzling hair clips?
The best glues for bedazzling plastic hair clips are industrial-strength craft adhesives like E6000 or B7000. These create a permanent, durable, and slightly flexible bond that can withstand daily use. E6000 is known for its superior strength, while B7000 has lower fumes and a more precise applicator tip, making it another excellent choice. Avoid using hot glue or basic craft glue, as they are not strong enough and gems will fall off.
How do you get rhinestones to stay on plastic?
To get rhinestones to stay on plastic permanently, you must properly prep the surface and use the right adhesive. First, lightly sand the shiny plastic surface with fine-grit sandpaper to give the glue something to grip. Then, clean the sanded area with isopropyl alcohol. Finally, apply a strong glue like E6000 and allow the item to cure for a full 24-48 hours before handling.
Can you use hot glue on hair clips?
It is not recommended to use hot glue for bedazzling hair clips that you intend to wear. While it might work for a temporary, single-use costume piece, hot glue does not form a strong, permanent bond with smooth plastic. The gems will pop off easily with regular use, flexing, or changes in temperature. For a durable design, always choose an industrial craft adhesive.
How do you prevent rhinestones from falling off?
The three keys to preventing rhinestones from falling off are surface prep, using the right glue, and allowing adequate curing time. First, scuff the clip’s surface with sandpaper and clean it with alcohol. Second, use a powerful adhesive like E6000, not hot glue. Third, and most importantly, let the clip sit undisturbed for at least 24 hours, and ideally 48 hours, for the glue to fully cure and create a long lasting bond.
What is a wax pen for rhinestones and how do I use it?
A wax picker tool, also called a wax pen, is a tool with a slightly tacky wax tip used to easily pick up and place small rhinestones. To use it, you simply touch the wax tip to the top of a rhinestone; it will gently stick. Then, you can precisely place the rhinestone onto the dot of glue on your project. It’s much faster and more accurate than using tweezers for small gems.
How many rhinestones do I need for a claw clip?
For full coverage on a standard 4-inch claw clip, you will typically need between 800 and 1,200 rhinestones (size ss12). The exact number depends on the clip’s size, the stone size, and your placement density. It’s always best to buy more than you think you need. A multi-size variety pack is a great option for a beginner project.
Can I bedazzle a metal claw clip?
Yes, you can absolutely bedazzle a metal claw clip, and the process is very similar. You should still clean the surface with isopropyl alcohol before starting. The same glues (E6000, B7000) work excellently on metal surfaces. Metal clips offer a different aesthetic and can feel more premium, making them a great base for crystal hair clips.
What are flat-back crystals?
Flat-back crystals are rhinestones that have a flat, smooth back, designed to be glued onto surfaces. This is different from “hotfix” stones, which have a heat-activated glue already on them. For this type of DIY project, you must use non-hotfix, flat-back stones in either glass (more sparkle) or high-quality resin/acrylic crystals (more lightweight and budget-friendly).
How do I clean a bedazzled hair clip?
To clean a bedazzled hair clip, gently wipe it with a soft, damp cloth or a cotton swab dipped in a little isopropyl alcohol. Avoid soaking the clip or using harsh chemical cleaners, as this can degrade the glue over time. For dust between stones, you can use a clean, soft-bristled makeup brush or a can of compressed air.
Is E6000 safe for hair accessories?
Once fully cured, E6000 is generally considered safe for incidental contact in hair accessories. The key is to let it cure completely (at least 48 hours) in a well-ventilated area. During application, E6000 does emit strong fumes, so it’s critical to work in a space with good airflow. If you are sensitive to smells, B7000 is a popular alternative with less odor.
Final Thoughts on Your Custom Claw Clip Journey
You are now fully equipped to turn simple claw clips into dazzling, personalized accessories. This guide has shared tested and proven methods to ensure that whatever design you choose—from an elegant ombré to a fun confetti scatter—your creation will be both beautiful and durable. This simple DIY project is more than just a craft; it’s a way to express your personal style and create a unique piece that can’t be bought in a store.
With the right glue, proper preparation, and a bit of patience, you can confidently create a stunning collection of sparkly claw clips for yourself or as thoughtful handmade gifts.
What design will you try first?
Last update on 2026-03-02 / Affiliate links / Images from Amazon Product Advertising API


