Struggling to find the perfect hair color that feels both fresh and you? You want a stunning transformation with hair color ideas extensions, but you’re terrified of that fake, unnatural look where the extensions are obvious. It’s a common fear holding many back from the hair of their dreams.
To get the best hair color with extensions, focus on matching undertones, choosing high-quality human hair, and using blending techniques like balayage or root smudging. High-quality Remy human hair extensions are essential as they allow for coloring and styling just like your natural hair, ensuring a seamless, natural-looking result.
Drawing from comprehensive analysis of current trends and proven methodologies, this guide is your blueprint for success. We’ll explore 9 expert-backed, trend-forward ideas that guarantee a seamless blend. You’ll discover how to use hair extensions not just for length, but as a powerful tool for creative, commitment-free color.
How Do You Find the Perfect Hair Color Ideas with Extensions for a Flawless Look?
The journey to flawless hair with extensions starts with inspiration but succeeds with technique. Finding the perfect seamless hair extension colors isn’t just about picking a photo you love; it’s about understanding how to integrate those colors with your own hair. The core relationship to master is between your natural hair color and the hair extensions. Achieving that coveted seamless blending effect hinges on expert color matching, choosing the right quality of hair, and applying proven extension color techniques. Many guides show you what looks good, but they fail to explain how to achieve it, leaving you at risk of mismatched tones or visible wefts. This guide bridges that gap. We’re moving beyond a simple gallery of images to provide a practical, actionable blueprint that combines visual hair color inspiration for extensions with the expert knowledge needed to bring those looks to life, whether you’re working with a stylist or tackling a DIY project.
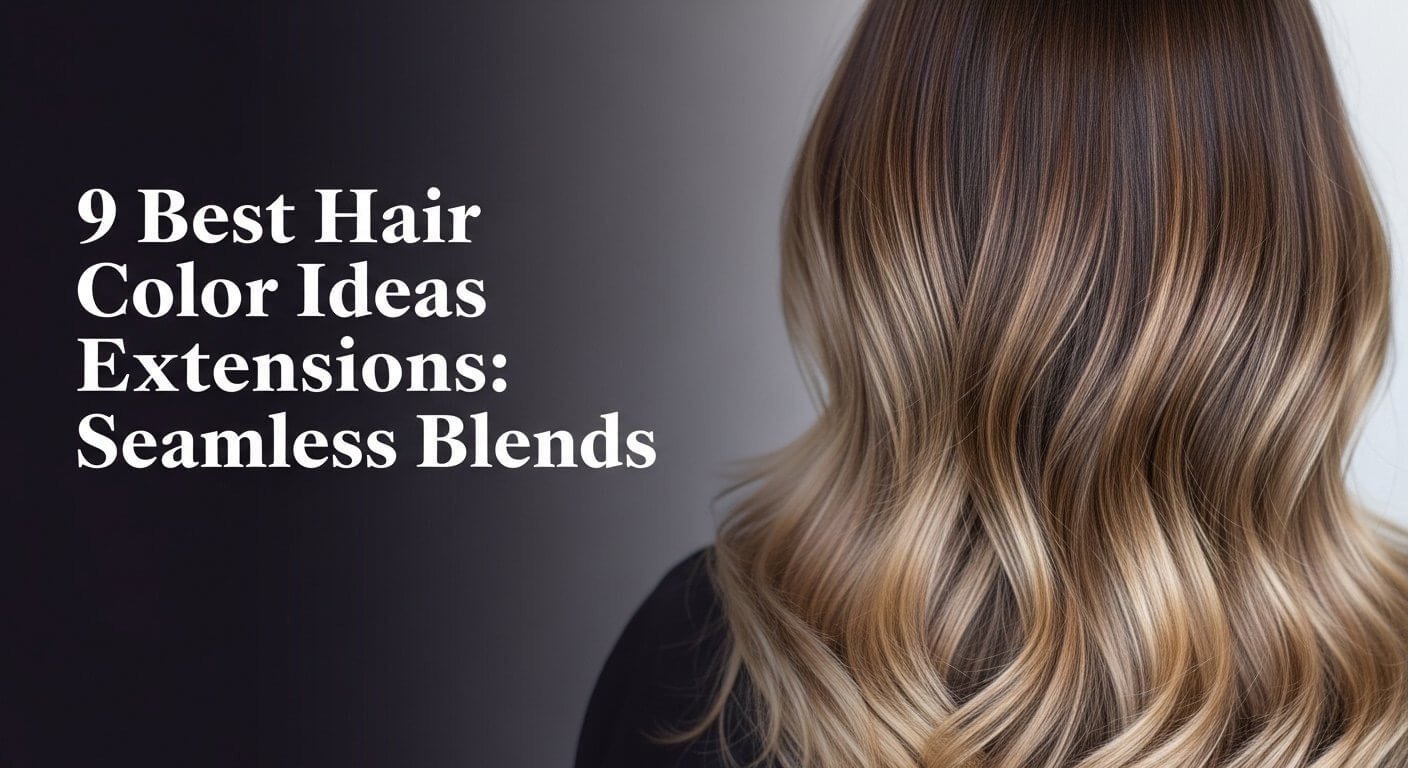
9 Best Hair Color Ideas Extensions for a Seamless Blend in 2026
Ready to transform your look? We’ve curated the 9 best hair color ideas using extensions for 2026, moving beyond simple inspiration to give you a complete mini-tutorial for each concept. Each idea is designed for a perfect blend hair finish, combining visual appeal with the practical steps needed for a professional result. From the sun-kissed glow of balayage hair extensions ideas to the dramatic flair of an ombre hair extensions ideas, you’ll learn how to use extensions as your ultimate creative tool. These aren’t just pictures; they’re recipes for gorgeous, believable hair.
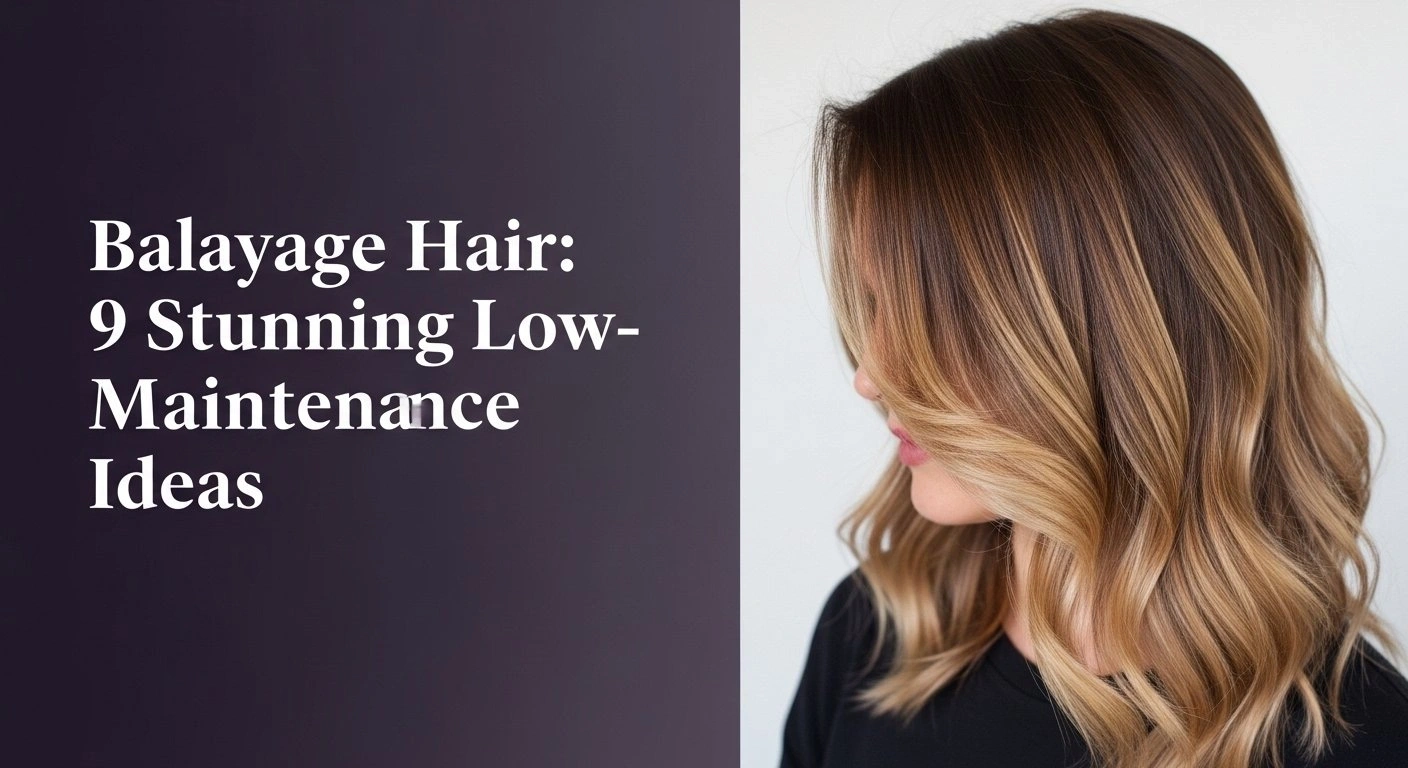
1. Creating a Seamless Balayage Effect with Human Hair Extensions

Pin this gorgeous balayage inspiration to your “Dream Hair” board!
Balayage is all about creating soft, sun-kissed dimension, and extensions make it easier than ever. By using multi-tonal extension colors, you can mimic the hand-painted look of balayage without bleaching your own hair. The key is to use high-quality Remy hair extensions, as their preserved cuticle integrity ensures they can be styled and blended flawlessly. This method uses human hair extensions color to add dimension and create a low-maintenance, high-impact style.
What You Need
- 2-3 sets of clip-in extensions in shades ranging from your root color to your desired end color (e.g., dark brown, medium brown, honey blonde). Look for 100% Remy human hair extensions as they have cuticle integrity for better styling.
- A tail comb for clean sectioning.
- Heat protectant spray designed for extensions.
- A 1.5-inch curling wand to help blend the hair.
Application/Styling Steps
- Start by sectioning your natural hair, leaving the bottom section down.
- Clip in the darkest shade of extensions closest to your nape. This will add depth and volume.
- In the next section up, alternate between the medium and light shades, placing the lightest pieces strategically where the sun would naturally hit. This is creating balayage with extensions.
- For the front “money pieces,” use the lightest blonde extensions to frame your face.
- Once all extensions are in, lightly mist with heat protectant.
- Use the curling wand to create loose waves, curling pieces of your natural hair and the extension hair together in the same section. This is the key to a perfect blend hair finish.
Pro-Tip: For ultimate realism, a master stylist would perform undertone identification on your natural hair first. Match your extensions to your hair’s undertones (cool, warm, or neutral), not just the level of color, to avoid a color clash.

2. Achieving a Natural Ombré Transition with Tape-In Extensions

Save this perfect ombré hair idea for your next salon visit!
An ombré effect offers a dramatic yet beautiful melt from dark to light. Using tape-in extensions is a professional method to achieve this look with precision. You can use pre-colored ombré extensions for a perfect gradient or have a stylist custom color them. Because tape-ins are a semi-permanent option, it’s crucial to seek licensed professional hair services for application to ensure a secure bond and prevent damage.
Products & Tools Used
- One pack of tape-in extensions in your natural root color.
- One pack of pre-colored ombré tape-in extensions that transition to your desired end shade. Choose virgin hair extensions color options for the best quality.
- Tape-in plier tool for secure application.
- Clarifying shampoo (to use before application).
- A professional stylist for application.
Application/Styling Steps
- This look is best achieved by a professional hair extension expert. Book a consultation first.
- Your stylist will wash your hair with a clarifying shampoo to remove any residue, ensuring a strong bond.
- They will begin by sectioning hair for extensions into clean, horizontal lines.
- Starting from the nape, the stylist will apply the solid-colored extensions that match your roots to build a base.
- As they move up the head, they will begin strategically intermixing the ombré extensions. The key to a natural looking ombré is a gradual transition.
- The stylist will use a “sandwich” method, placing a tape-in weft under a thin section of your hair and another on top, then pressing them together with pliers. This attaching colored extensions method is crucial for longevity.
Pro-Tip: To solve color blending issues, ask your stylist to use a color depositing conditioner during the first wash after application. This helps to marry the tones of your natural hair and the extensions for an even more seamless melt.

3. Adding Subtle “Money Piece” Highlights with Clip-Ins

Want to try face-framing highlights without the commitment? Pin this hack!
The “money piece” trend is all about bright, face-framing highlights, and it’s one of the easiest highlight hair extensions ideas to achieve. Using clip-in extensions is the perfect way to get this look. This is the ultimate low-risk, high-reward method, as it enables you to experiment with temporary hair color without any commitment. It’s a proven extension color technique for testing a new style.
What You Need
- Two single-weft clip-in extensions, one for each side of your face. Choose a color 2-3 shades lighter than your base color for a bold look.
- A flat iron.
Application/Styling Steps
- Part your hair as you normally would.
- On one side, take a thin section of hair right at your hairline, from the part down to your ear. Pin the rest of your hair back.
- Open the clip on one extension weft and slide it into the root of the sectioned-off hair, as close to the scalp as possible. Snap it shut.
- Let your natural hair fall over the clip to conceal it.
- Repeat on the other side.
- To ensure a seamless blend, run a flat iron over your natural hair and the extension together to make them lie flat and merge.
Pro-Tip: If the clip-in is too wide, you can carefully trim the weft (not the hair) to a smaller size. For a softer look, use color wheel theory for extension blending and choose a highlight shade that complements your skin’s undertone.

4. Deepening Your Look with a Rich Chocolate Brown Color Melt

Pin this if you love rich, dimensional brunette hair!
For brunettes, extensions aren’t just for length—they’re for creating incredible depth and richness. A chocolate brown hair melt uses dark hair extensions in multiple shades to add dimension. This is one of the best dark brown hair extensions with highlights inspiration looks, proving that luxury brunette hair is never a single, flat color. Proper care with a sulfate-free shampoo is crucial to preserve extension color and shine.
Supplies Needed
- One set of clip-in hair extensions that matches your base brunette color.
- A second, smaller set of extensions one to two shades lighter (e.g., a warm chestnut or caramel brown). Ensure both are high quality extension colors.
- A wide-tooth comb for blending.
Step-by-Step Directions
- Begin by installing the base color extensions throughout the lower and middle sections of your head to build volume and length.
- Take the lighter brown extensions and use these as your “highlight” pieces.
- Instead of creating a pattern, place them sporadically throughout the top layers of your hair. Focus on the mid-lengths to ends.
- Place a few lighter wefts around your face to add brightness.
- Once all extensions are in, use a wide-tooth comb to gently brush through your hair from ends to roots, marrying the different tones together.
- Style as desired. Waving the hair will further enhance the dimensional extension colors.
Pro-Tip: Avoid extensions look unnatural fixes by choosing shades within the same tonal family. If you have cool, ashy brown hair, choose a lighter ash brown highlight, not a warm red-toned one. This is a key part of advanced color theory for extensions.

5. Customizing Your Perfect Beige Blonde with Toner

Learn how to tone your own extensions for the perfect custom blonde! Pin this guide.
Sometimes the perfect beige blonde extensions aren’t available off the shelf. That’s where toning extensions comes in. Because human hair extensions allow for coloring, you can use a hair toner to neutralize unwanted brassy tones and achieve a custom shade. This DIY tutorial for ash blonde hair color ideas with extensions is an advanced technique, so following safety protocols for hair dyeing is essential.
What You Need
- A set of #613 Platinum Blonde 100% Remy Human Hair extensions. Do NOT attempt this with synthetic hair.
- A high-quality hair toner for extensions in a beige or natural blonde shade.
- 10-volume developer.
- A plastic mixing bowl and brush.
- Plastic gloves.
- A timer.
Instructions
- ALWAYS do a strand test first! Mix a tiny amount of toner and developer and apply to a small, hidden piece of one extension weft to check the final color and timing.
- Lay your extensions flat on a protected surface.
- In your bowl, mix the toner and developer according to the product’s instructions. A common ratio is 1:2.
- Wearing gloves, use the brush to quickly and evenly saturate each extension weft with the toner mixture. Work fast as toner can grab quickly.
- Watch the extensions closely. They will likely process much faster than hair on your head. This can take anywhere from 2 to 10 minutes.
- Once they reach your desired beige blonde shade (or are slightly darker, as they will lighten when rinsed), immediately rinse the extensions with cool water until the water runs clear.
- Apply a deep conditioning mask, let sit for 10 minutes, and rinse. Let them air dry.
Pro-Tip: To avoid uneven extension color correction later, ensure the wefts are fully saturated but not dripping. Porosity management is key; dry extensions will absorb color unevenly, so applying toner to slightly damp hair can sometimes yield a more even result.

6. Embracing the Natural Grow-Out with a Root Smudge

Love low-maintenance color? Pin this root smudge idea for a perfect grow-out.
Having dark roots hair doesn’t mean you can’t rock blonde extensions. The “root smudge” is a sophisticated blending technique that creates a modern, lived-in look. This process uses a demi-permanent hair dye on the top of blonde extensions to create a soft, seamless transition from your natural roots. Using a demi-permanent color is an expert tip, as it’s less damaging than permanent dye and offers a more gentle fade over time.
What You Need
- A set of blonde human hair extensions.
- A demi-permanent hair color that matches your natural root color.
- A low-volume developer (as specified by the color brand).
- A color brush.
- Foil or plastic wrap.
Step-by-Step Directions
- This is an advanced technique; if unsure, seek a hair extension specialist consultation.
- Lay your extension wefts flat, with the clips or tape at the top.
- Mix your demi-permanent color and developer.
- Using the color brush, apply the dye only to the top 1-2 inches of the extension weft.
- Use your fingers (with gloves!) or a dry brush to “smudge” or “drag” the color down slightly, creating a soft, blurred edge rather than a hard line.
- Process according to the dye’s instructions (usually 15-20 minutes).
- Rinse carefully, pointing the water downwards so the dark dye doesn’t stain the blonde ends. Condition and dry.
Pro-Tip: For the most believable blend, purchase pre-made “rooted” extensions. These are professionally colored to have a darker root area already, saving you the work and guaranteeing a consistent result across all wefts.

7. Experimenting with a Bold Peekaboo Pop of Color

Add a secret pop of color! Pin this fun peekaboo hair idea.
Peekaboo color is the perfect way to experiment with bold hair extension colors in a subtle, surprising way. This technique uses pre-colored extensions in vibrant hair extension colors placed in a hidden layer of your hair. It allows you to try fashion hair color extensions like blue or pink without having to bleach your own hair, thus preventing color damage. It’s the ultimate way to express your personality while maintaining a professional appearance when needed.
Supplies Needed
- 2-4 wefts of pre-colored extensions in a bold or pastel shade (e.g., pink, blue, purple, green). Clip-in extensions are ideal for this.
Step-by-Step Directions
- Section off the top 3/4 of your hair and clip it up out of the way.
- Identify the area where you want the color to “peek” from, usually the section of hair right above your ear or at the nape of your neck.
- Take one of your colored wefts and clip it in securely to the root of your hair in this hidden bottom section.
- Add another 1-2 wefts right next to it to create a concentrated panel of color.
- Unclip the top section of your hair and let it fall over the colored wefts.
- The color should now be completely hidden. When you tuck your hair, put it in a ponytail, or when the wind blows, you’ll get a fun “peekaboo” of the fashion hair color.
Pro-Tip: If using synthetic hair extensions for this (which come in many vibrant colors and are cheaper), do NOT use heat styling on them unless the packaging explicitly says they are heat-safe. They will melt.

8. Reviving the ’90s with High-Contrast Chunky Highlights

The 90s are back! Pin this chunky highlight guide to get the look without the damage.
The ’90s are calling, and chunky highlights are making a major comeback. You can rock this high contrast hair trend without the commitment or potential bleach damage by using clip in extensions. This technique is all about strategic placement of wide, contrasting wefts to create those iconic, bold stripes of color. It’s a fun and temporary way to embrace a powerful retro trend.
What You Need
- A set of clip-in extensions in a color that contrasts sharply with your base color (e.g., platinum blonde for dark hair, dark brown for blonde hair). Look for wefts that are 3-4 inches wide.
Step-by-Step Directions
- Start with your hair styled straight to best showcase the stripes.
- Part your hair down the middle.
- Take a 2-inch wide weft of your contrast color extension. Place it about one inch back from your hairline on one side of your part, clipping it in securely at the root.
- Let the hair fall over it. You should have a clear, thick “stripe” of color.
- Create another stripe about two inches behind the first one.
- Repeat on the other side of your part, ensuring the placement is symmetrical.
- The goal is not to blend, but to have clearly defined panels of color for that authentic chunky highlights vibe.
Pro-Tip: To fully commit to the ’90s aesthetic, use a flat iron to make the hair pin-straight. This will make the high-contrast stripes even more pronounced and graphic, which is the entire point of this bold look.
9. Achieving Your Dream Fantasy Color with Custom Dyeing

Dreaming of fantasy hair? Pin this guide to custom-dyeing your own extensions!
Have you always dreamed of lavender or pastel pink hair? Custom colored extensions make it possible. By dyeing clip in human hair extensions at home, you can achieve any fantasy color imaginable. The key is to start with high-quality virgin hair extensions, which have the best cuticle integrity and have never been processed, allowing for the most successful custom formulation of colors.
Supplies Needed
- A set of the highest quality blonde (#613) or virgin hair extensions you can find. Virgin hair that has never been processed will yield the best results.
- Semi-permanent hair dye in your chosen fantasy color(s). These are direct dyes and don’t require developer.
- A plastic bowl.
- A color brush.
- Gloves.
- Conditioner.
Step-by-Step Directions
- In your bowl, mix your chosen semi-permanent dyes. For a more dimensional look, mix a slightly darker and a slightly lighter version of your color in separate bowls.
- To create a pastel shade, mix a small amount of your color with a large amount of white conditioner until you reach your desired pastel intensity.
- Preparing extensions for color: Make sure your extensions are clean and completely dry. Lay them flat.
- Wearing gloves, apply the dye to the extensions. You can color them all one shade, or alternate between your light and dark mix for a multi-tonal effect.
- Fully saturate the hair. Semi-permanent dyes are conditioning, so it’s okay to be generous.
- Let them process for the time listed on the dye package, typically 30-60 minutes.
- Rinse each weft with cool water (no shampoo) until the water runs clear. Let them air dry.
Pro-Tip: A common problem is color fading solutions. To maintain your vibrant colored hair extensions, always wash in cool water with a sulfate-free shampoo, and add a few drops of your leftover semi-permanent dye to your conditioner for a color-refreshing mask every few weeks.

Key Takeaways: Your Quick Guide to Hair Color Extensions
Navigating the world of colored hair extensions can be simple if you remember a few core principles. This summary recaps the most important points for achieving a beautiful, natural looking transformation.
* Quality is Non-Negotiable: Always choose 100% Remy human hair extensions for any coloring project. Their aligned cuticles are essential for even color absorption and preventing tangles.
* Blending is an Art: The secret to a seamless blend is never using just one color. Incorporate multiple tones, and always curl or wave your natural hair and the extensions together to marry them.
* Test, Don’t Guess: Before applying any dye or toner to a full set of extensions, always perform a strand test on a small, hidden piece to confirm the color and processing time. This prevents costly mistakes.
* Low and Slow with Heat: Colored extensions can be more fragile. Always use a heat protectant and the lowest effective temperature setting on your styling tools to preserve color longevity.
* Know When to Call a Pro: For semi-permanent applications like tape-ins or fusion bonds, or for complex techniques like root smudging, a licensed professional hair service is your best investment for a flawless, damage-free result.
* Temporary Color is Your Friend: For trying trends like chunky highlights or peekaboo colors, clip-in extensions are the smartest choice. They offer maximum impact with zero commitment or damage.
People Also Ask About Hair Color Ideas Extensions
Can you color human hair extensions?
Yes, you can absolutely color 100% human hair extensions, especially those labeled ‘Remy’ or ‘Virgin’. Because they are made from real human hair, they will take dye and toner in the same way your natural hair does. However, it’s always recommended to deposit color (go darker) rather than lift it (go lighter), as bleaching can compromise the hair’s integrity. Never attempt to color synthetic extensions.
How do you blend colored hair extensions seamlessly?
The key to blending is to use multiple shades and create texture. Instead of one solid color, use extensions in 2-3 similar tones to create depth. After installing, curl or wave your natural hair and the extensions together. This forces the different strands to mix, blurring any lines and creating a perfectly seamless blend.
Do extensions have to match your hair color exactly?
No, and for the most natural look, they shouldn’t match exactly. Your natural hair has many different tones. Using extensions that are a perfect, single-color match can look flat and unnatural. The best approach is to match the extensions to the color of your ends and choose a shade that has a mix of highlights and lowlights similar to your own.
What is the difference between balayage and ombre extensions?
Balayage extensions are used to create a blended, sun-kissed highlight effect, while ombre extensions create a more distinct, two-toned look that melts from dark to light. Balayage involves placing lighter extension pieces throughout the hair for a multi-tonal result. Ombre typically uses extensions that are themselves colored in a gradient from top to bottom.
Is it better to dye your hair or dye extensions?
For adding highlights or fantasy colors, it is almost always better and safer to dye the extensions. This allows you to achieve a bold look without bleaching or damaging your natural hair. For matching a base color, you can have a stylist dye your extensions to perfectly match your professionally colored hair for the best result.
How do you maintain vibrant colored hair extensions?
To maintain vibrant colors, minimize washing and use cool water. Wash only when necessary with a sulfate-free, color-safe shampoo and rinse with the coldest water you can tolerate. You can also add a few drops of your semi-permanent dye into your conditioner to create a color-depositing mask to refresh the shade every few weeks.
Can you dye your hair with extensions in?
It is strongly advised not to dye your hair while semi-permanent extensions (like tape-ins, fusion, or wefts) are installed. The dye can get trapped in the bonds, causing them to slip or break down. It also makes an even application nearly impossible. Always color your hair and extensions separately before installation.
How do you fix mismatched hair extension color?
If the color is slightly off, a professional stylist can use a toner or a color gloss to adjust the shade. If the mismatch is significant, the easiest solution for clip-ins is to buy a new, better-matched set. For a quick fix, styling the hair in waves or curls can help blend the different shades more effectively than wearing it straight.
Which hair extensions are best for coloring?
Virgin Remy hair extensions are the absolute best for coloring. “Virgin” means the hair has never been chemically processed (dyed or permed), and “Remy” means all the cuticles are intact and aligned. This pristine condition allows the hair to accept color evenly and predictably with the least amount of damage.
Can I use semi-permanent dye on extensions?
Yes, semi-permanent (direct) dyes are perfect for coloring human hair extensions, especially for fantasy or vivid shades. They don’t require developer and are less damaging than permanent dyes. They are the ideal choice for custom-coloring blonde extensions into shades like pink, blue, or purple.
Final Thoughts on Your Hair Extension Color Journey
Ultimately, the best hair color ideas extensions are the ones that make you feel confident and excited. As you’ve seen, hair extensions are an incredibly versatile and powerful tool for creative expression. Whether you’re aiming for subtle, natural-looking dimension with a balayage or a bold, temporary statement with peekaboo highlights, the key is to start with high-quality Remy human hair and apply the right extension color techniques.
By embracing these methods, you can safely explore a world of color without damaging your natural hair. You’re now equipped with the knowledge to either embark on a DIY project with confidence or have a much more informed conversation with your stylist. Your dream hair is within reach. Which color idea will you try first?
Last update on 2026-04-27 / Affiliate links / Images from Amazon Product Advertising API