Are you terrified of a DIY hair disaster ruining your locks? You are not alone in this struggle. Finding the perfect hair color ideas tips for a safe at-home transformation can feel completely overwhelming.
The best hair color ideas tips start with analyzing your skin undertones and hair porosity. To dye your hair safely at home, always perform a 48-hour patch test, use a high-quality sectioning clip system, apply a damage-reducing bond builder, and strictly follow the developer volume ratios for your target shade. This ensures professional results without compromising your hair health.
Drawing from comprehensive analysis of current data and proven professional colorist methodologies, we have curated the ultimate guide. You will discover exactly how to execute these stunning visual trends safely. Get ready to transform your look with confidence and achieve salon-quality results today.
Hair Color Ideas Tips: How Can You Achieve Salon-Quality Results At Home?
Achieving salon-quality results at home requires strict adherence to chemical safety protocols, proper sectioning, and understanding how developer volumes interact with your unique hair porosity.
Before you mix any chemicals, professional colorists strongly recommend utilizing an AI hair color changer to virtually test how different shades complement your specific skin undertones and eye color. This eliminates the guesswork from your hair color inspiration phase. Once you have settled on a vision, your priority must shift to safety. A mandatory 48-hour patch test prevents severe allergic reactions, while understanding the molecular weight of your chosen dye ensures you do not inadvertently cause irreversible cuticle damage.
Knowing when to use a gentle 10-volume developer for depositing color versus a 20-volume developer for lifting is the difference between healthy, vibrant hair and a brittle disaster. By establishing these safety parameters first, you can confidently explore the most exciting hair coloring techniques and transition into our curated gallery of trending hair colors equipped with the knowledge of a professional hair color expert.
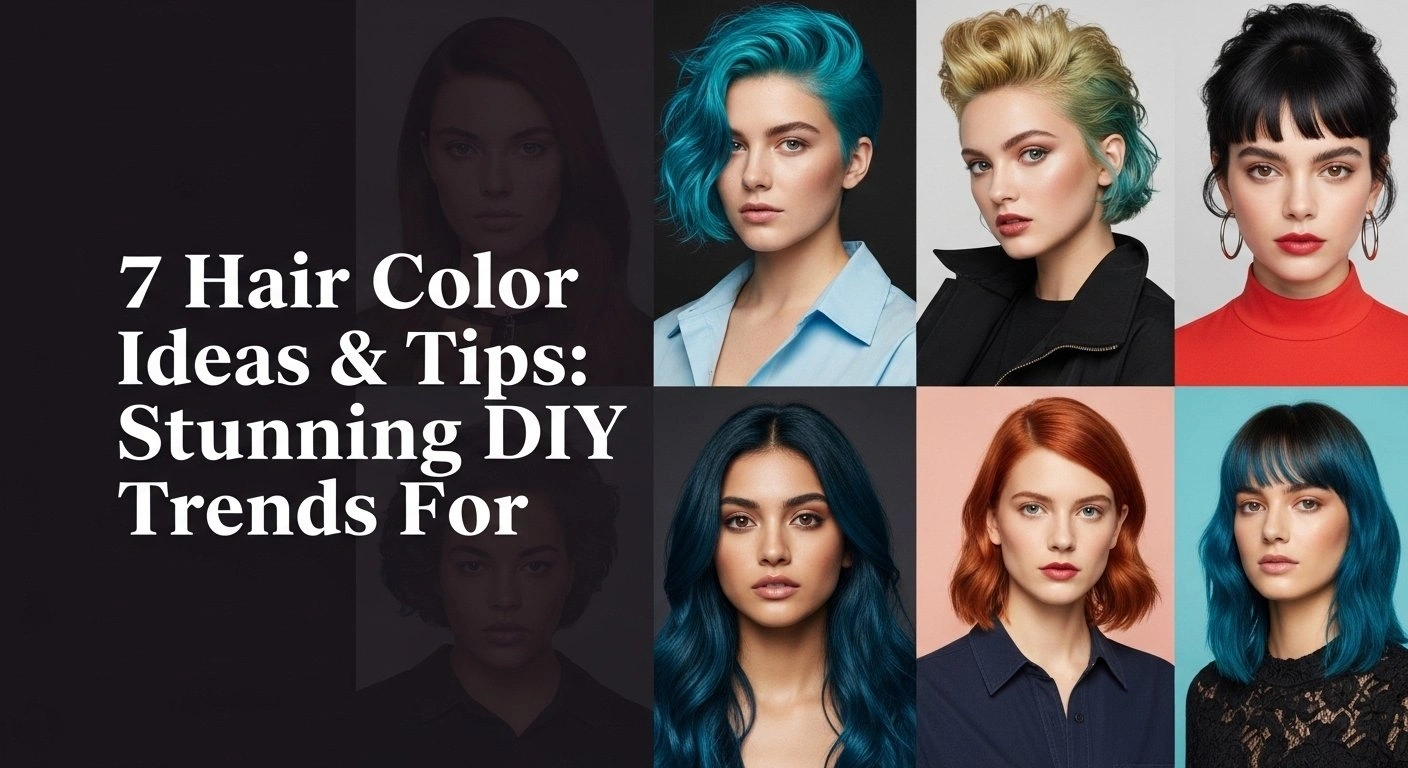
7 Hair Color Ideas & Tips: Stunning DIY Trends For 2026
The secret to executing stunning DIY trends lies in choosing the right technique for your hair history and meticulously following step-by-step application procedures.
This comprehensive lookbook goes beyond basic aesthetic inspiration by providing actionable, safe DIY manuals for each style. Whether you are aiming for a highly blended balayage hair color or learning the precise differences in balayage vs ombre, proper execution relies heavily on the right tools. Using professional sectioning clips ensures even saturation, while selecting the correct toner neutralizes unwanted brassiness. Let’s explore seven distinct hair dye tips and tutorials designed to give you flawless, dimension-rich results without leaving your bathroom.
1. Formulate a Face-Framing Money Piece

Pin this stunning money piece tutorial to your DIY Hair Goals board!
Creating a money piece hair look is the ultimate way to frame your face with a high-impact, low-commitment transformation. The goal is to safely isolate and lighten only the front sections of your hairline to achieve an icy platinum blonde pop of color. Because the hair around the face is exceptionally fine and fragile, you must limit your chemical exposure by using a maximum 20-volume developer to prevent breakage.
Products & Tools Used
- Professional bleach powder formulated for on-scalp application
- 20 volume hair developer (keep it low and slow for delicate hairline hair)
- Ashy hair toner to neutralize pale yellow undertones
- Sectioning clips and a metal-tail weaving comb
- Latex-free gloves and hair foils
Application Steps
- Section a one-inch deep triangle at the front of your hairline, clipping the rest of your hair securely away.
- Mix your bleach and developer at a 1:2 ratio until it reaches a creamy, pudding-like consistency.
- Apply the lightener starting mid-shaft, working down to the ends, and finally brushing up toward the root to prevent “hot roots.”
- Process inside a foil for up to 45 minutes, checking elasticity every 10 minutes.
- Rinse thoroughly, shampoo lightly, and apply your ash toner for 10-15 minutes to tone yellow out of blonde.
Pro-Tip: The hairline features finer, more fragile hair that processes faster than the rest of your head. Always apply your lightener to the mid-lengths first, dragging it to the root during the final 15 minutes of processing to maintain hair elasticity and prevent breakage.

2. Transition to a Cool Mushroom Brown

Save this cool-toned brunette transformation to your Hair Color Palette board!
Transitioning warm, brassy strands into a trendy mushroom brown hair look requires a solid understanding of color theory. Brunette hair naturally contains heavy red and orange underlying pigments (eumelanin and pheomelanin). To achieve ashy hair colors, you must use a green or blue-based demi-permanent gloss to mathematically fix brassiness and cancel out the warmth without causing permanent structural damage to the hair cuticle.
Products & Tools Used
- Ash brown demi-permanent hair color (look for green or blue base notes)
- 10 volume developer (for deposit-only coloration)
- Chelating shampoo for pre-color prep
- Color-safe conditioner
- Hair dye brush and mixing bowl
Application Steps
- Wash your hair with a chelating shampoo to strip away hard water minerals and product buildup that can block color absorption.
- Formulate your demi-permanent gloss by mixing equal parts color and 10 volume developer.
- Section damp, towel-dried hair into four quadrants for systematic application.
- Saturate each section from root to tip, massaging the color into the hair cuticle.
- Process for 20-25 minutes, then rinse with cool water to seal the cuticle and lock in the ashy tone.
Pro-Tip: If you are lifting dark hair to achieve a mushroom blonde or brown, your hair will naturally expose orange underlying pigments. You must use an ash-based toner with blue-violet correctors to completely neutralize this warmth.

3. Apply High-Contrast Calico Split Dye

Pin this bold Calico hair trend to your Alternative Hairstyles board!
The highly technical calico hair color trend combines stark black, bright blonde, and vibrant copper red hair into one statement-making look. Executing a split hair color or multi-tonal style like this is a complex “double process color” procedure. It demands flawless sectioning techniques and protective barriers to isolate the distinct shades, ensuring the dark dye does not bleed onto the lighter panels during processing or rinsing.
Products & Tools Used
- Permanent black hair color
- Vibrant copper semi-permanent dye
- Pre-lightened hair extensions (optional, for adding blonde without bleach)
- Embossed hair foils
- Barrier cream (or petroleum jelly)
Application Steps
- Apply barrier cream along your entire hairline and ears to prevent staining from the dark dye.
- Section the hair into thick, chunky horizontal slices, determining which panels will be black, copper, or blonde.
- Isolate the blonde sections tightly in foils first to protect them from accidental dye transfer.
- Apply the black dye to the root and mid-shafts of your designated dark sections, wrapping them in foil.
- Saturate the remaining sections with the copper red hair dye, process according to manufacturer instructions, and rinse each color group entirely separately with cold water.
Pro-Tip: When washing a multi-tonal style like calico hair, always use ice-cold water and a color-safe, sulfate-free shampoo. Wash the dark sections first while holding the blonde sections out of the way to prevent the black pigment from muddying the lighter pieces.

4. Lift a Strawberry Blonde Ombre

Save this beautiful strawberry blonde melt for your Summer Hair Ideas!
To successfully lift a strawberry blonde ombre, you must master the art of seamless blending. Unlike traditional foil highlights, ombre diffuses a natural dark root into lightened ends by employing a strategic backcombing technique. If you are debating balayage vs ombre, remember that ombre focuses on a horizontal gradient melt, beautifully showcasing warm brunette shades as they transition into peachy blonde tips via open-air processing.
Products & Tools Used
- Balayage lightener (clay-based for open-air processing)
- 30 volume developer
- Strawberry blonde/rose gold hair gloss
- Balayage board and paddle brush
- Teasing comb
Application Steps
- Section hair into four workable quadrants, starting the application at the nape of the neck.
- Tease (backcomb) each 1-inch slice of hair at the mid-shaft. This teasing creates the seamless blur between your dark roots and light ends.
- Paint the lightener onto the un-teased ends using a balayage board to ensure heavy, even saturation on the tips.
- Process until the ends reach a pale yellow stage (approx. 35-45 minutes), then rinse and gently comb out the teasing with conditioner.
- Apply the strawberry blonde gloss all over damp hair, processing for 15 minutes before the final rinse.
Pro-Tip: A clay-based lightener is essential for open-air techniques like ombre or balayage. Unlike traditional bleach, clay lightener forms a hard shell on the outside while staying moist inside, allowing it to process without transferring onto other sections of hair.

5. Formulate Gray Hair Ash Blending

Pin this elegant gray blending technique to your Silver Hair Journey board!
Embracing natural silver growth through gray hair blending is a sophisticated, low-maintenance alternative to constantly trying to cover gray roots with opaque dye. Because gray hair entirely lacks melanin and has a tightly packed cuticle, it resists color absorption. Using micro-fine babylights instead of a solid color is one of the best hair color ideas for women over 50 with gray hair, as it seamlessly diffuses the line of demarcation.
Products & Tools Used
- Ash blonde high-lift color (or lightener)
- Cool-toned silver/ash toner
- Purple shampoo for maintenance
- Fine-tooth weaving comb for babylights
- Hair foils
Application Steps
- Section hair very finely, taking micro-weaves (babylights) across the crown and natural parting to mimic the natural pattern of graying hair.
- Apply the lightener only to the previously colored (darker) bands of hair, avoiding overlapping onto the natural silver roots.
- Incubate in foils until the darker hair lifts to a pale, buttery yellow.
- Rinse and neutralize by applying a silver/ash toner from roots to ends to marry the natural gray with the freshly lightened pieces.
- Maintain the cool tone by washing with a high-quality purple shampoo once a week to prevent environmental yellowing.
Pro-Tip: Gray hair is notoriously coarse and resistant because the cuticle layers are packed tightly together. Blending with highlights rather than using a harsh 20-volume permanent dye all over preserves the hair’s integrity while hiding harsh lines of demarcation.

6. Saturate Vivid Dip Dye Ends

Save this vivid dip-dye tutorial for your next fun weekend project!
Applying direct fashion colors to the tips of your hair requires specific dip dye tips to ensure the pigment holds. Vibrant hair colors applied via semi-permanent dye contain no developer, meaning they simply coat the outside of the hair cuticle. For the color to show up brightly and to properly maintain vivid hair colors, your ends must be pre-lightened to a highly porous blonde base that can aggressively grip the pigment.
Products & Tools Used
- Semi-permanent vivid hair dye (e.g., pink, blue, or purple)
- Pre-lightened hair tips (level 9 or 10 blonde is required)
- Wide-tooth comb
- Old t-shirt and protective gloves
- Color-safe deep conditioner
Application Steps
- Prepare your workspace, as vivid direct dyes will stain countertops, skin, and fabrics instantly.
- Section clean, dry hair into two pigtails for easy access to the ends.
- Saturate the bottom 2-3 inches of your hair with the semi-permanent color, using your gloved fingers to aggressively massage the pigment into the cuticle.
- Comb through the boundary line where the dye meets your natural color to create a slightly diffused edge rather than a blunt line.
- Process for 30-45 minutes (semi-permanent dye contains no harsh chemicals and will not damage hair if left on longer), then rinse with freezing cold water to prevent fading.
Pro-Tip: Vivid semi-permanent dyes are direct deposit only; they do not require developer. To keep the color vibrant for weeks, add a dollop of your leftover dye to your regular conditioner and use it as a color-depositing mask every time you shower.

7. Blend a Seamless Shadow Root

Pin this root smudge technique to hide regrowth and extend your color!
The shadow root technique is the ultimate professional secret to hide regrowth line demarcation on grown-out highlights. By utilizing a demi-permanent liquid gloss that matches your natural base color, you can strategically deepen the root area. This creates a beautifully blended, low maintenance color that easily extends the lifespan of your expensive blonde highlights by several months.
Products & Tools Used
- Demi-permanent hair gloss (formulated 1-2 levels darker than your highlights, matching your natural root)
- 10 volume developer
- Applicator bottle or precision tint brush
- Wet detangling brush
- Clips for sectioning
Application Steps
- Apply the formula to damp, towel-dried hair. Damp hair increases porosity slightly and allows for a smoother, blurrier blend.
- Section hair into four quadrants and begin applying the root color using an applicator bottle, strictly targeting the first 1 to 2 inches of regrowth.
- Emulsify and drag the color down. Use a wet detangling brush to comb the root color down another inch, blending it seamlessly into the blonde.
- Process for 10-15 minutes, watching carefully to ensure the dark color doesn’t pull too far down your lightened ends.
- Rinse thoroughly, ensuring the dark root water runs clear before applying conditioner to the ends to prevent staining the blonde.
Pro-Tip: Always use a demi-permanent liquid gloss rather than a permanent cream dye for a shadow root. Liquid glosses are translucent, meaning they create a soft, blurred shadow that will fade beautifully over 6-8 weeks without leaving a harsh line of demarcation as it grows.

Key Takeaways: Your Quick Guide to Hair Color Ideas Tips
To ensure optimal results and protect hair health during your DIY journey, strictly follow foundational color theory and chemical safety guidelines. Consolidating the core insights from our advanced tutorials guarantees a smooth, predictable transformation.
- Utilize an AI virtual try-on tool first: Before committing chemicals to your hair, use an AI hair color changer to test how different hair color ideas match your specific skin undertones and eye color.
- Respect the patch test rule: Always perform a 48-hour patch test and strand test before applying bleach or dye to prevent color fading and check for severe allergic reactions.
- Match developer volume to your goal: Use 10-volume developer for depositing color (like glosses or shadow roots) and 20-volume or 30-volume to safely lighten and lift the hair cuticle.
- Neutralize unwanted tones with color theory: To fix brassiness, remember that opposite colors on the wheel cancel each other out; use purple to neutralize yellow, and blue/green to neutralize orange and red.
- Embrace low maintenance techniques: Techniques like balayage hair color and the shadow root technique offer stunning results that grow out seamlessly, saving you time and money on root touch-ups.
- Prep hair for even saturation: Always section your hair cleanly and clarify with a chelating shampoo before dyeing to avoid patchy dye results caused by mineral buildup.
People Also Ask About Hair Color Ideas Tips
Addressing common DIY uncertainties is essential for a safe, successful at-home coloring experience. Below are direct answers to the most frequently asked questions regarding techniques, formulation, and maintenance.
What are the best hair colors for blue eyes?
The best hair colors for blue eyes are warm brunette shades, rich coppers, and icy platinum blondes, as these create striking high-contrast looks that make the eyes pop.
According to professional colorists, understanding the color wheel is key; orange and copper tones sit directly opposite blue on the wheel, making shades like strawberry blonde or rich auburn highly complementary. Alternatively, a cool-toned ash blonde matches the cool tones of blue eyes, creating a cohesive, icy aesthetic.
How to choose the best hair color for my skin tone?
To choose the best hair color for your skin tone, identify your undertone by looking at your wrist veins: blue/purple veins indicate cool undertones, while green veins indicate warm undertones.
If you have cool undertones, opt for ashy hair colors, icy blondes, and cool mushroom browns. If your skin is warm or olive, vibrant copper red hair, golden blondes, and warm chestnut brunettes will complement your complexion beautifully. Neutral undertones can generally pull off any shade.
Should I dye my hair at home or salon?
You can safely dye your hair at home for single-process color deposits (like going darker, applying glosses, or vivid dip dyes), but complex lightening requires a professional salon.
Major transformations, such as transitioning from black to blonde hair, color corrections, or full-head bleach applications, carry a high risk of chemical damage and uneven lifting. Industry standards recommend leaving intense chemical processing to certified colorists to protect your hair’s integrity.
How to fix brassy hair color?
To fix brassy hair color, you must apply a toner or depositing shampoo containing the exact opposite color of your unwanted brassiness on the color wheel.
If your blonde hair is pulling yellow, apply a purple shampoo or violet-based toner. If your brunette or balayage hair is pulling orange or red, you need to neutralize it with a blue or green-based ash toner. Always process toners on damp hair for even absorption.
How long does semi-permanent hair color last?
Semi-permanent hair color typically lasts between 4 to 12 washes, depending heavily on your hair’s porosity and your maintenance routine.
Because semi-permanent dye only coats the outside of the hair cuticle rather than penetrating it, it fades quickly. To maintain vivid hair colors longer, professional stylists recommend washing your hair exclusively with freezing cold water and sulfate-free, color-safe shampoos.
What is calico hair color trend?
The calico hair color trend is a bold, high-contrast, multi-tonal style featuring thick, chunky panels of black, copper, and blonde hair woven together.
Inspired by 90s alternative fashion and the distinct markings of a calico cat, this split dye style requires advanced sectioning techniques. It is highly sought after by those wanting to combine warm and cool tones into one dramatic, statement-making look.
How to blend gray hair with blonde highlights?
To flawlessly blend gray hair, ask your stylist to weave ultra-fine ash blonde babylights throughout your natural silver roots to diffuse the line of demarcation.
Rather than covering the gray with an opaque, single-process dye, highlighting allows the natural silver to act as a cool-toned lowlight. This technique drastically reduces maintenance, as the root regrowth blends naturally with the multi-dimensional ash blonde pieces.
Can I dye my hair without bleach?
Yes, you can dye your hair without bleach if you are depositing a darker color, matching your current level, or using a high-lift tint on virgin hair.
However, if you have previously dyed dark hair and want to go lighter, you cannot achieve this without bleach. Hair dye cannot lift existing artificial pigment; you must use a lightener to strip the old color before applying your new desired shade.
What is a money piece hair style?
A money piece is a face-framing highlight technique where the front sections of the hairline are lightened significantly brighter than the rest of the hair.
This creates a flattering, high-contrast pop of color around the face. It is a highly popular, low-maintenance trend because it delivers maximum visual impact while requiring minimal bleaching, making it healthier for the overall hair cuticle.
Why is my hair color fading so fast?
Your hair color is likely fading fast due to high porosity from bleach damage, washing with hot water, or using harsh sulfate shampoos that strip pigment.
To prevent rapid fading, seal the hair cuticle by rinsing with cold water, use a chelating shampoo prior to coloring to ensure the dye adheres properly, and always apply a heat protectant before using hot styling tools, as high heat literally vaporizes color molecules.
Final Thoughts on Hair Color Ideas Tips
Navigating the endless sea of hair color ideas doesn’t have to end in an overwhelming trip to the salon or a disastrous DIY mishap. By understanding the foundational elements of color theory—like neutralizing brassiness, respecting developer volumes, and accurately assessing your skin’s undertones—you can confidently take control of your hair’s aesthetic. Whether you are aiming for a subtle, low-maintenance shadow root technique or a high-contrast calico hair color transformation, the secret lies entirely in the preparation.
Remember that professional hair color results at home require patience. Always utilize virtual try-on tools to visualize your chosen palette, invest in high-quality sectioning clips and bowls, and never skip the mandatory patch test. Maintaining the integrity of your hair cuticle should always be your top priority; healthy hair holds pigment far better than compromised, over-processed strands.
Equipped with these expert hair dye tips and precise application techniques, you are ready to formulate, blend, and saturate your way to a stunning new look. Which of these trending styles are you feeling brave enough to try this weekend? Let us know in the comments below, and don’t forget to pin your favorite tutorials for later!
Last update on 2026-04-27 / Affiliate links / Images from Amazon Product Advertising API