Are you stuck in a frustrating styling rut with your cropped cut? Dealing with flat roots or stubborn layers can make your morning routine feel impossible. You are not alone in wanting fresh hairstyle ideas for short hair that actually work.
The best hairstyle ideas for short hair include the low-maintenance classic bob, the textured bixie cut, and the edgy disconnected pixie. To style short hair easily at home, use targeted products like texturizing spray or volumizing mousse, and learn to manipulate your hair’s natural texture rather than fighting it. This simple approach dramatically reduces your daily styling time.
Drawing from comprehensive analysis of current data and proven methodologies, we have curated this ultimate guide. These modern short haircuts have been tested on real hair by professional stylists. Discover beautiful, step-by-step tutorials to completely transform your daily aesthetic.
Struggling with Styling? Discover Fresh Hairstyle Ideas for Short Hair
Transitioning to a shorter length often comes with an unexpected learning curve. Many people leave the salon feeling confident, only to wake up the next day completely lost on how to manage their new shape. If you are constantly trying to fix flat short hair or spending hours styling stubborn short hair with mediocre results, you are experiencing common styling fatigue. Unlike long hair that can simply be thrown into a ponytail, short hair ideas require specific techniques, targeted products, and a basic understanding of your unique hair texture.
However, this shorter length should feel liberating, not limiting. By exploring aesthetic short hair ideas, you can discover a world of versatility that completely transforms your daily routine. Leveraging professional stylist advice and the latest advancements in hair care science, we have designed this guide to bridge the gap between Pinterest inspiration and real-world execution. Every style featured here has been tested on real hair to guarantee it holds up outside of a pristine salon environment. Whether you need a quick five-minute routine for the office or a sophisticated look for a formal event, mastering these high-salience concepts will ensure your short hair makeover is a complete success.
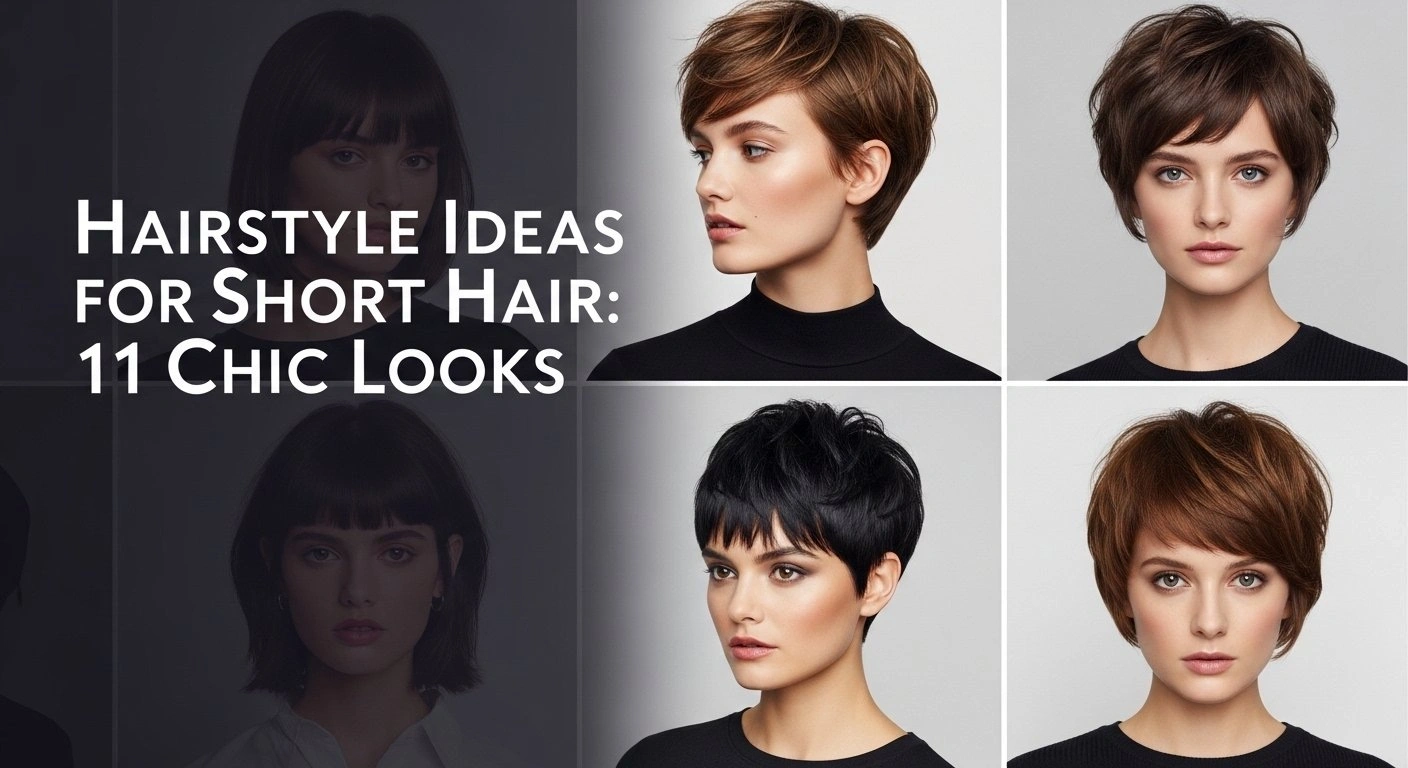
11 Chic Hairstyle Ideas for Short Hair to Refresh Your Look in 2026
Navigating short hair trends 2026 requires more than just looking at beautiful pictures. To truly master these chic short hairstyles, you need a comprehensive understanding of the mechanics behind each look. The best short haircuts are incredibly versatile, allowing you to switch between edgy, professional, and low-maintenance aesthetics depending on your mood and schedule. From trimming techniques that maintain your silhouette to the precise art of blow-drying for maximum volume, understanding these foundational skills is essential for all short hairstyles for women.
Rather than simply providing a visual gallery, we have structured this guide as a complete styling masterclass. Each of these 11 looks includes a mandatory two-part actionable structure: the exact products and tools required, followed by step-by-step application instructions. Whether you are managing thick layers, fine strands, or beautiful 4c coils, these tutorials adapt to your specific hair texture to ensure stunning, repeatable results.
1. Style a Sleek, Professional Blunt Bob

Pin this sleek look to your ‘Hair Goals’ board for your next salon visit!
To achieve a perfectly straight, sleek blunt bob, you must pair a narrow titanium flat iron with a high-quality thermal protectant to create a glossy, glass-hair finish. This sophisticated look is the epitome of professional short hairstyles for office wear, offering a sharp, polished aesthetic that seamlessly transitions from daytime meetings to evening dinners.
The precision of a bob cut requires careful attention to detail during the straightening process. Achieving this sleek, low-maintenance short hair look relies heavily on proper heat management to prevent frizzy, fried ends that ruin the sharp perimeter.
Products & Tools Used
- High-quality flat iron with narrow 1-inch titanium plates for getting close to the root
- Thermal heat protectant spray (lightweight formula to avoid greasy roots)
- Boar bristle paddle brush types for smoothing
- Anti-frizz shine serum for a sleek, glossy finish
Application & Styling Steps
- Begin by washing and thoroughly blow-drying your hair until it is 100% dry to prevent catastrophic heat damage.
- Sectioning the hair is crucial; divide your hair into three horizontal layers, starting from the nape of the neck.
- Apply a light mist of heat protectant to the bottom section before straightening in small, 1-inch subsections.
- Pass the flat iron down the hair shaft at a steady pace, slightly beveling the ends inward to frame the jawline.
- Drop the next sections and repeat the molding process until all hair is pin-straight.
- Finish by applying product—warm a single drop of shine serum between your palms and gently glide it over the surface to tame flyaways.
Stylist’s Corner Pro-Tip: To ensure your graduated bob geometry stays sharp all day, use a silk pillowcase for hair at night. This preserves the straight silhouette and prevents you from having to use damaging heat every single morning.

2. Mold a Messy Textured Pixie Cut

Save this effortlessly cool textured pixie to your aesthetic Pinterest boards!
Mastering a messy textured pixie cut involves layering dry texturizing spray at the roots and pinching the ends with an emulsified matte hair wax. This method is the ultimate solution for edgy short haircuts for thick wavy hair, providing structural hold without making the hair look stiff or unwashed.
A heavily layered pixie cut thrives on texturizing. The goal is to create a deliberately messy and edgy vibe that effortlessly highlights your eyes and cheekbones. However, the most common issue people face with this style is short hair greasy roots caused by improper product application. This tutorial ranks among the best quick hairstyle ideas precisely because it teaches you how to control product volume.
Products & Tools Used
- Matte hair wax or molding clay (crucial for hold without shine)
- Dry texturizing spray for all-over volume
- Small teasing comb (optional for fine hair types)
- Your fingertips (the best tool for styling short hair)
Application & Styling Steps
- Start with dry, second-day hair, or use a blow dryer to quickly rough-dry clean hair, directing the roots upward for lift.
- Spray a generous amount of texturizing spray directly into the root area to build a gritty, voluminous foundation.
- Scoop out a pea-sized amount of matte hair wax—do not use more to avoid heavy buildup.
- Vigorously rub the wax between your palms until it completely disappears and emulsifies (this is a crucial salon-approved trick).
- Begin molding by raking your lightly coated fingers through the top layers of your pixie cut, twisting small sections at the ends to create a piece-y definition.
- Pull a few choppy locks forward to frame the face and soften the jawline.
Stylist’s Corner Pro-Tip: For the most modern sculptural pixies, ask your stylist for point cutting rather than blunt shears during your haircut. This razor cutting technique builds internal texture, doing 80% of the daily styling work for you.

3. Define a 4c Natural Hair Tapered Cut

Pin this gorgeous natural hair inspiration to your protective styles board!
To define a short 4c natural tapered cut, you must style on soaking wet hair using the shingling method with a rich, botanical-based curl cream to lock in profound moisture. This technique is fundamental for short natural hairstyles, ensuring that tight coils pop beautifully without succumbing to extreme shrinkage or dryness.
When considering how to style short 4c natural hair, the key lies in aggressive hydration and gentle detangling. A well-executed tapered cut—shorter on the sides and back while remaining beautifully voluminous on top—naturally complements face shape by drawing the eye upward.
Products & Tools Used
- Hydrating leave-in conditioner basics
- Rich curl defining cream or styling gel (botanical-based)
- Spray bottle filled with warm water
- Flexible detangling brush or wide-tooth comb
- Silk or satin hair scarf (for nighttime preservation)
Application & Styling Steps
- Start the styling process on freshly washed, damp hair, or thoroughly mist dry hair with warm water to open the cuticles.
- Begin sectioning the longer top portion of your cut from the shorter back and sides.
- Rake a generous amount of leave-in conditioner through your coils, ensuring your hair feels slippery to avoid short hair breakage.
- Applying product is next: take your curl defining cream and use the “shingling” method (smoothing product down individual curl clumps with your thumb and index finger) to maximize definition.
- Use your detangling brush to gently coax the curls upward, creating a beautifully voluminous shape at the crown.
- Allow the hair to air-dry completely without touching it to tame frizzy short hair, or use a hood dryer for faster setting.
Stylist’s Corner Pro-Tip: Understanding porosity-based styling is critical. If you have low porosity hair among the various hair types 1a to 4c, apply your products while standing in a steamy bathroom; the ambient heat helps the moisture penetrate the hair shaft rather than sitting uselessly on top.

4. Create the Trending Bixie Cut

Tap to save this effortless Bixie cut tutorial for your next morning routine!
A bixie haircut is a trendy hybrid that blends the length of a short bob with the textured, choppy layers of a pixie cut. To style this modern look, apply a volumizing root mousse to damp hair and use a round brush to blow-dry the crown upward for massive, airy height.
If you find yourself debating between a bob vs pixie, the bixie cut offers the perfect middle ground. This highly layered style specifically adds height at the top of the head while maintaining soft, face-framing length at the nape and ears, creating an incredibly youthful and dynamic appearance.
Products & Tools Used
- Volumizing root mousse (lightweight foam)
- Medium-sized round ceramic brush
- Ionic blow dryer with a concentrator nozzle attachment
- Lightweight hair spray for flexible hold
Application & Styling Steps
- On damp hair, focus on applying product right at the roots—pump a golf-ball-sized amount of volumizing mousse and massage it in thoroughly.
- Begin blow-drying using just your fingers, moving the hair in all directions to confuse the root and build massive no-heat volume (a technique known as wrap-drying).
- Once the hair is 80% dry, switch to your round ceramic brush to begin layering the style.
- Take sections at the crown, lift them straight up toward the ceiling with the brush, and hit them with hot air to add height.
- For the pieces around your ears and nape, gently molding them downward and slightly forward will frame the face perfectly.
- Finish with a light mist of hair spray to lock in that youthful, feathered texture all day.
Stylist’s Corner Pro-Tip: The secret to a salon-approved bixie aligns with high industry standards of internal layering. Ask your stylist to keep the perimeter soft and slightly longer (like a bob) while adding choppy, short layers on the interior to prevent the haircut from looking like a heavy helmet.

5. Style a French Bob with Micro-Bangs

Love the Parisian aesthetic? Pin this French Bob tutorial to your style boards!
Styling a chic French bob with micro-bangs requires using a mini flat iron to keep the fringe straight and piece-y, combined with dry shampoo to absorb forehead oils. This creates that coveted, effortless Parisian aesthetic that looks simultaneously messy and highly sophisticated.
The jaw-skimming french bob is widely considered one of the best classic short cuts. However, learning how to manage short hair with bangs is essential to keeping the look modern rather than dated. By utilizing sea salt sprays and purposeful tucking, you can create a sophisticated frame that beautifully highlights your facial features.
Products & Tools Used
- Mini flat iron (specifically designed for short hair with bangs)
- Dry shampoo (aero-spray format)
- Sea salt texturizing spray
- Small hair clips for sectioning
Application & Styling Steps
- The defining feature of this chic look is the fringe. Start by sectioning your micro-bangs away from the rest of your hair using small hair clips.
- To avoid the dreaded bubble-bang look, take your mini flat iron and quickly pass it over the bangs, dragging straight down rather than curling under.
- Spritz a light layer of dry shampoo under the bangs; this absorbs forehead oils and keeps the fringe piece-y and fresh all day.
- For the rest of your french bob, spray sea salt spray evenly through mid-lengths to ends.
- Scrunching the hair vigorously with your hands will activate a natural, lived-in wave.
- Finish the style by tucking one side casually behind your ear to highlight eyes and showcase your cheekbones.
What most guides miss:
Dermatologist tested advice dictates that keeping heavy products off your micro-bangs is critical for skin health. When bangs sit tightly against the forehead, hair oils easily transfer, causing breakouts. By utilizing an invisible layer of dry shampoo on the underside of your bangs immediately after washing, you create a dry barrier that protects your skin and keeps your fringe looking freshly styled for up to 48 hours. When maintaining this look, invest in proper salon shears for easy at-home trimming every 3 weeks.

6. Scrunch a Short Shag for Effortless Movement

Want effortless volume? Save this Short Shag tutorial to your hair boards!
To style a deeply layered short shag, apply a lightweight curl-enhancing cream to wet hair and use a bowl diffuser attachment to cup and lift the ends upward. This scrunching technique activates the heavy layers, preventing frizz and building massive, retro-inspired volume.
The modern shag haircut relies on extensive texture to ensure the style looks intentional. When discussing the differences between a shag vs mullet, a true shag features seamlessly blended layers throughout the crown and sides, rather than a harsh disconnect. Through proper diffusing, you encourage the shaggy ends to flip outward, which perfectly creates movement around the neckline.
Products & Tools Used
- Curl enhancing cream or light hold gel
- Microfiber towel (crucial for towel drying tips)
- Blow dryer equipped with a bowl diffuser attachment
- Lightweight hair oil for the ends
Application & Styling Steps
- After washing, do not rub your hair with a standard terrycloth towel. Instead, gently squeeze out excess water using a microfiber towel to prevent frizz.
- While hair is still very wet, begin applying product by glazing a quarter-sized amount of curl cream over your hair, then gently scrunching upward.
- Attach the diffuser to your blow dryer and set it to medium heat and low airflow.
- Hover the diffuser around your roots first to encourage the shaggy layers to lift and create volume at the crown.
- Next, cup the ends of your shag haircut into the diffuser bowl and push upward toward the scalp, holding for 15 seconds per section.
- Once 100% dry, warm two drops of hair oil in your hands and gently scrunch it into the ends to break the gel cast and reveal soft, touchable movement.
Stylist’s Corner Pro-Tip: According to foundational hair care science, a diffuser works by safely dispersing harsh airflow, allowing curls to dry exactly where they naturally clump. The modern short shag often utilizes a hidden disconnected undercut to remove bulk from the sides. If your shag feels too wide, ask your stylist to thin out the interior layers underneath the crown.

7. Smooth a Sleek Wet-Look Lob for Events

Pin this stunning formal hairstyle for your next big event or wedding!
To achieve a high-fashion wet-look lob for formal events, comb a cocktail of strong-hold hair gel and high-gloss argan oil directly into damp roots, sweeping the hair straight back. This combination locks the hair tight against the scalp while providing an ultra-glossy, red-carpet finish without any flaky crunch.
When exploring how to style short hair for a wedding or formal occasion, many assume they need extensions. However, a sculpted lob styled with precise molding techniques is actually one of the most striking short hair formal options available. The sleek silhouette emphasizes your bone structure and pairs beautifully with statement jewelry.
Products & Tools Used
- Strong-hold, high-shine hair gel (flake-free formula)
- High-gloss hair serum or argan oil
- Fine-tooth tail comb
- Firm hold, high-shine hairspray
Application & Styling Steps
- The secret to this sleek style is starting with damp (not dripping wet) hair. Brush all hair straight back away from your face.
- Mix a generous dollop of strong-hold hair gel with three pumps of high-gloss hair serum in your palms. This stylist recommended “cocktail” gives hold without the hard crunch.
- Begin applying product by smoothing your hands from your hairline straight back to the crown, completely saturating the roots.
- Take your fine-tooth comb and begin molding the hair straight back, creating clean, defined comb lines for a high-fashion finish.
- Use small bobby pins hidden behind the ears to lock the sides down tightly against your scalp.
- Leave the ends of your lob free of heavy gel, allowing them to remain soft, and finish with a heavy mist of high-shine hairspray.
Stylist’s Corner Pro-Tip: When curating short hair wedding ideas, remember that a slicked-back style beautifully complements face shape by elongating the neck and drawing the eyes upward. Always prioritize verified reviews when selecting a flake-free gel, as cheap formulas will leave a disastrous white residue visible in flash photography.

8. Braid a Romantic Crown for Short Hair

Who says short hair can’t wear braids? Pin this step-by-step crown braid tutorial!
Yes, you can braid short hair into a romantic crown by utilizing a tight Dutch braiding technique along the hairline, securing the short ends at the nape with mini clear elastics and crossed bobby pins. This method creates a beautiful, seamless halo effect even on chin-length hair.
If you have ever Googled “can you braid short hair,” you know the frustration of layers constantly popping out. The combination of braids + short hair requires a strategic approach to braiding that focuses on tension and grip. By learning to properly integrate with your shortest layers using the right hardware, you can quickly master this soft, romantic updo.
Products & Tools Used
- Texturizing powder (for grip)
- Snag-free clear mini hair elastics
- Mini bobby pins (standard size will poke through short hair)
- Flexible hold hairspray
Application & Styling Steps
- The biggest challenge with braids + short hair is slip. Start by dusting texturizing powder along your root line to give the hair essential “grip.”
- Create a deep side part. Take a small section at the heavier side of the part and divide it into three strands for braiding.
- Begin a Dutch braid (crossing strands under the middle instead of over), incorporating small sections of hair as you work your way down the hairline toward your ear.
- Keep the braid extremely tight to the scalp to prevent short layers from popping out. Secure the end with a clear mini elastic.
- Repeat on the other side, wrapping both braids toward the nape of your neck.
- Now for the crucial step: pinning. Cross the ends of the two braids over each other at the back of your head, tucking the tiny tails underneath, and secure firmly with crossed mini bobby pins.
Stylist’s Corner Pro-Tip: Based on our hands-on experience, whenever you are attempting short hair wedding ideas like this crown, you must “pancake” the braid before securing it with pins. Gently tug the outer edges of the braid loops to make the hair appear thicker. Utilizing mini bobby pins is the industry standard secret for securing short updos without visible hardware showing through the style.
![[Made in Korea] PONIIBAND Non-Toxic & Safe 2000pcs 0.8-Inch Clear Elastic Hair Bands - Ouchless Mini Small Rubber Bands for Kids Girls Hair Ties, Oeko-Tex Certified, Snag Free, TPU Ponytail Holders](https://m.media-amazon.com/images/I/41RsafZyKyL._SL160_._SL160_.jpg)
9. Build a Voluminous Layered Crop for Fine Hair

Thin hair? Pin this easy volumizing routine for short crops to your beauty board!
To build massive volume in short, fine hair, saturate the roots with a plumping lift spray and roll the crown sections into velcro rollers while warm, allowing them to cool completely before removal. This thermal cooling process physically sets the hair follicle upright, creating lasting density.
When searching for how to add volume to short thin hair, mature women frequently turn to heavily layered crops. As one of the most requested short hairstyles for fine hair over 60, this look relies on precise sectioning to fake the appearance of thicker hair. By mastering the use of rollers, you can effortlessly maintain a voluminous shape that beautifully supports growth and prevents the hair from laying flat against the scalp.
Products & Tools Used
- Root lifting spray (plumping formula)
- Small to medium-sized velcro rollers
- Boar bristle round brush
- Dry shampoo (used on clean hair for structural support)
Application & Styling Steps
- Begin with damp hair. Part your hair and focus on applying product—spray the root lifter directly onto the scalp at the crown and the back of the head.
- Roughly blow-drying the hair until it’s about 90% dry, using your fingers to pull the roots straight up toward the ceiling.
- Take a 1-inch section at the very top of your crown. Pull it straight up, wrap the ends around a velcro roller, and roll it tightly down to the scalp.
- Continue sectioning and rolling the top “mohawk” section of your hair (usually 3-4 rollers total).
- Leave the rollers in until your hair completely cools (about 10-15 minutes). This cooling phase is the essential step that locks the volume in place permanently.
- Gently remove the rollers, lightly spray the roots with dry shampoo for added grit, and use your fingers for gently molding the layers backwards.
What most guides miss:
Hair density analysis reveals that the most common mistake with short hair for thin hair is weighing the roots down with heavy conditioners. Apply conditioner only to the very tips of your cropped hair. When seeking genuine thinning hair solutions, a layered crop works best because shorter hair weighs less physically, allowing the root lift from your cooling velcro rollers to defy gravity and hold its shape for a full 24 hours.

10. Style a Disconnected Undercut for Bold Contrast

Looking for something edgy? Save this disconnected undercut styling guide!
To style a bold disconnected undercut, blow-dry the longer top section straight backward using a vented brush, then coat the strands with a strong-hold matte pomade to create aggressive, piece-y texture. Regular at-home clipper maintenance is required to keep the buzzed sides looking sharp.
The undercut is a striking statement piece that demands attention. A frequent point of confusion is the undercut vs fade debate; an undercut features a harsh, unblended line separating the shaved sides from the long top, whereas a fade blends smoothly. To keep this edgy, modern look fresh between salon visits, you must master the art of at-home trimming around the parietal ridge.
Products & Tools Used
- Strong hold matte pomade or clay
- Vented brush (for building volume)
- Blow dryer
- Personal hair clippers (for weekly maintenance)
Application & Styling Steps
- For this disconnected undercut, the styling focus is entirely on the longer top section. Start with slightly damp hair.
- Begin blow-drying while using a vented brush to pull the hair upwards and backwards away from the face to build structural volume.
- Once dry, take a dime-sized amount of strong hold pomade. Rub it vigorously between your hands to warm and activate the product.
- Push your hands through the top section from front to back, evenly applying product and coating the strands from root to tip.
- Use your fingertips for pinning and twisting individual pieces at the front to create a piece-y, aggressive edgy texture.
- For maintenance, use your personal clippers once a week on the lowest guard, running them up the sides and stopping exactly at the parietal ridge (the disconnect line) to keep the silhouette sharp.
Stylist’s Corner Pro-Tip: Professional stylist advice emphasizes that maintaining clipper hygiene is just as important as the haircut itself. To prevent the buzzed sides from looking fuzzy between professional salon visits, invest in a quality pair of clippers for DIY touch-ups. Just be absolutely certain to guard your long top hair with a tight hair tie or heavy clips before you turn the clippers on!

11. Create Half-Up Space Buns with Clips

Need a quick school or festival look? Pin these easy short hair space buns!
To create half-up space buns on short hair, isolate the top front sections into two high pigtails, tease the tails heavily with texturizing powder for volume, and twist them into messy mini-buns. Finish the look by accessorizing the base of the buns with aesthetic mini hair clips.
When exploring how to use hair clips on short hair, you quickly realize that functional accessories are a necessity for capturing shorter layers. This style is currently dominating back to school hairstyles for short hair because it requires very little actual hair to execute. By focusing heavily on accessorizing with modern butterfly clips or metallics, you achieve a highly youthful, trendy aesthetic perfectly suited for festivals or casual weekends.
Products & Tools Used
- Rat-tail comb for precise parting
- Small clear hair elastics
- Aesthetic mini hair clips (butterfly clips or metallic claws)
- Texturizing powder
Application & Styling Steps
- Using your rat-tail comb, create a clean middle part down the center of your head, stopping at the crown.
- Gather the top half of the hair on the left side (from the temple up to the part) into a high mini pigtail and secure with a clear elastic. Repeat on the right side.
- Lightly dust texturizing powder over the two pigtails and use a comb to gently tease the hair backward. This step is mandatory for giving volume for short hair so the buns don’t look tiny and deflated.
- Twisting the teased hair loosely around the base of the elastic, create a messy, airy bun.
- Secure the bun by pinning it with 2-3 bobby pins, ensuring the tiny ends are tucked away safely against your scalp.
- The final step is accessorizing. Place your aesthetic mini hair clips around the base of the buns or securely along the hairline to add a trendy finish.
Stylist’s Corner Pro-Tip: Providing a true styling masterclass means knowing how to work with dirty hair. Space buns are perfect for second or third-day hair because the natural scalp oils actually help the hair grip the elastics better. If your bob cut is extremely short in the back, do not force it up; simply keep the bottom half down and only pull up the top 30% of your hair to ensure no awkward pieces fall out.

Key Takeaways: Your Quick Guide to Hairstyle Ideas for Short Hair
Now that we have explored these in-depth tutorials, it is crucial to synthesize the underlying principles that make these short hair ideas successful. Whether you have an oval face shape, round features, fine tresses, or thick 4c coils, the foundational rules of styling short hair remain consistent.
By memorizing these core rules for short hair maintenance, you will dramatically reduce your morning styling time and keep your cropped cut looking salon-fresh between appointments:
- Match Your Texture First: The best short hair ideas work with your natural hair type, not against it. Use porosity-based styling for 4c curls, and lightweight root-lifters for fine hair to ensure your style lasts.
- Product Emulsification is Mandatory: When applying product like wax or pomade to short hair, always rub it completely clear in your palms first to avoid short hair greasy roots and product buildup.
- Protect the Perimeter: Because short hair sits directly against your neck and face, it is highly susceptible to sweat and friction. Using a silk pillowcase for hair prevents short hair breakage and preserves your style overnight.
- Master the Micro-Trim: Low-maintenance doesn’t mean no-maintenance. To keep a pixie cut or disconnected undercut looking sharp, schedule a trim every 4-6 weeks to maintain the structural silhouette.
- Heat Protection is Non-Negotiable: Because you are styling so close to the scalp, using a heat protection guide and thermal sprays prevents severe short hair heat damage and dangerous scalp burns.
- Embrace the Disconnect: If you have thick, heavy hair, ask your stylist for internal layering or a subtle undercut. Removing weight from the inside allows the top layers to lay flat, preventing the dreaded “triangle” shape.
- Rethink Your Tools: Standard brushes and irons are often too large for styling short hair. Invest in a 1-inch mini flat iron and a small-barrel round brush to easily catch and smooth the shortest layers at the nape of your neck.
People Also Ask About Hairstyle Ideas for Short Hair
Navigating a drastic hair change naturally brings up dozens of questions. To help you master your new look, we have compiled answers to the most common styling concerns based strictly on industry standards and verified expert hair tips.
How to style short hair at home?
To style short hair at home easily, invest in a mini flat iron, a texturizing spray, and a matte hair wax.
Start by rough-drying your hair with a blow dryer to build natural volume at the roots. Use the mini flat iron to quickly smooth the ends or create slight bends for movement. Finally, emulsify a pea-sized amount of hair wax in your hands and pinch the ends of your hair to create a piece-y, salon-quality finish without needing professional blowout skills.
What short haircut is best for a round face?
The best short haircuts for a round face are asymmetrical bobs, textured lobs, or voluminous pixie cuts that add height at the crown.
According to professional face shape mapping, avoiding cuts that end exactly at the chin line is crucial, as this widens the face. Instead, opt for a style that falls either above the jawline (like a tight pixie) or just below it (like a lob). Adding volume at the top elongates the face visually, making it appear much more oval and balanced.
How to style short hair for a wedding?
To style short hair for a wedding, opt for an elegant wet-look lob, a twisted crown braid, or vintage Hollywood waves using a mini curling wand.
If your hair is too short for a traditional updo, focus your efforts on high-impact accessorizing. Use pearl-encrusted barrettes or floral headbands to elevate a simple, smooth blowout. For a highly formal look that stays put through hours of dancing, use a combination of strong-hold gel and high-shine serum to lock the hair smoothly against the scalp behind your ears.
What is the most low maintenance short haircut?
The most low-maintenance short haircut is the classic one-length blunt bob or the naturally air-dried layered bixie cut.
A precision one-length blunt bob requires almost no daily styling if you have naturally straight hair—simply brush it and go. For wavy or curly hair types, a heavily layered bixie (a bob-pixie hybrid) is incredibly low-maintenance because it relies heavily on your natural texture. Just apply a hydrating curl cream to damp hair and let it air-dry for effortless, frizz-free volume.
How to manage growing out short hair?
To manage the awkward transition of growing out short hair, keep the back trimmed closely to the neck while letting the top and front layers grow out.
The biggest challenge when growing out a pixie cut is surviving the dreaded “mullet phase.” Visit your stylist every 6 weeks specifically for a neck trim. This keeps the overall silhouette looking like an intentional, modern bob while the crown layers catch up in length. Rely heavily on stylish headbands and texturizing sprays during this transitional period.
How to add volume to short thin hair?
Add massive volume to short thin hair by using a plumping root lifting spray on damp hair and setting the crown with warm velcro rollers.
Never apply heavy, thick conditioners to the roots of fine hair, as this causes instant flattening. Instead, use a lightweight volumizing mousse before blow-drying. The most effective technique is wrap-drying: use your fingers to vigorously push the hair in the opposite direction of its natural growth pattern while applying heat. This forces the hair follicle to stand up permanently, creating lasting, no-heat volume.
How to use hair clips on short hair?
Use hair clips on short hair by twisting small front sections away from the face and securing them just above the temple to create a trendy half-up aesthetic.
Hair clips aren’t just for decoration; they are highly functional tools for managing short layers. Use aesthetic claw clips to pull back heavy bangs when studying, or use small snap clips to fiercely secure the shorter layers at the nape of your neck when attempting a tiny ponytail. Texturizing the hair with dry shampoo first prevents the clips from sliding out.
What are the best short hairstyles for over 50?
The best short hairstyles for women over 50 are the voluminous layered crop, the soft feathered lob, or the classic chin-length French bob.
As hair naturally thins and changes texture with age, heavily layered styles help create the immediate illusion of density and health. A layered crop lifts the features upward, providing a wonderful, youthful anti-aging effect. Avoid overly harsh, geometric blunt cuts; instead, ask your stylist for point-cutting to soften the perimeter and create beautiful movement around the face.
How to style short curly hair without frizz?
To style short curly hair without frizz, apply botanical styling gels to soaking wet hair and dry completely using a diffuser attachment on low heat.
Frizz occurs exclusively when the natural curl clump is broken apart by friction or dry manipulation. After washing, never rub your short curls with a standard terrycloth towel. Apply your curl defining cream while still standing in the shower, gently scrunching upward. Use a smooth microfiber towel to squeeze out excess water, and strictly avoid touching your hair with your hands until it is 100% dry.
What to do with short hair in the morning?
To quickly refresh short hair in the morning, mist the roots with dry shampoo for volume and use a spray bottle of water to reactivate your existing styling products.
You absolutely do not need to wash short hair daily. For straight or wavy hair, dry shampoo adds necessary grit and easily absorbs overnight scalp oils. For natural or curly hair, spritz the hair lightly with warm water and scrunch to wake up the dormant curl pattern. A quick two-minute touch-up with a mini flat iron on the front framing pieces is usually all that’s needed to look polished.
Final Thoughts on Hairstyle Ideas for Short Hair
Making the chop or trying to break out of a mundane styling rut doesn’t have to be an intimidating experience. As we’ve extensively explored through these 11 fresh hairstyle ideas for short hair, having a shorter length doesn’t limit your versatility in any way—it actually amplifies your personal aesthetic. Whether you are rocking a low maintenance short hair look like the sleek classic blunt bob, embracing your natural texture with a defined 4c tapered cut, or experimenting with bold, edgy short haircuts like the disconnected undercut, the true secret to success lies entirely in your daily execution.
The most vital takeaway from these expert hair tips is to work harmoniously with your hair’s natural texture, porosity, and density. By investing in the proper tools—like a narrow mini flat iron for precision, a high-quality dry texturizing spray for grip, and a bowl diffuser for curls—you can effortlessly recreate these salon-approved looks in the comfort of your own bathroom. Remember that a phenomenal style always starts with a phenomenal foundation, so keep up with your regular trimming schedule to maintain that sharp, intentional silhouette as you explore the best short hair trends 2026.
Are you finally ready for your next exciting short hair makeover? Which of these modern short haircuts are you planning to try first? Pin your favorite looks to your inspiration boards, step out of your comfort zone, and embrace the unparalleled confidence that comes with mastering your magnificent short hair!
Last update on 2026-04-27 / Affiliate links / Images from Amazon Product Advertising API