Tired of trying volumizing tutorials only to find the model has more hair than you have on your whole head? Finding the right hairstyle ideas for thin hair can feel like a frustrating, endless search for a solution to limp, flat strands that refuse to cooperate.
The best hairstyles for thin hair create the illusion of volume and density through strategic cuts and styling. Cuts like blunt bobs, texturized lobs, and choppy pixies build structure, while techniques like deep side parts and soft waves add movement and lift, making hair appear much fuller.
Drawing from stylist-recommended principles and tested techniques, this guide moves beyond empty inspiration. We’ll first clarify the crucial difference between thin and fine hair to help you understand your unique type. Then, you’ll discover 9 genius, achievable styles complete with step-by-step instructions to finally get that thicker, fuller look you’ve been searching for.
What Are the Best Hairstyle Ideas for Thin Hair That Actually Work?
Finding the perfect style starts with understanding what you’re working with. People often use “thin” and “fine” interchangeably, but they mean different things. Fine hair refers to the small diameter of each individual strand. Thin hair refers to low density, meaning you have fewer hair follicles on your scalp. You can have fine, thick hair (many small strands) or coarse, thin hair (fewer large strands). The most common challenge is having hair that is both fine and thin. The goal of a great hairstyle isn’t to magically grow more hair, but to create a clever illusion of body and volume. These styles use strong lines, texture, and strategic lifting to make your hair appear significantly fuller than it is.
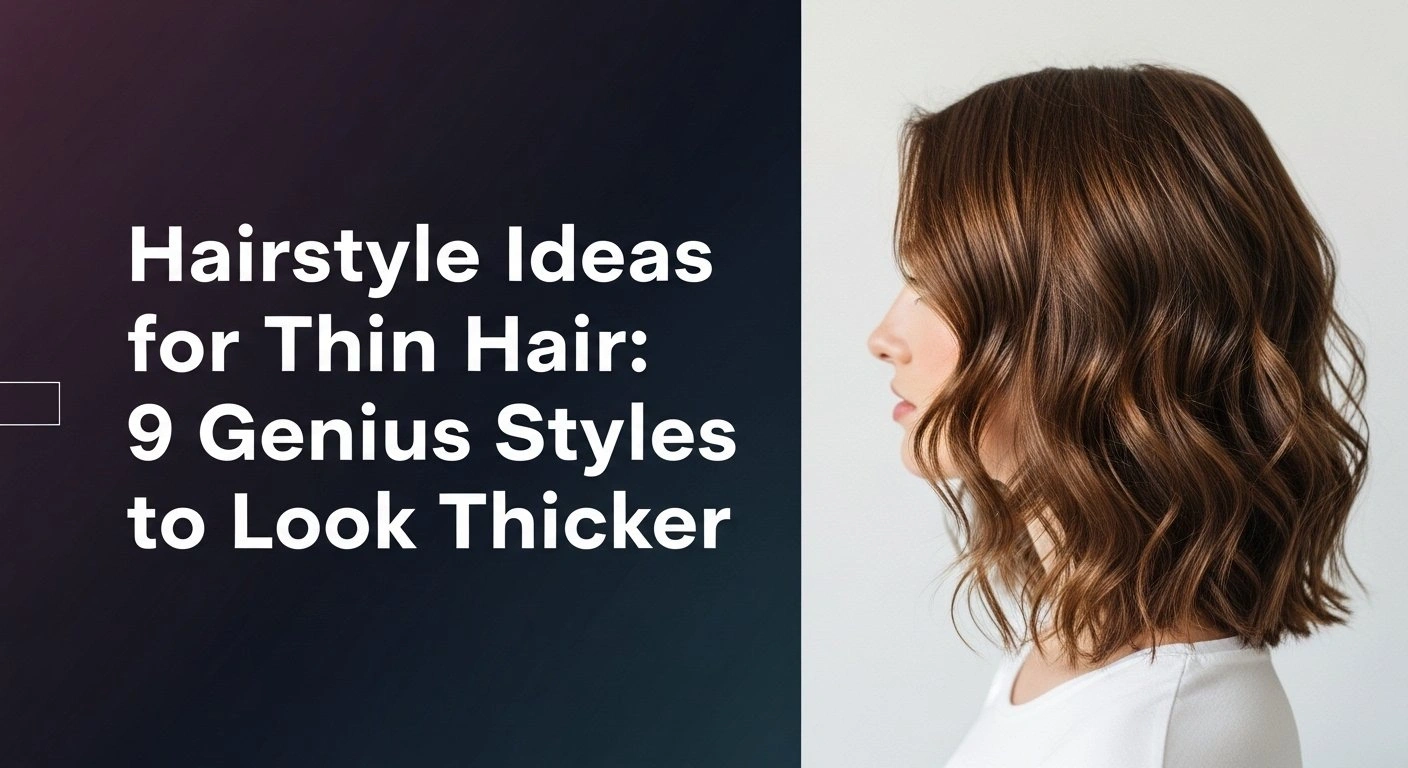
9 Genius Hairstyle Ideas for Thin Hair to Look Thicker
Here are nine stylist-approved haircuts and styling blueprints designed specifically to combat a flat crown, stringy ends, and a lack of movement. Each idea is a complete plan, explaining why it works, the products you’ll need, and exactly how to achieve the look at home.
1. Master the Classic Blunt Bob to Create a Strong Foundation

Pin this chic solution for instantly fuller looking hair!
A blunt bob is arguably the number one haircut for volume. By cutting all the hair to a single length, it creates a solid, heavy-looking perimeter. This prevents the ends from appearing wispy or stringy, which is a common issue with longer, thin hair. The sharp, clean line of the cut tricks the eye into seeing a thicker, dense-looking base, making it a powerful foundation for a fuller style.
Products & Tools Used
- Sulfate-free volumizing shampoo and weightless conditioner
- Heat protectant spray
- A flat iron with adjustable temperature settings
- Lightweight smoothing serum or shine spray
Application/Styling Steps
- Apply a golf-ball-sized amount of volumizing mousse to damp hair, focusing on the roots.
- Blow-dry your hair using a paddle brush, directing the nozzle down the hair shaft for a smooth, sleek finish.
- Once dry, section your hair. Take a 1-inch section and lightly run the flat iron over it, slightly beveling the ends inward to avoid a stiff look.
- Finish with a single pump of smoothing serum, warmed in your hands and applied only to the mid-lengths and ends to tame flyaways.
Pro-Tip: Ask your stylist for a blunt bob with subtle point cutting on the very ends. This technique, shared by many award-winning stylists, removes minimal weight but adds a soft, piecey texture that prevents the cut from looking too heavy or helmet-like.

2. Implement a Deep Side Part to Instantly Lift Your Roots

Save this 5-second trick to beat a flat crown!
This is the easiest and fastest of all thin hair hacks. A deep side part forces the hair at your roots to stand up and go against its natural growth pattern. This simple act creates lift instantly, giving you immediate volume right at the crown where thin hair tends to lie flat. It’s a no-cost, no-cut way to completely change your look and add volume in seconds.
Products & Tools Used
- A pintail comb (for a sharp line)
- Root lifter spray or volumizing dry shampoo
- Medium-hold hairspray
Application/Styling Steps
- Start with dry hair. If it’s day-two hair, even better!
- Using the tail of your pintail comb, create a new part line about two inches deeper than your usual part, on the opposite side.
- Flip the larger section of hair over. You should see immediate lift.
- To enhance it, lift the hair at the new part line and spray a small amount of root lifter or dry shampoo directly at the roots.
- Massage the product in with your fingertips to activate it and create more texture and hold. Finish with a light mist of hairspray.
Pro-Tip: To make a deep side part last, try “part training.” Sleep with your hair loosely clipped into the new part. Over time, your hair will naturally start to have more volume in that direction. This also helps disguise thinning if your part line feels sparse.

3. Embrace a Texturized Lob with Soft Waves for Movement

Pin this to your “Dream Hair” board for the perfect lob + waves inspo!
A texturized lob (long bob) is a fantastic medium-length option. The length is ideal because it’s short enough to not be weighed down, but long enough for versatile styling. Adding soft waves is the key to making this cut work for thin hair. The bends and curves of the waves create movement and dimension, breaking up the surface and preventing flatness. The key is to aim for imperfect, undone waves, not perfect ringlets, which can look dated and make hair appear thinner.
Products & Tools Used
- Sea salt spray or texturizing spray
- A 1-inch or 1.25-inch curling wand or iron
- Light hold hairspray
- A wide-tooth comb
Application/Styling Steps
- Start with dry hair. Lightly mist a sea salt spray all over to give your strands some grit and hold.
- Section your hair into a top and bottom half. Working with 1-2 inch pieces from the bottom section, wrap the hair around the curling wand, leaving the last 1-2 inches of the ends out. This creates a modern, undone look.
- Alternate the direction you wrap the hair (one piece towards your face, the next away) for a more natural, less uniform texture.
- Repeat on the top section. Don’t aim for perfection; some pieces can be wavier than others.
- Let the curls cool completely, then gently rake through them with your fingers or a wide-tooth comb to break them up into soft waves. Finish with a light hairspray.
Pro-Tip: For the ultimate illusion of thickness, ask your stylist for a lob with internal layering. This advanced technique involves cutting shorter, invisible layers underneath the longer top sections. It removes bulk from the interior, allowing the exterior hair to have more bounce and movement, a secret used by many certified hair experts.

4. Style a Choppy Pixie Cut to Maximize Volume

Add this to your “Short Hair Don’t Care” board! Proof that short hair can have major volume.
Many people with thin hair fear that short thin hairstyles will expose their scalp, but a well-executed choppy pixie cut does the opposite. By removing all the dead weight that pulls hair down, a pixie + cut promotes fullness. The choppy, layered texture on top creates tons of lift and visual interest, drawing the eye upward. It’s one of the best thin hair solutions for making hair appear instantly healthier and thicker.
Products & Tools Used
- Texturizing or styling paste/pomade
- A blow dryer
- Your fingers (your best tool for this style!)
Application/Styling Steps
- Start with towel-dried hair. Work a pea-sized amount of styling paste between your palms until it’s warm and pliable.
- Apply the product throughout your hair, starting at the back and moving forward. Use your fingers to lift the hair at the roots as you go.
- Blow-dry your hair using just your fingers, directing the hair in different directions to create multi-directional lift and a “piecey” texture.
- Once dry, take another tiny amount of paste and use your fingertips to define individual pieces, especially around the face and at the crown, creating that choppy, wispy look.
Pro-Tip: The key to a great pixie + cut on fine hair is a taper at the nape of the neck and around the ears. This keeps the perimeter neat and clean, drawing the eye upward to the volume and texture you’ve created on top.

5. Add Strategic Face-Framing Layers for Softness and Body

Pin this if you’re wondering “can you have layers with thin hair?” The answer is yes!
The debate over layers for thin hair is intense. The wrong kind—short, choppy layers throughout—can remove too much weight and make ends look sparse. The right kind—long, soft face framing layers—can be transformative. They add dimension and a gentle movement around the face without sacrificing the crucial density of your overall length. They soften a blunt cut and can be styled to create a bouncy, full-bodied look.
Products & Tools Used
- A good quality round brush (boar bristle and nylon mix is great for grip and shine)
- Blow dryer with a concentrator nozzle
- Lightweight leave-in conditioner
Application/Styling Steps
- On damp hair, spray a light leave-in conditioner from mid-lengths to ends to protect and smooth.
- Roughly blow-dry your hair until it’s about 80% dry.
- Section off the top of your hair. Working with the bottom sections first, place the round brush underneath a 2-inch section of hair at the root.
- Aim the blow dryer’s nozzle down onto the hair covering the brush. Pull the brush through to the ends, rolling them under slightly.
- When you get to your face framing layers, roll the brush away from your face to create a soft, bouncy flick that opens up your features.
Pro-Tip: The great debate: Blunt Cut vs. Layers for thin hair. A blunt cut creates maximum density at the ends. Layers create movement and volume. The stylist recommended solution? A hybrid. Keep the overall perimeter blunt, but ask for very long, soft face framing layers or “invisible layers” to add shape around your face without thinning out your ends.

6. Rock a Modern Shag with Curtain Bangs for Effortless Texture

Save this for when you’re feeling bold! The modern shag + curtain bang combo is a winner.
A modern shaggy haircut for thin hair is all about strategic layers that build volume on top and around the face. Unlike shags of the past that could look stringy, today’s version focuses on texture and movement. Pairing it with curtain bangs is a genius move, as they help to frame eyes and can disguise thinning around the hairline. This style is meant to look lived-in and effortless, making it a great low-maintenance option.
Products & Tools Used
- A high-quality texture spray (this is the key product!)
- A blow dryer with a diffuser attachment
- Air-dry cream (optional)
Application/Styling Steps
- Start with damp hair. Scrunch a small amount of air-dry cream or mousse into your hair.
- Flip your head upside down and use the diffuser on low speed and medium heat. Gently cup sections of your hair in the diffuser bowl and hold for 10-15 seconds to encourage natural waves and texture.
- When your hair is about 90% dry, flip back up.
- Generously spray a texture spray all over, focusing on the mid-lengths. Use your hands to scrunch and tousle the hair to create that perfectly messy, rock-and-roll vibe. Use your fingers to part the curtain bangs.
Pro-Tip: The secret to a successful shag on fine hair is asking your stylist for lowlights for depth. Adding slightly darker pieces underneath the top layers creates a shadow effect, tricking the eye into seeing more density and dimension.

7. Perfect a Voluminous High Ponytail to Hide Flat Roots

Your new go-to updo! Pin this easy updo for thin hair now.
A limp, sad-looking ponytail is a common frustration for those with thin hair. The secret to a thick, voluminous high ponytail lies in a simple trick: use two ponytails instead of one. This is one of the best easy updos for thin hair and is often used for wedding hairstyles for thin shoulder length hair. It instantly doubles the apparent volume of your ponytail and adds lift at the crown.
Products & Tools Used
- A teasing comb or brush
- Texturizing spray or dry shampoo
- Two hair elastics (one regular, one small clear elastic)
Application/Styling Steps
- Separate your hair into two horizontal sections: a top section (from the ears up) and a bottom section. Clip the top section out of the way.
- Gather the bottom section into a small ponytail in the middle of the back of your head and secure with a clear elastic.
- Unclip the top section. Gently backcomb the hair at the crown by taking a small section, holding it straight up, and pushing the teasing comb down towards the scalp 2-3 times.
- Smooth the top layer of hair over the teased section and gather all of the top section hair into a second ponytail, directly on top of the first one. Secure with your regular hair elastic.
- The hair from the top ponytail will cascade over the bottom one, hiding it and creating the illusion of a single, super-thick and long ponytail. Spray with texturizing spray for more body.
Pro-Tip: Before you start, spray dry shampoo or texturizing spray all over your dry hair. This gives the strands grip and makes it much easier to tease and build volume that lasts all day.

8. Try an Asymmetrical Cut to Create Visual Interest

Pin this edgy yet elegant look that masterfully plays with proportions!
An asymmetrical cut is a powerful tool because it creates a strong, dynamic line that draws the eye and distracts from a lack of overall density. By making one side longer than the other, the style automatically balances proportions and adds a high-fashion edge. This type of cut is especially effective when paired with a deep side part, which throws the majority of the hair’s weight to the longer side, making it look incredibly full.
Products & Tools Used
- Shine spray or anti-frizz serum
- A flat iron
- A paddle brush
Application/Styling Steps
- Blow-dry your hair straight using a paddle brush for a sleek base. Be sure to use a heat protectant.
- Create a deep side part, with the part on the side that will be shorter. This allows the bulk of the hair to fall over to the longer side.
- Straighten your hair in sections with a flat iron for a sharp, polished look that emphasizes the clean lines of the cut.
- Finish with a light mist of shine spray to catch the light and make the hair look healthy and vibrant. Avoid heavy products that will weigh it down.
Pro-Tip: The key to a successful asymmetrical cut is maintaining the health of the ends on the longer side. They become the focal point, so regular micro-trims (dustings) and avoiding excessive heat will keep the line sharp and prevent split ends.

9. Create Polished Waves to Add Luxurious Body

Save this for your next special occasion! The ultimate guide to glamorous waves for thin fine hair.
Unlike messy beach waves, polished, uniform soft waves create a luxurious body that looks intentional and expensive. The key to making this style work for thin fine hair—which often struggles to hold a curl due to poor hair elasticity—is the cooling and setting technique. Creating a structured ‘S’ wave pattern adds dimension and lifts the hair away from itself, giving a full-bodied appearance that lasts.
Products & Tools Used
- A 1.5-inch or 2-inch barrel curling iron
- Setting clips (optional, but highly recommended)
- Strong-hold, flexible hairspray
- A paddle brush
Application/Styling Steps
- On clean, dry hair, section your hair. Take a 2-inch wide section and spray it lightly with hairspray.
- Curl the section around the barrel of the curling iron, all in the same direction. Hold for 5-7 seconds.
- Here is the most important step: As you release the curl, catch it in your palm and either clip it to your head with a setting clip or hold it until it’s completely cool to the touch. This is what locks the shape into fine hair.
- Repeat for your entire head, curling every section in the same direction.
- Once all curls are completely cool, remove the clips. Gently brush through the curls with a paddle brush. They will transform from tight curls into a single, cohesive, polished wave. Finish with a final mist of hairspray.
Pro-Tip: To make the waves look even more dimensional, consider asking your colorist for a reverse balayage or adding a shadow root. This coloring technique adds depth at the root, which makes the lighter, wavy ends appear fuller by comparison.

Key Takeaways
- Blunt Ends Build Weight: The fastest way to make hair look thicker is a blunt cut like a bob or lob. It concentrates hair density at the ends, creating a strong, solid line.
-
Texture is Your Best Friend: Whether from soft waves, a choppy pixie cut, or a modern shag, adding texture breaks up flat surfaces and creates the illusion of thickness and movement.
-
Lift Starts at the Root: A deep side part is a zero-cost way to get instant volume. For lasting lift, invest in a good root lifter spray or learn to tease the crown for updos.
-
Layers Must Be Strategic: Avoid short, choppy layers all over. Opt for long, face framing layers or ask for advanced techniques like internal layering to add shape without sacrificing precious density.
-
Products are Tools, Not Miracles: Volumizing mousse, sea salt spray, and dry shampoo are essential. They provide the grit and hold needed to build and maintain voluminous styles on silky strands.
-
Heat Styling Requires a “Cool Down”: For fine hair to hold a curl or wave, you MUST let the heated section cool down completely before brushing or letting it drop. This sets the bond and ensures your style lasts.
FAQs About hairstyle ideas for thin hair
What is the best haircut for thin hair?
The best haircuts for thin hair are generally shorter, blunt styles that create a strong perimeter, like a blunt bob or a texturized lob. These cuts make the ends of the hair appear thicker. For those preferring very short hair, a choppy pixie cut can also create significant volume on top.
Does short hair make thin hair look thicker?
Yes, in most cases, shorter hair makes thin hair look much thicker. Long hair is heavy and can weigh down fine strands, making them look flat and stringy. A shorter cut removes this weight, allowing for more volume, bounce, and the illusion of density.
Is a bob good for fine hair?
A bob is one of the best hairstyles for fine hair, especially a blunt or graduated bob. The single-length cut creates the thickest possible baseline. Paired with a deep side part and some light texturizing, it’s a classic way to add volume and style to fine or thin hair.
Can you have layers with thin hair?
Yes, but they must be strategic. Avoid short, shaggy layers all over, as this can make ends look sparse. Instead, opt for long, “invisible” layers that add movement without removing weight, or stick to soft, face framing layers to add shape around your features.
How can I hide my scalp with thin hair?
A zigzag part, a deep side part, or using a root concealer powder or spray are the most effective ways to hide a visible scalp. Volumizing dry shampoo sprayed at the roots can also lift the hair, providing more coverage. For updos, teasing the crown before pulling hair back helps immensely.
What is the difference between thin hair and fine hair?
Fine hair refers to the diameter of each individual strand, while thin hair refers to the density, or the number of strands on your head. You can have fine hair that is dense (many small strands), or coarse hair that is thin (fewer large strands). Many people have both fine and thin hair.
Which hair color makes hair look thicker?
Adding dimensional color with highlights and lowlights is more effective than a single solid color. The contrast between light and dark shades creates shadows and depth, tricking the eye into seeing more volume. A “shadow root” (darker roots, lighter ends) can also give the illusion of density at the scalp.
How do I add volume to my flat hair?
Volume starts in the shower with a volumizing shampoo, followed by mousse at the roots when damp. Blow-drying your hair upside down is a classic trick. A deep side part provides instant lift, and finishing with a texturizing spray or dry shampoo will give you lasting body.
Should thin hair be cut blunt or layered?
It depends on the goal. A blunt cut provides maximum thickness at the ends. Layers provide movement and volume. The best approach, recommended by many stylists, is often a hybrid: a mostly blunt cut with a few long, strategic layers to frame the face.
What products are essential for styling thin hair?
The top three essential products are a volumizing mousse (for damp hair), a texturizing spray (for dry hair), and a root-lifting dry shampoo. These three products provide lift, grit, and hold, which are the foundations for making any style on thin hair last.
Final Thoughts on Styling Thin Hair
Finding the right hairstyle ideas for thin hair is less about hiding a flaw and more about embracing clever geometry and texture. The power lies not in changing your hair, but in changing your approach. By understanding the principles of building weight with blunt lines, creating movement with texture, and lifting the roots, you can work with your hair type, not against it.
A great haircut is the foundation, and the right styling products are the tools to bring it to life. Armed with these techniques, you have a full arsenal of thin hair solutions to create a look that feels full, healthy, and authentically you.
Which of these styles are you most excited to try? Let us know your experience in the comments below
Last update on 2026-04-27 / Affiliate links / Images from Amazon Product Advertising API