Do you remember the thrill of twisting distinct spikes or snapping vibrant clips into place? The nostalgia hits hard, but nailing authentic hairstyles y2k today can feel surprisingly tricky without the right technique. You want that perfect blend of retro flair and modern polish, not a messy disaster.
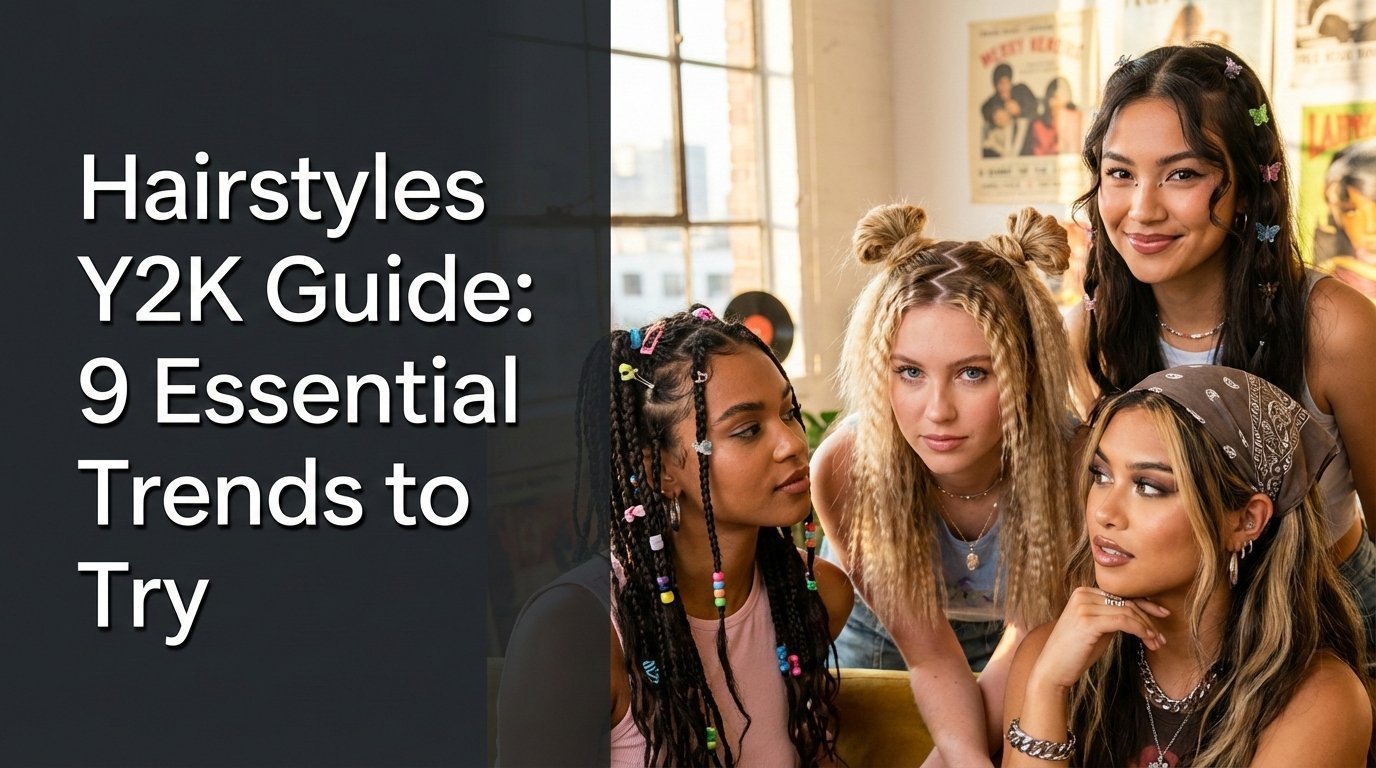
Y2K hairstyles: Iconic hair trends from the late 1990s and early 2000s characterized by playful features like spiky buns, distinct crimped hair, and an abundance of butterfly clips. These looks combine nostalgic pop culture influence with bold textures, often requiring specific products like strong-hold gel to achieve their signature futuristic aesthetic.
Drawing from historical fashion analysis and professional y2k hair techniques, we have deconstructed the essential elements of this era for you. In this post, you will discover exactly how to master nine iconic looks with step-by-step precision. Get ready to unleash your inner pop star and transform your look.
Master Hairstyles Y2K: 9 Essential Trends to Try in 2026
Y2K hairstyles represent more than just a fleeting moment in fashion history; they are a vibrant celebration of the new millennium’s optimism and the explosion of pop culture. Defined by specific visual and structural elements, these styles often feature a mix of sleek finishes, defined textures, and playful asymmetry. The resurgence of early 2000s hairstyles highlights the cyclical nature of hair trends, where the bold experimentation of the past meets the refined techniques of today. Whether you are looking for y2k hair inspiration for a themed party or everyday wear, understanding the core aesthetic is crucial.
This revival isn’t just about copying old photos; it is about adapting the spirit of noughties hair for the modern era. Y2K hairstyles influenced by pop stars like Britney Spears and Christina Aguilera set the standard, but today’s tools allow for healthier, longer-lasting results. Authentic Y2K hair trends rely heavily on the interplay between hair and accessories. It is almost impossible to separate the hairstyle from the hair accessories used to create it; butterfly clips complete y2k look just as much as the cut itself. As we dive into these trends, remember that y2k hair requires specific products to hold those defying-gravity spikes and intricate parts in place.
Unleash Your Inner Pop Star: 9 Essential Y2K Hairstyles to Recreate Today
Ready to transform your look? To create y2k hairstyles that turn heads, you need to move beyond simple observation and get hands-on with the right techniques. This section is your ultimate y2k hair tutorial, designed to bridge the gap between inspiration and reality. We will explore how to style y2k hair using modern tools that protect your strands while delivering that authentic retro vibe. Whether you want to do y2k hairstyles that are subtle or fully committed to the aesthetic, the secret lies in the details.
To achieve y2k look, you must assemble your toolkit. Y2K hair trends are famous for their texture and hold, meaning gel creates spiky y2k hair and crimping irons achieve y2k texture better than any substitute. We will guide you through using hair spray, flat irons, and essential accessories to recreate early 2000s hair. By following these steps, you will master everything from spiky hair to face-framing pieces, ensuring you have the skills to execute these looks flawlessly. Let’s dive into the specifics.
1. Create Spiky Buns: Master the Iconic Y2K Updo

Pin this edgy Y2K updo to your ‘Hair Inspo’ board!
Spiky buns: A quintessential y2k updo where hair is twisted into tight buns with the ends left loose and stiffened to create distinct, architectural spikes. To achieve spiky buns, you simply twist high ponytails into knots, leaving the ends free, and use strong gel to sculpt those ends into sharp points.
This look defines the era’s obsession with futuristic, edgy silhouettes. The key to a successful spiky buns tutorial is ensuring the spikes don’t flop over; gel creates spiky y2k hair by providing the necessary structural integrity.
Products & Tools Used
- Extra-hold hair gel specifically designed for styling and definition
- Fine-tooth comb for precise parting
- Hair ties (small, clear elastic bands recommended)
- Bobby pins or mini claw clips for extra security
- Strong-hold finishing hairspray to lock in style
Application/Styling Steps
- Start with clean, dry hair, applying a small amount of heat protectant if you plan to use any heat.
- Part your hair: Use a fine-tooth comb to create a clean, central part, extending it down the back of your head to create two even sections for space buns tutorial accuracy.
- Create your base buns: In each section, gather hair into a high ponytail on top of your head, securing tightly with a hair tie. The height dictates the final bun placement.
- Apply hair gel: Take a generous amount of extra-hold hair gel and evenly distribute it through one ponytail, ensuring every strand is coated for maximum definition and spike.
- Form the spikes: Begin twisting the gelled ponytail into a tight bun at the base. Before fully securing, pull out small, distinct sections of hair from the bun to create individual “spikes.”
- Secure the style: Once you’ve achieved the desired spiky hair look, use additional bobby pins or mini claw clips around the base of the bun to secure any loose strands and ensure the spikes stand firm.
- Repeat on the other side: Follow steps 4-6 for the second section of hair, aiming for symmetry.
- Finish with hairspray: Mist a generous layer of strong-hold finishing hairspray over both buns to set the style, tame any flyaways, and provide an all-day hold.
Pro-Tip: For extra-defined spiky hair, use a small amount of texturizing paste on each individual spike before applying hairspray. This enhances the architectural structure of the spikes and demonstrates advanced y2k hair artistry.

2. Adorn with Butterfly Clips: Enhance Your Face-Framing Pieces

Save this cute butterfly clip look for your next retro outfit!
Butterfly clip hair: A playful style where small, colorful clips are used to secure sections of hair, particularly around the hairline, to accentuate face-framing pieces. Butterfly clips complete y2k look by adding a splash of color and whimsy that defines the era’s youthful energy.
Knowing how to use butterfly clips isn’t just about clipping them on; it’s about strategic placement. These accessories serve a dual purpose: they keep hair out of your eyes while highlighting those delicate hair tendrils that soften your features.
Products & Tools Used
- Assorted mini butterfly hair clips (various colors and sizes)
- Small elastic bands (optional, for securing tendrils)
- Light-hold hairspray or texturizing spray
- Heat protectant spray (if using a curling iron for tendrils)
- Small curling iron or flat iron (optional, for shaping tendrils)
Application/Styling Steps
- Prepare your hair: Start with your hair styled as desired (straight, wavy, or natural texture). Ensure it’s clean and tangle-free.
- Section face-framing pieces: Using your fingers or a comb, carefully pull out two small sections of hair from around your hairline, one on each side of your face. These are your face-framing tendrils.
- Define tendrils (optional): For more definition, you can use a small curling iron or flat iron to gently curl or wave these tendrils away from your face. Apply heat protectant first.
- Secure tendrils (optional): If your hair is very fine or you want extra security, you can tie a tiny elastic band at the end of each tendril.
- Place butterfly clips: Select your butterfly clips. Position the first clip a few inches back from your hairline, along the side of your head, using it to secure a small section of hair. You can stack multiple clips or place them staggered for a playful effect.
- Symmetry and balance: Aim for a balanced look, placing an equal number of clips on each side, or intentionally create an asymmetrical style if preferred. Experiment with hair clips styles holding back just the tendrils, or larger sections of hair.
- Light hold: Finish with a light mist of hairspray to keep your face-framing pieces in place without stiffness, ensuring your y2k hair accessories stay put.
Pro-Tip: Don’t be afraid to mix and match colors and sizes of mini butterfly hair clips! This is key to capturing the playful, experimental spirit of y2k aesthetic hairstyles and showcasing your advanced y2k hair artistry.

3. Revive Crimped Hair: Embrace the Textured Wave

Pin this nostalgic crimped hair tutorial for a retro twist!
Crimped hair revival: This style involves creating small, uniform zig-zag waves throughout the hair to add significant volume and a distinct visual texture. Crimping iron achieves y2k texture by pressing hair between heated, serrated plates, a technique that instantly screams early 2000s hair.
If you want to know how to crimp hair y2k style, safety is paramount. High heat is required to set the pattern, so y2k hair requires specific products like quality heat protectants to prevent damage while achieving those bold crimped hair looks.
Products & Tools Used
- Crimping iron with adjustable heat settings
- Heat protectant spray
- Hair sectioning clips
- Light-hold hairspray or texturizing spray
- Detangling brush or wide-tooth comb
Application/Styling Steps
- Prepare your hair: Start with clean, completely dry hair. Apply a generous amount of heat protectant spray evenly throughout your hair to shield it from damage.
- Section your hair: Divide your hair into manageable sections using hair clips. Start with the bottom layers, working your way up to the top. Smaller sections yield more defined crimps.
- Adjust crimping iron: Preheat your crimping iron to an appropriate temperature for your hair type (lower for fine, higher for thick).
- Begin crimping: Take a small section of hair (about 1-2 inches wide) and place it between the plates of the crimping iron, close to the root. Clamp down gently for 3-5 seconds.
- Continue crimping: Release the iron and move it down the same section of hair, aligning the top plate with the last crimped wave. Continue clamping down the entire length of the hair strand, ensuring a continuous crimped pattern.
- Repeat for all sections: Continue this process for all remaining sections of your hair, working methodically around your head.
- Cool and set: Once all textured hair is crimped, allow it to cool completely before touching it to help set the waves.
- Finish: Lightly mist with a texturizing spray or a flexible-hold hairspray for added volume and to help the crimped hair last all day. Gently separate crimps with your fingers if you desire more volume.
Pro-Tip: For a subtle, modern take on crimped hair, try crimping only the bottom layers of your hair or alternating sections for a mixed texture effect. This adds a unique dimension without being overwhelming and demonstrates advanced y2k hair artistry.

4. Style Face-Framing Tendrils: Perfect Your Delicate Accents

Pin this elegant face-framing tendrils look to your ‘Everyday Hairstyles’ board!
Face-framing tendrils: Thin strands of hair intentionally left loose from an updo or pulled forward to frame the face, often styled with a subtle curve or wave. Learning how to do face framing tendrils y2k style involves isolating these pieces and treating them as the star of the show, rather than an afterthought.
This technique is essential because y2k hair requires skill in balancing sleekness with softness. Whether you have layered hair or a blunt cut, soft tendrils add a touch of romance and are a staple of y2k hairstyles with bangs or without.
Products & Tools Used
- Small curling iron (e.g., 1/2 inch or 3/4 inch barrel) or mini flat iron
- Heat protectant spray
- Light-hold hairspray or texture spray
- Fine-tooth comb or rat-tail comb for sectioning
- Hair clip (to keep rest of hair out of the way)
Application/Styling Steps
- Prepare your hair: Ensure your hair is clean and dry. Apply heat protectant spray to the areas you’ll be styling.
- Isolate tendrils: Use your comb to carefully pull out two small, thin sections of hair on either side of your face, right at your hairline. These should be approximately 1/4 to 1/2 inch thick face-framing pieces.
- Secure main hair: Pull the rest of your hair back into a ponytail or bun to keep it out of the way.
- Curl tendrils: Take one hair tendril and wrap it around the curling iron (or gently wave with a flat iron) away from your face. Hold for a few seconds, then release. Repeat for the other side.
- Cool and set: Allow the curled tendrils to cool completely. This is crucial for the curl to set and last.
- Gently loosen: Once cool, gently pull down on the tendrils or lightly comb through them with your fingers to soften the curl into a more relaxed, natural-looking wave. The goal is a delicate, effortless look.
- Finish with spray: Lightly mist your face-framing tendrils with a light-hold hairspray or texture spray to keep them in place without making them stiff or crunchy.
Pro-Tip: If your hair doesn’t hold a curl well, try misting a light-hold hairspray on the tendrils BEFORE curling. This helps create longer-lasting face-framing pieces and utilizes tested y2k hair looks.

5. Elevate with High Ponytails & Flipped Ends: The Ultimate Sleek Statement

Pin this chic high ponytail look for instant Y2K glam!
High ponytails with flipped ends: A polished style where hair is pulled into a tight, crown-level pony, straightened to perfection, and then dramatically curled upward at the tips. Flipped ends create a jaunty, cartoon-like silhouette that was incredibly popular, with y2k hair shaped by fashion dolls of the time.
This look combines the discipline of sleek hair with the fun of retro styling. Because y2k hair for straight hair often demands a glass-like finish, using the right smoothing products is non-negotiable to achieve high ponytail styles that look intentional and glossy.
Products & Tools Used
- Paddle brush or boar bristle brush
- Strong elastic hair tie
- Flat iron with rounded edges (ideal for flipping)
- Heat protectant spray
- Smoothing anti-frizz serum or hair oil
- Light-hold hairspray
Application/Styling Steps
- Prepare your hair: Start with straight or freshly straightened hair. Apply heat protectant spray evenly.
- Create a high ponytail: Using a paddle or boar bristle brush, gather all your hair into a super high ponytail on the crown of your head. Aim for a sleek, bump-free base. Secure tightly with a strong elastic hair tie.
- Smooth the ponytail: Apply a small amount of smoothing anti-frizz serum or hair oil through the length of your ponytail to add shine and reduce flyaways.
- Section for flipping: Take a 1-2 inch section of hair from the end of your ponytail.
- Flip the ends: Clamp the flat iron onto the section of hair a few inches from the end. As you glide the flat iron down to the very end, gently flick your wrist upwards to create a dramatic, outward flip.
- Repeat for all ends: Continue this technique around the entire circumference of your ponytail until all the ends are flipped. For maximum voluminous hair, you can backcomb the underside of the flipped ends before spraying.
- Set the style: Finish with a light mist of hairspray to keep the flipped ends in place and maintain the sleekness of the ponytail.
Pro-Tip: To hide your hair tie for an extra polished look, take a small section of hair from the underside of your ponytail, wrap it around the base, and secure with a bobby pin. This elevates your high ponytail to salon quality y2k looks.

6. Introduce Chunky Highlights: Go Bold with Contrasting Colors

Pin this bold chunky highlights idea to your ‘Hair Color Inspo’ board!
Chunky highlights y2k: A hair coloring technique featuring thick, clearly defined stripes of contrasting color, often placing high-contrast blonde streaks against a dark base. Unlike modern balayage which blends seamlessly, y2k hair colors were all about visibility and bold demarcation.
If you want to dye hair y2k colors, be aware that y2k hair incorporates bright colors and heavy bleaching. Because y2k hair requires skill to avoid damage and get that precise “stripe” effect, we strongly recommend seeing a professional. Prioritizing hair health is essential when dealing with such intense color processing.
Products & Tools Used
- Professional hair color or bleach kit (if doing at home, extreme caution advised)
- Hair sectioning clips
- Foil or specialized highlighting papers
- Applicator brush
- Gloves
- Hair bonding treatment (highly recommended after coloring/bleaching)
- Color-safe shampoo and conditioner
Application/Styling Steps
- Consult a professional: While DIY is possible, for best results and to prevent damage, consult a professional hairstylist who specializes in color. This is especially crucial when using bleach.
- Select your colors: Choose two contrasting colors. Classic chunky highlights y2k often feature platinum blonde against a dark base (e.g., black or dark brown), or bold colorful hair like pink or blue.
- Section your hair: A stylist will carefully section out thick, distinct strands of hair where you want the highlights to be most prominent, typically around the face or in specific areas of the hair.
- Apply color/bleach: The chosen sections will be expertly painted with your selected color or bleach. The thickness of the sections is key to achieving the “chunky” effect.
- Process: The color or bleach will be allowed to process for the appropriate time, carefully monitored by the stylist to achieve the desired lightness or color intensity.
- Rinse and treat: After processing, the hair is thoroughly rinsed, and a hair bonding treatment is often applied to help restore strength and health to the hair.
- Tone (if needed): For blonde highlights, a toner may be applied to achieve the desired shade and eliminate any brassiness.
- Style: Your stylist will then style your hair, showcasing the dramatic effect of the chunky highlights.
Pro-Tip: To maintain the vibrancy and health of your chunky highlights, use color-safe shampoo and conditioner, and incorporate a weekly deep conditioning treatment. Consider temporary color sprays for a commitment-free y2k hair trends experiment, demonstrating sustainable y2k hair practices.

7. Define with a Deep Side Part & Side Bangs: Frame Your Face with Precision

Pin this sleek deep side part to your ‘Classic Y2K Hairstyles’ board!
Deep side parting: A dramatic styling choice where the hair is parted far to one side, often starting from the arch of the eyebrow or even wider. This technique allows for heavy, sweeping side bangs that cover a significant portion of the forehead, a hallmark of y2k hairstyles with bangs.
Knowing how to style a deep side part y2k properly can completely transform your face shape. The asymmetry adds mystery and elegance, but because the side part enables y2k trend silhouettes, it requires precision tools like a fine-tooth comb and sleek hair products to ensure the line is crisp and the hair lays flat.
Products & Tools Used
- Fine-tooth comb or rat-tail comb
- Flat iron (optional, for extra sleekness)
- Heat protectant spray (if using flat iron)
- Light to medium hold hairspray
- Styling cream or smoothing serum
Application/Styling Steps
- Prepare your hair: Start with clean, dry, and preferably straight hair. If needed, straighten your hair with a flat iron after applying heat protectant for maximum sleekness.
- Create the deep side part: Use the end of your rat-tail comb to draw a clean, straight line starting from the arch of one eyebrow, extending diagonally back towards the crown of your head. This will create a dramatic, deep side parting.
- Define side bangs: The hair on the larger side of the part will form your side bangs. If you have existing bangs, ensure they sweep naturally across your forehead. If not, coax the front section of this larger side to fall across.
- Smooth and shape: Apply a small amount of smoothing serum or styling cream to your hands and gently smooth down any flyaways, guiding your side bangs into place.
- Set with flat iron (optional): For stubborn side bangs or a very sleek look, you can gently run a flat iron through them, curving them slightly to frame your face.
- Secure with hairspray: Finish with a light mist of medium-hold hairspray to keep your deep side part crisp and your side bangs perfectly in place without stiffness.
Pro-Tip: To ensure your deep side part stays sharp all day, lightly spritz hairspray directly onto your comb before parting, then comb through. This provides extra hold and demonstrates professional y2k hair techniques.

8. Master Micro Braids & Baby Braids: Add Intricate Details

Pin these tiny micro braids for a touch of Y2K nostalgia!
Micro braids: Extremely thin, delicate braids, often referred to as baby braids, that are woven into loose hair to add texture and detail. Braids add y2k detail without overwhelming the style, making them a perfect subtle nod to y2k braids trends.
Whether you braid micro braids to frame the face or disperse them throughout your length, this style requires patience and dexterity. Y2K hair requires skill to keep these mini braids uniform and neat, turning simple hair into intricate y2k hair details.
Products & Tools Used
- Fine-tooth comb or rat-tail comb
- Tiny, clear elastic hair bands
- Light-hold hair gel or edge control (optional, for smoothing)
- Hair sectioning clips
Application/Styling Steps
- Prepare your hair: Start with clean, detangled hair. Decide where you want to place your micro braids – common placements include framing the face, along a part, or randomly throughout the hair.
- Section a tiny piece: Using your rat-tail comb, take a very small, thin section of hair (the thinner the section, the tinier and more delicate the braid). Isolate it using a hair clip if needed.
- Apply gel (optional): If your hair is prone to flyaways, apply a tiny amount of light-hold hair gel or edge control to the section before braiding to ensure a sleek finish.
- Begin braiding: Divide the tiny section into three equal strands. Begin braiding normally (cross the right strand over the middle, then the left strand over the new middle).
- Braid tightly and evenly: Continue braiding all the way down to the ends of the hair, keeping the tension tight and even to create a neat, uniform micro braid.
- Secure the braid: Once you reach the end, secure the baby braid with a tiny, clear elastic hair band.
- Repeat: Continue creating as many micro braids as desired, strategically placing them to enhance your overall Y2K hairstyles look.
Pro-Tip: To prevent your micro braids from unraveling, secure the ends with a tiny elastic band, then dab a small amount of strong-hold hair gel on the ends and let it dry. This helps to seal the braid and demonstrates professional y2k hair techniques.

9. Get the Gelled Spikes & Wet Look: Embrace the High-Shine Finish

Pin this bold gelled spikes look for your next avant-garde moment!
Gelled spikes and wet look: A high-impact style that uses generous amounts of product to make hair appear wet, glossy, and sculpted. Whether it is full wet look hair y2k style or strategically placed gel spikes, this look relies on shine and hold.
Knowing how to get the y2k gelled look involves mastering product application; gel creates spiky y2k hair by binding strands together for that piecey, separated effect. Because y2k hair requires specific products, look for non-flaking formulas that deliver glossy hair without the crunch.
Products & Tools Used
- Extreme hold hair gel (non-flaking formula recommended)
- Fine-tooth comb or styling brush
- High-shine finishing spray or gloss serum
- Hair sectioning clips (optional)
Application/Styling Steps
- Prepare your hair: Start with damp or completely dry hair, depending on the desired intensity of the wet look. Damp hair will generally give a more pronounced wet effect.
- Apply hair gel: Take a generous amount of extreme hold hair gel and evenly distribute it through your hair. For a full wet look, apply from roots to ends. For sculpted gelled spikes, focus on the sections you want to spike.
- Comb and sculpt: Use a fine-tooth comb to slick your hair back or into your desired shape. For spiky hair, use your fingers to pull small sections of hair upwards or outwards, shaping them into distinct spikes.
- Define spikes: Pinch and twist individual sections of hair between your fingers to create more defined gelled spikes. The more gel you use, the stiffer and more dramatic the spikes will be.
- Set the look: Once your hair is sculpted into the desired wet look and gelled spikes, allow the gel to dry and harden naturally. Avoid touching it as it dries to prevent disrupting the shape.
- Finish with shine: For an extra glossy finish and to lock in the wet look, mist a high-shine finishing spray or apply a few drops of gloss serum once the gel is completely dry.
Pro-Tip: To prevent product buildup when creating the wet look and gelled spikes, ensure you use a clarifying shampoo when washing your hair. This helps maintain hair health while enjoying y2k hair trends and demonstrates sustainable y2k hair practices.

Key Takeaways: Your Quick Guide to Hairstyles Y2K
Before you rush to the mirror, here is a quick summary of the essential points to remember. These hairstyles y2k summary points ensure you have the key points y2k hair mastery needed to replicate these looks successfully.
- Embrace Iconic Y2K Elements: The core of hairstyles Y2K lies in distinct features like spiky buns, butterfly clips, crimped hair, and face-framing tendrils, making them instantly recognizable.
- Actionable Styling is Key: Recreating Y2K hair trends requires specific techniques, from precise parting for deep side parts to careful product application for gelled spikes.
- Accessories Define the Era: Don’t underestimate the power of Y2K hair accessories such as butterfly clips and bright pins to complete your early 2000s aesthetic.
- Product Selection Matters: Achieving authentic Y2K hair looks relies on using the right products, like strong-hold hair gel for definition or heat protectants for crimped hair to prevent damage.
- Prioritize Hair Health: Especially when experimenting with chunky highlights or heat styling, integrating hair bonding treatments and heat protectant spray is crucial for maintaining hair health.
- Modernize for Wearability: While nostalgic, many Y2K hairstyles can be adapted with a contemporary twist, blending retro charm with modern elegance for everyday wear.
- Experiment with Confidence: The Y2K aesthetic was all about bold self-expression; feel empowered to experiment with different styles and colors to find your perfect millennium hairstyle.
People Also Ask About Hairstyles Y2K
Still have questions about how to do y2k hairstyles or what products to use? We have gathered the most common queries to help you perfect your look.
What are Y2K hairstyles?
Y2K hairstyles are distinctive hair trends from the late 1990s and early 2000s, characterized by bold, playful, and often futuristic looks. They include styles like spiky buns, face-framing tendrils, crimped hair, and a heavy use of accessories such as butterfly clips. This aesthetic often features high shine, sleekness, or defined texture, reflecting the pop culture and tech optimism of the millennium era.
How do you achieve the spiky bun look for Y2K hair?
To create spiky buns, you need strong-hold hair gel and bobby pins to sculpt small sections of hair into upward-pointing spikes from tight mini buns. Start with divided hair, gather into high ponytails, apply gel generously, then twist and pull out small sections to form spikes before securing them at the base with pins and finishing with hairspray for extra hold.
What products are essential for creating Y2K hairstyles?
Essential products for Y2K hairstyles typically include strong-hold hair gel for definition, heat protectant spray for styles like crimped hair or flipped ends, and light to medium hold hairspray for setting. Smoothing serums are also crucial for achieving a sleek finish, and butterfly clips or other bright hair accessories are indispensable for the aesthetic.
Are Y2K hairstyles suitable for all hair types?
Many Y2K hairstyles can be adapted for various hair types, though some require specific techniques or products. For example, spiky buns work best with straight or slightly wavy hair, while micro braids can be stunning on textured or natural hair. Styling creams and gels can help fine hair achieve volume, while thicker hair may need more product for hold.
How can I incorporate Y2K hair trends into modern styles?
To blend Y2K hair trends with modern styles, try subtle integrations like adding a few butterfly clips to a contemporary updo or styling delicate face-framing tendrils with a sleek ponytail. You can also opt for a less dramatic deep side part or choose muted shades for chunky highlights to create a modern interpretation of the nostalgic look.
What was the ‘wet look’ trend in Y2K hairstyles?
The ‘wet look’ in Y2K hairstyles involved using ample hair gel or mousse to create a slick, high-shine finish that appeared perpetually damp or freshly styled. This look was often paired with gelled spikes or a super-sleek, pulled-back style, exuding an edgy and futuristic vibe popular in the early 2000s.
How do I prevent heat damage when recreating crimped or flipped ends?
To prevent heat damage when recreating crimped hair or flipped ends, always apply a high-quality heat protectant spray to dry hair before using any hot tools. Ensure your crimping iron or flat iron is set to the lowest effective temperature for your hair type, and avoid clamping or passing over the same section multiple times.
What are some easy Y2K hairstyles for beginners?
Easy Y2K hairstyles for beginners include simple face-framing tendrils secured with a couple of butterfly clips, a high, sleek ponytail with a wrapped base, or a defined deep side part paired with a simple low bun. These styles require minimal tools and practice, offering a quick way to embrace the Y2K aesthetic.
What defines the aesthetic of Y2K hair accessories?
The aesthetic of Y2K hair accessories is defined by their bright colors, playful designs, and often chunky or futuristic appearance. This includes the iconic butterfly clips, plastic claw clips, zig-zag headbands, and even hair mascara or glitter, all designed to add a bold, expressive, and often nostalgic touch to any hairstyle.
How do Y2K hairstyles compare to 90s hairstyles?
While both eras influenced each other, Y2K hairstyles typically feature more boldness, shine, and visible styling than 90s looks, which often leaned towards more grunge, minimalist, or undone aesthetics. Y2K hair embraced a more overt, “done” appearance with distinct elements like chunky highlights and gelled spikes, compared to the more natural or subtle trends of the late 90s.
Final Thoughts on Hairstyles Y2K
Hairstyles Y2K are more than just a fleeting trend; they represent a bold, playful, and expressive era that continues to inspire modern beauty. From the structured flair of spiky buns to the delicate charm of butterfly clips and face-framing tendrils, these iconic looks offer a unique opportunity to inject personality into your style. Embracing these trends allows you to tap into a rich vein of nostalgia while adapting them with contemporary finesse.
Remember that the key to mastering Y2K hair lies in precise execution, the right product choices, and a willingness to experiment. So, whether you opt for the dramatic texture of crimped hair or the sleek elegance of high ponytails with flipped ends, confidently create y2k hairstyles that speak to your inner pop star. What Y2K hairstyle will you try first to channel your inner early 2000s icon?
Last update on 2026-03-07 / Affiliate links / Images from Amazon Product Advertising API


