Struggling to get that perfectly cute, long-lasting manicure? Achieving the dream hello kitty nails at home can feel impossible, with complicated designs that smudge and charms that fall off within a day. You just want a fun, flawless look that expresses your love for the iconic character.
Getting Hello Kitty nails involves choosing a method like press-ons, stickers, or hand-painting, then applying them to a prepared nail. For a classic look, use a pink and white color scheme, add Hello Kitty’s face to an accent nail, and finish with a glossy top coat and a signature red bow charm. This process can be easily adapted for any skill level.
Drawing from proven methodologies and current data, this guide breaks down everything you need for the perfect kawaii manicure. You’ll discover nine essential design ideas, complete with step-by-step tutorials and pro tips. Get ready to create salon-quality nail art that showcases your unique style.
How Do You Get Hello Kitty Nails? A Guide to the Cutest Kawaii Manicure
The enduring popularity of Hello Kitty has made her a staple in the world of beauty and cosmetics, especially when it comes to hello kitty nail art. Achieving this look is more accessible than ever, tapping into the nostalgia and kawaii culture that the Sanrio character represents. Whether you’re aiming for a subtle nod or a bold Y2K aesthetic, there’s a method that fits your skill level and style. From simple DIY hello kitty nails using stickers to professional-level acrylic nail tutorials with 3D sculpted figures, the possibilities are endless. This guide will walk you through the various techniques, from beginner-friendly hello kitty press on nails to advanced artistry using 3D hello kitty charms. To ensure authenticity and quality, it’s always best to look for a licensed sanrio product, especially when choosing designs that feature other characters like Kuromi or My Melody.
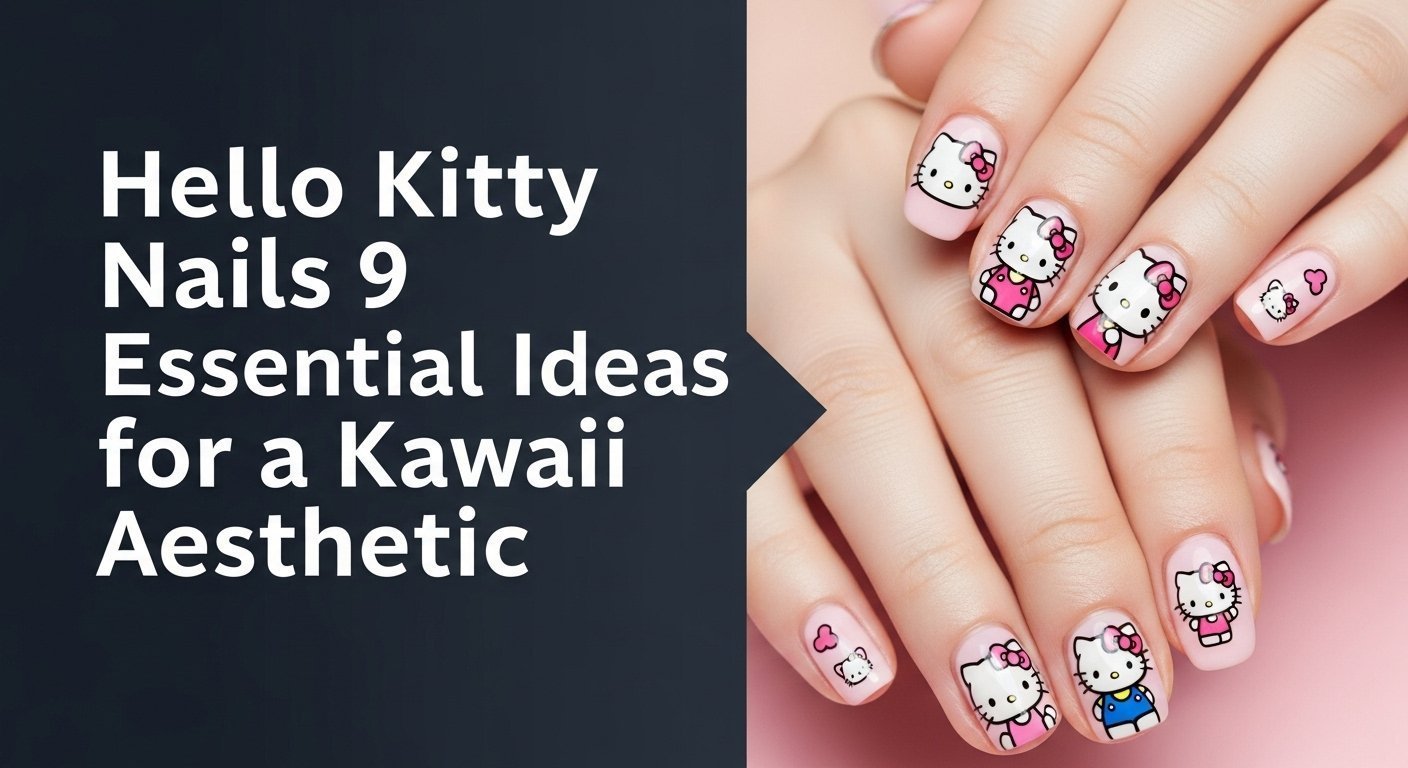
9 Essential Hello Kitty Nail Ideas for a Kawaii Aesthetic
Diving into Hello Kitty nail art is a journey of creativity. The nine ideas below offer something for every fan, from minimalist designs to over-the-top creations. Each concept is presented as a complete mini-tutorial, providing you with the specific nail charms, polish types, and application methods needed to bring the look to life. We’ll cover various techniques, including using press-on kits for beginners, mastering acrylic extensions for durability, and working with modern gel-x systems. By following these actionable steps, you can confidently recreate these styles, whether you’re a DIY enthusiast or bringing inspiration to your nail tech.
1. Design the Classic Pink & White Hello Kitty Nails

Pin this iconic look to your ‘Kawaii Nails’ board for your next salon visit!
This timeless design is the perfect entry point into pink hello kitty nails. It’s elegant, simple, and instantly recognizable, making it a favorite for those who want a cute but not overly flashy look. The key is using a fine-liner brush to create the detailed art of Hello Kitty’s face, a skill that’s easier to master than it looks when broken down into simple shapes.
Products & Tools Used
- Pastel pink gel polish (e.g., a creamy, opaque formula for full coverage)
- Opaque white gel polish for the face
- Black fine-liner nail art polish or gel
- Bright yellow nail polish for the nose
- A dotting tool and a super-fine nail art brush
- Glossy, no-wipe top coat
Application/Styling Steps
- Prep nails by filing, buffing, and cleaning the nail plate. Apply a base coat and cure.
- Paint two coats of the pastel pink polish on all nails, curing after each coat.
- On your chosen accent nail, use the white polish to paint a large oval for Hello Kitty’s head. Cure for 60 seconds.
- Using the dotting tool and black liner polish, carefully place two dots for the eyes. Use the fine-liner brush to draw three whiskers on each side.
- With the yellow polish, place a small oval dot between the eyes for her nose.
- Top coat all nails, ensuring you seal the design completely for a long lasting wear. Cure for a final 60 seconds.
Pro-Tip: For perfectly symmetrical whiskers, flash cure (cure for 10-15 seconds) each individual line after you paint it. This prevents the fine lines from bleeding or smudging as you work.

2. Create Over-the-Top Y2K Bling Hello Kitty Nails

Need that Y2K aesthetic? Pin this bling-ed out design to your ‘Baddie Nails’ board!
Embrace the maximalist revival with hello kitty junk nails. This style is all about layering 3d hello kitty charms, rhinestones, and glitter for an unapologetically bold look. The key to making this bling-heavy design last is using a strong nail glue or gem gel to properly adhere each decorative element.
Products & Tools Used
- Hot pink and black gel polish
- Chunky silver glitter polish
- A variety of large 3d hello kitty charms and pink bow charms
- Assorted sizes of pink and clear rhinestones and pearls
- Professional grade nail glue or gem glue gel
- Wax pencil for picking up gems
Application/Styling Steps
- Apply your base color. Alternate nails with hot pink, black, and the chunky silver glitter. Cure.
- Plan your charm placement before applying glue. Lay out the large Hello Kitty charms and surrounding gems.
- Apply a generous dot of gem glue gel where you want to place your largest charm.
- Press the charm firmly into the gel. Use the wax pencil to add smaller rhinestones and pearls around it, creating a dense, bling effect.
- Cure the gem glue under a UV/LED lamp for 60-90 seconds. Make sure it’s fully hardened.
- For extra security, use a fine-liner brush to apply more gem glue around the base of each large charm, filling any gaps. Cure again. Do not apply a top coat over the charms as it will dull their sparkle.
Pro-Tip: To create true salon quality junk nails, encapsulate the smaller gems. After applying your color, add a layer of clear builder gel, place the small rhinestones into the wet gel, and then cure. This integrates them into the nail structure for ultimate durability.

3. Sculpt a 3D Hello Kitty Face with Builder Gel

Ready for a challenge? Pin this advanced 3D sculpted nail art tutorial to try later!
For those looking to level up their skills, this acrylic nail tutorial hello kitty style shows you how to sculpt a character directly on the nail. Using 3D building gel and a silicone sculpting tool, you can create a high-impact, professional-looking design. This technique requires patience, but the result is a stunning piece of nail art that stands out. Remember that the building gel requires a UV lamp to cure and harden properly.
Products & Tools Used
- Non-sticky white 3D building gel or “molding gel”
- Red 3D building gel for the bow
- A silicone-tipped shaping tool and a small detail brush
- 99% isopropyl alcohol (to clean tools)
- Black and yellow gel paint for details
Application/Styling Steps
- After applying your base color and top coat, take a medium-sized bead of white 3D building gel and roll it into a ball.
- Place the ball on the nail and gently pat it down to form the main head shape, keeping it rounded.
- Take two smaller beads of white gel, roll them into ovals, and place them on the top corners of the head to sculpt the ears. Use the silicone tool to blend them seamlessly. Cure the entire head for 60 seconds.
- Take a small bead of red gel and split it into two tiny triangles. Place them side-by-side to form the bow, adding a tiny dot of red in the middle. Cure.
- Use a fine brush to paint on the eyes, nose, and whiskers with gel paint.
- Finish by applying a top coat around the 3D figure, not over it, to maintain the matte, sculpted texture.
Pro-Tip: Keep a small dappen dish with isopropyl alcohol handy. Dipping your silicone tool in it prevents the 3D building gel from sticking, allowing you to sculpt smooth, perfect shapes with ease. This is a common practice for nail tech approved results.

4. Apply Easy & Safe Hello Kitty Press-On Nails for Kids

A fun and safe manicure for your little one! Pin this beginner friendly guide for a rainy day activity.
For a fun, temporary, and safe for kids manicure, a hello kitty press-on nails for kids kit is the perfect solution. These kits are beginner friendly and designed with safety in mind, typically using adhesive tabs instead of harsh glues. This ensures easy application and gentle removal that is non-damaging to young, delicate nails. Always look for products that are certified non-toxic.
Products & Tools Used
- An official Sanrio licensed hello kitty press-on nails for kids kit
- The included sticky adhesive tabs
- Alcohol prep pad (usually included in the kit)
- A small nail file or buffer
Application/Styling Steps
- First, match each press-on nail to your child’s fingernails to find the correct size for all ten fingers.
- Use the alcohol pad to cleanse each natural nail. This removes oils and helps the tabs stick better.
- Peel an adhesive tab from the sheet and press it firmly onto the natural nail.
- Peel the top film off the tab, then align the press-on nail with the cuticle and press down firmly.
- Hold the nail down for 10-15 seconds to ensure a strong adhesive bond.
- Repeat for all nails. Advise your child to avoid water for at least one hour to allow the adhesive to set.
Pro-Tip: Most non-toxic kids’ press-on kits are designed for gentle removal. To take them off without damage, soak fingers in warm, soapy water for 5-10 minutes. The adhesive will soften, allowing you to gently peel the nails off from the side.

5. Paint Elegant Hello Kitty French Tips

The perfect blend of chic and cute! Pin this Hello Kitty french tip idea for a sophisticated twist.
For a more minimalist hello kitty nails white and red look, incorporate the iconic character into a classic french + tip design. This is a subtle, elegant way to show your love for Hello Kitty. The white polish is used to create the french + tip in the shape of her head, which is enhanced by a tiny red + ribbon charm for that signature finishing touch.
Products & Tools Used
- Sheer nude or pastel pink base polish
- Opaque white polish
- A fine-liner brush OR french tip guide stickers
- Tiny red bow nail charms
- Gem glue gel
- High-gloss top coat
Application/Styling Steps
- Apply two thin coats of your sheer pink base polish and cure.
- Paint the French tip. For the freehand method, use a liner brush to draw the outline of Hello Kitty’s head (a wide ‘U’ shape with two bumps for ears) at the tip of your nail. Fill it in with white polish. For the easier method, place a guide sticker and paint the tip white.
- Cure the white tip for 60 seconds.
- Apply a small dot of gem glue on one of the “ears” of the Hello Kitty shape.
- Use a wax pencil to place a tiny red bow charm onto the glue. Cure for 60 seconds.
- Finish with a high-gloss top coat over the entire nail to smooth everything out.
Pro-Tip: To achieve that sharp, clean “liquid light” look on your white tips, use a clean-up brush dipped in acetone to perfect the “smile line” (the curve of the French tip) before you cure the white polish. This is a key step for salon quality results.

6. Design Edgy Kuromi x Hello Kitty Nails

Show your sweet and spicy side! Pin this Kuromi x Hello Kitty nail art idea.
Explore the duality of Sanrio characters with a hello kitty vs kuromi nails design. As contrasting but related characters, their “yin-yang” aesthetic is perfect for an edgier, punk-inspired manicure. This look combines the cuteness of Hello Kitty with the mischievous vibe of Kuromi, using a color palette of black, lavender, and hot pink. Using stickers can make this detailed design much easier to achieve.
Products & Tools Used
- Black, lavender, and white gel polish
- A pop of hot pink for Kuromi’s skull icon
- Fine-liner nail art brush
- Kuromi and Hello Kitty nail decals or stickers (for an easier version)
- Small silver chain or stud nail charms
Application/Styling Steps
- Paint your nails, alternating between black and lavender.
- On a white-painted accent nail, design Kuromi. Paint her black jester hat with the signature pink skull in the center. Add her mischievous eyes and grin.
- On another accent nail, create a matching Hello Kitty face. You can use a black base and paint her in white for a goth twist.
- For an easier method, apply high-quality Kuromi and Hello Kitty nail stickers over your cured base colors.
- Use gem glue to adhere small silver charms like studs or short pieces of chain for a punk-rock vibe.
- Seal everything with a glossy top coat, making sure to dab around the base of any 3D charms.
Pro-Tip: To make your hand-painted characters pop, use a “negative space design” technique. Paint the character on a clear or nude nail, and fill in the surrounding area with black or lavender. This creates a high-impact, professional look.

7. Decorate with Simple Hello Kitty Stickers & Decals

The quickest way to cute nails! Pin this Hello Kitty sticker hack for a 5-minute manicure.
For a perfect design with minimal effort, hello kitty nail stickers are the ultimate solution. The main benefit of stickers vs hand-painted designs is the easy application and flawless detail, making them ideal for beginners or those with short hello kitty nails. It’s important to understand the difference between peel-and-stick stickers and water-slide decals to ensure a smooth, bubble-free finish.
Products & Tools Used
- A sheet of high-quality hello kitty nail decals or stickers
- Your favorite base color polish
- A pair of fine-point tweezers
- A bowl of water (for water-slide decals)
- A thick, glossy top coat that is not quick-dry
Application/Styling Steps
- Paint your nails with two coats of your chosen base color. Let it dry completely if using regular polish, or cure fully if using gel.
- Using tweezers, carefully peel a sticker from its backing.
- Place the sticker onto the nail and press down firmly from the center outwards to avoid bubbles.
- For water-slide decals: Cut out the desired decal, soak it in water for 10-20 seconds, then slide the design off the paper backing and onto your nail.
- Immediately apply a generous layer of top coat. Make sure to “cap” the free edge of your nail to seal the sticker and prevent chipping.
- Add a second layer of top coat for a perfectly smooth, smudge proof finish.
Pro-Tip: Don’t use a fast-dry top coat directly on a sticker or decal. The strong solvents can sometimes cause the ink to wrinkle or bleed. Use a standard top coat for the first layer to seal the design, then you can apply a quick-dry top coat over it if desired.

8. Recreate the “Jelly” or “Syrup” Hello Kitty Nails

Obsessed with the jelly nail trend? Pin this kawaii “syrup” nail tutorial!
Combine two major trends by creating kawaii hello kitty nails with a “Jelly” or “Syrup” finish. This style, popular in Japanese and Korean nail products, uses translucent polish to create a see-through, dimensional effect. The magic of this look is in the encapsulated nail art, where glitter or confetti appears to float inside the polish. This is achieved by layering a translucent jelly polish with clear builder gel.
Products & Tools Used
- A sheer, translucent pink or red “jelly” or “syrup” gel polish.
- Tiny white Hello Kitty head-shaped glitter or confetti
- Clear builder gel
- A fine-tipped tool or wax pencil
Application/Styling Steps
- Apply one thin coat of the pink jelly polish and cure. This creates the first translucent layer.
- Apply a thin layer of clear builder gel (do not cure yet). This will act as your “glue”.
- Use a wax pencil to pick up and place the Hello Kitty glitter onto the wet builder gel. Spread them out as desired. Cure for 60 seconds.
- Paint another layer of the pink jelly polish over the glitter. This encapsulates the glitter and creates the “syrup” effect. Cure.
- If the surface is bumpy, apply another thin layer of clear builder gel to smooth everything out. Cure.
- Finish with a final layer of high-gloss top coat for that ultra-shiny, see-through finish.
Pro-Tip: You can create a custom jelly polish by mixing a few drops of your favorite opaque pink or red polish into a clear builder gel or top coat. This allows you to control the exact sheerness and color for your Jelly Nails look.

9. Glam Up with Hello Kitty Cat Eye Nails

Combine two trends in one! Pin this cat eye Hello Kitty design for a truly magical manicure.
Elevate your Sanrio style by incorporating the mesmerizing cat eye effect. This technique uses a special gel polish containing magnetic particles. A nail magnet is required to activate these particles, pulling them into a sharp, shimmering band of light. The result is a glamorous, liquid light background that provides a stunning canvas for a subtle Hello Kitty detail.
Products & Tools Used
- A black gel polish for the base
- A pink or silver magnetic cat eye gel polish
- A strong nail art magnet (often comes with the polish)
- White liner polish for the Hello Kitty detail
Application/Styling Steps
- Apply one coat of black gel polish as your base. This makes the cat eye effect more dramatic. Cure.
- Paint a thick, even coat of the cat eye polish over the black base. DO NOT CURE YET.
- Immediately take your magnet and hover it close to the nail for 5-10 seconds. You will see the magnetic particles gather into a bright line. You can hold it diagonally, vertically, or move it to create patterns.
- Once you are happy with the effect, cure the nail immediately for 60 seconds to lock the design in place.
- On an accent nail, use a fine-liner brush to paint a small, simple Hello Kitty outline in white.
- Finish the entire design with a high-gloss top coat and cure one last time.
Pro-Tip: For an even more intense “liquid light” effect, repeat steps 2-4. Apply a second coat of cat eye polish over the first cured layer, use the magnet again, and cure. This dual-layer technique creates incredible depth and shimmer.

Key Takeaways: Your Quick Guide to Hello Kitty Nails
- Start with Your Skill Level: For a beginner friendly approach, use high-quality hello kitty nail stickers or a press on kit. For a challenge, try hand-painting or using 3d building gel to sculpt your own charms.
- Preparation is Key for Longevity: No matter the method, proper nail prep—cleaning, buffing, and using a quality base coat—is the most critical step to prevent chipping and achieve a long lasting wear.
- Invest in the Right Tools: A fine-liner brush for details, a wax pencil for gems, and strong gem glue for 3d hello kitty charms are non-negotiable for achieving clean, salon quality at home results.
- Safety First for Kids’ Nails: When creating hello kitty nails for kids, always choose certified non-toxic and peelable water-based polishes or press-on kits that use gentle adhesive tabs instead of harsh glue.
- The Top Coat is Your Best Friend: A good top coat is essential. It smooths out decals, protects hand-painted art, and seals charms to prevent them from snagging, ensuring a professional, smudge proof finish.
FAQs About Hello Kitty Nails
How do you do Hello Kitty nails at home for beginners?
The easiest way for beginners is to use high-quality nail stickers or press-on nails. For stickers, simply paint your nails with a base color, let it dry completely, apply the sticker with tweezers, and seal with two layers of top coat. For press-on nails, use a kit with adhesive tabs for a simple, damage-free application.
How do you keep Hello Kitty charms from falling off?
The key is using a strong, dedicated gem glue gel, not regular nail glue. Apply a thick bead of the gel, press the charm in, and cure under a UV/LED lamp. For extra hold, use a small brush to add more gel around the base of the charm to fill any gaps and cure again.
What are the best colors for Hello Kitty nails?
The most classic combination is a soft, pastel pink and opaque white. Red is also essential for her signature bow. However, for different aesthetics, you can use black and hot pink for a Y2K or Kuromi-inspired look, or sheer “jelly” polishes for a trendy, modern take.
Can you use Hello Kitty stickers on gel nails?
Yes, you can absolutely use stickers on gel nails for a long-lasting design. Apply the sticker after you have cured your final color coat but before you apply the top coat. Place the sticker, press it down firmly, and then encapsulate it with one or two layers of a no-wipe gel top coat, making sure to cap the free edge.
Are Hello Kitty nail products safe for kids?
Many brands offer products specifically designed to be safe for kids. Look for water-based, non-toxic nail polish sets that are peelable for easy removal. When using press-on nails, choose kits that come with sticky adhesive tabs instead of chemical-based nail glue for a safer experience.
What are “Hello Kitty junk nails”?
“Hello Kitty junk nails” refer to a maximalist nail art style where nails are heavily decorated with a mix of charms, rhinestones, pearls, and other 3D embellishments. The look is intentionally crowded and “junky,” creating a bold, textured, and over-the-top design that is popular within the Y2K aesthetic.
What’s the difference between Hello Kitty stickers and decals?
Stickers are typically adhesive-backed and can be peeled and stuck directly onto the nail. Decals are often water-slide transfers; you cut them out, soak them in water to separate the design from the paper backing, and then slide it onto the nail. Both need to be sealed with a top coat.
How much do Hello Kitty acrylic nails cost at a salon?
The cost can vary widely, from $60 to over $200. A simple design with one painted character might be on the lower end. However, a complex set with hand-sculpted 3D elements, multiple characters, and extensive bling on all ten nails will be significantly more expensive due to the time and skill required.
Which brand has an official Hello Kitty nail collection?
Several brands have had official collaborations, with Glamnetic and OPI being two of the most popular. The Crème Shop also frequently releases licensed Sanrio beauty products, including nail items. Always look for the licensed Sanrio product seal to ensure you are buying authentic artwork.
Are Hello Kitty nails still popular in 2026?
Yes, Hello Kitty nails remain incredibly popular and are a timeless trend. They constantly adapt to new nail aesthetics, from the Jelly Nails trend to Cat Eye effects. The character’s iconic status in kawaii culture ensures they are always in style, beloved by both new and long-time fans.
Final Thoughts on Your Kawaii Manicure
Creating Hello Kitty nails is a fun and expressive way to connect with a beloved character. As this guide has shown, there’s a design for every fan, regardless of your skill level or personal style. Whether you opt for short hello kitty nails with a simple sticker for a quick and cute look or dive into an elaborate acrylic masterpiece with 3D charms, the key is to have fun with the process.
This post has provided you with everything from expert tutorials to hands-on review tips to help you achieve your desired look. Remember that the versatility of Hello Kitty allows her to be integrated into almost any trend, from minimalist French tips to edgy Kuromi mashups.
Now that you’re armed with these ideas and techniques, which Hello Kitty nail design will you try first?
Last update on 2026-04-07 / Affiliate links / Images from Amazon Product Advertising API