Tired of your same old nail colors? You’re searching for a look that feels fresh, modern, and effortlessly chic, but finding the right shade can be a challenge. You want something trendy yet timeless that revitalizes your style.
Mint green nail designs offer a fresh and versatile manicure perfect for any season, especially spring and summer. This chic and calming color complements all skin tones and can be adapted to any style, from minimalist looks to intricate nail art. Its popularity lies in its ability to feel both trendy and timeless.
Drawing from established best practices and current trend analysis, this guide unlocks the potential of the mint green nails phenomenon. We will explore nine distinct and achievable designs, complete with step-by-step instructions. Discover your next favorite manicure and learn how to create a salon-quality look at home.
What Makes Mint Green Nail Designs the Perfect Refresh?
The appeal of fresh mint green nails lies in their unique ability to evoke feelings of optimism and renewal. Unlike bolder neons or classic reds, mint green occupies a sweet spot—it’s a pop of color that remains sophisticated and calming. According to recent beauty trend analysis, this shade has seen a surge in popularity because it complements a wide range of spring and summer fashion palettes, pairing beautifully with both pastel and neutral colors. Whether you prefer a simple mint green nails look or more intricate mint green nail art, the color enhances a clean, chic aesthetic, making it a go-to choice for a style refresh in 2026. This versatility is why it’s a top pick among beauty editors and style influencers.
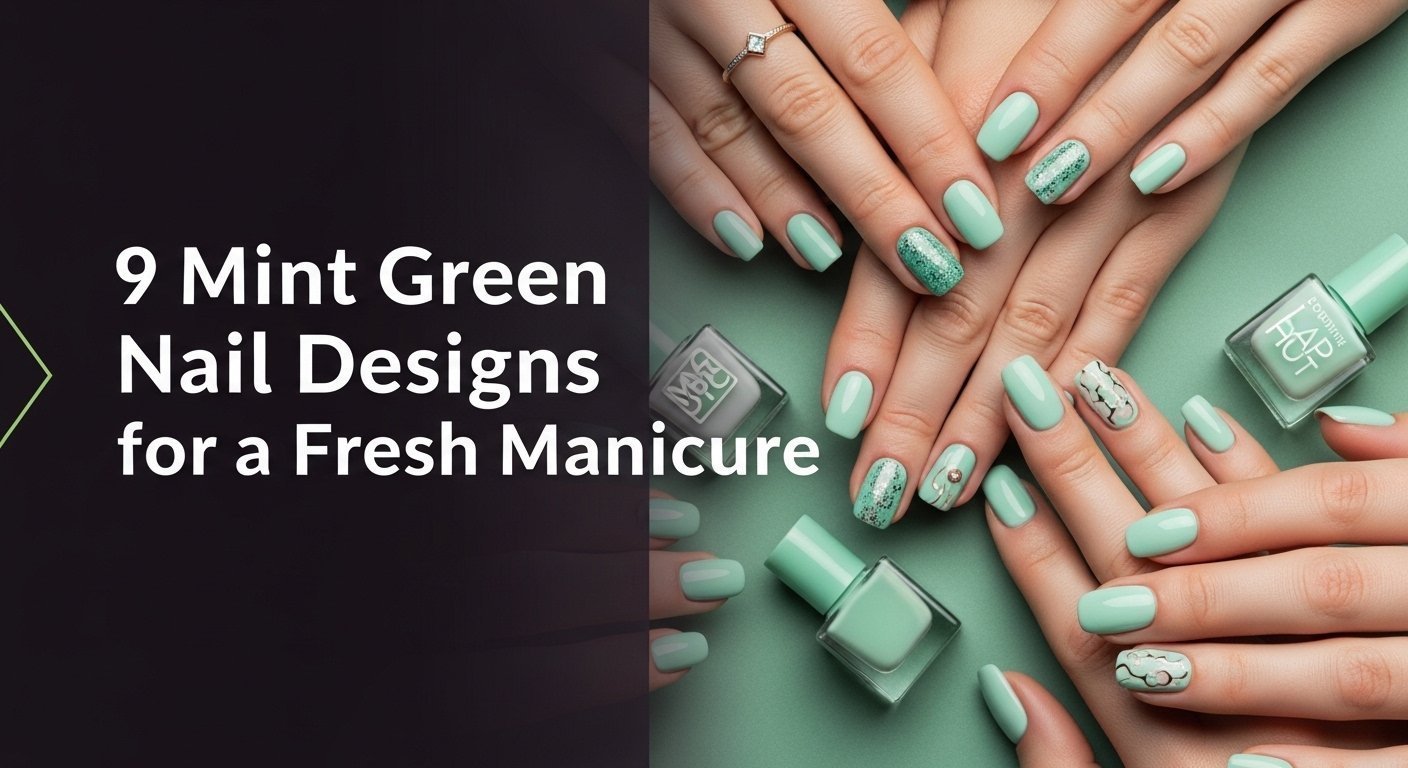
9 Mint Green Nail Designs for a Fresh 2026 Manicure
Ready for some inspiration? Here are nine beautiful and trendy mint green nails ideas that you can either show your nail technician or create yourself. We’ll cover everything from simple, elegant looks to more creative and artistic designs, including styles perfect for acrylic nails, gel polish, and even easy press-on nails. Each design includes the specific products you’ll need and a step-by-step guide to achieving a flawless finish.
1. Create Elegant Mint Green French Tips

Pin this chic look to your ‘Spring Nails’ board!
A modern twist on a timeless classic, french tip mint green nails replace the traditional white with a fresh pop of color. This elegant mint green nails design is perfect for a sophisticated yet playful look that works well on any nail shape, especially almond nails.
Products & Tools Used
- Sheer pink or nude base coat polish
- A high-opacity pastel mint green nail polish
- Fine-tipped nail art brush or nail striping tape
- High-gloss, quick-dry top coat
Application Steps
- Apply one to two coats of your sheer pink base coat and let it dry completely.
- For a clean line, place a piece of nail striping tape across your nail, leaving the tip exposed.
- Carefully paint the exposed tip with the mint green polish. Apply two coats for full opacity, allowing drying time between each.
- While the second coat is still slightly tacky, gently peel off the striping tape.
- Finish with a high-gloss top coat to seal the design and add shine.
Pro-Tip: For a super sharp “smile line” without tape, a nail technician guide trick is to use a small, flat brush dipped in acetone to clean up the edge of the mint green tip before it fully dries. This creates a salon-quality finish.

2. Achieve a Subtle Mint and White Ombre

Save this dreamy ombre idea for your next manicure!
Ombre mint green nails offer a soft, dreamy gradient effect that is surprisingly easy to achieve at home. The seamless blend from white to mint green is perfect for a gentle yet eye-catching manicure, especially on longer nail shapes like coffin nails or tapered squares.
Products & Tools Used
- A creamy white nail polish
- A light mint green nail polish
- A small, disposable makeup sponge
- Liquid latex or petroleum jelly for skin protection
- A glossy top coat
Application Steps
- Apply liquid latex around your nail on the cuticle and skin to make cleanup easier.
- On a flat, non-porous surface, paint a stripe of the white polish and a stripe of the mint green polish right next to each other.
- Use a toothpick to gently swirl the area where the two colors meet to help them blend.
- Dab the makeup sponge directly down onto the polish stripes a few times.
- Gently press and roll the sponge onto your nail. Repeat this dabbing motion to build up the color and blend the gradient.
- Before the polish dries, peel off the liquid latex.
- Once dry, apply a generous top coat to smooth out the texture and make the colors pop.
Pro-Tip: According to expert mint green tips, slightly dampening your makeup sponge before dabbing it in the polish can help create a smoother blend and prevent the sponge from soaking up too much product.

3. Add a Touch of Glam with a Mint Glitter Accent Nail

Pin this easy glam idea for a touch of sparkle!
For an easy way to elevate a simple mint green nails look, add a glitter accent nail. This design provides a touch of glamour without being overwhelming. The cool tones of a silver or holographic glitter polish complements the mint green beautifully, creating a balanced and chic look that’s perfect for short mint green nails.
Products & Tools Used
- A creamy, glossy mint green nail polish
- A high-density silver or gold glitter nail polish
- A smoothing or “gel-like” top coat
Application Steps
- Paint the nails on your thumb, index, middle, and pinky fingers with two coats of the mint green polish. Let dry.
- On your ring finger (the accent nail), apply the glitter polish.
- To achieve full coverage, use the “dabbing” method: instead of brushing, gently dab the glitter onto the nail. This places the glitter particles closer together.
- Apply a second coat of glitter if needed for complete opacity.
- Finish all nails with a thick, smoothing top coat. This is especially important for the glitter nail to create a smooth, non-gritty surface.
Pro-Tip: To solve the problem of removing mint green glitter polish, use a peel-off base coat on your accent nail before applying the glitter. It makes removal incredibly easy and prevents nail damage.

4. Style Minimalist Nails with Gold Foil Accents

A perfect touch of luxe! Pin this minimalist design.
For a look that is both minimalist mint green nails and incredibly chic mint green nails, adding gold foil accents is the perfect solution. This technique enhances a simple mint green base with an artistic, luxurious touch that looks custom and high-end but is simple to do.
Products & Tools Used
- A solid mint green nail polish
- A small pot of gold nail foil flakes
- A pair of fine-point tweezers
- A clear top coat
Application Steps
- Paint all nails with two coats of mint green polish.
- Work on one nail at a time. While the second coat is still slightly sticky (not wet), proceed to the next step.
- Use the tweezers to pick up small, individual flakes of gold foil.
- Gently decorate the nail by placing the foil flakes randomly. Press them down lightly with the tweezers or a silicone tool to ensure they are flat.
- Once you are happy with the placement, let the polish dry completely.
- Apply two layers of top coat to fully encapsulate the foil and create a perfectly smooth finish.
Pro-Tip: For better adhesion, a specialist mint green design technique involves applying a thin layer of nail glue or a dedicated foil gel where you want the flakes, waiting for it to become tacky, and then pressing the foil on. This offers more control and longevity.

5. Paint Cute and Simple Daisy Nail Art

So cute for spring! Pin this easy floral nail art.
Cute mint green nail designs with flowers are perfect for spring mint green nails. This simple daisy design is beginner-friendly and requires no drawing skills. All you need is a dotting tool (or even the tip of a bobby pin) to create a charming floral pattern.
Products & Tools Used
- A solid mint colored nail polish for the base
- An opaque white nail polish
- A small dot of bright yellow nail polish
- A nail art dotting tool (or the end of a bobby pin)
Application Steps
- Apply two coats of your mint green base color and let it dry completely.
- Pour a small drop of white polish onto a piece of foil or a palette.
- Dip the larger end of your dotting tool into the white polish.
- To create the flower, press five dots in a small circle to form the petals.
- Clean your dotting tool. Pour a tiny drop of yellow polish onto your palette.
- Dip the smaller end of your dotting tool into the yellow polish and place a single dot in the center of your white petals.
- Repeat to create as many daisies as you like. Seal with a top coat once fully dry.
Pro-Tip: Don’t reload the dotting tool with white polish for every single petal. Using the leftover polish from the first dot for the next two or three will create variation in petal size, making the flower look more natural and delicate. This is a common nail art layering trick.

6. Rock a Modern, Velvety Matte Finish

A totally different vibe! Pin this edgy matte look.
Transform any mint green polish into a modern statement piece with a matte finish. Matte mint green nails have a velvety, non-reflective texture that feels edgy and high-fashion. This effect is achieved simply by using a special top coat over your favorite color, making it a super easy way to get a modern mint green nails look.
Products & Tools Used
- Any mint green nail polish of your choice
- A high-quality matte top coat
Application Steps
- Apply two coats of your favorite mint green polish just as you normally would. Allow it to dry completely. This is critical, as applying matte top coat to wet polish can cause streaking.
- Once the color is fully dry to the touch, apply a single, even layer of the matte top coat over every nail.
- Watch as the finish transforms from glossy to a soft, velvety matte texture as it dries. This usually takes about 60-90 seconds.
- Do not apply a regular glossy top coat over the matte coat, as this will reverse the effect.
Pro-Tip: To solve the problem of dull mint green nails becoming shiny from natural oils on your hands, you can quickly refresh the look by wiping the nails with a bit of rubbing alcohol on a cotton pad. This will instantly restore the flat matte finish.

7. Design Chic Nails with Mint and Black Geometric Lines

For the modern art lover! Pin this geometric look.
Create a unique mint green nails look with sharp, geometric lines. The contrast between the soft mint and the stark black creates a visually striking and stylish mint green nails design that is both artistic and sophisticated. Even if you don’t have a steady hand, you can use ultra-thin striping tape to get perfectly crisp lines.
Products & Tools Used
- A solid mint green nail polish
- An ultra-thin nail art striping brush OR thin nail striping tape
- A highly pigmented black nail art liner polish
- A glossy top coat
Application Steps
- Paint all nails with two coats of mint green and let them dry completely.
- Using Tape: Lay down thin strips of nail art tape on your chosen accent nails to create your desired geometric pattern (triangles, chevrons, etc.).
- Press the tape down firmly at the edges to prevent bleeding.
- Paint over the entire nail with the black polish. Immediately and carefully peel off the tape while the black polish is wet.
- Using a Brush: If you have a steady hand, dip your long, thin striping brush into the black liner polish and draw your lines directly onto the dry mint green base.
- Clean up any mistakes with a small brush dipped in acetone. Finish with a top coat.
Pro-Tip: When choosing a black liner polish, look for one labeled “one-coat” or “stamping polish.” These formulas are much more opaque, meaning you can get a crisp, solid black line in a single stroke without having to go over it again, which is a key part of advanced nail technology.

8. Try a Dreamy Mint Abstract Swirl Design

Get creative with this abstract swirl art!
For creative mint green nail ideas, look no further than an abstract swirl or marble design. This technique creates a soft, watercolor-like effect that looks incredibly artistic. For gel polish users, a special product called “blooming gel” makes this design effortless, as it is used for spreading the colors out into a perfect, soft blend.
Products & Tools Used
- A sheer nude or pink gel polish base
- Mint green gel polish
- White gel polish
- “Blooming” gel polish (for gel users)
- A thin liner brush
- UV/LED nail lamp
Application Steps
- Apply your sheer nude gel base coat and cure it under your lamp.
- Apply a layer of blooming gel over the nail, but DO NOT CURE IT.
- Place small dots of mint green and white gel polish onto the wet blooming gel.
- Use your liner brush to gently drag through the dots, creating a swirl pattern.
- Watch as the colors “bloom” and spread out, creating a soft, watercolor effect.
- Once you are happy with the design, cure it under your lamp immediately to lock it in place.
- Finish with a glossy gel top coat and cure one final time.
Pro-Tip: For non-gel users, a similar effect can be achieved by applying your color swirls onto a still-wet layer of clear top coat. It won’t bloom as dramatically, but it will help the colors blend together softly. This is a key DIY mint green nail technique.

9. Apply Easy and Flawless Mint Press-On Nails

The ultimate hack for a perfect mani! Pin this press-on idea.
Want a perfect manicure in minutes with zero drying time? Mint green press-on nails are the ultimate solution. Modern press-ons look incredibly natural and come in all the latest shapes and colors. The key to making them last is required prep work before application.
Products & Tools Used
- A set of high-quality mint green press-on nails in your preferred shape
- Nail glue or adhesive tabs
- A nail file
- An alcohol prep pad
- A cuticle pusher
Application Steps
- Select the correct size press-on nail for each of your fingers and lay them out in order.
- Gently push back your cuticles. Lightly buff the surface of your natural nails to remove shine.
- Clean each nail with the alcohol prep pad to remove any oils or dust. This is the most important step for longevity.
- Apply a thin layer of nail glue to your entire natural nail and a small dot of glue to the back of the press-on nail.
- Align the press-on with your cuticle and press down firmly, holding for 20-30 seconds.
- Avoid contact with water for at least one hour to allow the glue to fully bond.
Pro-Tip: To prevent the problem of mint green nail damage, never forcefully pull or pop off press-on nails. To remove, soak your fingertips in warm, soapy water with a bit of oil for 10-15 minutes. This will loosen the glue, allowing you to gently rock them side-to-side to remove.

Key Takeaways
- Versatility is Key: Mint green nail designs aren’t just one look. They can be adapted for any style, from elegant mint green nails with French tips to edgy matte mint green nails.
- Tools Transform the Design: Simple tools like a makeup sponge for an ombre effect, a dotting tool for flowers, or a matte top coat can completely change your manicure with minimal effort.
- Nail Prep is Non-Negotiable: For any long-lasting manicure, especially with press-on nails or gel, cleaning the nail plate with alcohol to remove oils is the most critical step.
- A Top Coat is More Than Just Shine: Your top coat is essential for sealing designs like foil, smoothing out glitter, or transforming the entire texture with a matte version.
- Don’t Fear Art: Designs that look complex, like abstract swirls or geometric lines, are often achievable for beginners using “cheat” products like blooming gel or striping tape.
People Also Ask About Mint Green Nail Designs
What colors go with mint green nails?
Mint green nails pair beautifully with neutrals like white, cream, and soft gray, as well as metallics like gold and silver. For a bolder look, it complements other pastels, especially soft pink and lavender. A mint manicure with gold accents is a particularly chic and popular combination for an elegant style.
Is mint green suitable for short nails?
Absolutely. Mint green is an excellent color for short nails. Styles like a classic solid color, minimalist mint green nail art, or a subtle glitter accent nail look incredibly chic and clean on shorter lengths. In fact, a bright, fresh color like mint can make short nails appear neat and stylish.
How do you make mint green nails last longer?
To make your mint green manicure last, proper prep and sealing are key. Always start by cleaning your nail plate with rubbing alcohol to remove oils. Use a quality base coat, apply two thin coats of color, and finish with a durable top coat, making sure to “cap” the free edge of your nail.
What nail shapes look best with mint green?
Mint green is versatile and works well with virtually all nail shapes. Almond and coffin mint green nails are very popular for trendy looks like ombre and French tips. However, a simple, solid mint color looks equally fresh and clean on classic short square or rounded nails.
Can you get mint green shellac nails?
Yes, mint green is a very popular color choice for shellac and gel manicures. Most salons offer a wide variety of mint green gel polish shades. A gel or shellac application is a great option as it provides a highly durable, glossy finish that can last for two weeks or more without chipping.
Final Thoughts on Your Fresh Mint Manicure
As you’ve seen, mint green nail designs offer a world of creative possibilities, suitable for every skill level and personal style. From the effortless elegance of a matte finish to the playful charm of daisy art, there is a perfect mint manicure waiting for you. This versatile color is more than just a trend; it’s a simple way to refresh your look and express your creativity.
We’ve explored techniques using everything from gel polish to simple press-on nails, proving that a beautiful, professional mint green manicure is completely achievable at home. Now the only question is, which design will you try first for your fresh 2026 look?
Last update on 2026-03-31 / Affiliate links / Images from Amazon Product Advertising API