Ever stared at your plain camping gear and wished it had more personality, only to worry that customizing it might ruin the finish? You are not alone; many outdoor enthusiasts crave unique gear but struggle to find safe, durable ways to create painted enamel mugs that withstand the rigors of the trail.
Painting enamel mugs is a creative DIY project that transforms ordinary drinkware into personalized art, but ensuring food safe paint and proper curing is paramount for durability and safety. By selecting the right non-toxic mug paint certified for ceramics and following specific preparation and baking protocols, you can create a long-lasting painted design that resists chipping and fading even with regular use.
Drawing from comprehensive analysis of material safety standards and proven crafting methodologies, this guide ensures your projects are both beautiful and functional. We will explore the properties of the primary entity—the enamel surface—and how it interacts with specific pigments to create lasting bonds. Get ready to discover seven essential techniques that will elevate your camp kitchen in 2026.
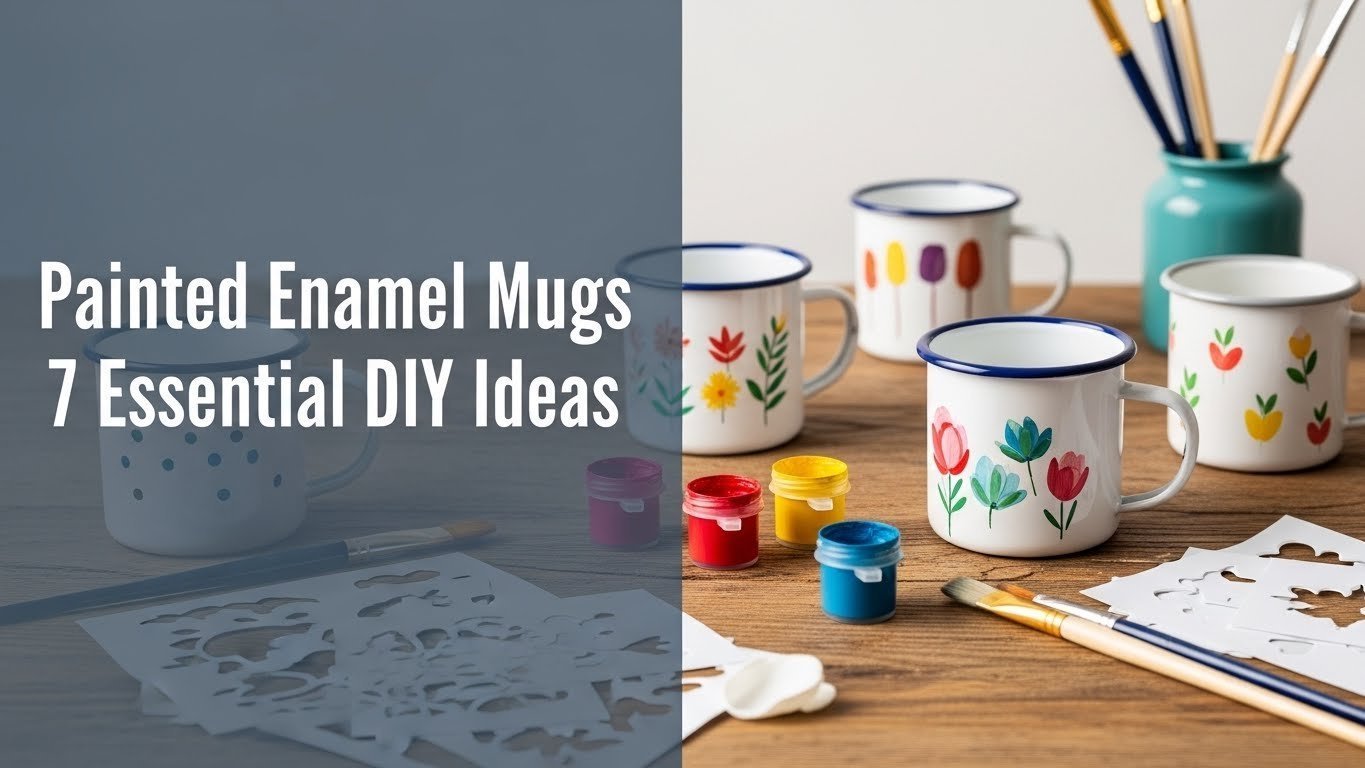
Transforming Your Camp Kitchen: 7 Essential DIY Ideas for Painted Enamel Mugs in 2026
Painting enamel mugs successfully requires understanding the unique relationship between the vitreous enamel surface and the pigments you apply. Unlike porous ceramics, enamel is a smooth, glass-like surface fused onto metal, which means standard acrylics will simply peel off without the right preparation. To create custom enamel mugs that look professional and last for years, you must bridge the gap between artistic vision and material science.
In this section, we focus on actionable strategies to ensure your DIY painted enamel mug projects are safe and durable. The key lies in selecting food safe paint that is specifically formulated to adhere to smooth, non-porous surfaces. Whether you are crafting gifts or upgrading your own gear, utilizing enamel mug designs requires a commitment to safety standards—specifically avoiding toxic materials on the rim or interior where food contact occurs. By mastering these proven methods, you ensure your creations are not just decorative, but fully functional parts of your outdoor kit.
Unlock Your Creativity: 7 Essential DIY Painted Enamel Mug Ideas to Customize Enamelware in 2026
Ready to customize enamelware with techniques that range from beginner-friendly to artistically advanced? The following list provides seven distinct DIY ideas designed to help you decorate enamel cups with precision and flair. Each project focuses on a specific technique to help you build personalized enamel camping gear that reflects your style.
We have structured these mug painting ideas to guide you through the process, ensuring you understand not just the “how,” but the “why” behind successful adhesion and durability. From choosing the right creative enamel mug art style to the final curing process, these steps are designed to produce professional-quality results.
1. Master the Dot Art Technique to Decorate Enamel Cups

Pin this intricate dot art design to your “DIY Craft Ideas” board!
The dot art technique is a fantastic entry point for beginners wanting to decorate enamel cups because it requires patience rather than advanced drawing skills. By using glass paint or specialized enamel paint, you can create stunning mandalas or simple geometric patterns. The raised texture of the dots adds a tactile element to the vibrant enamel colors, making the mug feel as unique as it looks.
Supplies Needed
- Enamel mugs (clean, white or light-colored, customizable mug surface)
- Food-safe enamel paint or glass paint in various vibrant enamel colors (ensure non-toxic mug paint certified)
- Dotting tools of various sizes (or skewers, toothpicks)
- Rubbing alcohol and cotton pads (to prepare enamel surface)
- Painter’s tape (optional, for sectioning designs)
Step-by-Step Directions
- Prepare enamel surface: Thoroughly clean your enamel mug with rubbing alcohol to remove oils and debris, ensuring paint adheres to enamel.
- Sketch designs for mugs: Lightly sketch your desired dot art pattern with a pencil or use painter’s tape to create sections.
- Apply enamel paint: Dip your dotting tool into the enamel paint and gently tap it onto the mug surface, creating dots of varying sizes according to your design.
- Dry painted enamel: Allow the paint to air dry for at least 24 hours in a dust-free environment.
- Cure paint on enamel: Bake the painted mugs in oven according to paint manufacturer’s instructions (typically 30-60 minutes at 300-350°F) to ensure heat fixed enamel and durable finish for mugs.
- Maintain painted mugs: Once cured, the painted enamel mugs are ready to use. Hand wash to prolong the life of the design, even if the paint claims to be dishwasher safe paint.
Pro-Tip: For truly professional dot art, use high-temperature enamel paints and allow each color layer to dry slightly before adding the next to prevent bleeding and ensure crisp inorganic pigment stability, a key aspect of advanced application techniques.

2. Craft Custom Stenciled Motifs for Personalized Enamel Camping Mugs

Save this unique stenciling idea for your next camping trip!
Creating personalized enamel camping mugs often involves replicating iconic outdoor imagery like mountains, trees, or wildlife. Using stencils allows you to achieve consistent, clean stenciled designs on mugs without needing freehand drawing skills. This method is particularly effective for making matching sets of durable outdoor mugs for a group trip, ensuring every piece of your camping gear looks cohesive.
Supplies Needed
- Enamel camping mugs (plain, suitable for durable outdoor mugs)
- Food-safe enamel paint or glass paint (ensure it’s designed for long-lasting painted design and outdoor use)
- Adhesive stencils (reusable vinyl stencils for stenciled designs on mugs)
- Small sponge brushes or stencil brushes
- Rubbing alcohol and cotton pads
- Painter’s tape
- Craft knife (optional, for custom stencils)
Step-by-Step Directions
- Prepare enamel surface: Clean the enamel camping mug thoroughly with rubbing alcohol.
- Apply stencils: Carefully position the adhesive stencil onto the mug, pressing down firmly to ensure no gaps where paint can bleed. Use painter’s tape to secure edges if needed.
- Apply enamel paint: Dab a small amount of enamel paint onto your sponge brush. Use an up-and-down motion to apply the paint over the stencil, building up thin layers for even coverage. Avoid overloading the brush.
- Remove stencil: Gently peel off the stencil immediately after painting, while the paint is still wet, for crisp lines.
- Dry and cure paint: Allow the mug to air dry for 24-48 hours. Then, cure paint on enamel in the oven following paint manufacturer’s instructions for heat fixed enamel and durable finish for mugs.
- Seal painted mugs: Consider an additional clear coat for mugs or protective coating for enamel if the mug will see heavy outdoor use, ensuring durable outdoor mugs.
Pro-Tip: To prevent paint bleed under the stencil, apply a thin layer of clear sealant (or the base coat color if doing a two-tone design) over the stencil edges before applying your main design color. This fills any small gaps, resulting in super crisp lines – a trick derived from professional enamel painting techniques.

3. Design Artistic Enamelware with Brushstroke Illustrations

Discover your inner artist and pin this hand-painted mug inspiration!
If you prefer a free-flowing aesthetic, creating artistic enamelware with freehand brushstrokes allows for limitless expression. Whether you want to hand-paint enamel cups with delicate florals or bold landscapes, this method relies on quality brushes and fluid paint application. It transforms mass-produced items into custom artwork on mugs that showcase unique hand-painted details.
Supplies Needed
- Enamel mugs (plain, smooth customizable mug surface)
- Food-safe enamel paint or glass paint (choose a range of vibrant enamel colors)
- Fine-tipped paint brushes (various sizes for detail work)
- Pencil and paper (for initial design sketches)
- Rubbing alcohol and cotton pads
- Palette for mixing colors
- Cotton swabs (for small corrections)
Step-by-Step Directions
- Prepare enamel surface: Clean the enamel mug with rubbing alcohol.
- Sketch designs for mugs: Lightly sketch your desired illustration directly onto the mug using a pencil, or practice on paper first.
- Apply enamel paint: Using your fine-tipped brushes, begin painting your design. Start with lighter colors and build up to darker tones. Allow layers to dry slightly to avoid smudging.
- Create mug art: Focus on varied brushstrokes for texture and detail, allowing your artistic enamel designs to come to life. Use cotton swabs for immediate error correction.
- Dry and cure paint: Let the painted mug air dry for at least 24-48 hours. Then, cure paint on enamel by baking in the oven according to the paint manufacturer’s instructions to ensure heat fixed enamel.
- Maintain painted mugs: Hand wash gently to preserve the long-lasting painted design and avoid harsh abrasives.
Pro-Tip: When hand-painting, always start with a very light sketch or practice on a piece of paper first. If you make a mistake on the mug before curing, you can often gently wipe it away with a cotton swab dipped in rubbing alcohol, provided the paint hasn’t fully dried. This showcases a practical application of proven methods for mug painting.

4. Achieve a Rustic Look with Distressed Vintage Style Enamel Mugs

Give your mugs a timeless look – pin this vintage enamelware idea!
There is a unique charm to vintage style enamel mugs that look like they have survived decades of adventures. You can achieve this rustic painted mugs aesthetic on brand new items by using layering and distressing techniques. By strategically removing paint to mimic wear, you create distressed enamelware that feels nostalgic and fits perfectly in a farmhouse kitchen or a rugged campsite.
Supplies Needed
- Enamel mugs (new or old, choose ones that will take to a rustic look painted)
- Food-safe enamel paint or chalk paint (in muted, rustic enamelware colors)
- Sandpaper (fine-grit, 220-400)
- Soft cloth
- Rubbing alcohol and cotton pads
- Food-safe clear coat for mugs (matte or satin finish)
Step-by-Step Directions
- Prepare enamel surface: Clean the enamel mug thoroughly with rubbing alcohol.
- Apply enamel paint: Paint your enamel mug with one or two thin, even coats of your chosen enamel paint color. Allow each coat to dry completely.
- Distress enamelware: Once the paint is fully cured (air-dried for several days or oven-cured), gently rub the sandpaper along edges, handles, and raised areas where natural wear would occur. Use a light hand for subtle distressing.
- Create mug art: For deeper distressed enamelware, you can focus on areas you want to appear worn away. Wipe away dust with a soft cloth.
- Seal painted mugs: Apply a thin, even coat of food-safe clear coat for mugs to protect the distressed finish and seal the paint. Ensure this sealant is also non-toxic and suitable for items handled frequently.
Pro-Tip: When distressing, always focus on areas that would naturally show wear and tear, like the rim, handle, and base. Avoid aggressively sanding the inside of the mug or areas that will come into direct contact with food or drink, ensuring food safety regulations for dishware are met and preventing paint peeling issues.
5. Personalize with Hand-Lettered Quotes on Custom Enamel Mugs

Inspire yourself daily! Pin this hand-lettered mug idea to your “Motivation” board!
Adding text is one of the most effective ways to make custom enamel mugs, whether it’s a name, a date, or a motivational phrase. Hand-painted enamel cups featuring beautiful calligraphy make exceptional gifts. Using paint pens specifically designed for ceramics allows for the control needed to design your own enamel cups with precise, readable text.
Supplies Needed
- Enamel mugs (smooth, light-colored for contrast)
- Food-safe enamel paint pens or fine-tipped brushes with food-safe enamel paint
- Pencil (for sketching guidelines)
- Ruler or straight edge
- Rubbing alcohol and cotton pads
- Practice paper
Step-by-Step Directions
- Prepare enamel surface: Clean the enamel mug with rubbing alcohol to ensure paint adheres to enamel smoothly.
- Sketch designs for mugs: Lightly sketch your chosen quote or design onto the mug using a pencil. Use a ruler for straight baselines.
- Apply enamel paint: Carefully trace your sketch with the enamel paint pens or fine brush. Take your time, allowing each stroke to dry slightly before proceeding.
- Create mug art: Apply multiple thin layers if necessary to achieve opaque, even lettering.
- Dry and cure paint: Let the mug air dry for at least 24 hours. Then, bake painted mugs according to the paint pen/paint manufacturer’s instructions to ensure heat fixed enamel and durable finish for mugs.
- Maintain painted mugs: Hand wash gently to protect your hand-painted enamel cups and preserve the lettering.
Pro-Tip: For perfectly aligned lettering, use a strip of painter’s tape or a ruler as a guide for your baseline. After the first line is dry, you can use the same technique for the ascenders and descenders of your letters. This method helps prevent uneven paint application and ensures professional enamel painting techniques.

6. Paint Creative Enamel Mug Art with Abstract Designs

Unleash your inner artist! Pin this abstract mug design to your “Artistic Home Decor” board!
Sometimes the best enamel mug designs come from letting go of rigid plans. Creative enamel mug art using abstract techniques involves bold colors, fluid movements, and texture. This approach is perfect for colorful enamel mugs hand painted with a modern twist, transforming standard kitchenware into artistic enamelware that serves as a conversation piece.
Supplies Needed
- Enamel mugs (plain, any color can be a base)
- Food-safe enamel paint or glass paint (choose a complementary palette of vibrant enamel colors)
- Various paint brushes, sponges, or even plastic wrap for textures
- Palette knife (optional, for mixing or applying paint)
- Rubbing alcohol and cotton pads
Step-by-Step Directions
- Prepare enamel surface: Clean the enamel mug with rubbing alcohol.
- Sketch designs for mugs: There’s no need for a sketch here! Embrace spontaneity.
- Apply enamel paint: Begin applying enamel paint in abstract patterns. Experiment with dabbing, swirling, dragging, or even dripping paint to create unique textures and forms.
- Create mug art: Layer colors, blend them, or keep them distinct. Don’t be afraid to experiment with unconventional tools to create different effects for your abstract enamel designs.
- Dry and cure paint: Allow ample air drying time (24-48 hours) for the layers to set. Then, cure paint on enamel in the oven as per paint manufacturer’s instructions for a long-lasting painted design.
- Maintain painted mugs: Hand wash to protect the integrity of your unique creative enamel mug art.
Pro-Tip: For dynamic abstract designs, try a “swirl” technique: apply a few drops of different paint colors, then gently swirl the mug to let the colors blend and move organically. For controlled chaos, use masking fluid before painting to create negative space, a trick borrowed from advanced historical enamel art techniques.

7. Transform Old Mugs: Enamel Repair Kit for Chipped Enamel Mugs

Don’t toss it, fix it! Pin this enamel mug repair guide for a sustainable solution!
Sustainability is a key part of the outdoor lifestyle, so knowing how to restore enamel mugs is a valuable skill. An enamel repair kit allows you to fix those inevitable chips that happen on the trail. By mastering the chipped enamel mugs repair process, you can prevent rust and save your favorite gear. This repair process is essentially a functional form of painting that prioritizes utility and protection.
Supplies Needed
- Chipped enamel mugs (cleaned, dry)
- Enamel repair kit (should contain appropriate food-safe paint and sealant if possible)
- Fine-tipped brush or toothpick
- Rubbing alcohol and cotton swabs
- Fine-grit sandpaper (optional, for smoothing)
Step-by-Step Directions
- Prepare enamel surface: Clean the chipped area of the enamel mug thoroughly with rubbing alcohol. Ensure it’s dry and free of debris.
- Smooth chipped area: If the chip has rough edges, gently sand them with fine-grit sandpaper, then clean again.
- Apply enamel paint: Mix the repair paint from the enamel repair kit as instructed. Using a fine-tipped brush or toothpick, apply a thin layer of paint to the chipped area.
- Fix smeared mug paint: Apply additional thin layers, allowing each to dry completely, until the area is filled and smooth, matching the mug’s original surface as closely as possible.
- Dry and cure paint: Allow the repaired area to air dry for the time specified by the enamel repair kit (often 24-72 hours). Some kits may require oven curing; follow instructions carefully for heat fixed enamel.
- Maintain painted mugs: Once fully cured, the restored enamel mugs can be used. Hand washing is highly recommended to protect the repaired area.
Pro-Tip: For the best, most seamless repair, try to match the color of the enamel repair kit paint to your mug’s original color as closely as possible. Apply the paint in very thin, multiple layers rather than one thick coat, allowing each to dry. This prevents paint bubbling on enamel and ensures a more durable finish, a method derived from micro-cracking prevention in enamel principles.

Key Takeaways: Your Quick Guide to Painted Enamel Mugs
- Always prioritize food-safe and non-toxic paints: For painted enamel mugs that will be used for drinking, select only food safe enamel paint that is non-toxic mug paint certified and explicitly states it’s safe for food contact.
- Proper surface preparation is crucial for durability: Cleaning your enamel mug with rubbing alcohol before you apply enamel paint ensures excellent paint adhesion to enamel and prevents paint peeling off mugs solution.
- Curing is essential for a long-lasting design: Whether air-drying or oven-baking, cure paint on enamel according to the manufacturer’s instructions to achieve a durable enamel finish and heat fixed enamel.
- Explore diverse artistic techniques: From intricate dot art technique to custom stenciled motifs and freehand brushstroke illustrations, creative enamel mug art offers endless personalization possibilities.
- Hand wash to extend the life of your designs: Even if paint claims to be dishwasher safe paint, gentle hand washing helps maintain painted mugs and prevents paint peeling off mugs solution.
- Don’t discard chipped mugs—repair them: An enamel repair kit can restore enamel mugs with minor chips, extending their lifespan and embracing a sustainable approach.
- Personalization creates meaningful gifts: Personalized enamel mug designs with quotes or custom artwork on mugs make thoughtful and unique presents for any occasion.
FAQs About painted enamel mugs
What kind of paint do you use on enamel mugs?
For painted enamel mugs that will hold food or drink, you must use a specialized, food-safe enamel paint or glass paint specifically designed for ceramics or glass, often labeled as non-toxic mug paint certified. These paints are formulated to adhere properly to non-porous surfaces like enamelware and withstand washing and heat after being heat fixed enamel through air-drying or oven-curing. Always check the product label for safety standards for painted mugs and food-safe claims.
Are painted enamel mugs food safe after curing?
Yes, if you use food-safe enamel paint that is explicitly labeled as non-toxic and safe for painted mugs and follow the manufacturer’s cure paint on enamel instructions precisely. The curing process typically bakes the paint onto the mug surface, making it permanent and safe for contact with food and beverages. It’s crucial to confirm certifications like food grade enamel paint for peace of mind, especially for custom enamel mugs.
How do you cure paint on enamel mugs?
Most enamel paint for mugs requires either air-drying for an extended period (21-28 days) or oven-curing to achieve its full durability and long-lasting painted design. For oven-curing, place the painted enamel mugs in a cool oven, then heat to the temperature specified by the paint manufacturer (typically 300-350°F) for 30-60 minutes. Allow the mugs to cool completely inside the oven before removing them to prevent thermal shock resistance enamel.
Can you put painted enamel mugs in the dishwasher?
While some durable enamel paint claims to be dishwasher safe paint, hand washing is generally recommended to prolong the life of your painted enamel mugs and prevent paint peeling off mugs solution. The harsh detergents and high heat of dishwashers can, over time, degrade even heat fixed enamel designs. If you must use a dishwasher, place the mug on the top rack and use a gentle cycle to maintain painted mugs.
How do you seal paint on enamel mugs?
To seal paint on enamel mugs for added durability, especially for designs made with regular acrylics (though food safe enamel paint is preferred), you can apply a specialized food-safe clear coat for mugs. This protective coating for enamel creates an extra barrier against chipping and fading. Ensure the sealant is also non-toxic and oven-safe if you plan to cure it, as this strengthens the durable finish for mugs.
What is the best paint for enamelware?
The best paint for enamelware is typically a food-safe enamel paint or glass paint designed for ceramic or glass surfaces, known for its vibrant enamel colors and durable enamel finish. Brands that specify non-toxic mug paint certified are ideal for items that will be handled or used for beverages. Paint pens for ceramics are excellent for detailed work, while brush-on paints offer broader coverage for artistic enamel designs.
How do you prevent paint peeling off mugs solution?
To prevent paint peeling off mugs solution, ensure proper surface preparation by cleaning the enamel mug with rubbing alcohol, use high quality painted enamel designed for mugs, and cure paint on enamel completely according to manufacturer instructions. Applying paint in thin, even layers rather than thick coats also aids paint adhesion to enamel. Avoid soaking painted enamel mugs or using abrasive cleaners.
What are good ideas for painted mugs?
Good ideas for painted enamel mugs include dot art technique, custom stenciled motifs for personalized enamel camping mugs, brushstroke illustrations, and hand-lettered painted enamel mugs with motivational quotes. You can also explore abstract enamel designs or distressed enamelware for a rustic painted mugs look. Consider themes relevant to the mug’s intended use, like camping or unique gift ideas, for creative enamel mug art.
How do you restore enamel mugs with chips?
You can restore enamel mugs with minor chips using a specialized enamel repair kit that often includes food-safe paint designed to fill and blend imperfections. Clean the chipped enamel mugs repair area thoroughly, apply thin layers of the repair paint, allowing each to dry, and then cure if recommended by the kit. This can prevent further cracked enamel paint repair and extend the life of your vintage style enamel mugs.
What materials do you need to paint enamel mugs?
To paint enamel mugs, you will typically need clean enamel mugs, food-safe enamel paint or glass paint (such as enamel glass paint), fine-tipped paint brushes or paint pens for ceramics, rubbing alcohol for surface preparation, and optionally, stencils or dotting tools. For curing, you’ll need an oven if the paint requires heat-setting. A food-safe clear coat for mugs can also be used for extra protection.
Final Thoughts on Painted Enamel Mugs
Creating painted enamel mugs is more than just a craft; it’s an opportunity to infuse everyday items with personality, artistry, and practical utility. Whether you’re aiming for personalized enamel camping mugs for your adventures, unique gifts for loved ones, or simply artistic enamelware to brighten your home, the key lies in understanding the right materials and techniques. We’ve covered 7 essential DIY ideas from intricate dot art to rustic distressing, all while emphasizing the crucial importance of food safe paint and proper curing for durable enamel finish.
Embracing DIY painted enamel mug projects allows you to express your creativity while also ensuring the longevity and safety of your custom enamel mugs. Remember, patience with drying and curing times, along with selecting non-toxic mug paint certified products, are paramount for achieving long-lasting painted design. With this comprehensive guide, you have the knowledge and inspiration to transform plain enamelware into treasured possessions that reflect your unique style.
What creative enamel mug art idea are you most excited to try first to design on enamel mugs?
Last update on 2026-04-27 / Affiliate links / Images from Amazon Product Advertising API