Tired of boring, mass-produced coffee cups that lack any real personality or charm? You likely crave unique drinkware to brighten your morning routine, but finding high-quality painted mugs bows or attempting to make them yourself often ends in frustration when designs chip away after a single wash.
Creating durable and food-safe painted mugs with bow designs: Select non-toxic, oven-bake ceramic paints or markers to ensure longevity. By properly cleaning the ceramic surface with alcohol, applying your chosen bow design, and curing the mug in the oven according to manufacturer instructions, you can create a permanent, dishwasher-safe finish that withstands daily use.
Drawing from professional ceramic painting techniques and extensive testing of food-safe paints, this guide eliminates the guesswork from your DIY projects. You will discover seven essential, step-by-step ideas to craft stunning, long-lasting bow mugs in 2026 that look professionally made.
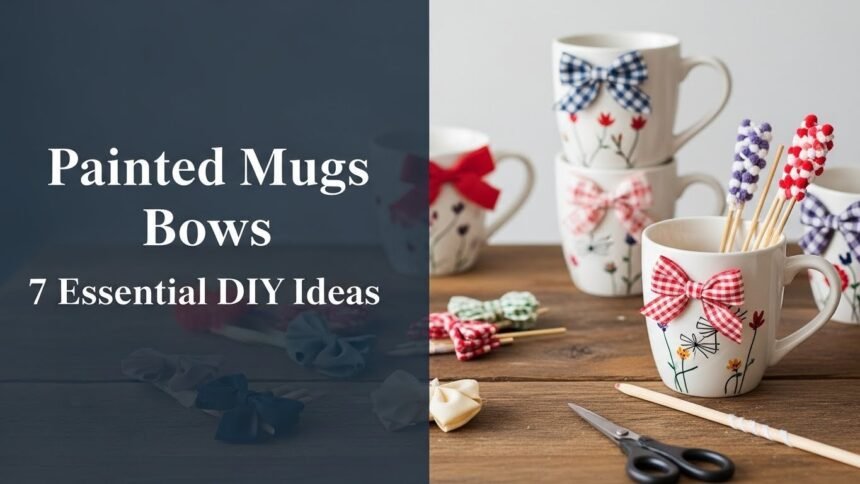
Master the Art of Painted Mugs Bows: 7 Essential DIY Ideas for 2026
Painted mugs bows have surged in popularity as a delightful way to add a touch of “coquette” aesthetic or personalized charm to your kitchenware. Unlike generic store-bought items, a hand-painted bow mug carries the unique signature of its creator, transforming a simple vessel into a piece of functional art. However, the transition from a plain ceramic mug to a durable masterpiece requires more than just artistic flair; it demands the right approach to materials and chemistry.
Many DIY enthusiasts struggle with paint that peels, fades, or isn’t safe for food contact. This section bridges the gap between artistic inspiration and practical application. By understanding how ceramic interacts with specific paints and curing processes, you can create beautiful custom bow mugs that survive the dishwasher and the microwave. Whether you are crafting a personalized gift or updating your own collection, the following ideas combine aesthetic beauty with the technical durability required for daily use.
7 Essential DIY Ideas for Crafting Your Own Painted Mugs Bows for 2026
Ready to transform your plain drinkware into trendy, hand-painted ceramic bow cups? We have curated seven distinct techniques that cater to every skill level, from absolute beginners to advanced artists. The secret to success lies not just in the bow design, but in the preparation and the finishing steps.
Each idea below includes a specific list of mug painting supplies and a clear workflow. We focus on process action keywords like “clean,” “cure,” and “seal” to ensure your hard work lasts. By following these DIY painted bow mugs tutorials, you will master the art of applying paint to mugs in ways that look professional and stay vibrant.
1. Simple Outline Bows: Perfect for Beginners to Paint

Pin this easy beginner bow design to your “DIY Mugs” board!
For those new to mug painting, starting with a simple outline is the best way to build confidence. This easy bow painting technique uses ceramic paint markers to create crisp, elegant lines without the mess of brushes and palettes. The result is a modern, minimalist fine line bow design that looks high-end but takes minutes to create.
Materials Needed
- Plain ceramic mug (Ensure it is a dishwasher-safe, oven-safe blank mug)
- Fine-tip ceramic paint markers (Choose non-toxic, oven-bake ceramic paint markers for durability)
- Rubbing alcohol and cotton pads
- Pencil and paper (for practice)
Step-by-Step Directions
- Clean your mug thoroughly with rubbing alcohol to remove any oils, fingerprints, or dust that could prevent paint adhesion. Let it dry completely.
- Practice drawing your desired bow outline on paper until you are confident with the shape and symmetry.
- Lightly sketch the bow outline onto your mug using a pencil. This step is optional but helps guide your marker.
- Trace over your pencil sketch with the ceramic paint marker, applying even pressure for a consistent line. Allow the paint to dry for at least 1 hour.
- Cure the mug according to the paint marker’s instructions, typically by baking it in a conventional oven to make the design permanent and dishwasher safe.
Pro-Tip: For the cleanest lines, use a ruler or masking tape to create guides, especially for symmetrical bow loops. Don’t press too hard with the pencil initially, as deep indentations can be difficult to cover with paint later.

2. Dimensional Bows: Create a 3D Raised Effect

Elevate your mug game with this stunning 3D bow technique!
If you want to move beyond flat designs, a 3D bow mug offers a tactile, sculptural element that stands out. By using specific materials to create a raised design ceramic effect, you can simulate the look of a real ribbon attached to your cup. This technique relies on building up layers or using specialized dimensional paint to achieve a dimensional bow effect.
Materials Needed
- Ceramic mug (clean and dry)
- Dimensional ceramic paint (Use non-toxic, food-safe dimensional paint that bakes hard)
- Small detail brush or toothpick (for fine shaping)
- Pencil (for sketching)
- Rubbing alcohol
Step-by-Step Directions
- Prepare your mug by cleaning it with rubbing alcohol and letting it dry completely.
- Sketch your bow design onto the mug with a pencil. Consider the natural flow and folds of a ribbon for a realistic 3D bow.
- Apply the dimensional ceramic paint, starting with the outline of your bow. Gradually build up layers, allowing each layer to partially dry (tacky, not fully dry) before adding the next, to create height and dimension.
- Use a small detail brush or toothpick to refine the edges and add subtle texture or folds within the bow loops.
- Allow the paint to air dry for at least 24-72 hours (check product instructions) to ensure it’s completely dry before proceeding.
- Cure your mug in the oven according to the paint manufacturer’s specific instructions. This typically involves baking at a low temperature for a set duration to harden the paint and make it durable.
Pro-Tip: Achieving a truly uniform 3D bow can be challenging. Work in small sections, allowing each part to set slightly before moving on. For very intricate bows, consider making a small template to guide your paint application and ensure symmetry.

3. Stenciled Bows: Design Perfect Patterns Every Time

Achieve professional-looking bow patterns with this smart stencil trick!
Consistency is key when you want a repeating pattern wrapped around your mug. Using a mug painting stencil allows you to create a stenciled bow pattern where every bow is identical in size and shape. This method is excellent for making sets of mugs or covering a large surface area with a uniform bow design without the stress of freehand painting.
Supplies Needed
- Ceramic mug (clean and dry)
- Flexible vinyl stencils (Choose reusable, adhesive-backed bow stencils for secure placement)
- Ceramic craft paint (Must be non-toxic, oven-bake ceramic paint)
- Small sponge daubers or a stiff-bristled brush
- Masking tape (optional, for non-adhesive stencils)
- Rubbing alcohol
Step-by-Step Directions
- Clean your mug with rubbing alcohol.
- Position your chosen bow stencil firmly on the mug. If using a non-adhesive stencil, secure it with masking tape, pressing down all edges to prevent paint bleeding.
- Dip your sponge dauber or brush into a small amount of ceramic paint. Blot any excess paint on a paper towel.
- Dab the paint onto the stencil, using a gentle up-and-down motion. Apply thin, even layers to build color, rather than one thick coat. This prevents paint from seeping under the stencil.
- Carefully remove the stencil immediately after painting, pulling it straight up rather than sliding it.
- Allow the paint to air dry for 24 hours.
- Cure the mug in the oven according to the ceramic paint’s instructions to make the design permanent and dishwasher-safe.
Pro-Tip: To ensure crisp lines with stencils, use a minimal amount of paint on your sponge dauber and apply it in light, dabbing motions. For multi-color stencils, ensure each color layer is dry before applying the next to avoid smudging.

4. Watercolor Effect Bows: Apply a Soft, Artistic Finish

Unleash your inner artist with these beautiful watercolor-style bows!
For a softer, more romantic look, a watercolor effect ceramic paint technique is ideal. This style relies on the blended paint technique to create translucent bow designs that look like they were painted on canvas. It’s perfect for creating artistic mug painting projects that feel organic and unique rather than rigid or graphic.
Supplies Needed
- Ceramic mug (clean and dry)
- Translucent ceramic paints (Ensure they are non-toxic, food-safe ceramic paints for watercolor effect)
- Small, soft-bristle paintbrushes (various sizes)
- Water or ceramic paint thinning medium
- Palette for mixing colors
- Rubbing alcohol
Step-by-Step Directions
- Clean your mug thoroughly with rubbing alcohol.
- Prepare your paints by adding a tiny amount of water or thinning medium to achieve a translucent consistency, similar to traditional watercolors. Test on a spare piece of ceramic or paper.
- Lightly sketch your bow design onto the mug with a pencil.
- Apply the thinned paint in light washes, building up layers for depth and blending colors directly on the mug for a soft transition. Start with the lightest colors first.
- Allow each layer to dry slightly before applying the next to prevent muddying, unless intentional blending is desired.
- Add darker accents or outlines (with less thinned paint) once the base layers are dry to define the bow’s shape.
- Allow the finished design to air dry for at least 24-72 hours.
- Cure the mug in the oven following the paint manufacturer’s instructions for durability.
Pro-Tip: To prevent fading colors or uneven application, always ensure your mug is completely clean before starting. When blending, work quickly while the paint is still wet, or use a clean, damp brush to soften edges.

5. Glitter & Embellished Bows: Customize with Sparkle & Bling

Add a touch of glam to your mugs with these sparkling bow embellishments!
Sometimes, paint alone isn’t enough. For a sparkle mug DIY, combining glitter ceramic paint with texture creates a show-stopping piece. An embellished bow design using rhinestone mug decoration techniques turns a standard coffee cup into a glamorous accessory. This method requires careful attention to adhesives to ensure the decorations don’t shed.
Supplies Needed
- Ceramic mug (clean and dry)
- Ceramic paint (for base bow design, if not using glitter paint directly)
- Ceramic glitter paint or fine craft glitter with food-safe mod podge for ceramics
- Small, flat-back rhinestones or pearls
- Strong, waterproof ceramic adhesive (non-toxic)
- Clear, dishwasher-safe sealant for ceramic (optional, but highly recommended)
- Tweezers and wax pencil (for picking up small gems)
- Rubbing alcohol
Step-by-Step Directions
- Clean your mug thoroughly with rubbing alcohol.
- Paint your base bow design using regular ceramic paint if desired, or skip this step if applying glitter directly. Allow to dry.
- Apply the ceramic glitter paint directly, or apply a thin layer of food-safe mod podge to the areas where you want glitter. Sprinkle fine glitter over the wet adhesive/paint. Gently tap off excess.
- Allow the glitter or glitter paint to dry completely. If adding rhinestones, apply a tiny dot of strong ceramic adhesive where each gem will go.
- Use tweezers or a wax pencil to pick up and apply the rhinestones or pearls onto the adhesive. Press gently to secure.
- Allow all adhesives and paints to cure for at least 72 hours, or as recommended by product instructions.
- Seal the entire decorated area with a clear, dishwasher-safe sealant for ceramic to encapsulate the glitter and secure embellishments, preventing paint chipping and ensuring durability. Follow sealant instructions for application and curing.
Pro-Tip: To ensure your glitter doesn’t flake off and your embellishments stay put, a high-quality dishwasher-safe sealant for ceramic is crucial. Always apply multiple thin coats of sealant, allowing each to dry completely, for the best protection against wear and washing.

6. Ombre Bows: Customize with Gradient Colors

Master the art of color blending with this elegant ombre bow technique!
An ombre ceramic paint design introduces sophistication by transitioning colors smoothly from dark to light. A gradient bow design mimics the sheen of satin ribbon, making the mug look expensive and custom-made. This color transition technique requires a bit of speed to blend the ceramic paints while wet, but the result is a professional-grade finish.
Supplies Needed
- Ceramic mug (clean and dry)
- 2-3 complementary ceramic paints (Use non-toxic, food-safe ceramic paints for blending)
- Soft blending brush or sponge
- Palette for mixing
- Water or ceramic paint thinning medium (optional, for smoother blends)
- Rubbing alcohol
Step-by-Step Directions
- Clean your mug with rubbing alcohol.
- Sketch your bow design onto the mug.
- Apply your first (lightest) color to one section of the bow.
- Immediately apply your second color next to the first, overlapping slightly. While both colors are still wet, use a clean, slightly damp blending brush to gently feather the colors together where they meet, creating a smooth transition.
- Repeat with subsequent colors, ensuring to blend wet-on-wet for the seamless ombre effect. Work quickly as ceramic paint can dry fast.
- Allow the entire design to air dry for at least 24 hours.
- Cure the mug in the oven according to the ceramic paint’s instructions.
Pro-Tip: The key to a successful ombre is blending while the paint is still wet. If paints dry too quickly, lightly moisten your brush with a tiny amount of water or thinning medium (if compatible with your paint type) to reactivate the edges for a smoother transition.

7. Personalized Message Bows: Customize with Names & Dates

Make your bow mugs extra special with a personal touch!
Combining a bow with hand lettering on mugs creates the ultimate personalized painted bow mugs. Whether it is a name, a date, or a short quote, adding text turns a decorative item into a deeply meaningful personalized gift. This technique uses extra-fine tip ceramic paint pens to ensure the text is legible and elegant alongside your giftable bow mugs.
Supplies Needed
- Ceramic mug (clean and dry, with a painted bow design already cured)
- Extra-fine tip ceramic paint pens (Use non-toxic, food-safe paint pens for detail)
- Stencils for lettering (optional, for consistency)
- Ruler and pencil (for guide lines)
- Rubbing alcohol
Step-by-Step Directions
- Ensure your bow design is completely cured and the mug is clean from any residue.
- Plan your personalized message, name, or date. Practice writing it on paper.
- Lightly sketch guide lines with a pencil and then transfer your message onto the mug. Use stencils if you prefer a uniform look.
- Carefully trace over your pencil sketch with the extra-fine tip ceramic paint pen. Take your time to ensure neat, consistent lettering. Allow the first coat to dry before applying a second for opacity.
- Allow the hand lettering to air dry for at least 24 hours.
- Cure the mug in the oven again, following the paint pen manufacturer’s instructions. This step is critical to make your personalized message permanent and dishwasher-safe.
Pro-Tip: For precise, professional-looking hand lettering on mugs, use a very light touch with a pencil to sketch guide lines and the words themselves. If using stencils, secure them firmly with painter’s tape and dab paint in thin layers to prevent bleeding under the edges, ensuring your personalized message is crisp.

Key Takeaways: Your Quick Guide to Painted Mugs Bows
Before you start your first project, here are the essential techniques and reminders to ensure your DIY painted bow mugs turn out perfectly.
- Selecting the right paint is crucial for durable and safe painted mugs bows. Always opt for food-safe ceramic paints that are designed for oven-curing to ensure your designs are long-lasting and safe for daily use.
- Mug preparation is key to paint adhesion. Thoroughly cleaning your ceramic mug with rubbing alcohol before painting removes oils and dust, preventing paint chipping and ensuring a smooth application.
- There are diverse techniques to create stunning bow designs. From simple outline bows with paint markers to intricate 3D bow mugs and artistic watercolor effects, explore different methods to match your skill level and desired aesthetic.
- Patience in drying and curing ensures longevity. Allowing paint to air dry completely before oven-curing, as per manufacturer instructions, is essential for making your hand-painted bow mugs permanent and dishwasher safe.
- Embellishments like glitter and personalized messages require specific sealants and tools. Use dishwasher-safe sealants for ceramic to protect glitter and adhere flat-back rhinestones or use extra-fine tip ceramic paint pens for crisp hand lettering.
- Consider personalization for unique, thoughtful gifts. Adding names, dates, or custom messages transforms a DIY painted bow mug into a cherished item for loved ones, making it an ideal personalized gift.
- Experimentation with colors and blending techniques can elevate your artistry. Techniques like ombre bows allow for beautiful gradient bow designs, showcasing advanced skill and creativity in ceramic art.
People Also Ask About Painted Mugs Bows
How to paint bows on mugs for beginners?
Beginners can easily paint bows on mugs using ceramic paint markers for simple outlines or stencils for perfect patterns. Start by cleaning your mug with rubbing alcohol, lightly sketch your design, then trace with a fine-tip, food-safe ceramic paint marker. For stencils, dab paint gently with a sponge. Always bake the mug according to paint instructions to set the design permanently.
What kind of paint is best to use on ceramic mugs?
The best paint for ceramic mugs is specifically formulated ceramic paint, often labeled as enamel paint or ceramic paint markers, that is non-toxic and food-safe. These paints are designed to adhere to ceramic surfaces and become permanent after oven-curing, making the painted mugs bows durable and safe for washing and drinking. Avoid regular acrylic paints unless specified for ceramics.
Can you bake painted mugs to make them permanent?
Yes, baking painted mugs in a conventional oven is a common method to cure and make ceramic paint designs permanent and dishwasher-safe. Always follow the specific temperature and duration instructions provided by your ceramic paint manufacturer. Proper oven-curing prevents paint chipping and fading, ensuring the longevity of your hand-painted bow mugs.
How do you make painted bows permanent on mugs without baking?
To make painted bows permanent on mugs without baking, you need to use air-dry ceramic paints that cure over several days at room temperature. While convenient, air-dry paints typically offer less durability and water resistance compared to oven-baked paints, often requiring gentle handwashing. Some may also require a clear sealant for added protection against fading colors.
Are painted mugs food safe, especially with a bow design?
Painted mugs can be food-safe if you use non-toxic, food-grade ceramic paints and avoid painting areas that come into direct contact with food or lips. Always choose paints explicitly labeled as food-safe ceramic paint or non-toxic certified. Keep designs at least an inch from the rim and avoid inside surfaces to ensure maximum safety when drinking from your custom bow mugs.
What are some common mistakes when painting mugs?
Common mistakes when painting mugs include inadequate surface preparation, using non-ceramic specific paints, improper curing, and applying paint too thickly. Not cleaning the mug can lead to poor adhesion. Using acrylics not meant for ceramics often results in paint chipping. Incorrect oven temperatures or drying times can cause dull finish or designs to rub off. Thick layers can also lead to cracking.
How do you clean painted mugs to prevent paint from chipping off?
To prevent paint from chipping off painted mugs, handwash them gently using warm, soapy water and a soft sponge, avoiding abrasive scrubbers. Even if cured to be dishwasher safe, frequent high-heat dishwashing can eventually degrade the paint. Avoid soaking painted mugs bows for extended periods, and dry immediately after washing to prolong the life of your design.
What is the difference between ceramic paint and acrylic paint for mugs?
Ceramic paint is specifically formulated to adhere to non-porous ceramic surfaces and typically requires oven-curing to become permanent, durable, and often food-safe. Acrylic paint, while versatile, is generally water-based and, unless specifically labeled for ceramics, may not adhere as well or be as durable on mugs, leading to paint chipping or washing off.
What materials do I need to paint a mug with bows?
To paint a mug with bows, you’ll need a clean ceramic mug, food-safe ceramic paints (markers, dimensional paint, or regular paint), paintbrushes or sponge daubers, and rubbing alcohol for cleaning. Depending on your design, you might also need pencils for sketching, stencils for patterns, or glitter and adhesive for embellishments to customize your hand-painted ceramic bow cups.
How do you draw a bow for mug painting easily?
To easily draw a bow for mug painting, start by sketching a small circle or knot for the center of the bow. Then, draw two rounded, symmetrical loop shapes extending from either side of the center. Add two ribbon tails flowing downwards from the center. Refine the lines and add subtle folds for dimension before tracing with paint. Practice on paper first to refine your bow design.
Final Thoughts on Painted Mugs Bows
Creating your own painted mugs bows is more than just a craft; it’s an opportunity to infuse personality into everyday items or craft deeply thoughtful personalized gifts. This guide has equipped you with 7 essential DIY ideas, from mastering simple outlines to intricate 3D bow mugs and dazzling glitter embellishments, ensuring your projects are not only beautiful but also durable and safe. By understanding the right paints, proper curing techniques, and creative applications, you can overcome common challenges like paint chipping or fading.
The journey of transforming a blank ceramic canvas into a cherished piece of hand-painted ceramic bow cups is immensely rewarding. Each stroke adds character, and each successful cure seals in your artistry. So, gather your supplies, choose your favorite bow design, and confidently create a mug that tells your unique story.
Which painted mugs bows idea are you most excited to try first? Share your creative plans in the comments below
Last update on 2026-04-27 / Affiliate links / Images from Amazon Product Advertising API